
Are you using Windows 10 or Windows 11 on your PC? If so, we assume you’ve experienced a White Screen of Death. This is one of the common issues that users might see from time to time when using their computers. You may encounter various issues related to Windows when using it daily.
One of the most common problems users face while using Windows is the “White Screen of Death” on Windows 11 (WSOD). The white screen error usually appears as a blank or white screen after logging into Windows.
It is a prevalent issue with all Windows versions and something that can happen even to the best of users. When things go wrong, you end up with a white screen on Windows. So let’s get right into it. This article will provide you with some quick fixes so that your computer returns to normal as soon as possible. After reading this blog post, you will learn how to fix the white screen on Windows 11/10 computers and get back to work in no time.
Read Also: What Is A Wave Browser? Should I Remove It?
Reasons Behind White Screen of Death On Windows 11
The main reason behind the White Screen of Death on Windows 11 is a hardware malfunction. Software problems can sometimes cause a white screen issue without any code.
A white screen issue while playing games is another sign of a hardware issue, so examine your graphics card to ensure it’s operating correctly.
Your computer screen can occasionally go white; if this occurs, there could be a problem with your monitor settings.
Read Also: 3 Ways To Secure Your Certificate When Chrome Says It’s Not Valid
Apart from this, it can also be due to the following reasons:
- An improper Windows upgrade is disrupting the system.
- A background program is hindering the system’s operation.
How To Fix White Screen On Windows 11- Recommended Methods
Keep reading to the finish because we’ll talk about how to fix and resolve every important problem that can result in WSOD.
1. Force Restart Your PC/Laptop
The problem can usually be resolved by forcing a restart of your computer. The first step you must attempt if you are having trouble booting your computer and the login screen gone white is a force-restart.
Pressing the “Power key” for a few seconds will typically start a force-restart. Till the shutdown process is over, don’t release the key. When it shutdowns completely, press the power key again to start the computer to check if the issue still exists after restarting.
Read Also: How to Update Powershell on Windows 11
2. Disconnect Peripherals or Check All the Cables
After restarting, unplug any USB-connected peripherals if Windows 11/10 displays the WSOD with a cursor. Most likely, the issue is caused by a certain external device. Therefore, remove anything connected to your computer first. Even the mouse and keyboard should be unplugged.
Additionally, look for loose wires in the system’s wiring. Ensure that the VGA & HDMI cables are correctly plugged into your computer. Force the PC to shut down. Check that the cords are correctly connected once the PC has been successfully switched off. Restart your computer now to see whether the White Screen of Death on Windows 11/10 still appears.
Read Also: How to Change Screensaver on Windows 11
3. Boot Into Safe Mode
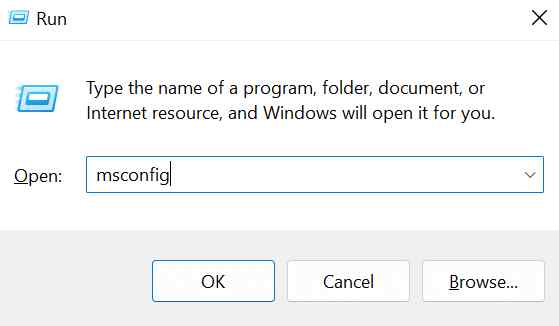
- Press the “Windows” key with the key “R” to open the “Run” dialogue box.
- Now type “msconfig” in the provided area and hit the enter key.
- A “System Configuration” window will appear in front of you.
- In this window, click on the tab “Boot.”
- Now look down at the “Boot options” and tap on the box related to “Safe boot.”
- If you wish to access the Internet in Safe Mode, choose “Network.”
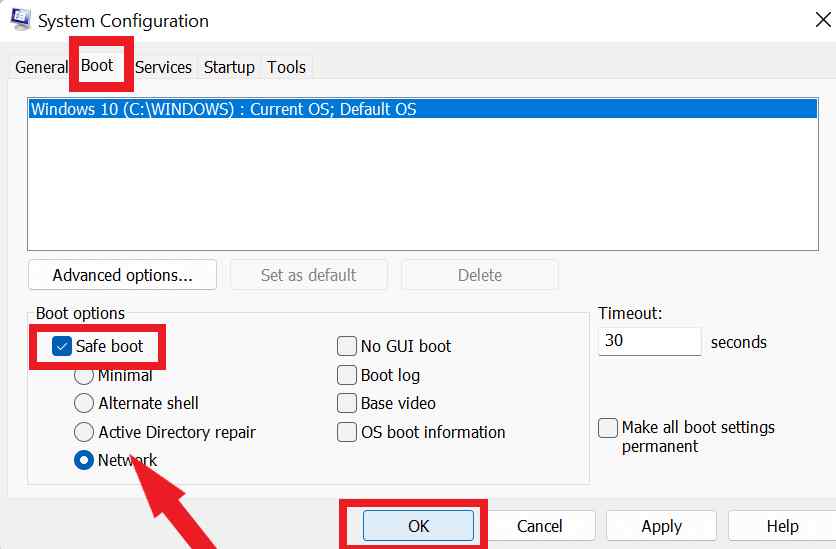
- When you restart your computer, it will start up in safe mode.
4. Rollback From A Recent Windows Update
Microsoft releases the latest update to enhance the OS and address any problems users may be experiencing. However, occasionally a software update is flawed, and rather than making your system run better, it makes it worse. There may be a flaw with the update if you begin to notice the white display problem immediately after downloading a recent Microsoft update. The issue can be resolved by uninstalling the update. To do so, follow the steps below:
- Press the “Windows” key with the key “I” to open Windows “Settings.”
- Now look for and tap on the “Windows Update” option from the left side of the window.
- Now tap on the “Update History” option.

- Scroll down, look for, and tap the “Uninstall updates” option.

- This will lead you to the “Control panel” window. Here you will find a list of all the recent updates.
- Look for the most recent one, after which this problem started.
- Right-click on that update and select “Uninstall.”

5. Stop Unnecessary Background Applications
The problem could be caused by a background running app interfering with the system is running. There are several strategies for dealing with the situation in this instance. If a specific application you installed, try uninstalling it to see whether that fixes it. Try using Task Manager to disable all unwanted third-party apps if you are unsure which application is causing the problem. Follow these steps:
- Press the “Ctrl,” “Shift,” and “Esc” keys altogether to open the “Task Manager.”
- Ensure that you are on the “Processes” tab. Look towards the left top corner of the task manager window.

- Go through the list of running processes, choose the apps you think are unnecessary, and then click on “End Task” from the bottom right corner of the window.
Read Also: DisplayPort not Working on Windows 11? Here’s the Fix!
6. Update Graphics Driver
Most frequently, a problem related to display drivers causes the white screen of death on Windows. There is a high possibility of encountering the white screen if the graphic driver is out-of-date or incompatible. To update your graphics drivers, follow the steps below.
- Tap the “Windows” icon and type “device manager” in the search bar.
- Now click on “Open.”

- Scroll down and look and double tap on the “Display adapters” option.
- Now right-click on the driver and tap on “Update driver.”

- Then Select the option “Search automatically for drivers.”

- When the procedure is finished, restart your computer to apply the modifications.
Because updating the graphic drivers yourself is time-consuming, we advise utilizing a specialized tool to accomplish it for you. The specific solution provided below is quick; it updates and fixes every driver at once with little to no impact on you.
We advise employing Advanced Driver Updater for the task because it is not easy to perform the process manually. This is how you do it:
Read Also: Review of Advanced Driver Updater
- Download and install the Advanced driver updater from this link.

- Once installed, launch the application.
- Now just click on the “Start Scan” button.
- Choose “Update All” to address any driver problems if you are a registered user. You can update drivers one at a time if you are using the free version by selecting “Update driver” for each.
This will resolve the issue.
Read Also: What To Do When Windows 11 Doesn’t Support A Processor
To Wrap This Up
There are many reasons your Windows could appear with a white screen, but most of them can be fixed relatively easily. But if you follow the above mentioned methods step-by-step, you will fix the white screen on Windows 11/10. And if you know any more fixes to address this issue, let us know in the comments below.