Receiving “The Local Device Name Is Already In Use” error on your Windows 10 PC?
Well, fret not! It’s not something that you can’t easily resolve, there are multiple methods to get rid of this annoying issue, which we will discuss in this post. But, let’s first understand what this error means.
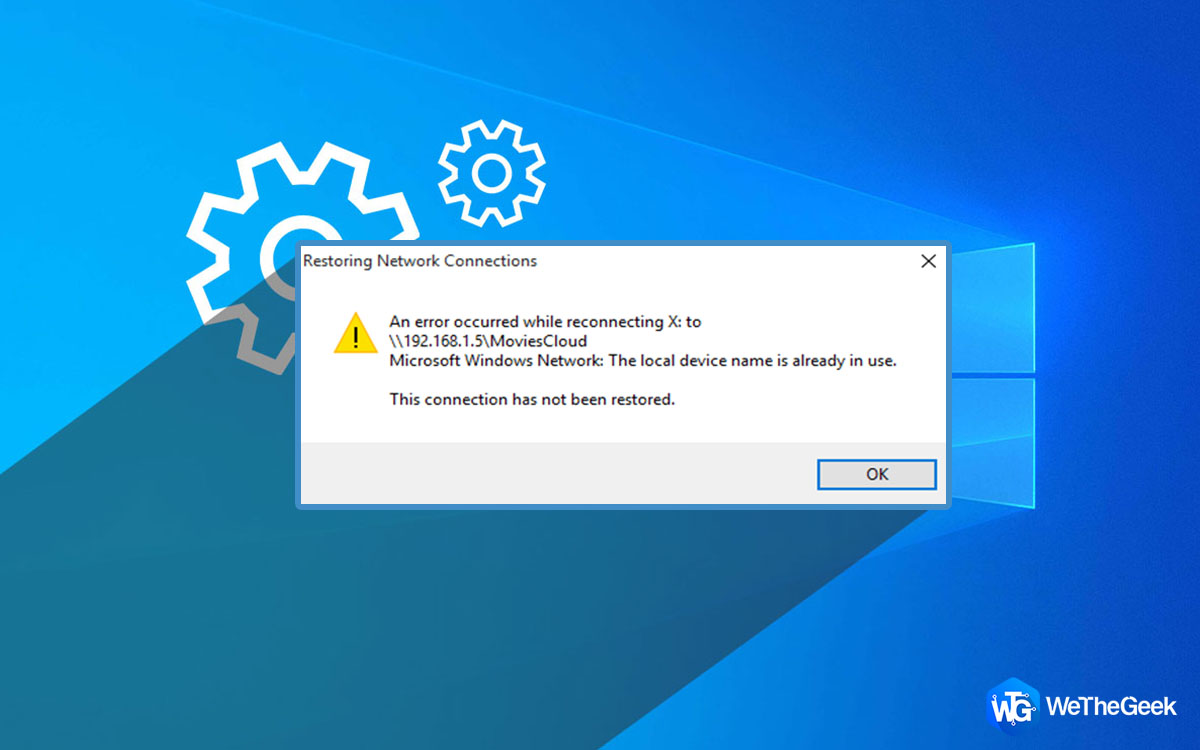
According to the explanation given by Microsoft, the error is associated with incorrect network drive mapping. The error message can appear due to a variety of reasons, but the majority of the time, it happens while accessing a mapped network drive. For instance: In organizations with multiple computers, drive mapping needs to be done to associate a local drive letter to share storage files. However, sometimes while attempting to access a mapped drive, you may end up with “Restoring Network Connections message box” along with the error mentioned below:
What Are The Main Causes Of “The Local Device Name Is Already In Use” Error?
Here are some of the possible reasons why you are facing this error message:
- The OS is unable to complete the process of Drive mapping correctly.
- Some drive letters are unassigned.
- The server has no space.
- File & printer sharing is turned off.
(FIXED): “The Local Device Name Is Already In Use” Error (2022)
Implement the following workarounds one by one to see what helps you to get rid of the issue:
METHOD 1 = Remap The Network Drive Correctly
Microsoft suggests the official resolution to get rid of “Restoring network connection error – The Local Device Name is Already in use” is to remap the drive.
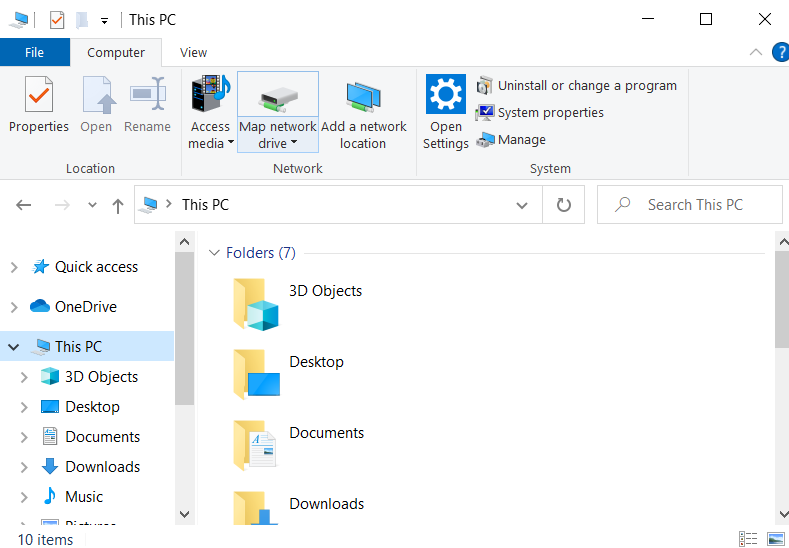
STEP 1 = Open File Explorer on your system. The shortcut keys are (Windows key + E)
STEP 2 = Click on This PC and from the new window click on the Map Network Drive button, located on the top of the screen.
STEP 3 = As soon as you click it, a new window will appear on the screen as shown below.
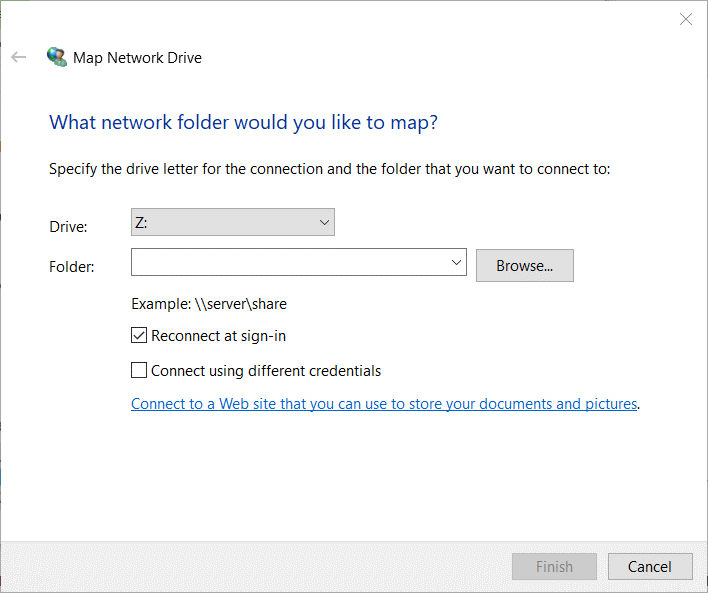
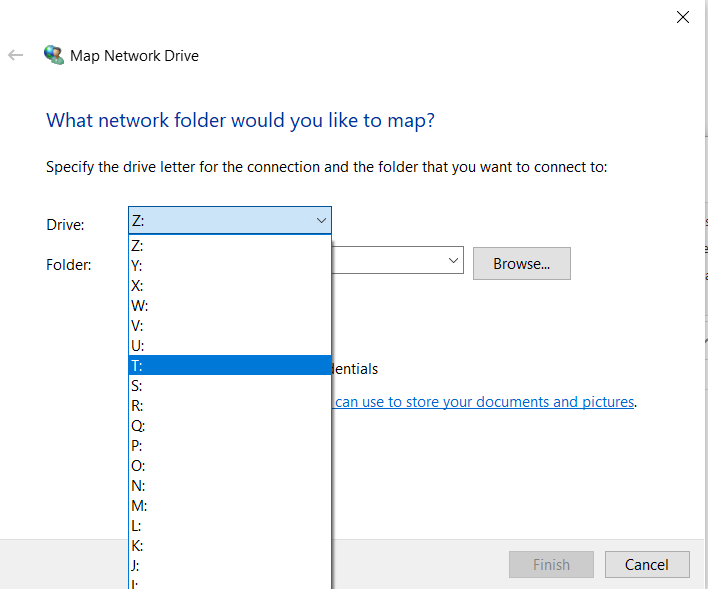
STEP 4 = At this step, you need to choose the drive for the connection from the Drive drop menu and hit the Browse button to simply select the location to Map.
Hit the Finish button to complete the remapping drive process.
METHOD 2 = Assign Drive Letter Properly
Several users have suggested that an unassigned drive might be responsible for causing the problem. So, rather than be in doubt, reassign the drive letters correctly.
Using Disk Management
You might want to read first: All about Disk Management and Partition Handling in Windows 10.
STEP 1 = Go to the Start menu and right-click on it.
STEP 2 – From the list options, find and click on Disk Management utility.

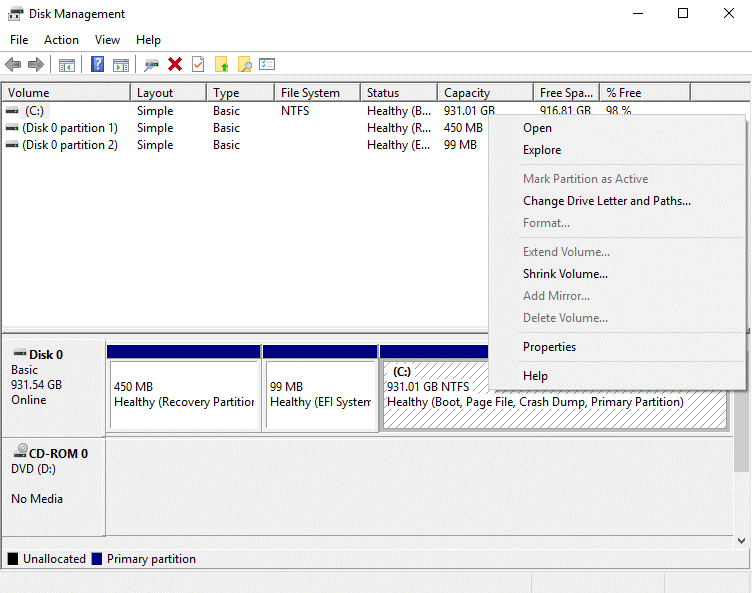
STEP 3 = From the Disk Management window, go to the partition you want to assign a drive letter and right-click on the same. From the context menu, choose the option “Change Drive Letter and Paths…”.
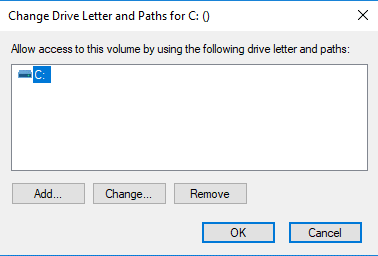
STEP 4 = On the next screen – – Click on the Add button and choose a letter in the list > click OK.
Using Third-Party Utility – AOMEI Partition Assistant Professional
Well, if you don’t want to indulge in the manual process, you can try using a professional utility that will help you get the job done in a few clicks. AOMEI Partition Assistant brings a lot of tools that help in fixing a variety of hard drive and partition issues.
STEP 1 = Get AOMEI Partition Assistant Professional software on your system and upon successful installation, launch the program.

STEP 2 = From the main dashboard, locate and choose the partition to which you wish to assign a new drive letter. Right-click on from the context menu, hit Advanced > Change Drive Letter.
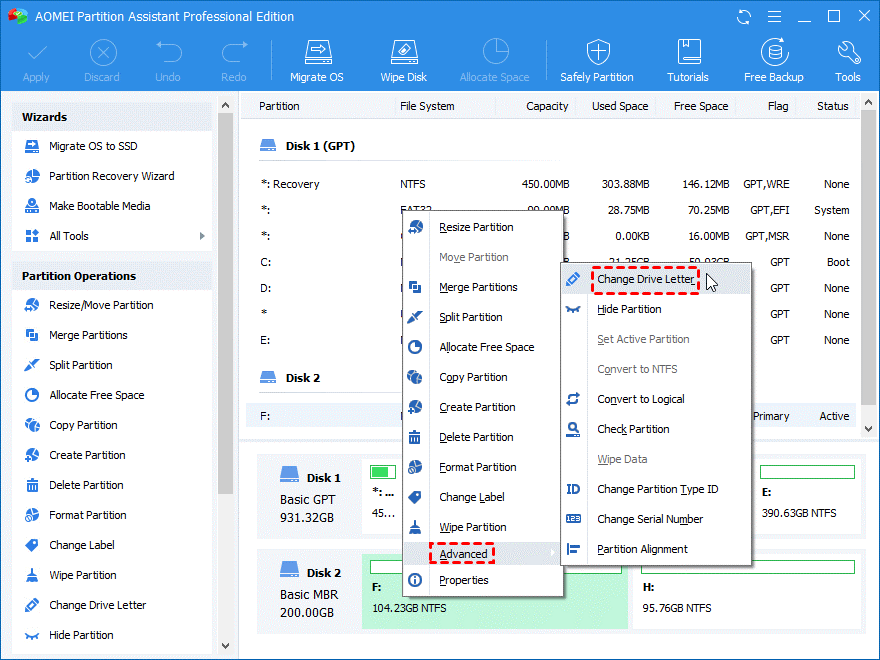
STEP 3 = From the new window that appears on the screen, select the drive letter from the New Drive Letter drop-down menu. Once selected according to your preference, hit the OK button!

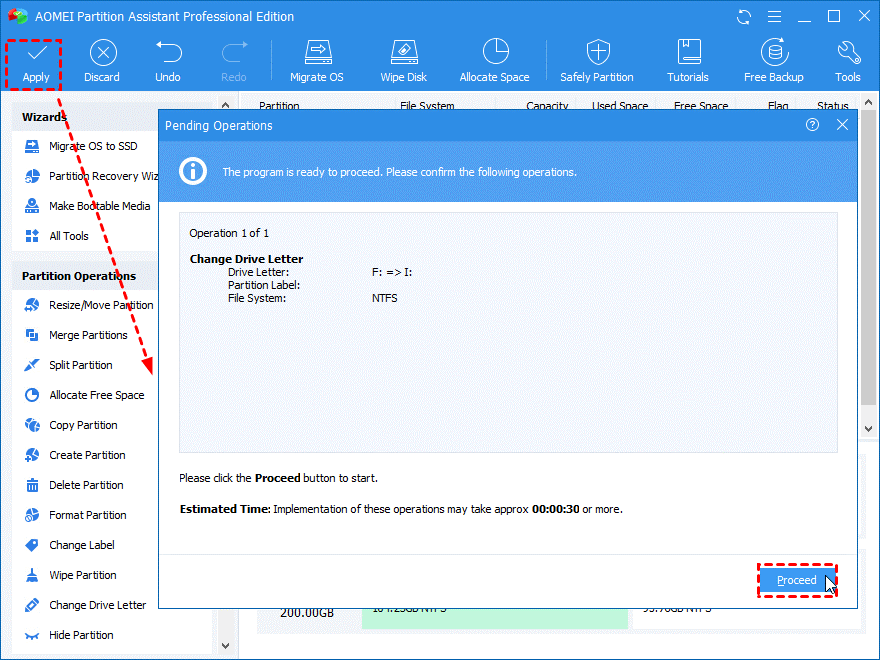
STEP 4 = Hit the Apply button, located at the top-left corner of the screen > Proceed to complete the entire process!
METHOD 3 = Enable File And Printer Sharing
The annoying error message “The Local Device Name Is Already In Use” might be appearing due to Firewall blocking File and Printer Sharing. To fix it, all you have to do is:
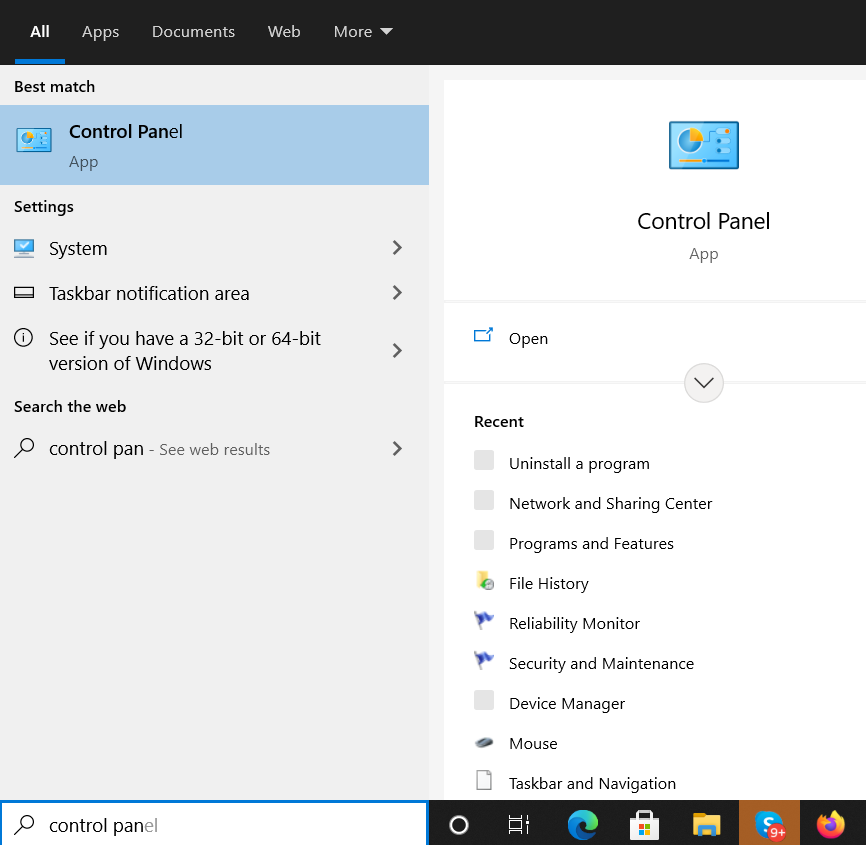
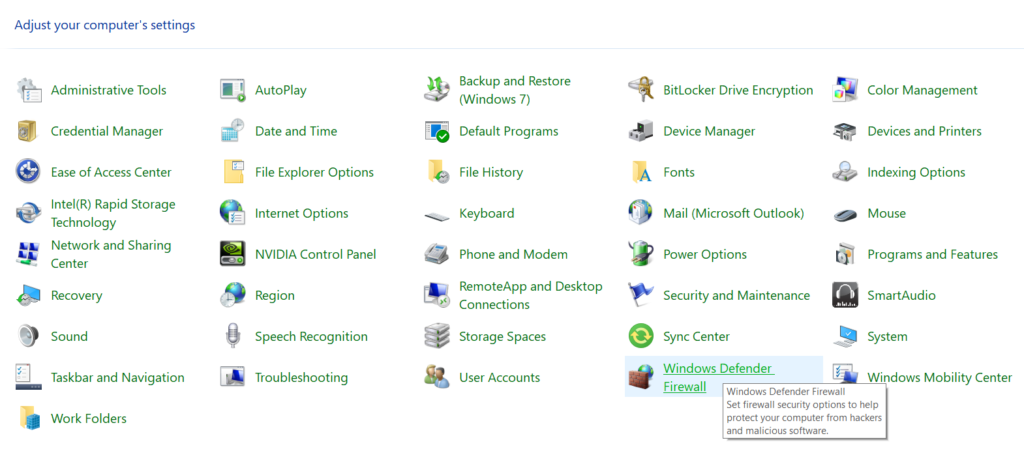
STEP 1 = Go to the search bar and type Control Panel.
STEP 2 = Go to the View by section and choose Large icons.
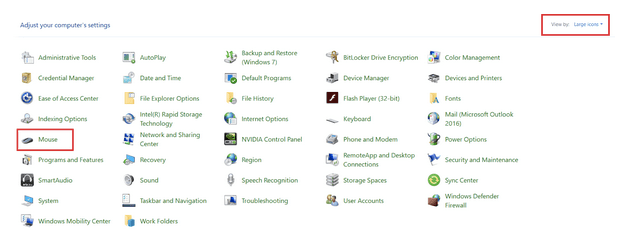
STEP 3 = Locate and click the option Windows Defender Firewall.
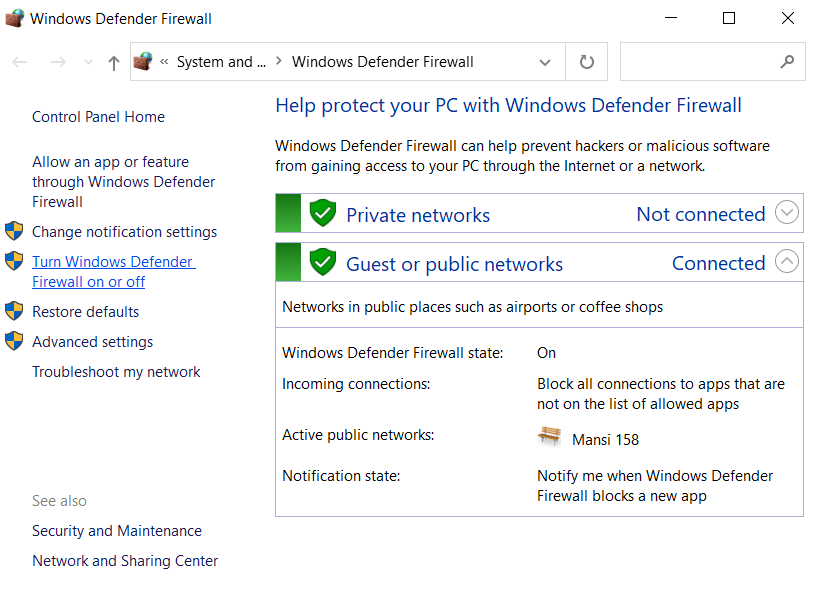
STEP 4 = Hit the option “Allow an app or feature through Windows Firewall” from the left-side panel.
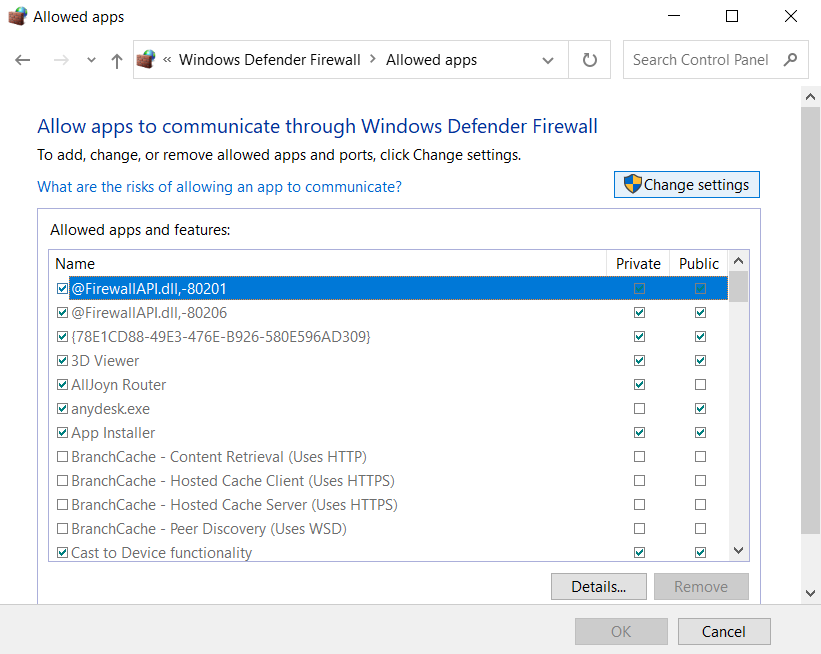
STEP 5 = As soon as you do that, a list of installed applications should be displayed to you. From this window, you need to hit the option Change settings.
STEP 6 = At this step, you need to find and check the boxes for File and Printer sharing, in case they are not selected already.
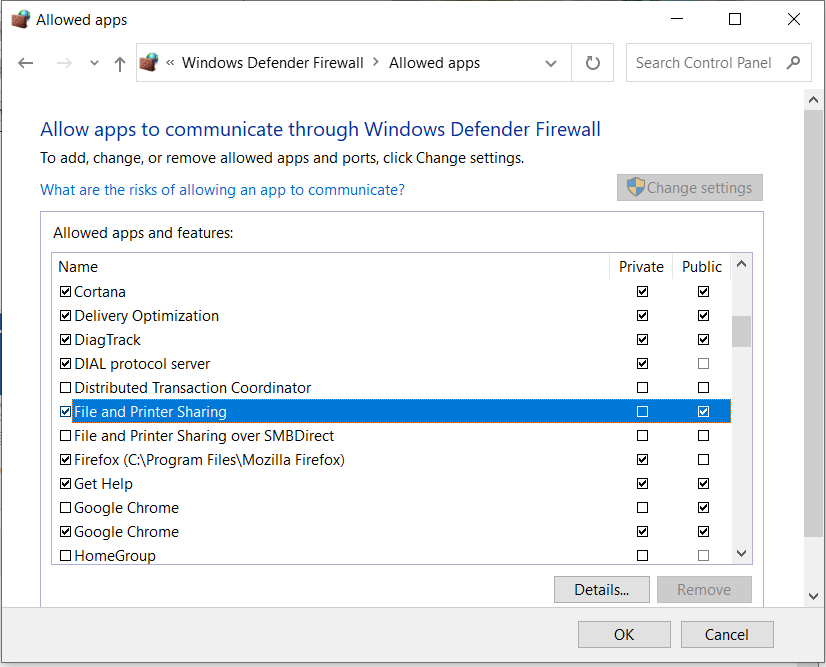
STEP 7 = Simply click the OK button to confirm the new changes!
You need to restart your Windows to implement the new alterations successfully. Hopefully, this time you will not witness the error message “The Local Device Name Is Already In Use”.
METHOD 4 = Remove ‘MountPoints2’ Registry Key
Users facing this issue with a virtual drive or a CD/DVD drive on the system can try removing the specific registry key “MountPoints2”. It certainly helped them to fix the error that appears in the Restoring Network Connections message box. So, let’s give that a shot:
| Important Read: How To Backup, Restore, And Edit Files Using The Registry Editor Windows 10 |
STEP 1 = Go to the Search bar and type Registry Editor.
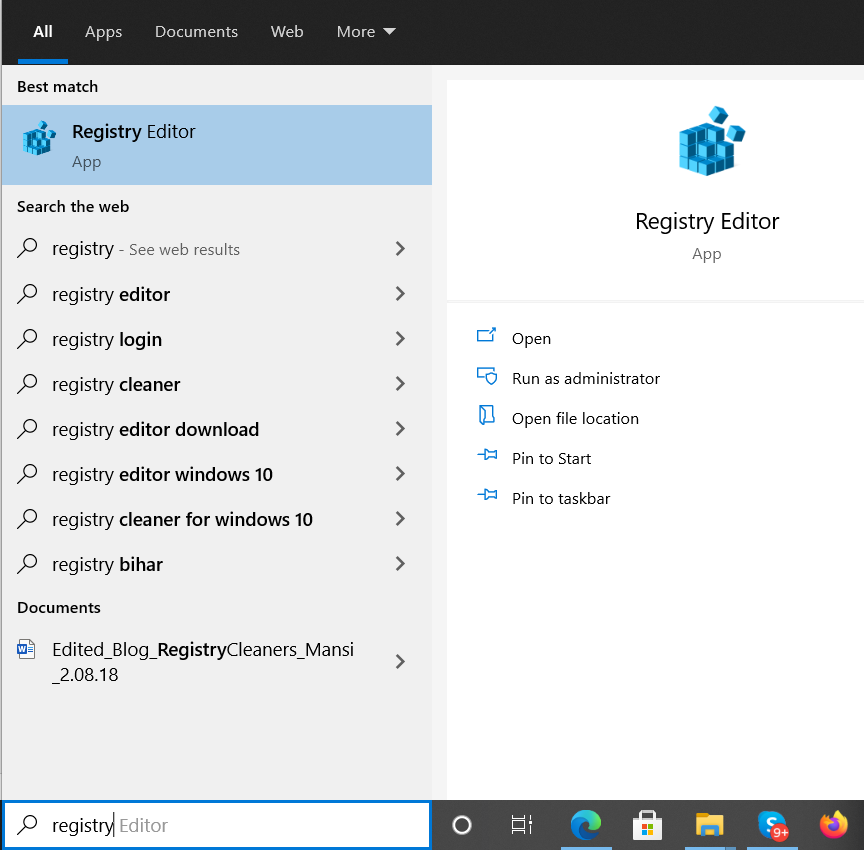
STEP 2 = Select the very first search result that appears and open Registry Editor.
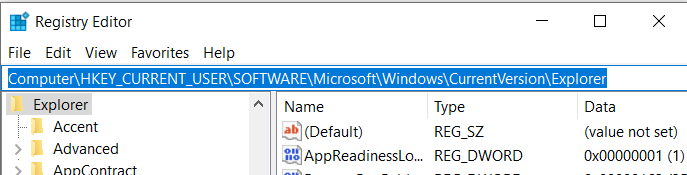
STEP 3 = At this step, you need to follow the path: HKEY_CURRENT_USER > Software > Microsoft > Windows > CurrentVersion > Explorer.
STEP 4 = Locate MountPoints2 entry and right-click on it to choose the option Delete.
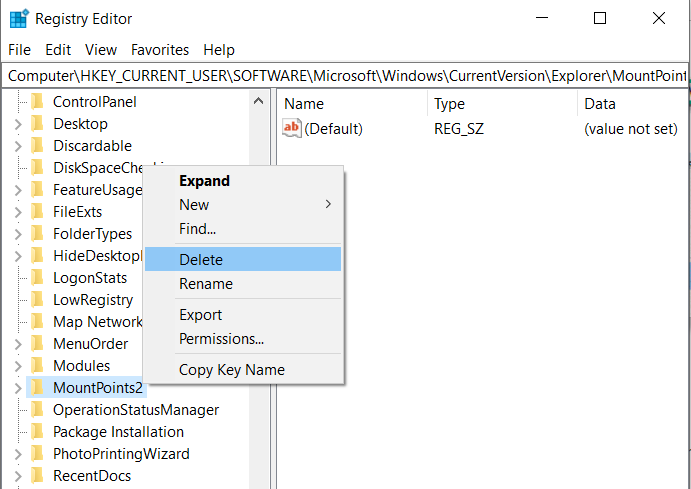
A warning may appear on your screen, whether you are sure to delete the key or not. Click Ok and Restart to implement the changes!
At last, make sure there is enough space on the root drive of the server. There’s no dedicated amount that needs to be freed, but ensures to keep a few gigabytes of space to prevent such annoying errors “The Local Device Name Is Already In Use”.
Have any questions? Feel free to mention them in the comments section below. You can even drop a line at [email protected]