In the modern age of technology, smartphones have become an integral part of our daily lives. They keep us connected, informed, and entertained. Recognizing the significance of this relationship, Microsoft introduced the Phone Link App, a feature that seamlessly integrates your smartphone with Windows 11. This exciting feature allows you to receive notifications, send and receive texts, and access your phone’s content directly from your PC. However, like any other software, occasional glitches can occur, and one common issue users have reported is the failure of Phone Link App notifications on Windows 11.
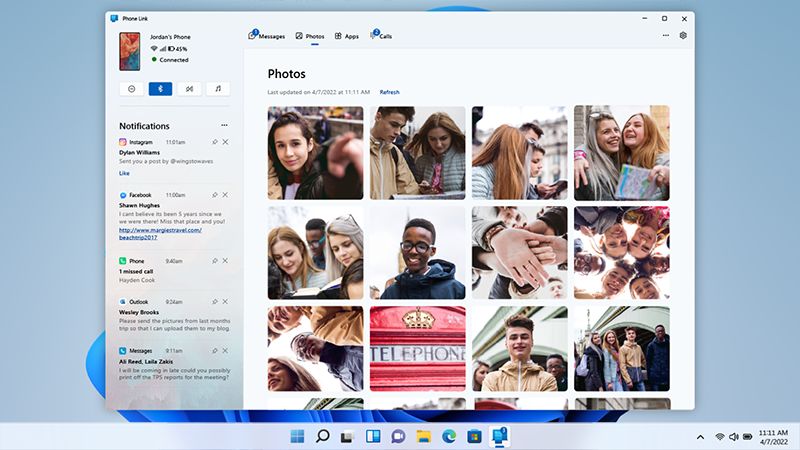
Image source: Microsoft Support
If you’ve encountered this problem, fret not! In this blog post, we will offer you solutions to fix the phone Link notifications not working issue on Windows 11 and provide you with effective troubleshooting methods to resolve it.
So, if you’re tired of missing important notifications or frustrated with the lack of synchronization between your smartphone and PC, read on. We’ve got you covered with step-by-step instructions and valuable insights to help you overcome this obstacle and get back to experiencing the full benefits of the Phone Link App on your Windows 11 device.
Let’s dive in!
Also Read: Microsoft Bridges the Gap: Phone Link is Now Available on iOS
Phone Link Notifications Not Working? Try These Solutions!
Solution 1: Manually Enable Phone Link Notifications
The first troubleshooting method you can try is manually enabling the notifications. Sometimes, due to system updates or settings changes, the notifications for the Phone Link App may get disabled.
Follow the steps below to manually enable the notifications:
Step 1: Open the Windows Settings menu. You can do this by clicking on the Windows icon and selecting the gear-shaped icon for Settings, or by using the keyboard shortcut Win + I.
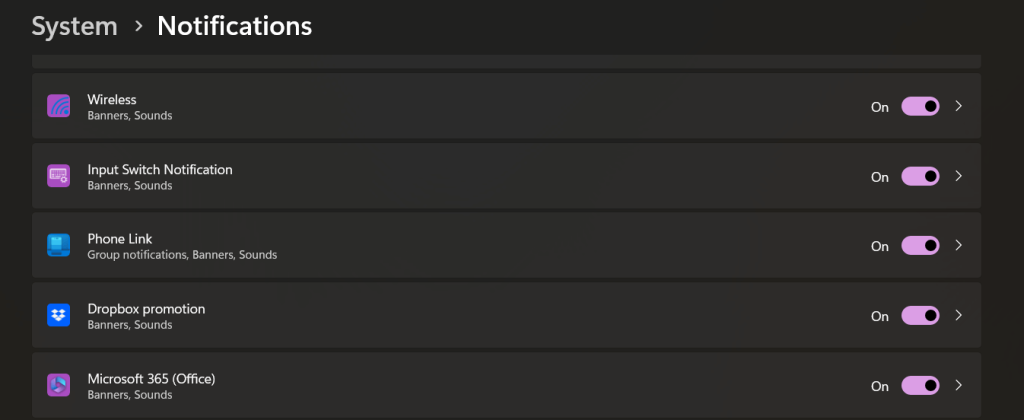
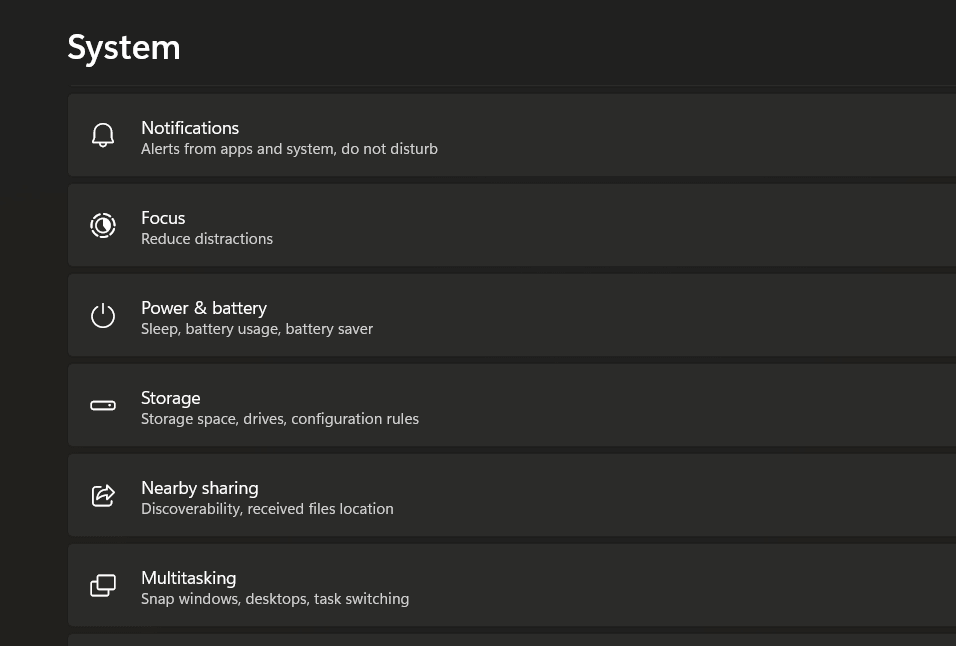
Step 2: In the Settings menu, click on “System” to access system-related settings and then select “Notifications”.

Step 3: First, toggle On the “Notifications” option that you see at the top of the window.
Step 4: Also, scroll through the list of apps to make sure the toggle switch next to the Phone Link App is turned on. If it’s off, click on the toggle switch to enable notifications for the app.
Reboot your device after making the above-listed changes. Once your PC restarts, check if the Phone Link App notifications are now working. You should start receiving notifications on your Windows 11 device from your connected smartphone.
Solution 2: Review In-App Notification Settings
Sometimes, the problem may lie within the app itself, where certain settings might be misconfigured or disabled. Here’s how you can review the in-app notification settings for the Phone Link App:
Step 1: Open the Phone Link App on your smartphone. Ensure that it is connected to your Windows 11 PC.
Step 2: Look for the app’s settings menu within the Phone Link App. The location of the settings may vary depending on the app version and device.
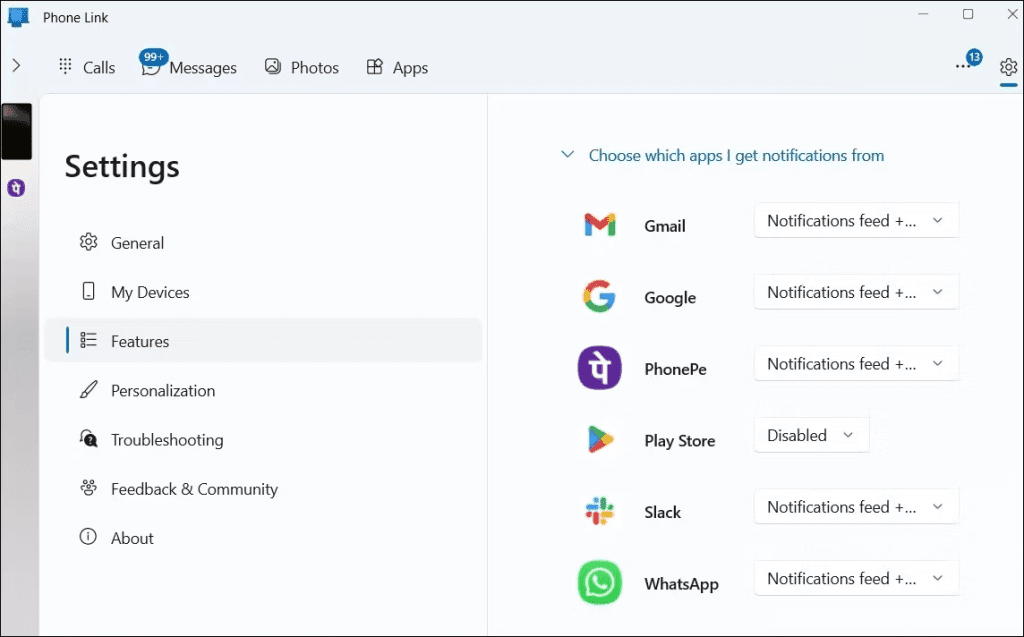
Step 3: Navigate to the notification settings or preferences section within the app.
Step 4: Verify that the notification settings are properly configured. Ensure that the desired types of notifications, such as text messages, call notifications, or app alerts, are enabled.
Step 5: If there are separate settings for each notification type, review them and make sure they align with your preferences.
By reviewing the in-app notification settings, you ensure that the Phone Link App is set up to send notifications to your Windows 11 device.
Also Read: How To Fix Microsoft Phone Link App not Working on Windows 11
Solution 3: Allow the App To Run in the Background
If you’re still experiencing difficulties with Phone Link notifications not working on Windows 11, another possible solution is to ensure that the app is allowed to run in the background. By default, Windows 11 may restrict certain apps from running in the background to optimize system performance.
Follow the steps below to allow the Phone Link App to run in the background:
Step 1: Open the Windows Settings app on your PC.
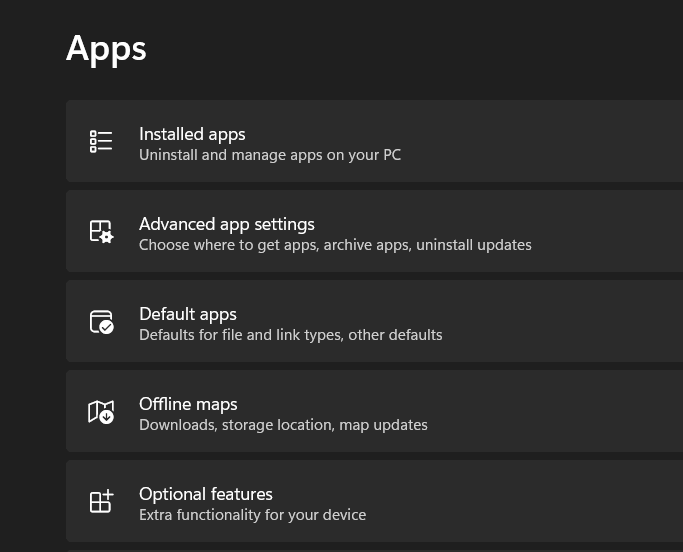
Step 2: In the Settings window, switch to the “Apps” section.
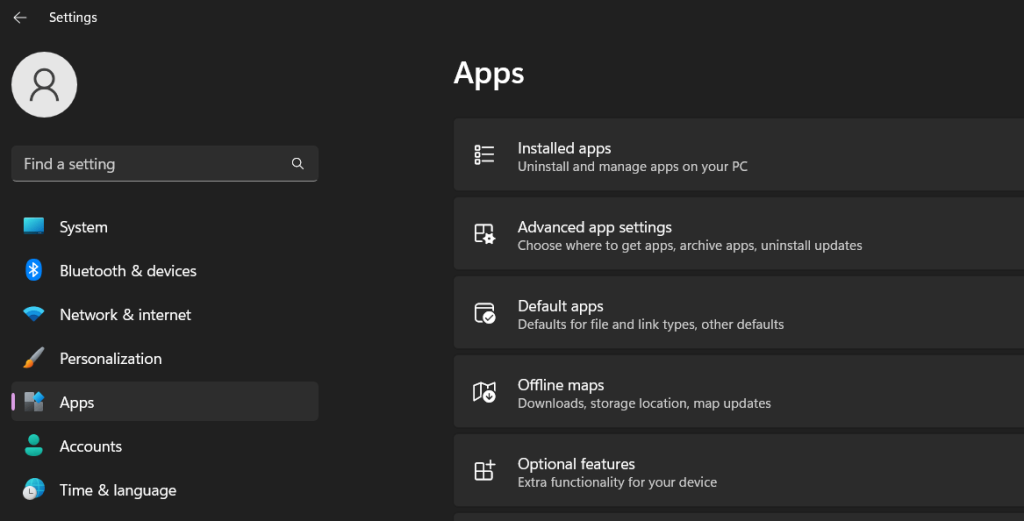
Step 3: Select “Installed Apps”
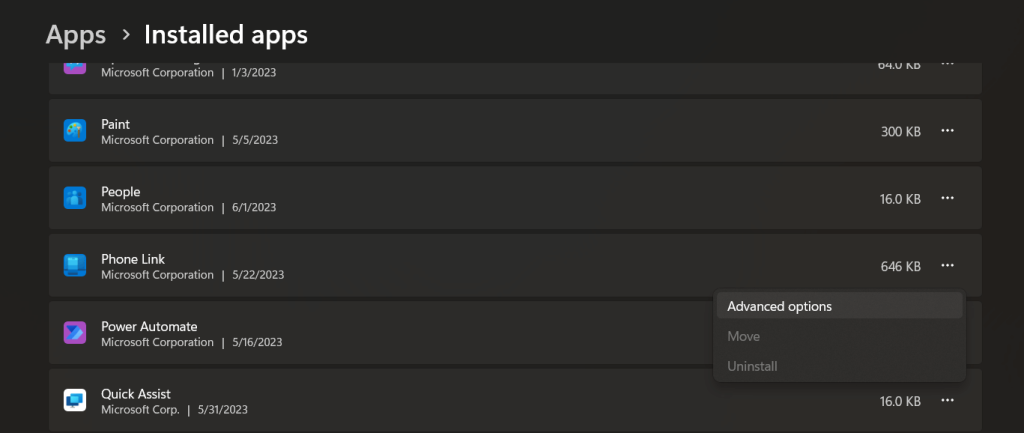
Step 4: Scroll down until you find the Phone Link App in the list of apps. Tap on the three-dot icon placed next to it and select “Advanced Options”.
Step 5: Scroll down and set the “Let this app run in the background” option to “Always”.
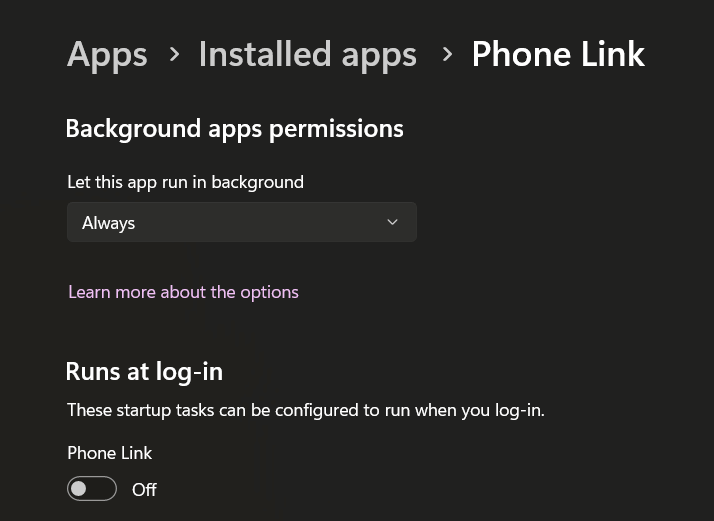
Step 6: Close the Settings menu and restart your PC to apply the changes.
Allowing the app to run in the background ensures that it can maintain an active connection with your smartphone, facilitating the seamless delivery of notifications to your Windows 11 device.
Solution 4: Disable Battery Saver Mode
Battery Saver mode is designed to conserve battery life by limiting certain background activities, which can potentially affect the functionality of apps like Phone Link. To ensure the app can function properly, try disabling Battery Saver mode using the following steps:
Step 1: Open the Settings app on your Windows PC.
Step 2: In the Settings menu, click on “System.”
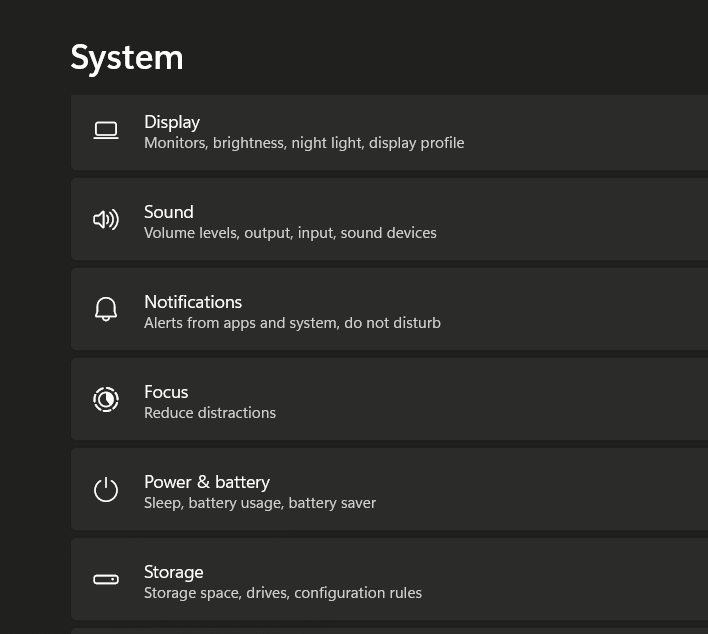
Step 3: Select “Power and Battery”.
Step 4: Under the “Battery” section, ensure that the Battery Saver mode is turned off. If it is currently enabled, click on the toggle switch to disable it.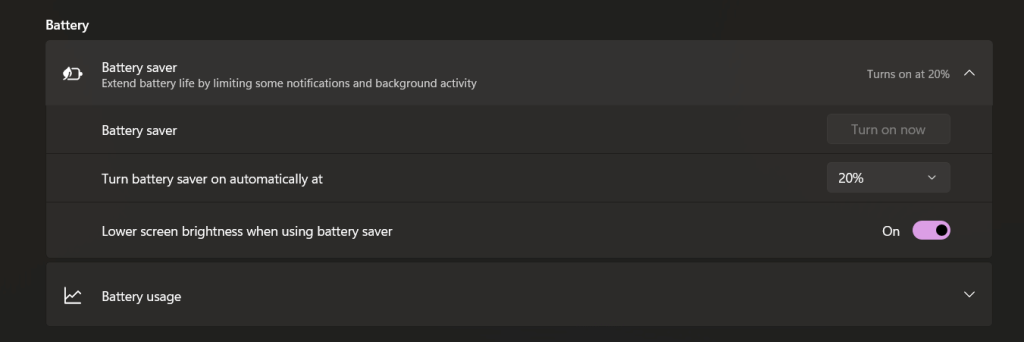
Step 5: Close the Settings menu.
After disabling Battery Saver mode, restart your Windows 11 device and check if the Phone Link App notifications start working as expected.
Also Read: How To Disable Update Notifications On Windows PC
Solution 5: Unlink Your Phone and Start Over
If none of the previous solutions have resolved the issue of Phone Link App notifications not working on Windows 11, it may be necessary to unlink your phone from your PC and start the setup process again. Unlinking and reconnecting your phone can help refresh the connection and resolve any underlying issues.
Follow these steps to unlink your phone and start over:
Step 1: Open the Phone Link App on your Windows 11 PC.
Step 2: Locate the option to unlink or disconnect your phone in Settings.
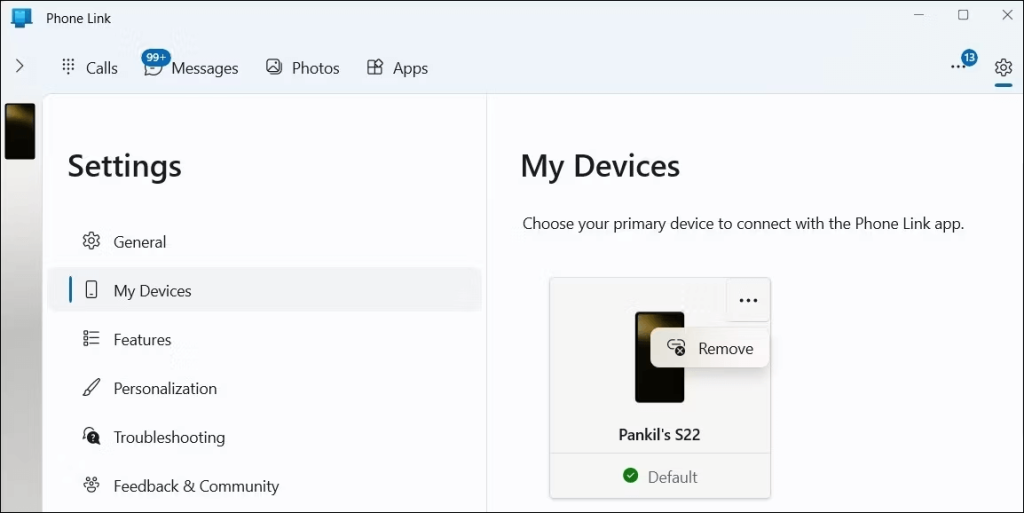
Step 3: Follow the prompts to unlink your phone.
Step 4: Once the unlinking process is complete, restart both your phone and Windows 11 PC.
Step 5: After the restart, open the Phone Link App again on your PC.
Step 6: Follow the setup process to reconnect and link your phone with your Windows 11 device.
This method can effectively resolve any underlying issues that were preventing the notifications from working as expected.
Solution 6: Reset the Phone Link App
Resetting the Phone Link App will revert it to its default settings and potentially resolve any configuration issues. Here’s how you can reset the Phone Link App:
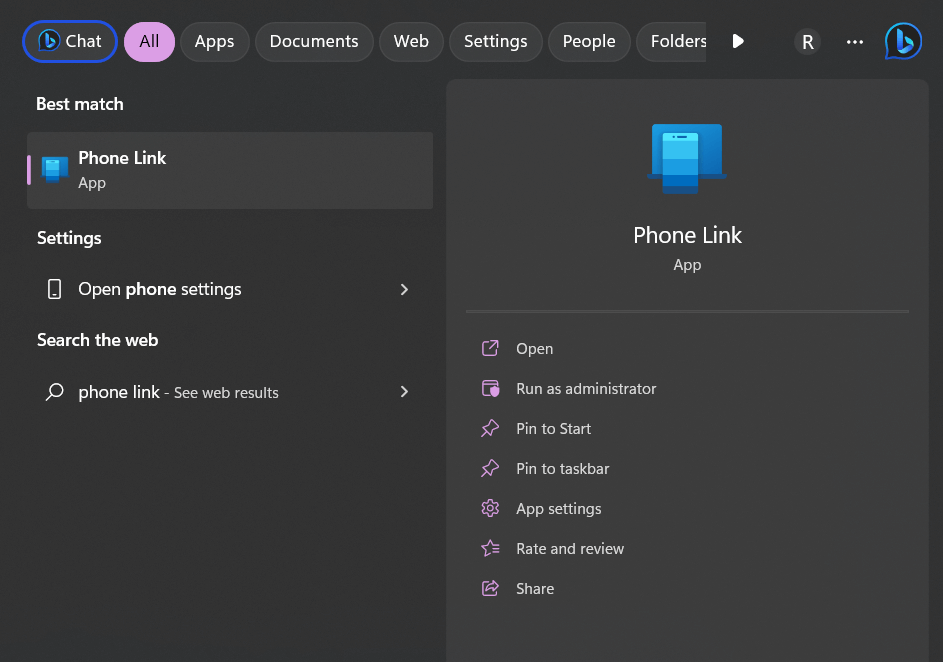
Step 1: Open the Windows Settings app.
Step 2: In the Settings menu, switch to the “Apps” section.
Step 3: Select “Installed Apps”.
Step 4: Scroll down and locate the Phone Link App in the list of installed apps.
Step 5: Click on the three-dot icon placed next to the “Phone Link” app and select the “Advanced options” link.
Step 6: In the advanced options menu, scroll down and find the “Reset” section.
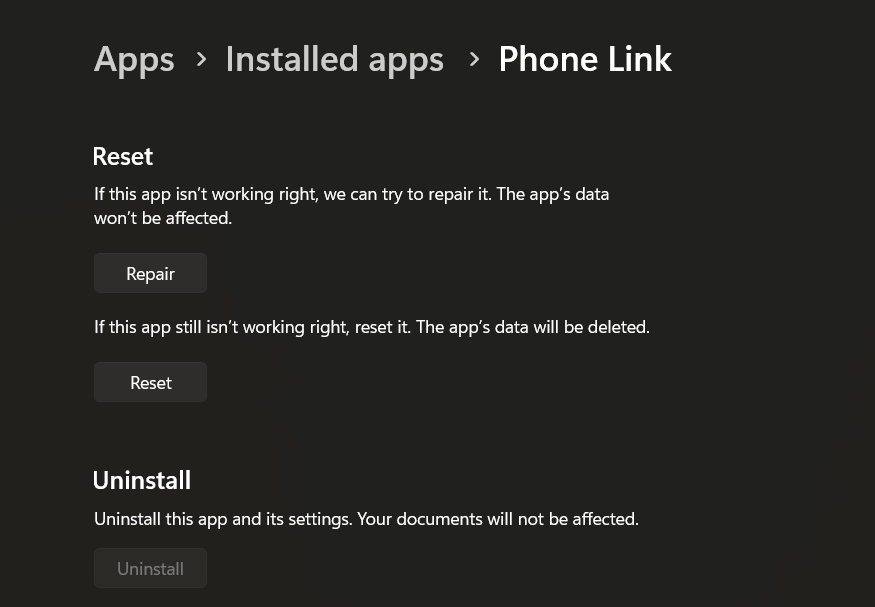
Step 7: Click on the “Reset” button to initiate the reset process for the Phone Link App.
Step 8: Follow any on-screen prompts to confirm the reset action.
Once your PC restarts, open the Phone Link App again and go through the setup process to connect your phone. Check if the notifications are now working as expected. Resetting the app can help resolve any persistent issues that may have been affecting its functionality.
Also Read: What To Do If Microsoft Teams Notifications Not Working
Conclusion
This wraps up our guide on how to fix the phone link notifications not working issue on Windows 11. With the solutions provided in this guide, you can overcome the hurdles of Phone Link App notifications not working on Windows 11 and enjoy seamless integration between your smartphone and PC once again. Stay connected, stay informed, and make the most of the features that technology has to offer. Follow us on social media – Facebook, Instagram and YouTube.