
According to the official website, Weasel is an all-encompassing error message that indicates a network problem. Moreover, if a player is in an activity and a ban is applied to their account, they will be returned to the title screen with a WEASEL error. . Weasel errors might occur as a result of network limitations, incompatible modifications being used, or issues with the Internet connection. Here are a few fixes that you need to consider to resolve the Destiny 2 Weasel code error.
Expert Recommended Methods On How To Fix Error Code Weasel In Destiny 2
Method 1: Use A VPN.
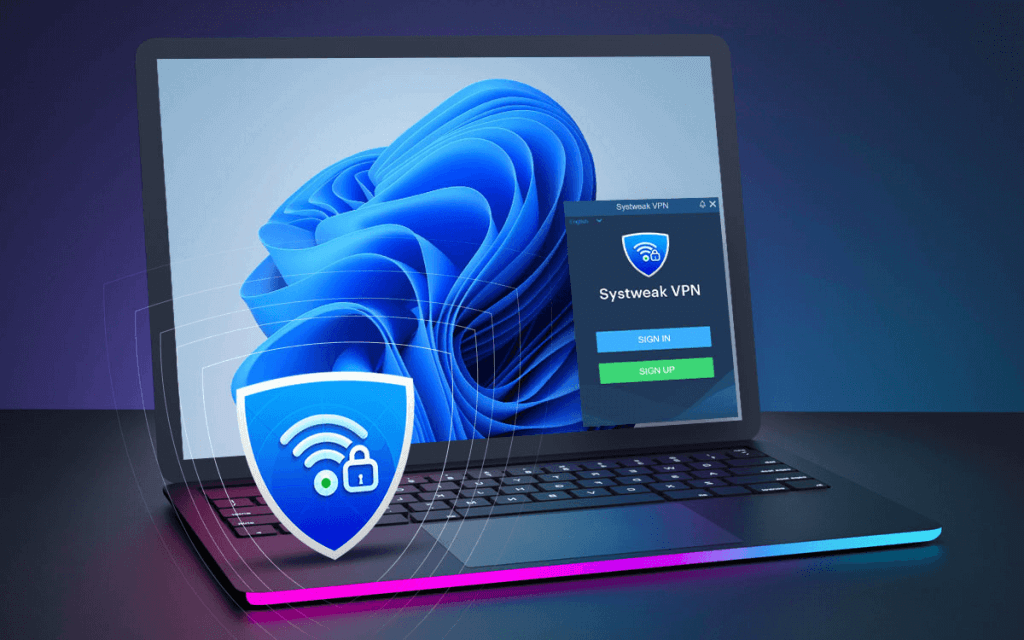
Using a reputable VPN service should be your main strategy when dealing with the Destiny 2 error code weasel. Choosing a server located in a different area often makes it easier to get over any network-related problems.
Remember, to continue playing, you may need to test out several servers and occasionally switch servers at the end of a session. We recommend using Systweak VPN which masks your IP address to ensure your online activities remain private. With the use of cutting-edge security technologies, this VPN can circumvent censorship, prevent ISP throttling, and offer online anonymity.

Also Read: Benefits of Using Systweak VPN – All You Need to Know
Method 2: Check The Integrity Of Game Files.
Verifying the integrity of game files helps in identifying and repairing corrupted or missing game files. Follow the instructions stated below to check the integrity of game files on Steam:
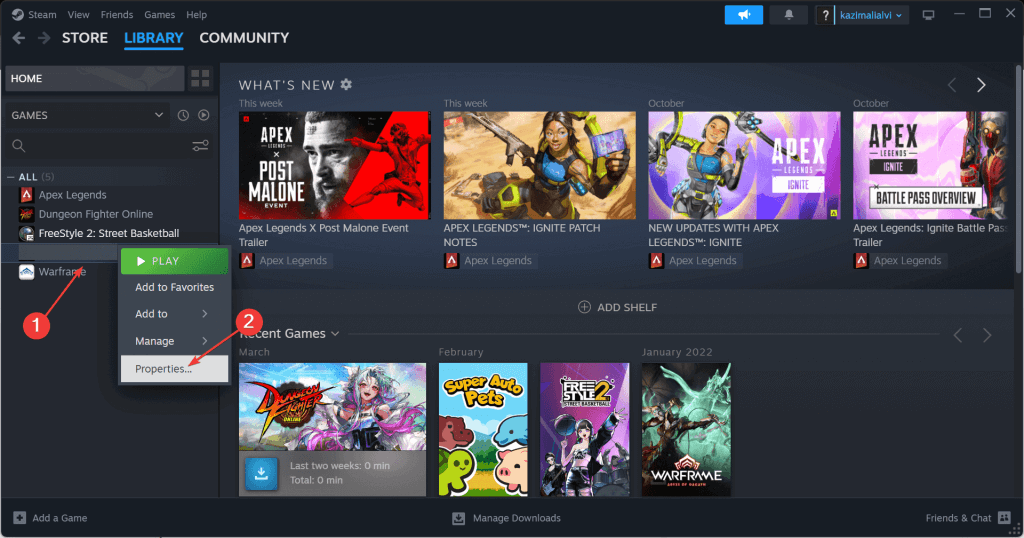
Step 1: Open the Steam app and select the Library option.
Step 2: From the list of games, right-click Destiny 2 and choose Properties.
Step 3: Select the “Verify integrity of game files” option under the Installed Files tab.
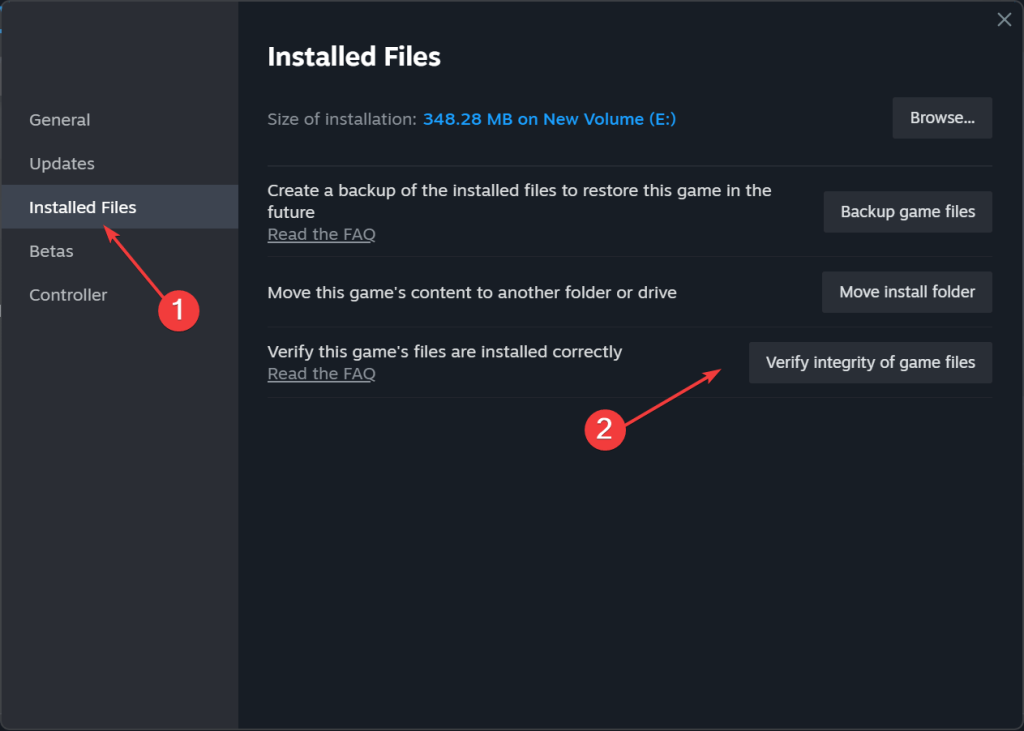
Step 4: After that, restart Steam, launch Destiny 2, and look for any updates.
Using the built-in file repair option will work if Destiny 2’s error code weasel is caused by damaged game saves, missing app data, or cache difficulties.
Method 3: Add The Game To The Firewall’s Whitelist.
Well, adding the Destiny 2 game to your Firewall’s Whitelist can help in fixing the Weasel error code. This ensures that your Firewall is not blocking or limiting the game’s Internet connection. Here’s what you need to do on your Windows 11/10 PC.
Step 1: To access Search, press Windows + S. Then, put Allow an app across Windows Firewall into the search field. Finally, select the appropriate result.
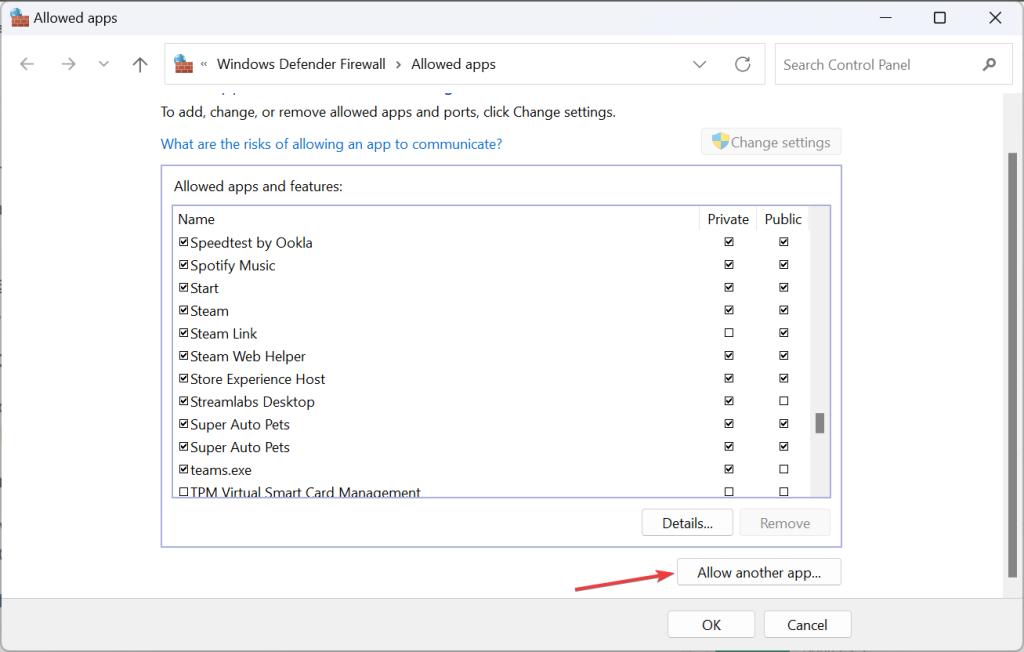
Step 2: Hit the Change Settings button.
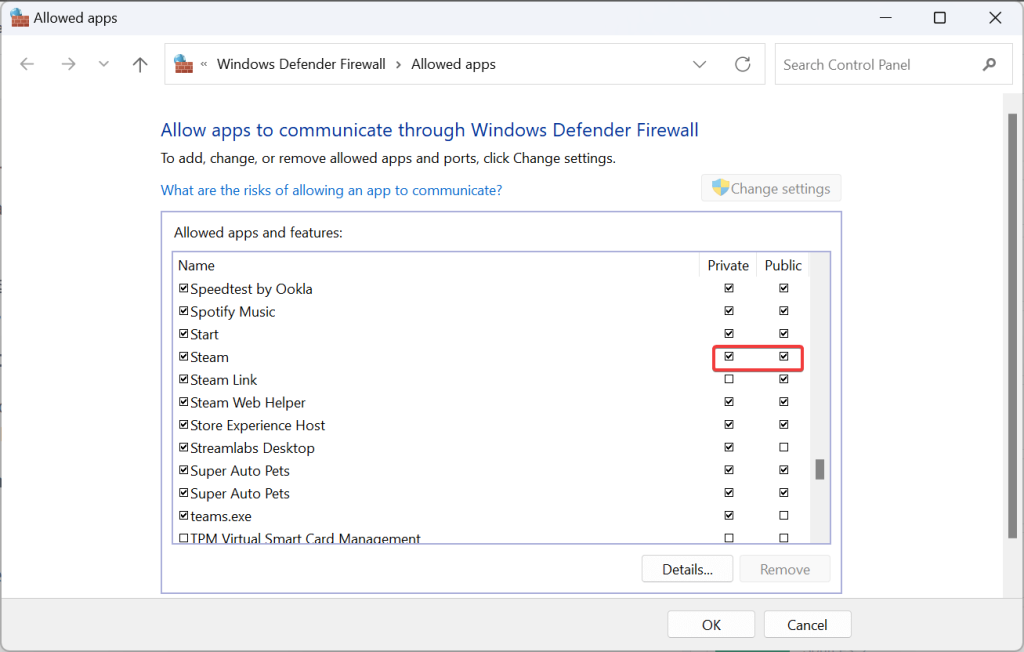
Step 3: Make sure the Private and Public checkboxes are checked in Destiny 2 and on the platform.
Step 4: Click on Allow another app at the bottom if you are unable to find one.
Step 5: Press the Browse icon.
Step 6: Now, navigate to the location of the app launcher, pick the.exe file, and press Open.
Step 7: Press the Add button.
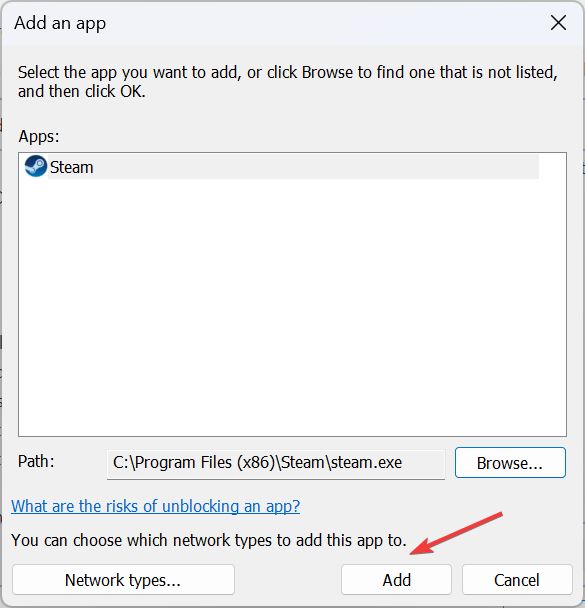
Step 8: To save the changes, check the boxes labeled Private and Public, then click OK.
You will need to manually whitelist the software or port if the firewall is preventing it from running. On a PC, it will remove the Destiny 2 error code weasel. Apply the same setting to all firewalls from third parties.
Method 4: Modify The DNS Server.
Modifying the DNS server helps in improving the network connection. Usually, the error code Weasel in Destiny 2 appears due to network-related problems but it could also happen due to corrupt game files or caches. Hence, following the instructions below can resolve the problem.
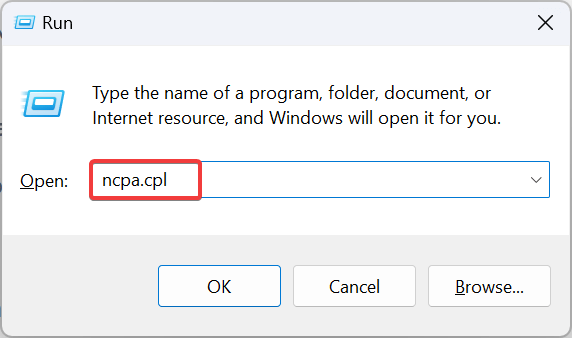
Step 1: Hit Win + R to launch the RUN box.
Step 2: Type ncpa.cpl in the search field and press the OK button.
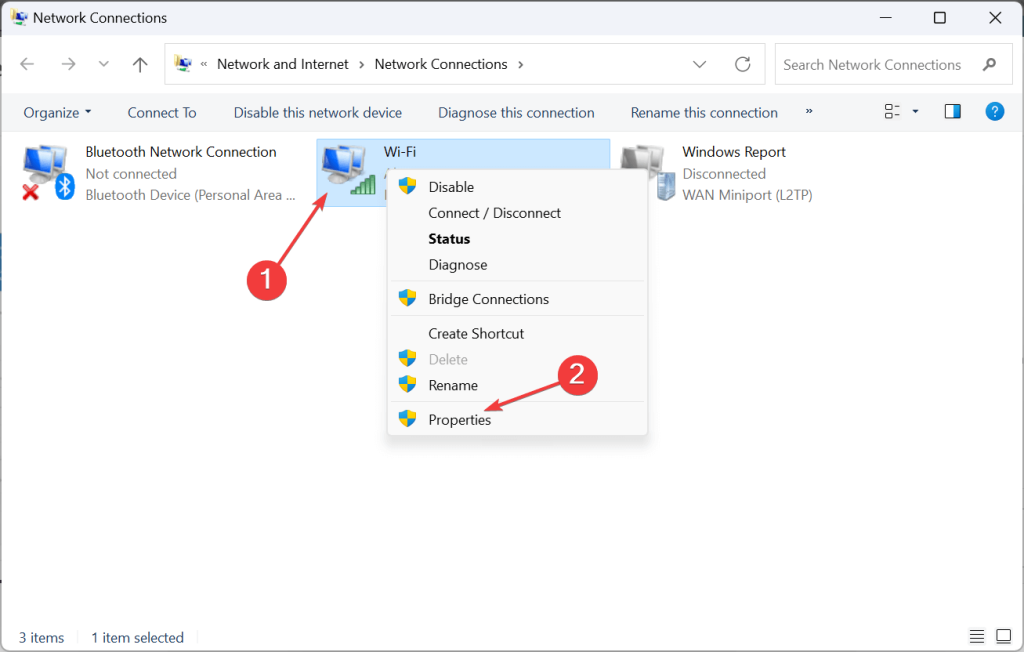
Step 3: Find the network adapter that is currently in use, then right-click and choose Properties.
Step 4: Select TCP/IPv4 (Internet Protocol Version 4) and press the Properties button.
Step 5: Choose Enter the following data using the DNS server addresses shown below:
Preferred DNS server: 8.8.8.8
Alternate DNS server: 8.8.4.4
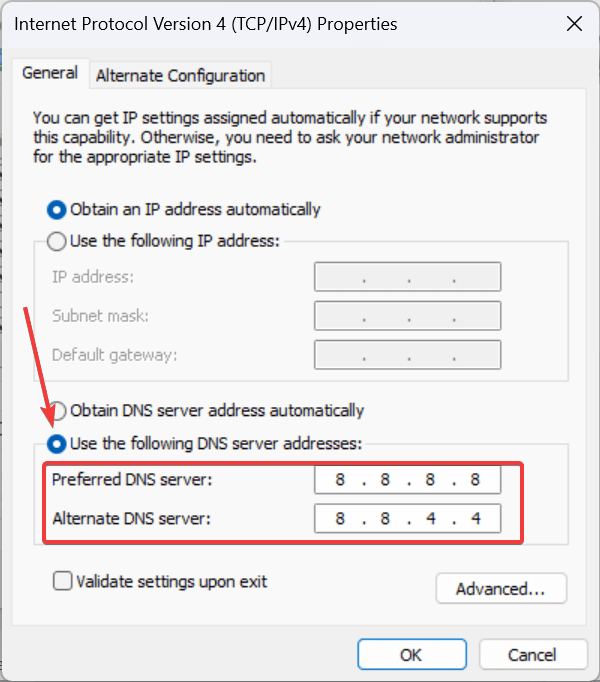
Step 6: To save the modifications, restart the computer, and look for enhancements, click OK.
Also Read: How To Fix DNS Server Not Responding On Windows 11?
Method 5: Turn on UPnP
For people who aren’t aware, UPnP allows devices on a network to discover each other and establish functional network services to ensure effortless data sharing, communication, and entertainment. If in case this function is disabled by any chance, it may result in a Destiny 2 Weasel Code Error. Hence, consider turning on UPnP by following the steps shared below:
Step 1: Open a web browser to see your router’s settings. Usually, the router’s back is printed with the internal IP address.
Step 2: Select Advanced after selecting the Advanced Network tab.
Step 3: After selecting the Enable UPnP checkbox, save the modifications.
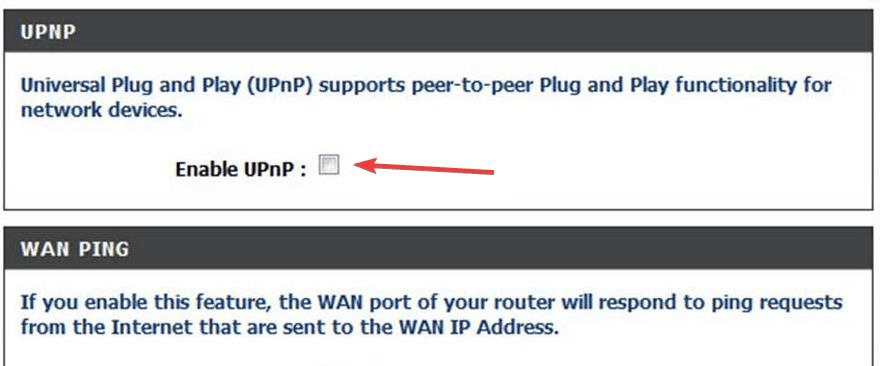
Step 4: Try relaunching Destiny 2 to see whether the weasel error has been resolved.
Also Read: How To Enable/Disable DLNA Server on Windows 11
Enhance Your Gaming Experience by Resolving the ‘Weasel’ Error in Destiny 2
I hope the above methods have helped you to fix Error Code Weasel In Destiny 2. Most of the experts suggest using Systweak VPN to change their location and connect to the Destiny 2 servers.
Let us know in the comments section below which method worked for you. You can also find us on Facebook, Twitter, YouTube, Instagram, Flipboard, and Pinterest.