A DLNA server can help simplify media sharing and playback, providing an easy and convenient way to access your media files from multiple devices. In this post, we have listed a step-by-step guide on how to enable and use the DLNA server on Windows 11.
Let’s get started with the basics first!
What is a DLNA Server?

DLNA stands for Digital Living Network Alliance, which is a technology standard used to share media content such as music, photos, and videos between devices on a local network. A DLNA server is a device or software application that hosts media files and shares them with other DLNA-compatible devices on the same network.
DLNA servers offer convenience and flexibility by allowing you to access your media files from multiple devices, without having to worry about file formats or compatibility issues. In fact, it is a cost-effective solution for sharing media files between devices, as it eliminates the need for additional hardware, such as USB drives or external hard drives.
Also read: How to Take Screenshots of A Video in VLC Media Player
How to Enable DLNA Server on Windows 11?
This section will demonstrate the process of enabling the Windows Media Server. Follow these steps:
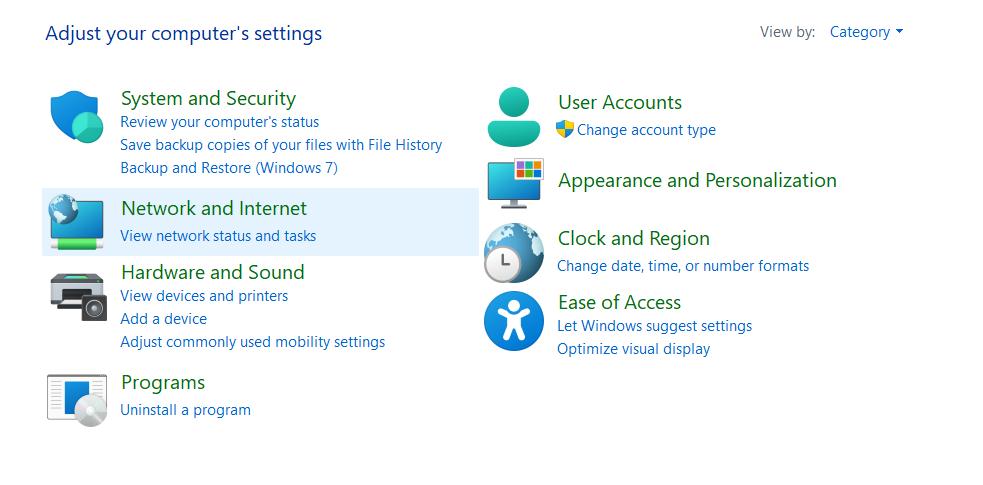
- Tap on the search icon placed on the Taskbar, type “Control Panel” and hit Enter.
- Click on Network and Internet.
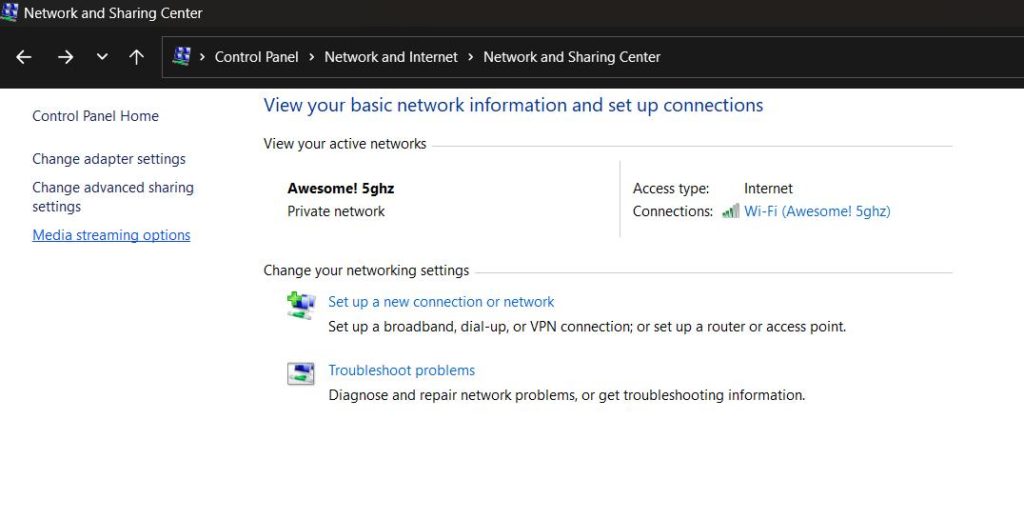
- Navigate to Network and Sharing Center in the pop-up window.
- On the left panel, select Change advanced sharing settings.
- Expand the All networks section.
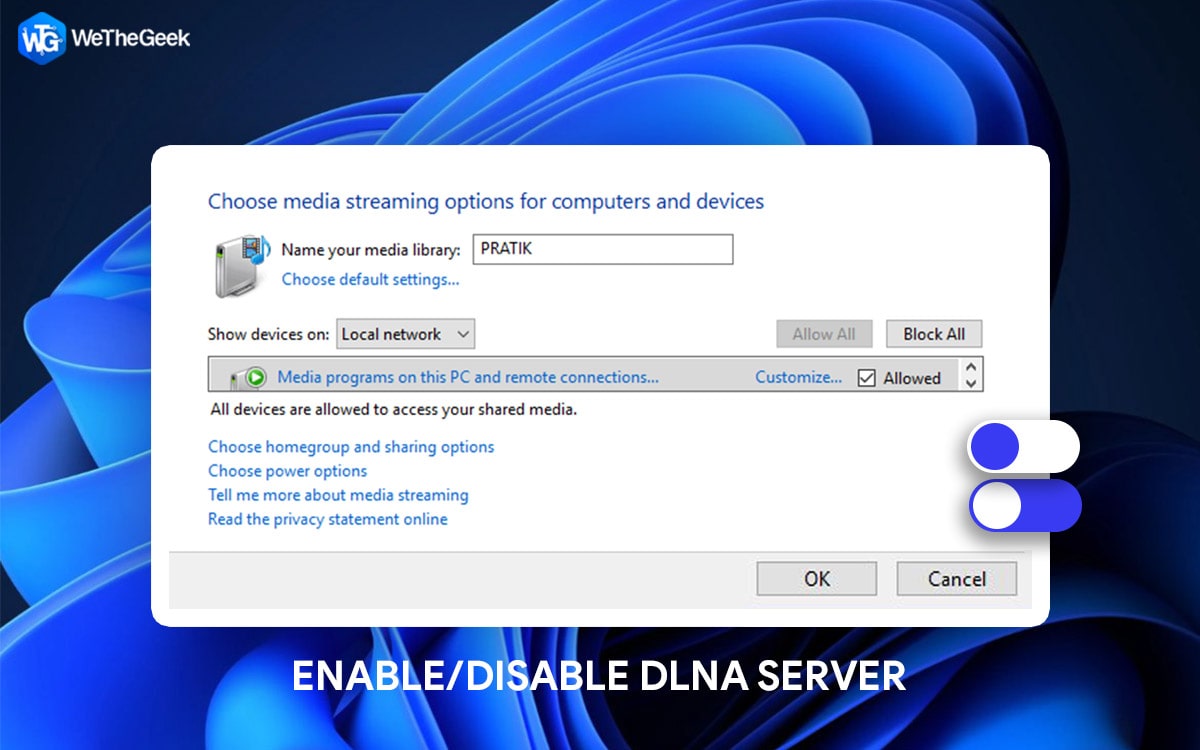
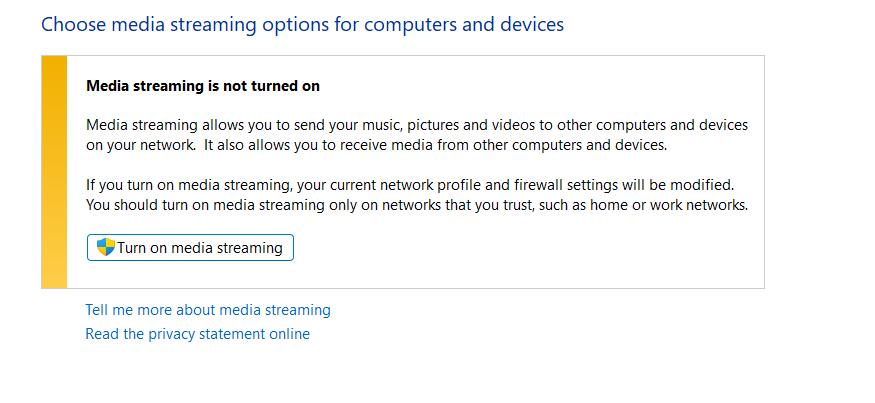
- Click on Choose media streaming options.
- Hit on the “Turn on media streaming” button.
Name the network library and then add the devices. After completing all the steps, your personal folders, such as Music, Pictures, and Videos, will be visible to any streaming devices that support UPnP.
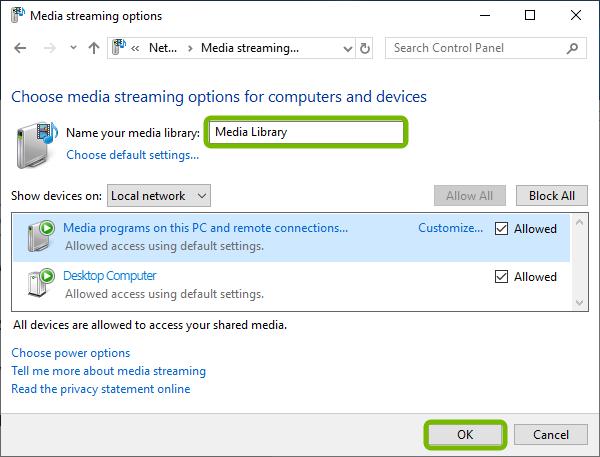
This means that you can easily stream video, music, or picture files by adding them to the corresponding libraries. You don’t need to move the files to the current library folder; instead, you can add folders to the libraries and then add the files to the created folder.
Using a DLNA server can simplify media sharing, reduce clutter, and make it easier to enjoy your favorite media content across multiple devices.
Also read: How to Fix: Windows Video App Can’t Play Error 0xc1010103
How to Disable DLNA Server on Windows?
Here’s a quick way to disable DLNA on Windows:
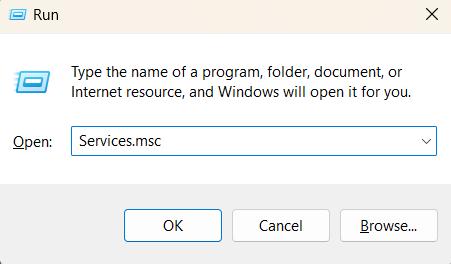
- Press the Windows + R key combination to open the Run dialog box. Type “Services.msc” and hit Enter.
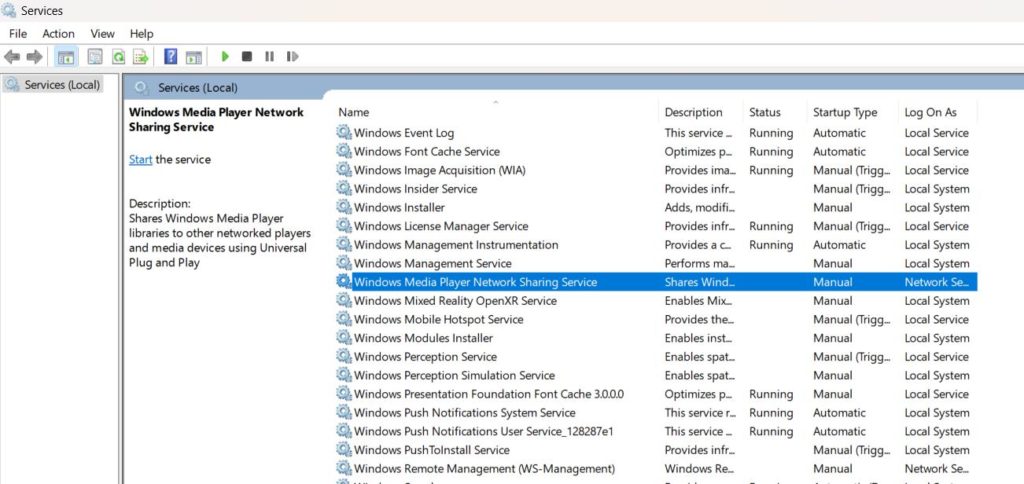
- In the Services window, look for the “Windows Media Player Network Sharing” service. Double-tap on it to open Properties.
- Set the “Startup type” option to “Disabled”. Hit on the OK and Apply buttons to save changes.
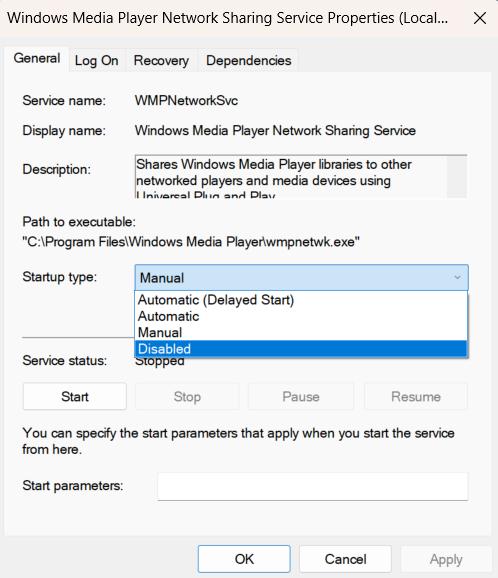
- Once you complete these steps, the DLNA server will be disabled on your device.
Also read: How To Fix The YouTube Video Freezes But Audio Still Plays Issue
Is it Advisable to Turn Off DLNA?
DLNA relies on UPnP, which enables the discovery of other devices on the network and allows them to communicate with each other. If you’re not streaming media content, it may be a good idea to disable DLNA until you need it again.
Can We Use Third-Party DLNA Servers on Windows?
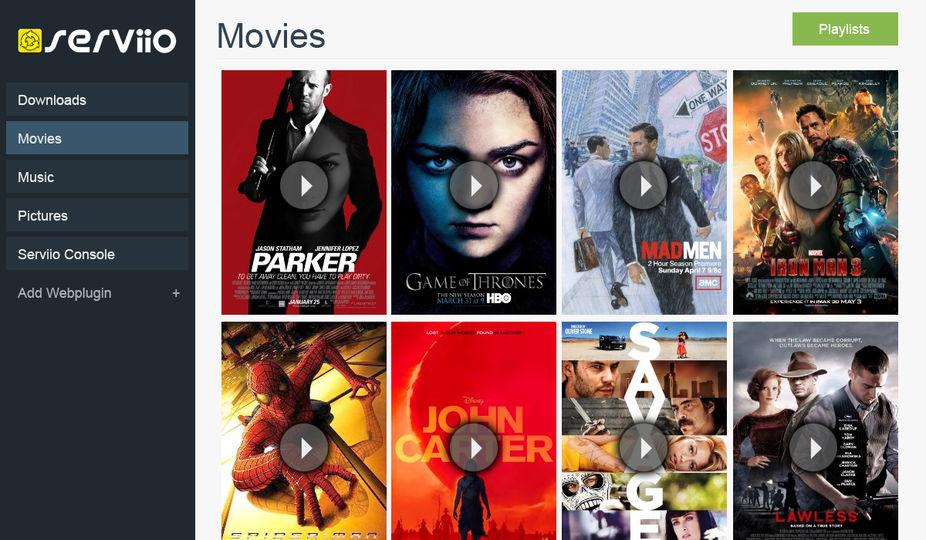
Yes, you can use third-party DLNA servers on Windows. There are several DLNA server software options available for Windows, including Universal Media Server, Plex, Emby, and Serviio, which offer more advanced features and customization options than the built-in Windows Media Player DLNA server.
These third-party DLNA servers can be downloaded and installed on your computer and can be configured to share media files with other DLNA-compatible devices on your network. Just make sure to choose a reliable and reputable third-party DLNA server that suits your needs and preferences.
Also read: How To Fix Custom Audio Not Working In Windows 11 Video Editor
Conclusion
Enabling and disabling DLNA on Windows is a simple process that can enhance your media streaming experience and improve the security of your network. By following the steps outlined in this guide, you can easily enable or disable the built-in DLNA server on Windows or use third-party DLNA servers to share your media files with other devices on your network.
However, It’s important to keep in mind that while DLNA can be a useful tool, it also poses security risks, and it’s essential to take appropriate measures to protect your network and data. By being aware of these risks and following best practices, you can enjoy the benefits of DLNA while minimizing the potential for security breaches.
So, did you learn something new today? Do you think DLNA technology is helpful? Feel free to shoot your thoughts in the comments box!