
Configuring the DNS settings on your Windows 11 PC/Laptop is necessary if you wish to increase your privacy. Whether a webpage is being opened or an app is attempting to connect to a server in the background, it will secure all internet interactions on your computer. Read this detailed article if you’re new to this area to find out how to change the DNS server in Windows 11.
Read Also: How To Change a Volume Label on Windows 11
What is DNS, And Why Do You Need To Change It?
Many of us find it as simple as flipping a switch to connect to the internet. We no longer need to worry about navigating time-consuming procedures to connect our gadgets to internet services in seconds. DNS is to be commended in this regard. We can thank DNS for this.
As its name implies, DNS (Domain Name System) links domain names to IP addresses, allowing you to access websites/webpages with names like “wethegeek.com” while all connected computers have an IP address to find the website you want to access.
Read Also: How to Perform a Clean Boot on Windows 11
That said, ISPs (Internet Service Providers) are increasingly collecting DNS queries, which is bad news for your privacy, which is why users need to change the DNS server on Windows 11. This implies that your Internet provider can use the DNS log to determine which website you visited. To protect yourself from the prying eyes of your ISP, malware, and phishing attacks, you should use custom DNS settings that won’t log your searches and provide dependable speed.
Read Also: Microsoft Paint not Working on Windows 11? Here’s the Fix!
How To Change DNS Server in Windows 11
In this guide, we’ve included two pretty basic and simple methods to change the DNS server on Windows 11. So without further ado, let’s get started.
Method 1: Change DNS Server Via Settings App
- Press the “Windows” key with the key “I” to open the “Settings: menu.
- Click on the “Network & Settings: option from the left side of the pane.
- Now tap on the “Wi-fi” under the Network & Settings page.

- Next, scroll down a bit and find & tap on “Hardware Properties.”

- Click “Edit” next to “DNS Server Assignment” to continue.

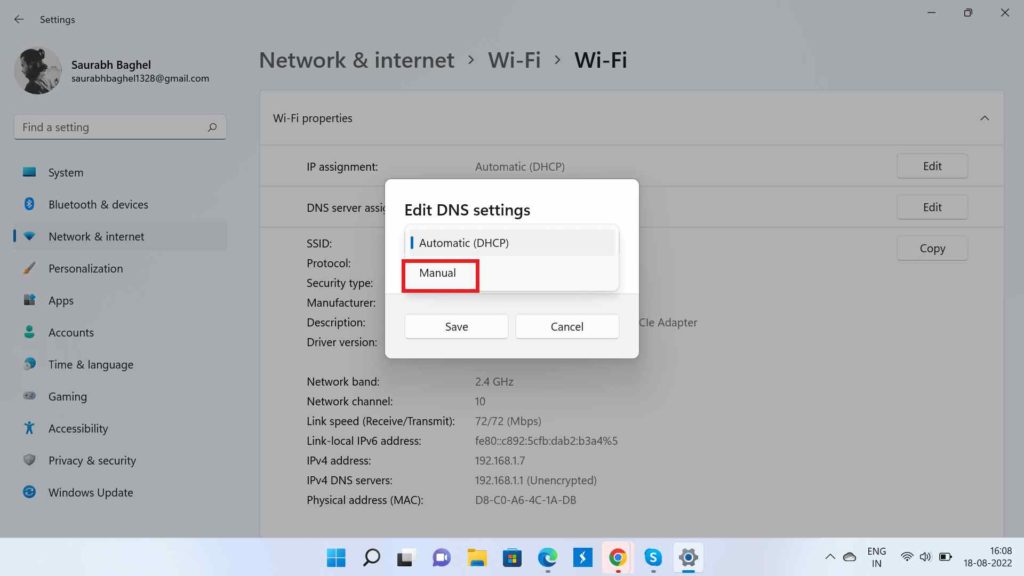
- Ensure the “IPv4” toggle is turned on and choose “Manual” from the drop-down option on the following page.

- Enter the new custom DNS server addresses you want to utilize in the “Preferred” and “Alternative” DNS sections.
- Enter these two DNS Servers given by Google, “8.8.8.8 &8.4.4,” in the “Preferred” and “Alternative” sections, respectively.
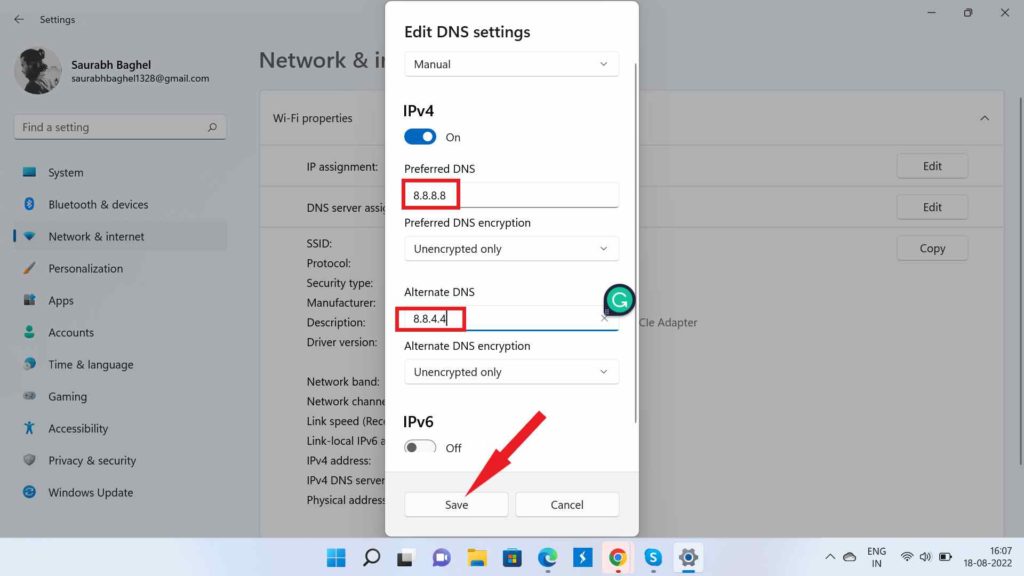
- Once finished, click “Save,” and Windows 11 will allow you to modify the DNS server.
Method 2: Change DNS on Windows 11 By Using Control Panel
- Pree the “Windows” key with the key “R” to open the “Run” dialogue box.
- Now type “Control” in the given area and hit “Enter” or press “Ok.”

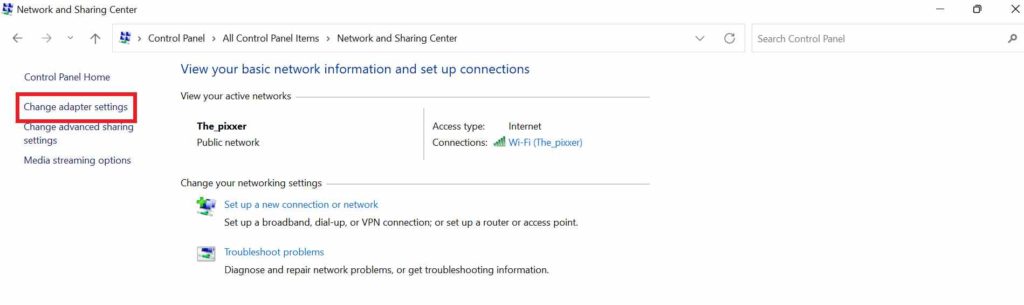
- Find the “Network and Sharing Center” option on the Control Panel page and click on it.

- Now click on “Change Adapter Settings” from the left side of the pane.
- Next, right-click on the connection type you are using and select “Properties” from the menu that appears.

- Find the “Internet Protocol Version 4 (TCP/IP4)” option in the “Properties” box and double-click it to open.
- Then, in the “Internet Protocol Version 4 (TCP/IP) Properties” box, select “Use the following DNS server addresses.

- Now, enter these two DNS Servers given by Google, “8.8.8.8 &8.4.4,” in the “Preferred” and “Alternative” sections, respectively.

- Once finished, click “Save,” and Windows 11 will allow you to modify the DNS server.
Read Also: How to Uninstall Updates In Windows 11
To Wrap This Up
So, with the help of our little how-to guide on “how to change DNS servers in Windows 11,” you will be safe prying eyes of your ISP and malware and phishing attacks. These were the two easy methods to change the DNS server on your Windows device. Which one is your favorite? Let us know in the comments section below.
Follow us on social media – Facebook, Instagram and YouTube.