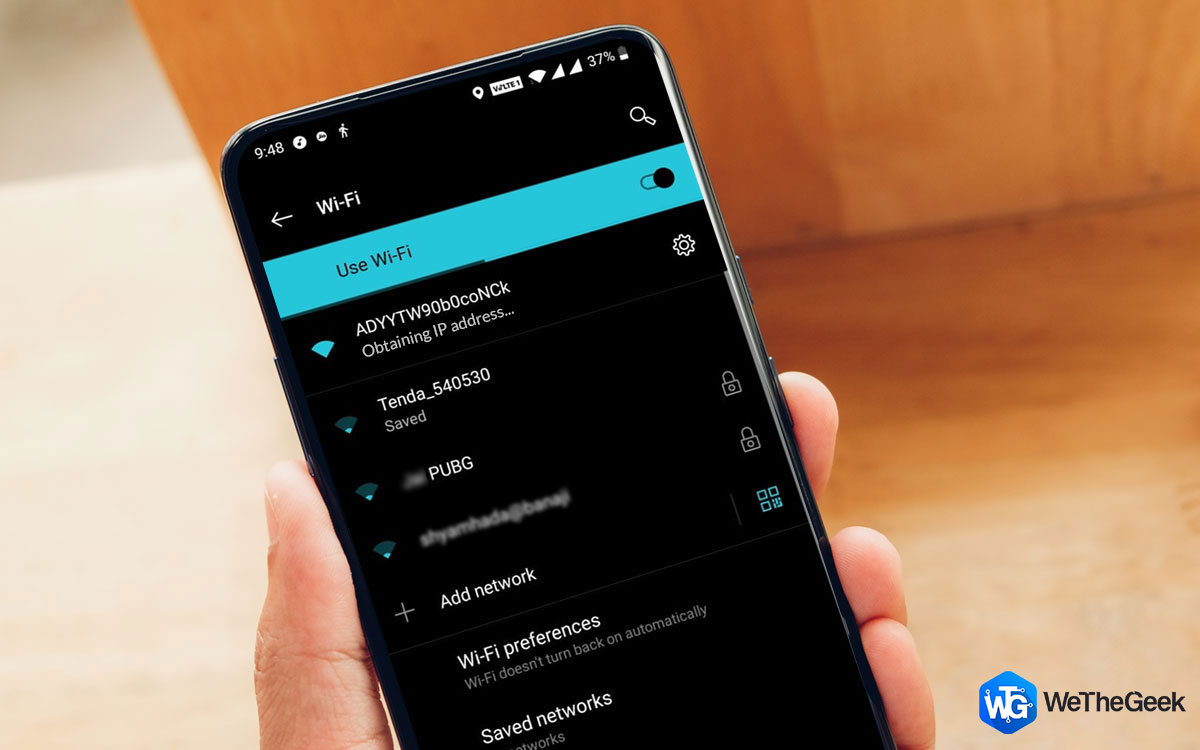
Connecting your Android device to the Wi-Fi network is one of the simplest things. Just pull down the notifications from the top and tap on the Wi-Fi icon, and you are connected to the network. However, this process becomes quite frustrating when you try to connect to a network and are stuck at the error, obtaining an IP address. Indeed, it’s quite an annoying situation, but the good news is that this can be fixed without even visiting a technician. To learn how to fix the failed to obtain IP Address error on Android, let’s get to the blog.
Also Read: How To Solve ERR_NETWORK_CHANGED Chrome Error
Cause for Failed to Obtain IP Address Error on Android
Before learning how to fix this problem, let’s first understand how a router helps your device connect to the Internet. When your Android device connects to a network, the first thing a router does is assign it a unique IP address. Without getting an IP address, you can’t connect to the network. Now when due to any of the reasons if your router is unable to assign your device an IP address, you get the failed to obtain an IP address error on your device.
How can I fix the “Failed to obtain IP address” error?
The exact cause for, failed to obtain IP address error can vary from the device on which you are getting to the network you are using. However, here are some troubleshooting tips that can help you to connect back with your network.
|
 Additional Tip
Restart Your Android Phone
If the error you are getting is more device-related than network-related, all you need to do is restart your device. Also, it is observed that a restart fixes many of the temporary glitches faced by the device due to the applications installed on it. Also, a restart fixes many of the temporary glitches due to the applications installed on it. If you haven’t restarted your Android phone in the past many days, it is strictly recommended to give it a fresh start.
1. Hold on the power button until you see the power options on the right.
2. Now tap on the Restart option.
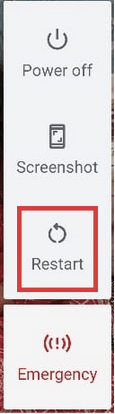
3. Your device will first close all the running processes and applications and then restart.
After the device restarts, check whether you are still getting failed to obtain IP Address error while connecting to the Wi-Fi network. If the error is fixed, you can now enjoy browsing on the Internet as before, but in case the problem persists, head on to the next step.
Also Read: How to Fix ‘Windows Has Detected An IP Address Conflict’
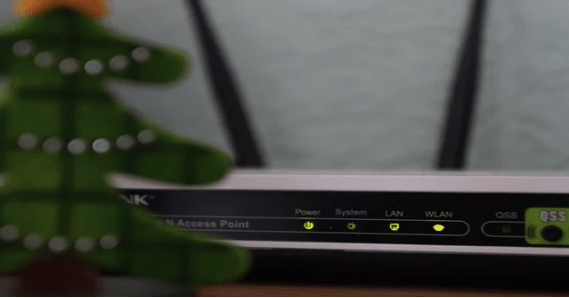
Restart Your Router
You have restarted your Android device, but you are still facing the problem while connecting to the network, then it might be the router that is not providing your Android device with an IP address when requested. A quick fix to resolve the problem is to restart the router you are trying to connect with.
Note: If you are on a public network, then skip this step.
- Power off your router and wait for at least 30-45 seconds.
- Now turn on the power again and try connecting your device to the network to check whether your device is still stuck at obtaining an IP Address. If yes, then look for the next troubleshooting step.
Reset Your Router
So, restarting your router doesn’t resolve the problem. The next step is to reset the router. Many of the users feel that resetting and restarting the router is similar. But it is not, as when you reset your router, all its configurations are permanently removed, and the router is restored to its factory settings.
- To reset your router, press the reset button that is usually present on every router’s back or bottom. Press and hold the reset button until the router restarts.
- After resetting the router, you need to reconfigure it.
Once you are done reconfiguring the router, try again connecting your device to the network. Suppose there is a problem with the configuration of the router, then after resetting. In that case, it will correctly reassign the IP address to the connecting device, and your device no longer remains stuck at the message of obtaining an IP address.
Forget and Reconnect to the Network
Once you connect to any available Wi-fi network by providing the correct credentials, your Android device saves that network for future use. So that you do not need to give the credentials every time you connect to that network. However, sometimes if the password is not correctly stored or gets corrupted in your device, then you start receiving an error, failed to obtain an IP address on Android.
To fix this, you need first to forget the network you cannot join and then reconnect to it.
Note: Once you set your device to forget the network, the network’s saved password will be lost. And you will need to enter the password again while connecting to the network.
1. Tap on the Settings(gear) icon to open Device settings.
2. On Settings tap on Network & Internet > Wi-Fi.
3. Now tap on the network and the Network details screen, tap on FORGET.
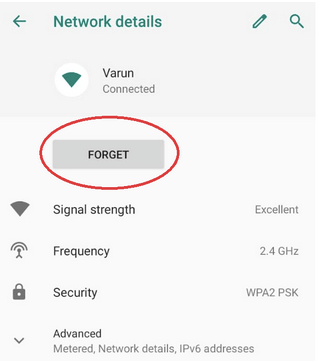
4. Now on the network list, tap on your network and provide the password when requested.
Now try connecting again. If the problem is due to invalid or corrupt password data, you can now easily connect to the network without the error.
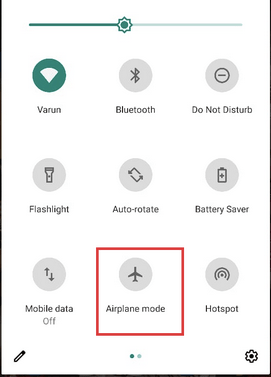
Enable/Disable Airplane Mode
We all know what Airplane Mode does, Right? It entirely cut off all the active connections to your Android device, whether it is Wi-Fi data. Mobile data or Bluetooth connections. Enabling and disabling Airplane mode is the troubleshooting step that we need to follow when your device doesn’t get the IP address automatically and is stuck on the screen, obtaining an IP address.
- Tap on the Settings(gear) icon to open Device settings.
- On Settings, tap on Network & Internet.
- Now tap on the Airplane mode to activate it.
- Alternatively, you can also pull the notification bar from the top of the screen and tap on the Airplane mode icon.
Once you have activated the Airplane mode, all your active connections will be disconnected. Now tap on the Airplane mode again to deactivate the mode.
The enabling and disabling Airplane mode will refresh all the networks, and hopefully, you can now connect to the network without the error, failed to obtain an IP address.
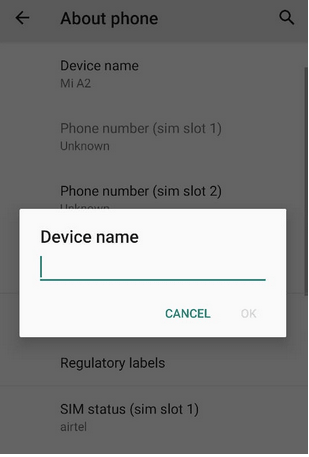
Change Your Device Name
Many of you might be thinking about changing the device name to fix the obtaining IP address error. But believe us, several users for whom this error is resolved just by changing the device name. Also, since changing the device name is not challenging, there is nothing wrong with giving it a try.
- Tap on the Settings(gear) icon to open Device settings.
- On Settings, tap on About phone option.
- Now on the About phone screen, tap on Device name, the first option on the screen, and enter a new name. Once entered, restart your device.
If the error is caused due to the issue with the device name, then changing it will resolve the failure to obtain IP address error permanently.
Move Closer to Your Router
A simple yet powerful solution for getting rid of failed to obtain IP address error. We all know that every router has some fixed network range, and if your device is out of that range, you are likely to get the error like obtaining an IP address while connecting to the network.
So the best solution is to go closer to your router; the closer you go, the stronger the signal will be. And hopefully, you can now easily connect to the network without any error or network issues.
Assign a Static IP Address
Although routers automatically assign IP addresses to each connecting device, if your device is stuck at the error, “obtaining IP address” while connecting to the network, then it means that the router is not assigning the IP address to the device automatically. So to troubleshoot the problem, we suggest you assign a static IP address to the device by following the instructions given below:
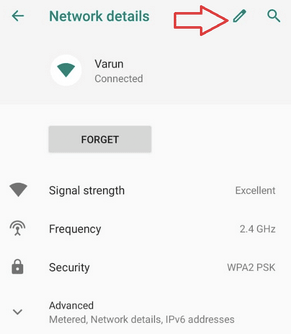
- On your Phone Settings, tap on Network & Internet > Wi-Fi.
- Next, tap on the Wi-Fi network you are facing a problem.
- Now on the Network details page, tap on the pencil icon located at the screen’s top right corner.
4. Tap on the Advanced options on the prompt that appears.
5. Scroll down a bit and tap on the IP settings, and from the drop-down list, select Static(by default it is DHCP).
6. Now in the IP address field, enter the IP address like 192.168.1.XXX. Here XXX can be any value ranging between 1 to 255.Note: You may get an error while assigning the IP address as the IP address already in use. You have to pick another value(last three digits) as the value may already be assigned to some other device.
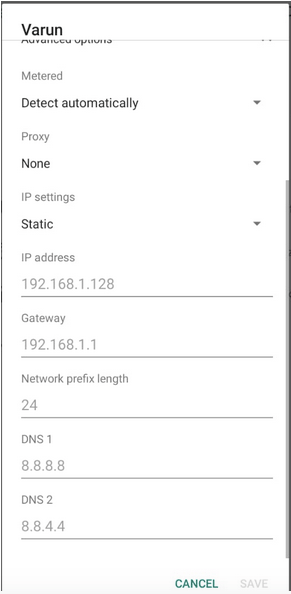
7. Once you have assigned the Static IP address, tap on the Save button to save the settings.
After assigning the Static IP address, check whether your device can now connect with Wi-Fi without any error.
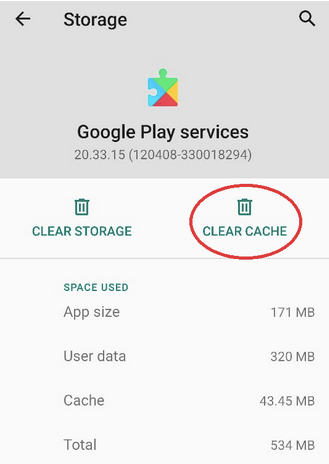
Clear Cache for Google Play Services
Another workaround to resolve this error is clearing the cache for Google Play Services by following the steps below:
- Open the Settings app and tap on Apps & notifications.
- Now locate Google Play Services and tap on it.
- On the App info screen, tap on Storage & cache option.
- On the Storage screen, tap on the CLEAR CACHE option.
Now try reconnecting to your Wi-Fi to check whether you can connect without any error message.
Reset Network Settings
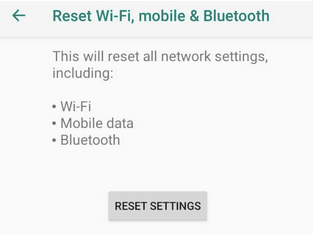
Getting an error, failed to obtain an IP address while connecting to your Wi-Fi is undoubtedly a network error. Since we have already reset the router and unfortunately, that doesn’t help much, now we should try resetting network settings to default on our device by following the steps listed below:
Note: Resetting Network Settings will reset Wi-Fi, mobile data, and Bluetooth settings on your device, and you have to configure them back, either by pairing or providing a password.
- Open Settings and tap on System option > Advanced > Reset options.
- On the Reset option page, tap on Reset Wi-Fi, mobile & Bluetooth.
- Now tap on Reset Settings to reset network settings.
Now try connecting your device to your Wi-Fi network by providing the password. If the problem is due to your device’s network configuration files, you can hopefully connect to your network without any error.
Wrapping Up
So, folks, we hope that any of the above methods have helped you in resolving, failed to obtain IP address error. Do share with us which method has worked for you in the comment section below. If any of your friends are getting the same error message while connecting to the network, share this article to resolve this problem.
Gajendra singh
Restarting my phone help in resolving the issueCamila Saunders
Hey, I have been trying the same thing since few days but it says that it doesn’t recognize the device. Are you familiar with thisMansi Vijay
I tried Assigning a Static IP Address. This helped me to resolve this annoying Android error! Thanks for the solutions.Mridula
Restarting Android helped me view my IP address.Abhay
Nice blog. Could you please tell me that how I can find my IP address in my laptop?