
Recommended
- Run “Full Scan” or “Custom Scan” to get accurate results.
- Easily declutter your device & reclaim storage space.
- Compatible with PC, Mac, Android & Cloud solutions.
Say goodbye to the hassle of manually finding and deleting duplicates. With Duplicate Files Fixer, you can reclaim valuable storage space in a few steps & get rid of low disk space errors. This powerful tool quickly identifies and removes unnecessary duplicate photos, videos, audio files, documents & other media files, giving you a clutter-free device & lots of available storage space.

What is Duplicate Files Fixer?
As the name says, Duplicate Files Fixer is an efficient tool that helps quickly run a scan and find duplicates of any files be it an image, audio, video or document. Run a full scan to get final results showing you the number of duplicate files stacked in your devices. It further asks your permission to remove the files displayed. These duplicate files are taking up space on your device making it cluttered.
You always have an option to keep either them or remove them. With its auto-mark option, you will be free from manually selecting duplicates to remove them. Once the scan process is finished, it just takes a single click to remove these duplicates from your device.
Using Duplicate Files Fixer for all your devices to get rid of duplicates and make ample storage space for other purposes. This duplicate file cleaner eliminates the stress of manual searching and deleting duplicates.
How To Use Duplicate Files Fixer On Windows PC?
Duplicate Files Fixer for Windows comes with several fantastic features. The latest addition to the tool is the ability to scan Google Drive and Dropbox as well as the computer. You just have to follow simple steps to use Duplicate Files Fixer on Windows to free up your disk space.
1. Download Duplicate Files Fixer on Windows.


2. Once the download is finished, run this software on your PC. Purchase or enter the license key (if you have one) to explore all its features.
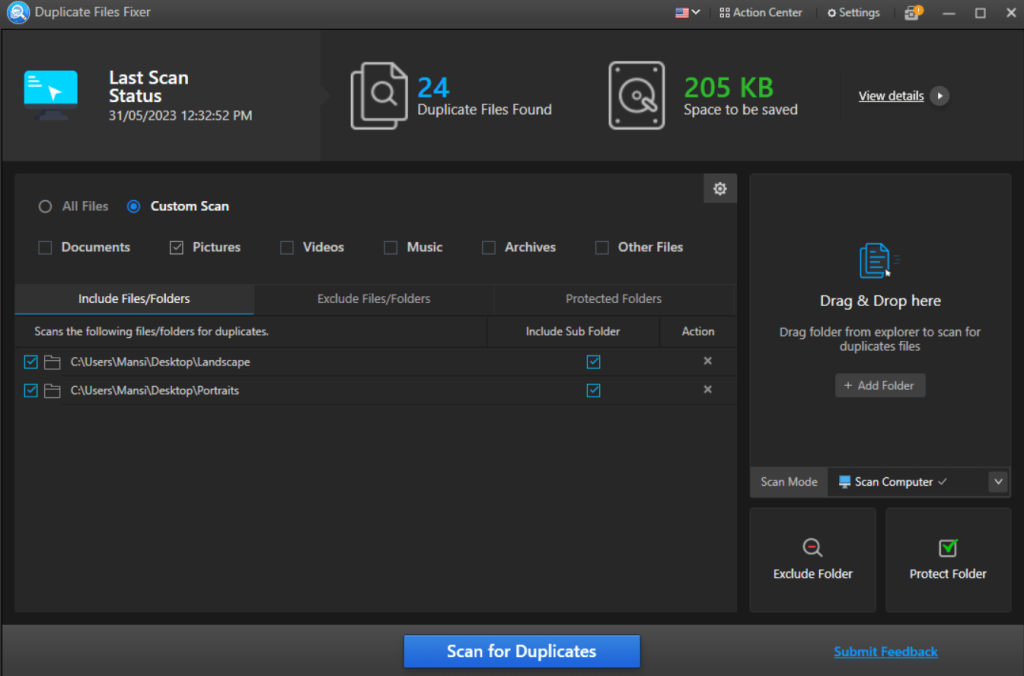
3. Choose the type of files you wish to scan from “All Files” or “Custom Scan”.
- All Files: It searches clone files across all added folders or selected locations. It offers a comprehensive and thorough scan to find all kinds of clone files.
- Custom Scan: It allows users to select specific file types from Documents, Pictures, Videos, Music, Archives, and Other Files separately to scan to get desired results.
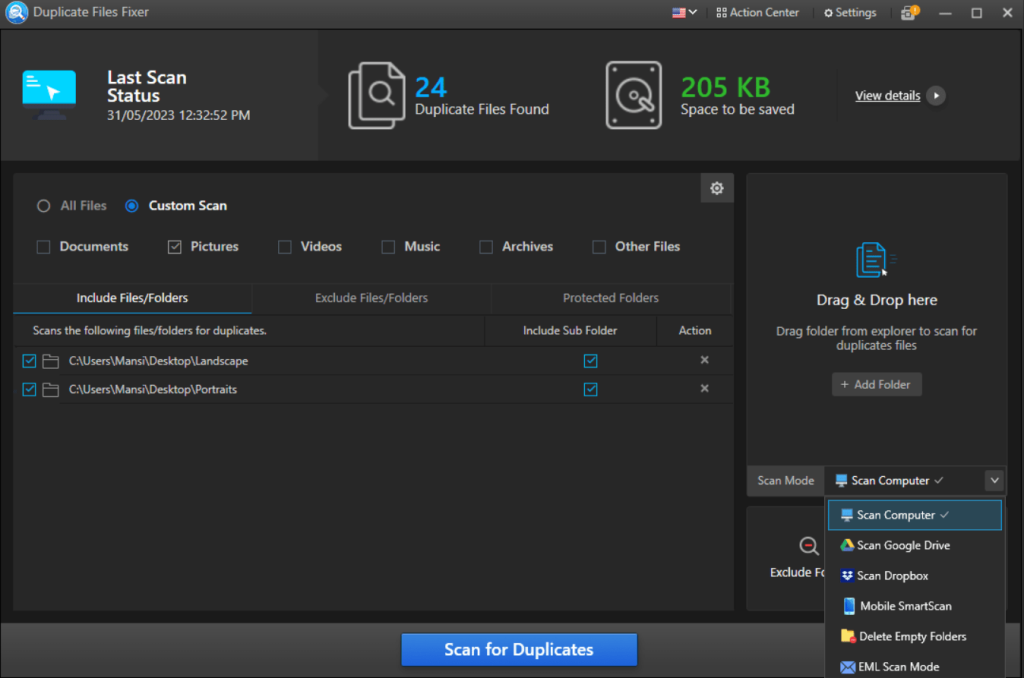
4. Drag & drop folders you wish to scan for duplicates. Alternatively, you can click on the Add folder option to add multiple folders in one go. You can also select the location from the Scan mode as it offers to scan Computer, Google Drive, Dropbox, Mobile, Delete Empty Folders & Emails.
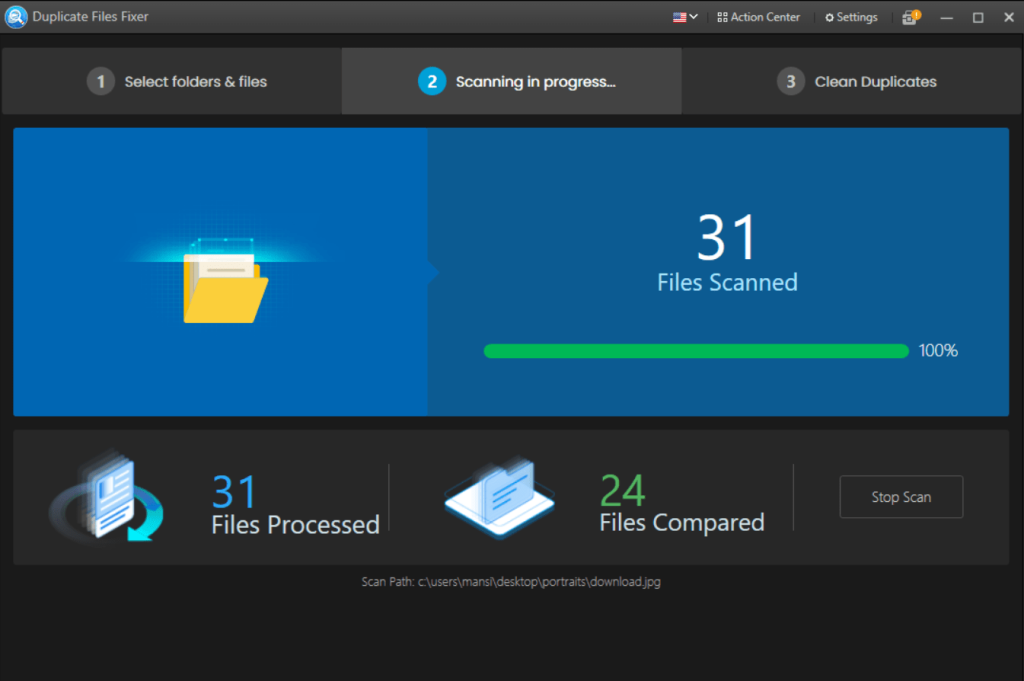
5. To go ahead, click on Scan for Duplicates button. Scanning takes a short amount of time usually depending on the size of the files being scanned.
6. Scan results will show the duplicates in groups under the different categories namely – All, Documents, Images, Music, Videos, and Other Files. While you click on the arrow you can see the files containing one group of the duplicates along with the original file.
You can preview them by clicking on a file one at a time and see the file details on the right side!
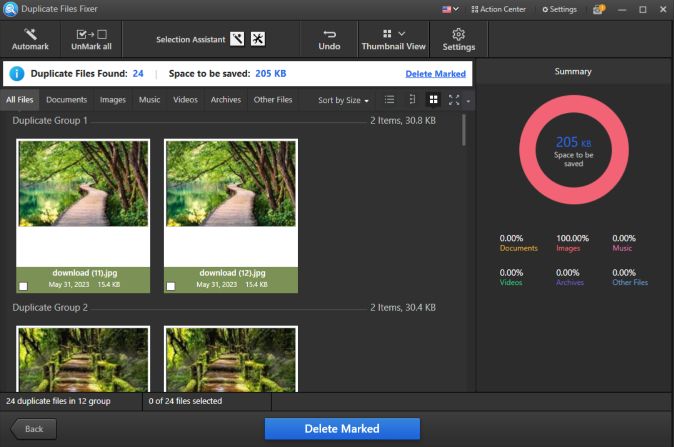
7. Click on the Auto Mark tab to select duplicates automatically and click on ‘Delete Marked’.
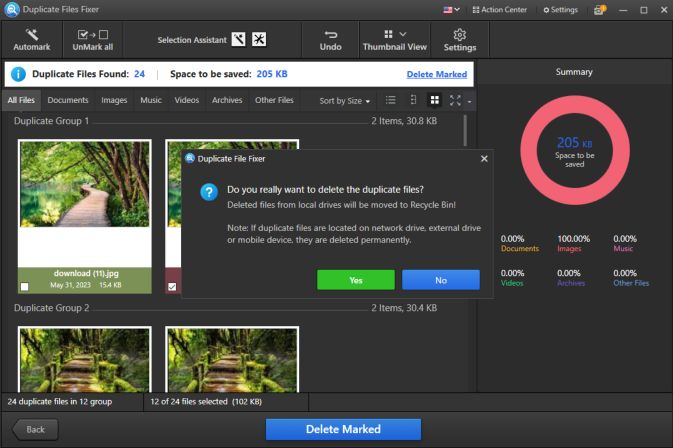
A confirmation box will appear on your screen, asking you whether you want to confirm the process of deleting duplicate files. Click on the “Yes” button to proceed!
Note: As per the new updates in Duplicate Files Fixer, you can use the Undo button immediately to get back the deleted files. Also, you can either manage duplicates or modify your selection to choose from the options to Automark duplicates you want to delete.
Read: How Can Duplicate Files Fixer Help in Recovering Disk Space on Windows 10?
Smart Duplicate Finder & Fixer for Mac: Duplicate Files Fixer
If you are pissed off deleting multiple duplicates from your Mac every now and then, you must try this amazing tool that not only helps you remove duplicate files but can also restore your disk space in no time. For all Mac users, Duplicate Files Fixer is an amazing tool. Unlock its incredible features by buying its full version.
With Duplicate Files Fixer, you can recover a lot of disk space by removing multiple redundant files taking up unnecessary space on your Mac.
How To Get Duplicate Files Fixer on Mac?
1. Install Duplicate Files Fixer software on your Mac.
2. Add the files and folders you want to scan.

3. Click on the Scan button to begin the process.
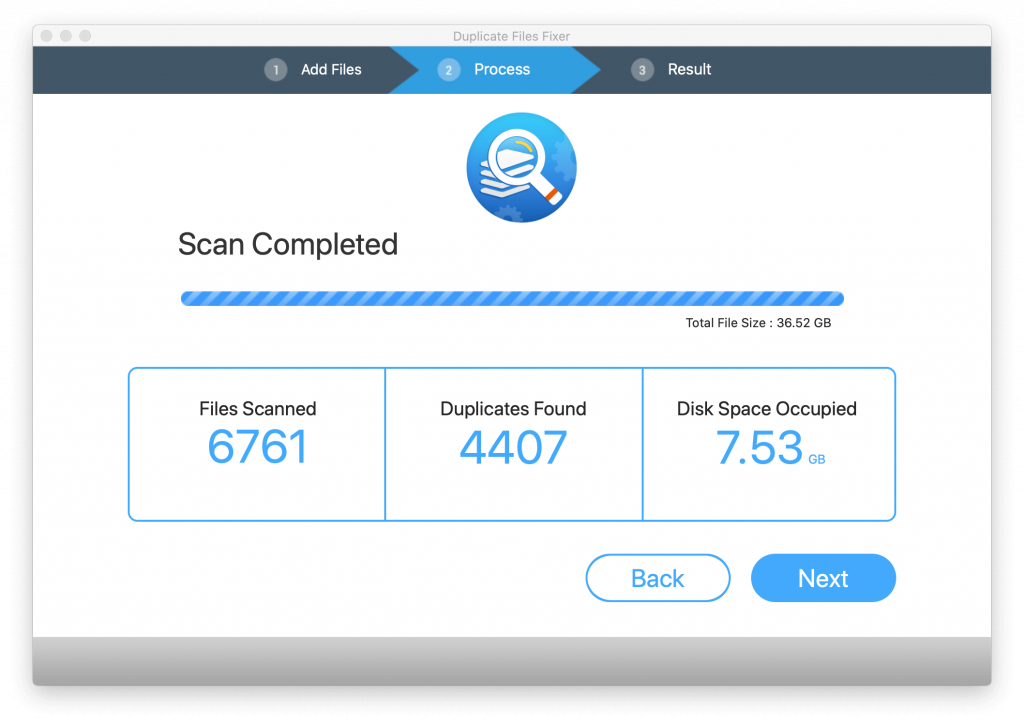
4. Preview the list of duplicate files on your Mac.
5. Auto-mark or select the identical files manually.
6. Confirm that you want to delete selected files.
This is it! You are done. Isn’t it really is a hassle-free tool? Alongside helping users to delete duplicates, Duplicate Files Fixer does many lots of work including accurate identification, creating a backup, excluding and preventing important folders, etc.
Does Duplicate Files Fixer Detect All File Formats?
Yes! It does. Duplicate Files Fixer helps the user to find duplicates from all over his device. From documents to images to audios to videos, Duplicate Files Fixer is a perfect tool to declutter your system by removing unnecessary files making more disk space for other storage.
What about Android? Does Duplicate Files Fixer Works on Android Too?
Being a million user app for Android, Duplicate Files Fixer & Remover has an amazing user-interface making it easy for every user to quickly scan and detect duplicate files like images, videos, audios, and documents, etc. To begin with, using Duplicate Files Fixer & Remover app, follow the steps below:
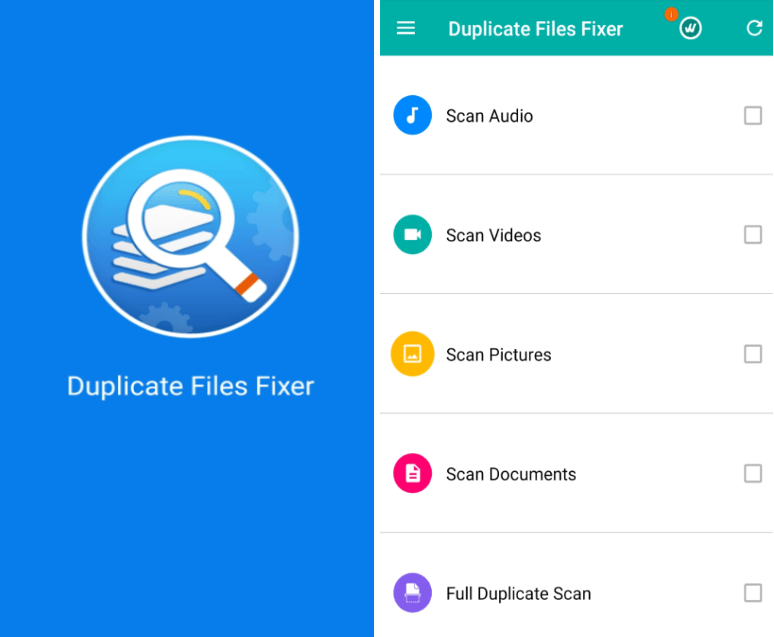
1. Download Duplicate Files Fixer & Remover from Google Play Store. Launch the app and you will see an interface similar to the image below. Select from the available options to scan for probable duplicates.
2. Once the scan is processed, Duplicate Files Fixer & Remover app will display the list of duplicates. With its inbuilt auto-select tool, you can eliminate the manual process of selecting each file you wish to delete. If you have a backup for all your data, simply click ‘Delete Now’ or otherwise, create a backup before you delete anything. (Refer the image below).

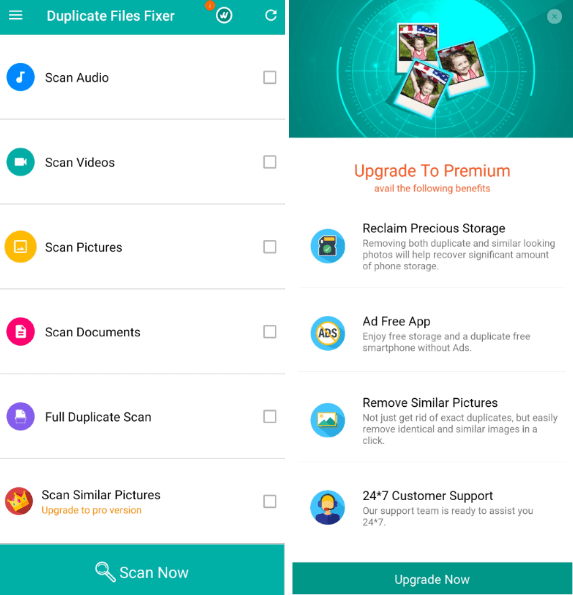
3. To unlock all its features, you need to upgrade your app to its Premium version. In the image below, you’ll see an option with a crown over it. This will help you delete clutter from your device only when you upgrade your app. The premium version will open more options for you and you’ll be able to make more space in your device.
Verdict: It’s Time To Say What You Feel!
For all devices, Windows, Mac and Android, Duplicate Files Fixer is a great tool to remove duplicates and recover significant disk space. Download this software in all your devices to get rid of unnecessary junk and make your device run smooth with no clutter in it.
Duplicate Files Fixer is a reliable product with millions of downloads on Android. Make sure you upgrade to its licensed/premium version to get the best benefit of this duplicate finder and fixer tool.
Haven’t used this till now? Give it a try and let us know about your experience. With its magic select and other useful features, the manual work process gets entirely eliminated.
We’d love to hear your feedback, please let us know in the comments section below.
Suzie Helmuth
Duplicate Files Fixer did not select duplicates I just saw on my tablet. Do I have to get the paid version to make it WORK? This same thing has happened before but I wanted to give it another try.Mridula Nimawat
Hello, Yes, the software will scan and show results in the free version, but deletes a limits a limited number of duplicates. To remove all of them you can make the purchase. Hope it helps.Suzie Helmuth
Thank you for responding. You have a good marketing technique I will admit.EDWARD S CHESLOW
Where is the AUTO-MARK Button and the DELETE Button in GUIMridula Nimawat
Hello Edward, Once you run the scan and get the results, you can view the Auto-mark button on the Top-left of the application and Delete Marked in the bottom. It can be seen in the Step 4 of the blog. Hope it helps.