
On Windows 11, certain tasks and settings require administrator rights to access or modify. However, it’s not always obvious whether your user account has these elevated permissions. Fortunately, there are several straightforward ways to check if you have admin rights on your Windows 11 PC.
Windows 11 operates with two distinct types of user accounts: “Administrator” and “Standard User,” each granting different levels of access and control over the system. This guide will walk you through four methods to identify the account type you’re using, be it an unrestricted “Administrator” account or a more limited “Standard User” account.
An “Administrator” account grants unrestricted access, allowing you to modify system settings, install applications, and run elevated Command Prompt or other command consoles. In contrast, a “Standard User” account is designed with more restrictions, permitting you to run applications, make basic account-specific changes, but preventing you from running elevated Command Prompt or other elevated command consoles.
This article outlines 5 easy methods to confirm your administrator status. Whether you’re troubleshooting an issue, customizing system settings, or simply curious about your account’s capabilities, these techniques will provide a clear answer.
Read Also:
How To Fix Run as Administrator Option not Showing up on Windows 11
Quick Solution:
- Right-click the Start button > If you see “Computer Management”, you have admin rights
- Click the Search icon > Type “command prompt” > Right-click and select “Run as administrator” > If it opens, you’re an admin
- Go to Settings > Accounts > Your account > Look for “Administrator” under Account type
What are Windows 11 Administrator Rights for an Account?
A user’s ability to take actions that can alter the operating system and other critical settings on a computer is referred to as having administrative rights, also known as administrator privileges. An account with administrative privileges in Windows 11 has access to all files and folders on the system and can install software and hardware, modify system settings, create and manage other user accounts, and more.
Having administrative capabilities also gives the user the ability to make adjustments that can endanger the machine, such as wiping out crucial system files or installing malicious software. Because of this, it is generally accepted that using normal user accounts for most tasks and granting administrator access solely to people who require them is the best practice.
Read Also: How to Download Windows 11 ISO File Legally
How to Check Administrator Rights in Windows 11
You can check to see if your account has administrator capabilities using five different methods which are as follows:
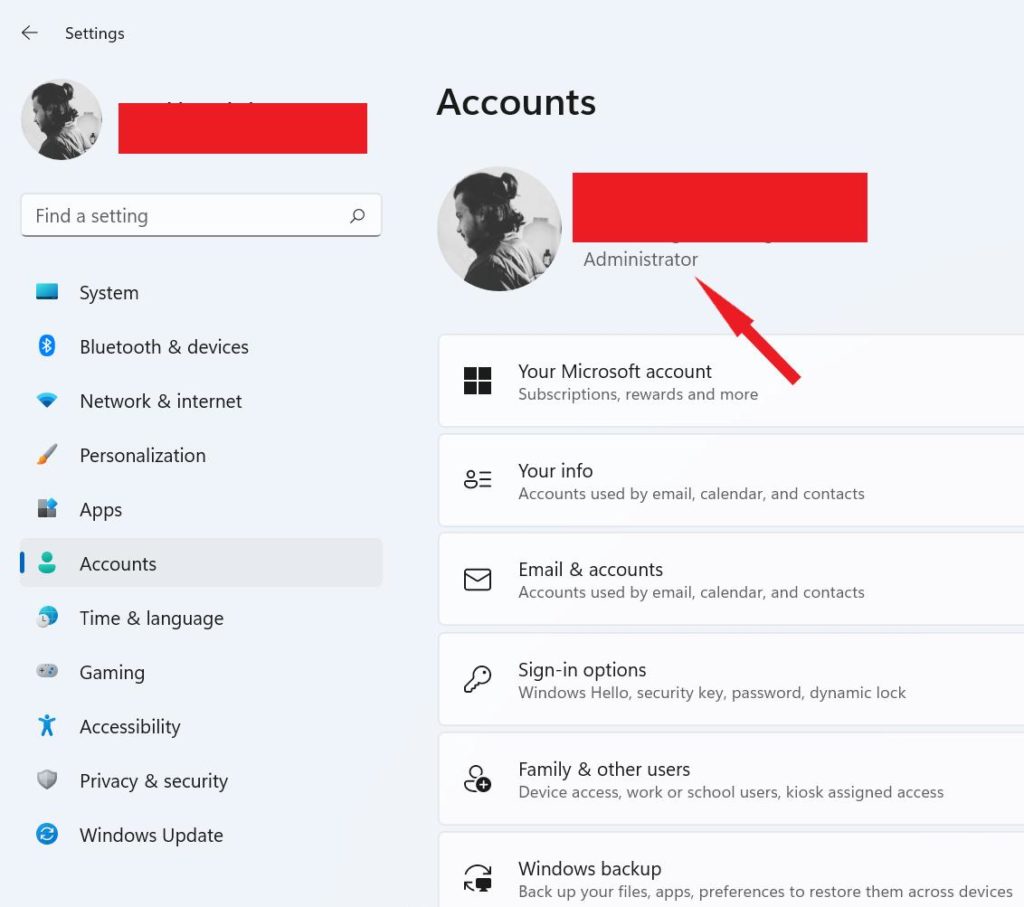
1.By using Windows Settings
- Press the Windows key with the key I to open Windows Settings.
- Now tap on the Accounts section from the left side of the settings window.
- On the right side of the settings window check your profile name. If you found ‘Administrator’ written your profile, it means your account has administrator privileges.
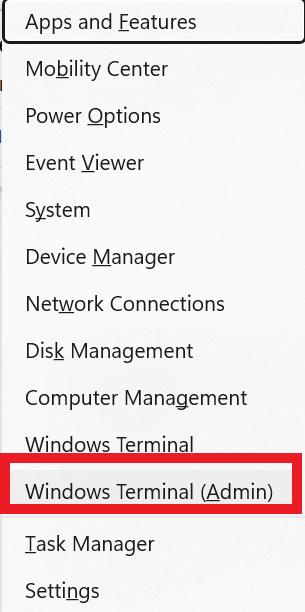
2.Via Windows Powershell
- Press the Windows key with the key X to open the WinX menu.
- Now tap on Windows Terminal (Admin).
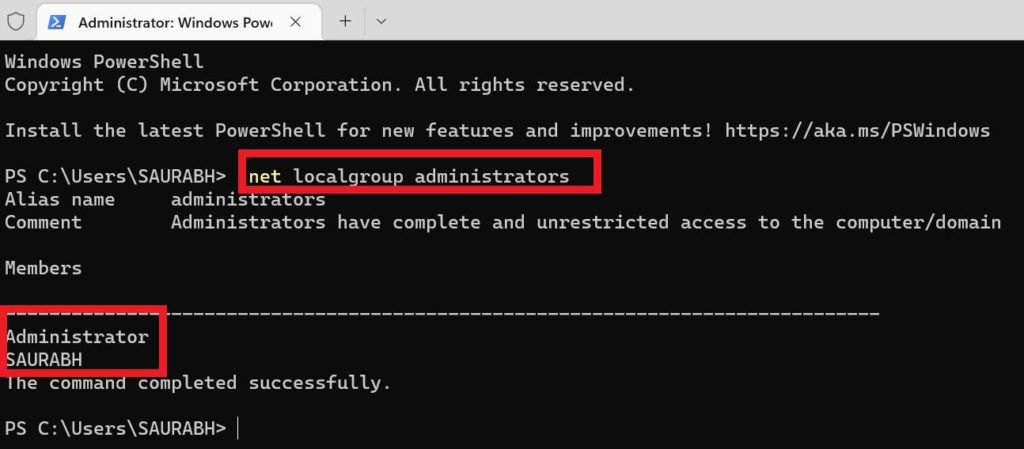
- Type this exact command and press the Enter key: net localgroup administrators
- When you do this, a list of administrative access accounts will appear.

Read Also: Cannot Add a New User Account on Windows 10/11? Here’s the Fix!
3.Via Control Panel
- Tap on the Search icon from the Taskbar and type control panel and open it by clicking on Open.
- Now find and tap on User Accounts.
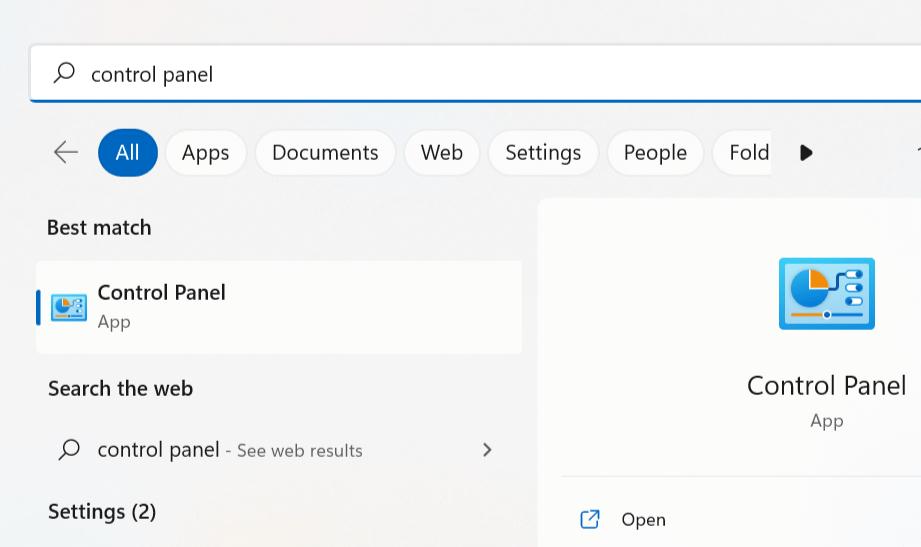
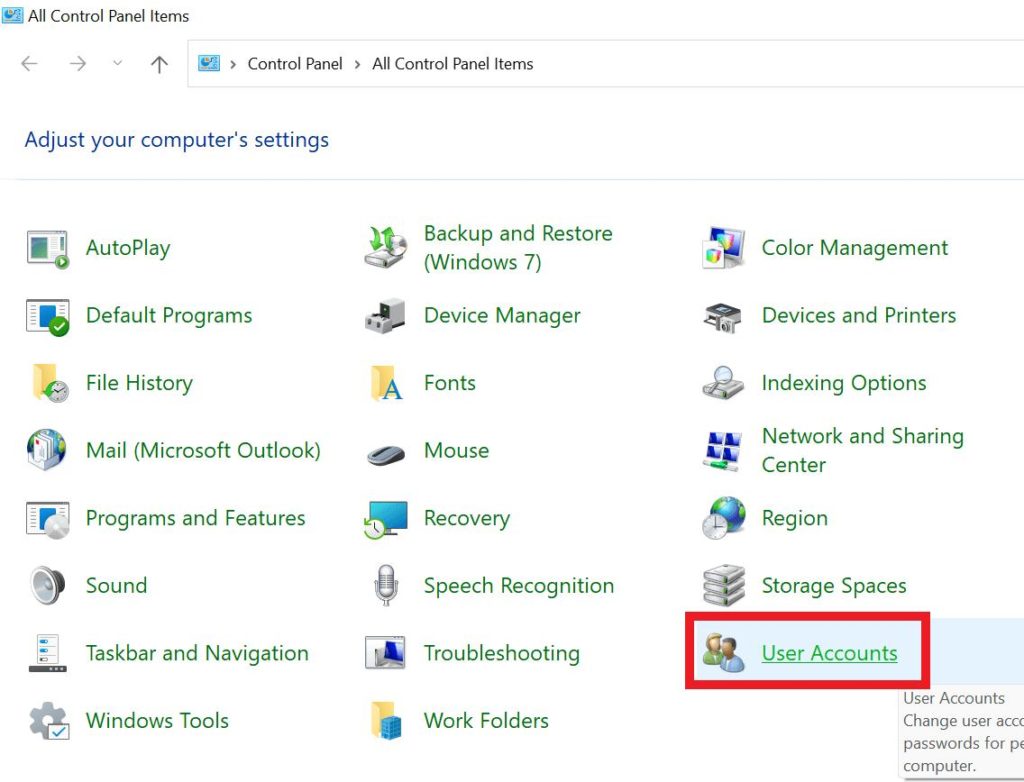
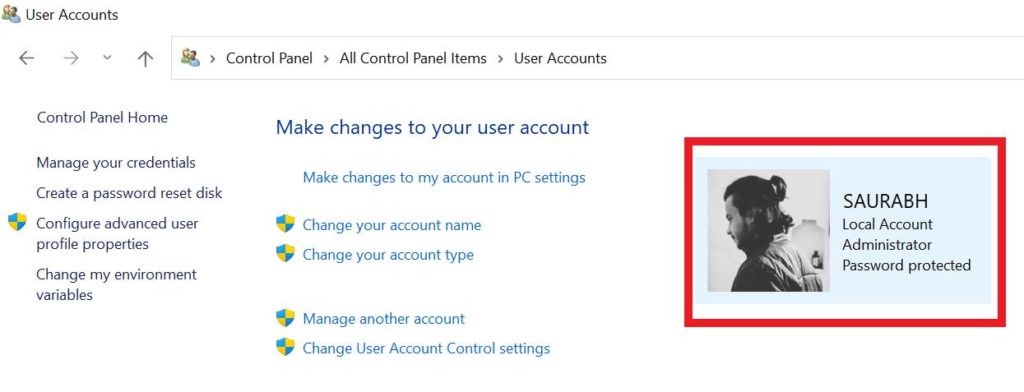
- Here you will get the info about your account.
- It will display if your account is local or a Microsoft account, standard or Administrator, and password-protected or not.
4.With the help of Local Users and Groups
The Local Users and Groups feature is included in the Computer Management utility and can be used to access and manipulate advanced settings through the use of a snap-in.
| Note: However, Windows 11 Home Edition does not have this capability. |
- Press the Windows key with the key R to open the RUN dialog box.
- Type lusrmgr.exe and tap on OK.
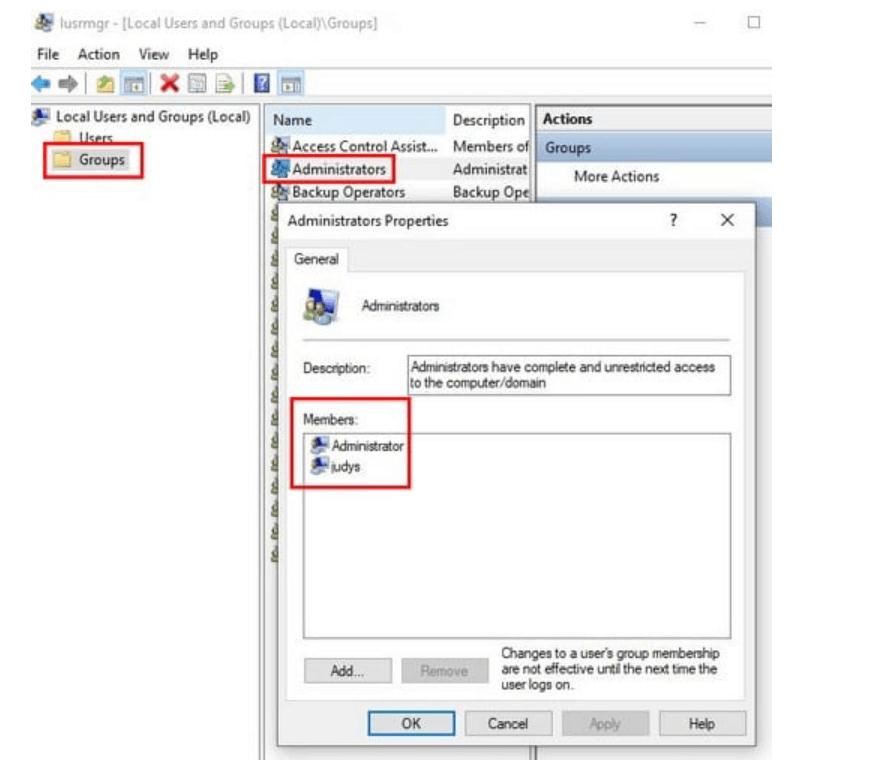
- Now tap on the Groups option from the left side of the pane.
- Double-click on Administrators from the right pane.
- The new dialog allows you to view all the users with administrative access by viewing the Members section.
5. Use Command Prompt
- Press Windows key with the key R to open the RUN dialog box.
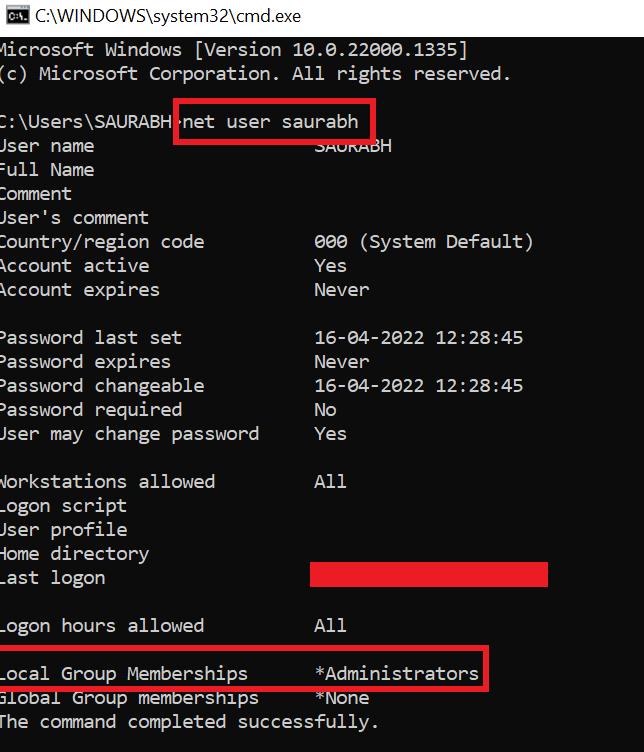
- Type cmd and tap on OK.
- Type this exact command and press the Enter key: net user username. Replace ‘username’ with your actual username
To Wrap This Up
So, these were the 5 ways to check if a Windows account has administrative rights in Windows 11. We believe that in the future while checking for administrator accounts on your Windows 11 PC, these methods will prove to be helpful. And for more such troubleshooting guides and tips & tricks related to Windows, Android, iOS, and macOS follow us on Facebook, Instagram, and YouTube
Next Read: What To Do If PC Health Check Is Not Working On Windows 11/10