
The Recycle Bin is one of the most crucial elements of Windows OS. All the files and data that you delete are automatically moved to the Recycle Bin folder. Recycle Bin also offers you a choice to restore files that were accidentally deleted or if you require it later. Well, in that case, getting stuck with the recycle bin association error on Windows 10 is nothing but a nightmare.

What is the Recycle Bin Association Error? Why is it Caused?
The Recycle Bin association error comes followed with the following message:
This file does not have a program associated with it for performing this action. Please install a program or, if one is already installed, create an association in the Default Programs control panel.
The Recycle Bin association error on Windows 10 can be triggered if any of the files stored are corrupt, or if your device is infected with a virus or malware. This particular Recycle Bin error can occur in unusual circumstances but the good thing is, you can easily troubleshoot the error via simple methods.
How to Fix Recycle Bin Association Error on Windows 10
In this post, we have listed several solutions that will allow you to fix the Recycle Bin association error on Windows 10 devices.
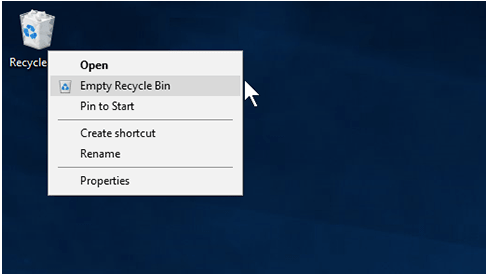
1. Check all the Stored Files and Empty the Bin
First things first, open the Recycle Bin folder and take a quick look at all the stored files. Restore the ones that are important and delete the rest of the files from the trash folder. If any of the files were corrupt, the Recycle Bin will function without popping any annoying errors. Hence, manually deleting all the files from Recycle Bin is the simplest method to get rid of the corrupt file.
To make a quick selection, press the Control + A key combination and delete all the files manually from the Recycle Bin folder.
NOTE: The files that you delete from the Recycle Bin folder are permanently deleted. In case you want to recover deleted files, you can use the “Advanced Disk Recovery” tool to restore lost data. (Refer to the latter section of this post).
Also read: How To Schedule Auto-Empty In Recycle Bin
2. Grant Admin Privileges to your User Account
The Recycle Bin association error can also occur if you’re accessing your Windows PC from a guest account. Well, to make sure that your user account has access to administrator rights, follow these steps:
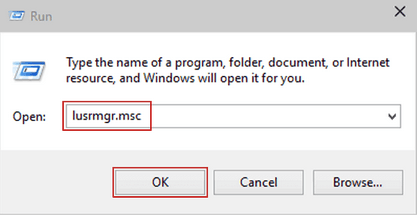
Press the Windows + R key combination to open the Run dialog box. Type “lusrmgr.msc” in the textbox and hit Enter to launch the Local Users and Groups Manager.
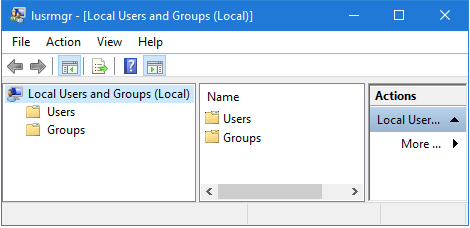
Switch to the “Users” folder from the left menu pane of the window.
Double-tap on your user account title from the right panel.
In the new window that appears on the screen, switch to the “Member of” tab. Now tap on the “Add” button.
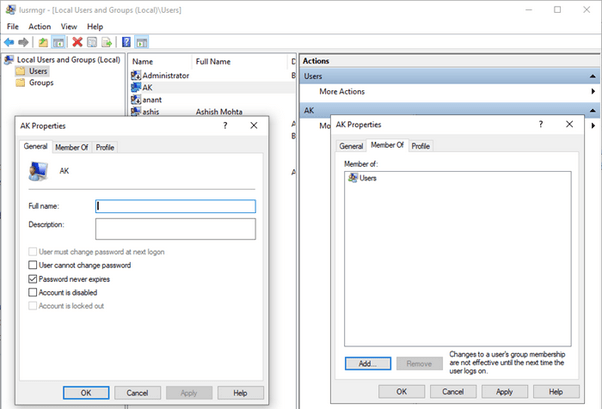
In the “Enter the object names to select” section, enter “Administrator” as the value in the textbox. To make sure everything is going in good order, tap the “Check names” button and then hit the OK button to proceed.
Now, the next step is to remove your user account from other groups.
Head back to one level and tap the “Member of” tab. Select “Users” and then hit the “Remove” button to remove all additional user accounts from your device.
Exit all windows, reboot your machine to check if the issue persists.
Also read: How to Fix The Recycle Bin Is Corrupted In Windows 10
3. Delete Files via Command Prompt
If the Recycle Bin is stuck and you’re unable to access it then you can try deleting the stored files via Command Line Terminal. Here’s what you need to do.
Launch the Start menu search box, type Command Prompt, right-click on it and select “Run as Administrator”.
In the Command Line window, type the following command and hit Enter.
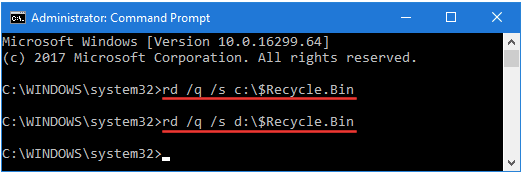
rd /s /q C:$Recycle.bin
Windows will display a confirmation message asking whether you’re sure about deleting all the files stored in the Recycle Bin folder.
Type the “y” key and hit Enter to confirm.
Also read: How To Recover Deleted Files From Recycle Bin After Empty
4. Run the SFC Scan
SFC (System File Checker) is an in-built Windows utility that allows you to scan and fix corrupt system files. The SFC command replaces the corrupt files and stores a new cached copy of files on your device and helps you in removing common Windows errors and bugs.
Open Command Prompt in admin mode.
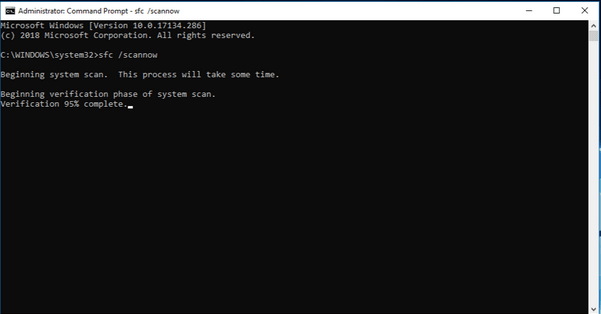
Type the following command and hit Enter:
sfc/scannow
Once the scan is completed, exit Command Prompt and reboot your device.
Also read: How To Restore Lost Recycle Bin Icon On Windows 10
Download Advanced Disk Recovery to Recover Lost Files
Accidentally removed an important file while cleaning up the Recycle Bin? Don’t worry! We’ve got you covered.

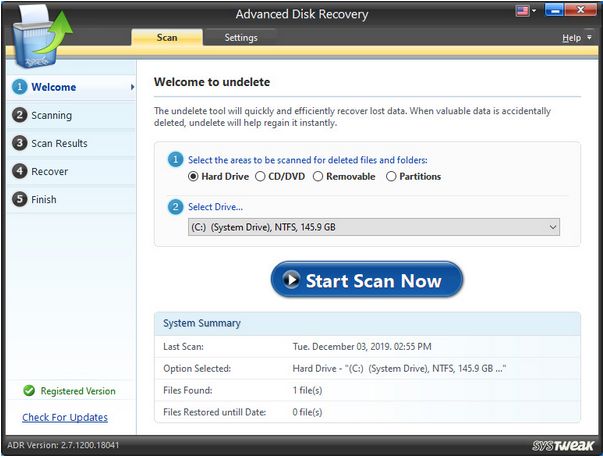
Download the Advanced Disk Recovery tool on your Windows PC to recover accidentally deleted/lost/formatted files in just a few clicks. The Advanced Disk Recovery can run a quick scan to restore lost files, and even help you recover the permanently deleted files within no time.
Conclusion
Here were a few solutions to fix the Recycle Bin association error on Windows 10 devices. You can use any of these steps to resolve the Recycle Bin error by just making a few quick changes in your device’s settings.
Was this post helpful? Do let us know which solution worked out the best for you!