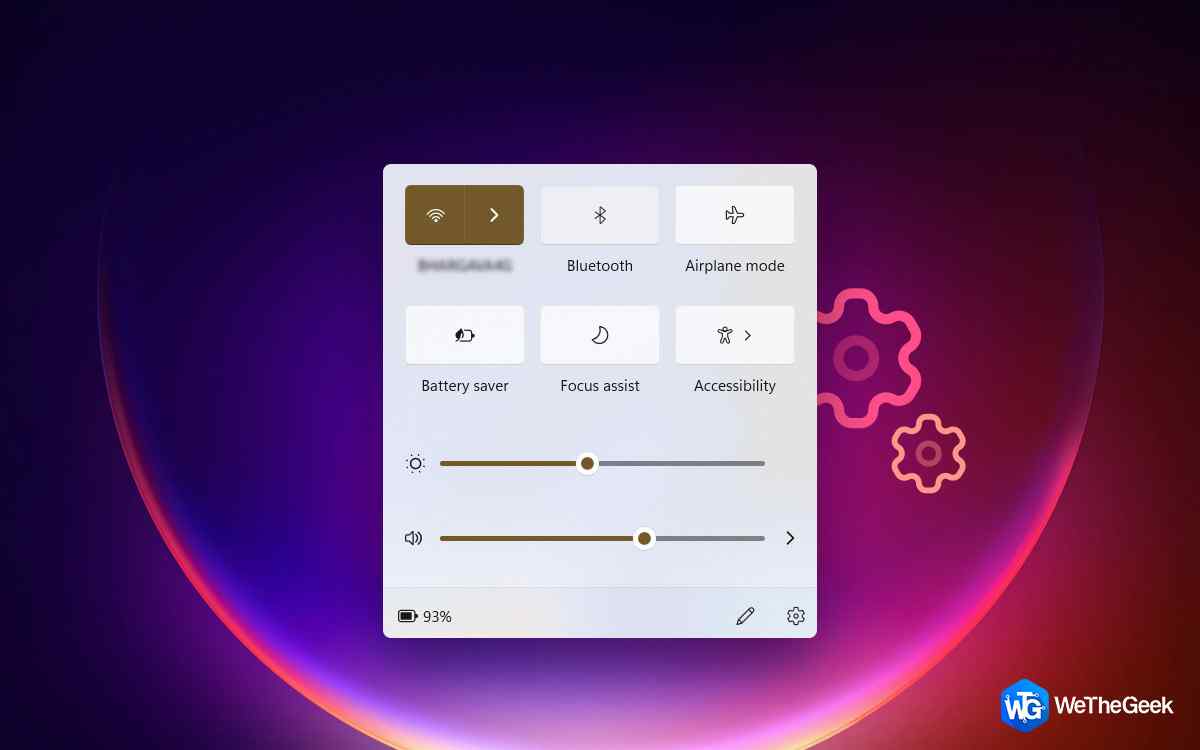
The Quick Settings panel on Windows is a useful space where you can get access to all the important settings in one place be it adjusting the volume or brightness levels, turning on/off WiFi or Bluetooth, enabling/disabling Focus Assist, checking the battery percentage and so on. It is a convenient option to tweak or toggle the basic settings without having to open the Settings app.
But if the Quick Settings panel fails to load or show up on Windows 11, you may get a bit frustrated and it may also hamper your productivity. Wondering how to resolve this glitch? Don’t worry. We’ve got you covered. In this post, we have listed a few workarounds that you can use for fixing the “Quick settings not working” issue on Windows 11.
Here you go!
Also read: How To Fix Windows 11 Shutting down Automatically
How To Fix Quick Settings Not Working in Windows 11
Solution 1: Restart the File Explorer App
Windows Explorer is a useful app that also integrates the functionality of the Quick Settings panel. So, to fix this issue we will try to terminate the app using the Task Manager and then re-launch it to check if it fixes the issue.
Press the Control + Shift + Escape key combination to open the Task Manager app.
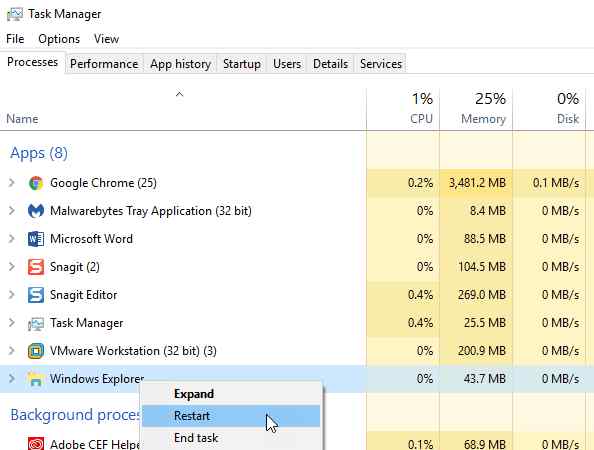
Switch to the “Processes” tab. Scroll through the list of active processes and look for “Windows Explorer” in the list. Right-click on it and select “Restart” to restart the File Explorer app on Windows.
Reboot your device and launch the Quick Settings panel to see if you’re still experiencing any issues.
Also read: How To Change Windows 11 Lock Screen Image & Clock?
Solution 2: Re-register the Action Center
Tap the search icon placed on the Taskbar, type “Windows PowerShell” and then select the “Run as Administrator” option.
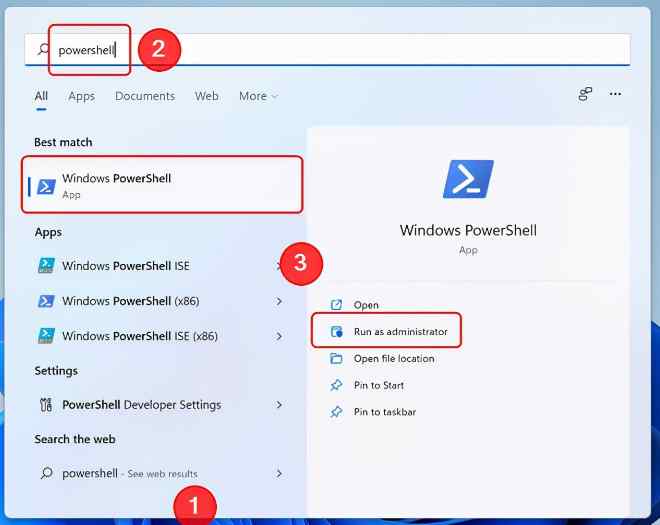
In the PowerShell window, type the following command and then hit Enter to execute it:
Get-AppxPackage | % { Add-AppxPackage -DisableDevelopmentMode -Register "$($_.InstallLocation)\AppxManifest.xml" -verbose }
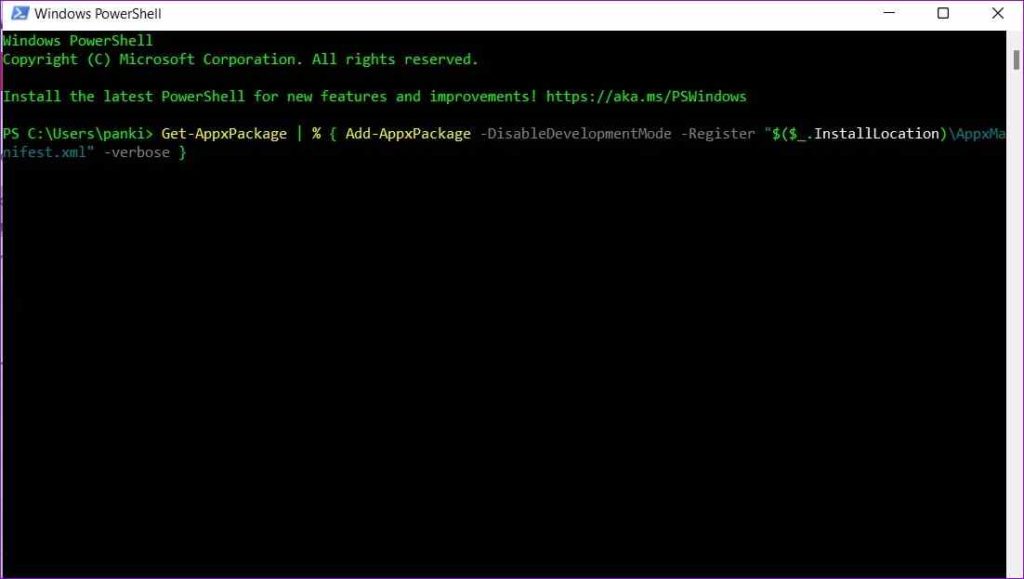
This command will re-register the action center and will resolve any issues related to the Quick Settings panel on Windows.
Also read: How To Fix PowerShell Keeps Popping Up on Windows 11
Solution 3: Enable the Connected Devices Platform Service
Here comes another resolution to fix the “Quick settings not working” issue on Windows 11.
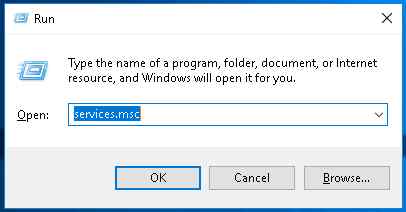
Press the Windows + R key combination to open the Run dialog box. Type “Services.msc” in the textbox and hit Enter.
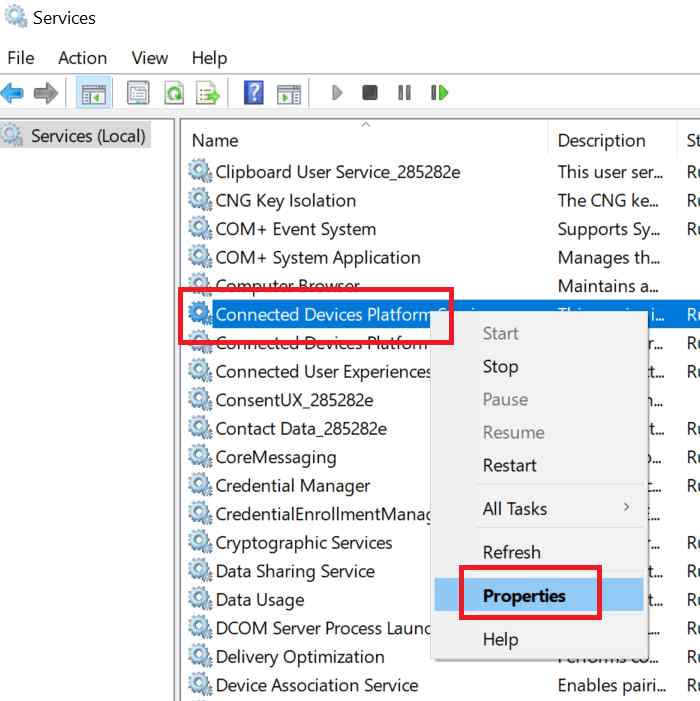
Scroll through the list of Windows services and look for “Connected Devices Platform Service”. Double-tap on it to open Properties.
In the Properties window, select the Startup Type value as “Automatic”.
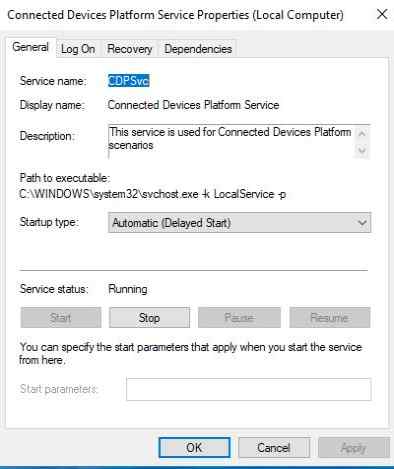
Hit on the OK and Apply button to save the changes.
Also read: Windows On Screen Keyboard Not Working? Here’s the Fix!
Solution 4: Edit the Registry
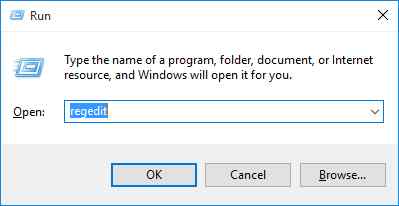
As we mentioned earlier, there are a variety of different ways that you can use for fixing the Quick settings panel not showing up issue on Windows. Press the Windows + R key combination to open the Run dialog box. Type “Regedit” and hit Enter.
Navigate to the following folder location in the Registry Editor window:
HKEY_CURRENT_USER\Software\Microsoft\Windows\CurrentVersion\Policies\Explorer
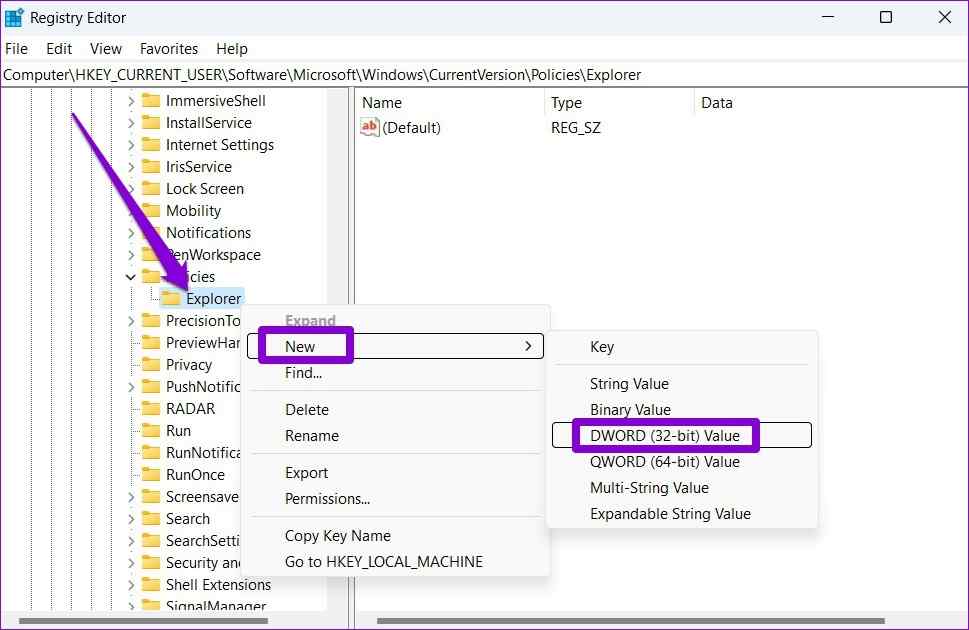
Right-click on the Explorer folder, and select New> D-Word (32-Bit) Value. Name the new file as “New Control Panel” and then set the value data as “0”. Tap on OK when done.
Solution 5: Run the SFC Scan
System File Checker is a built-in Windows utility that scans and fixes corrupt system files and settings. It performs a deep scan on your device to look for corrupt system files and replaces them with a cached copy. To use the SFC tool on Windows 11, here’s what you need to do:
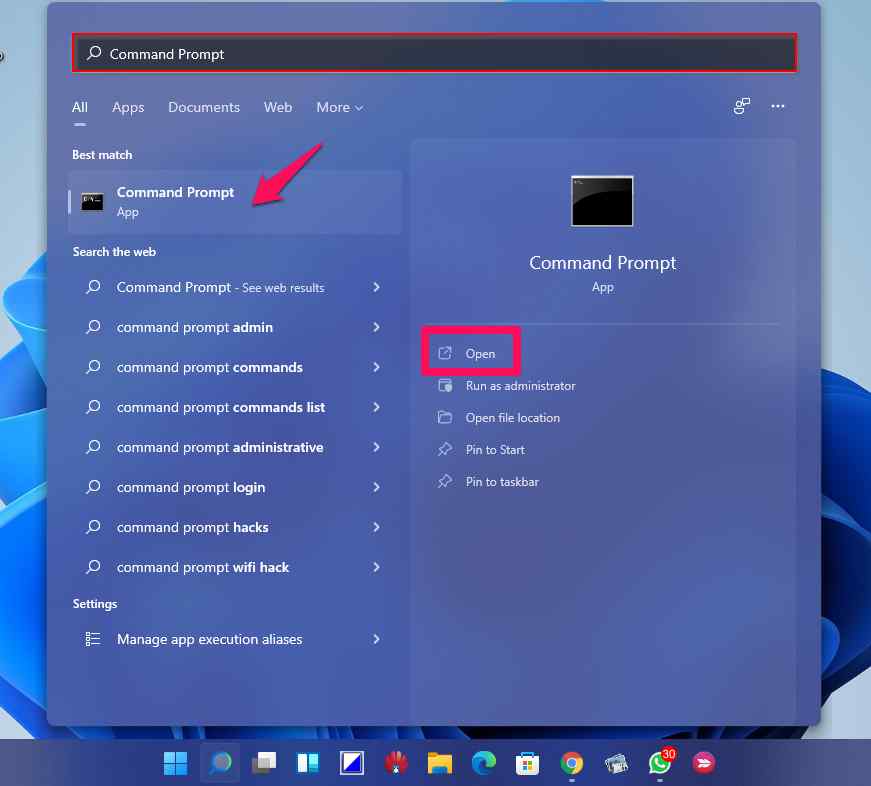
Press the search icon placed on the Taskbar, type “Command Prompt” and then select the “Run as Administrator” option to launch the app in admin mode.
In the Command Line window, type the following command and then hit Enter to execute it:
sfc/scannow
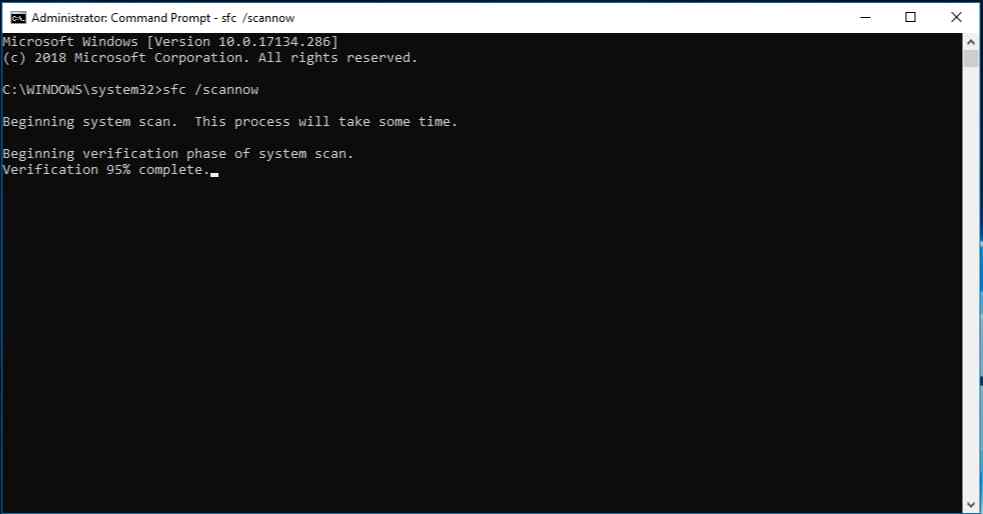
Wait for a few minutes until the command is executed. Once the command is executed, reboot your device and launch the Quick Settings panel to check if you’re still experiencing any issues.
Also read: How To Fix Quick Assist Not Working on Windows 11/10
Solution 6: Update Windows
When was the last time you checked for available Windows updates? Must be a while, isn’t it? Well, better late than never, right? Follow our lead!
Tap on the Windows icon placed on the Taskbar, and select “Settings”. In the Settings window, switch to the “Windows Update” section from the left menu pane. Hit the “Check for Updates” button and wait for a while.
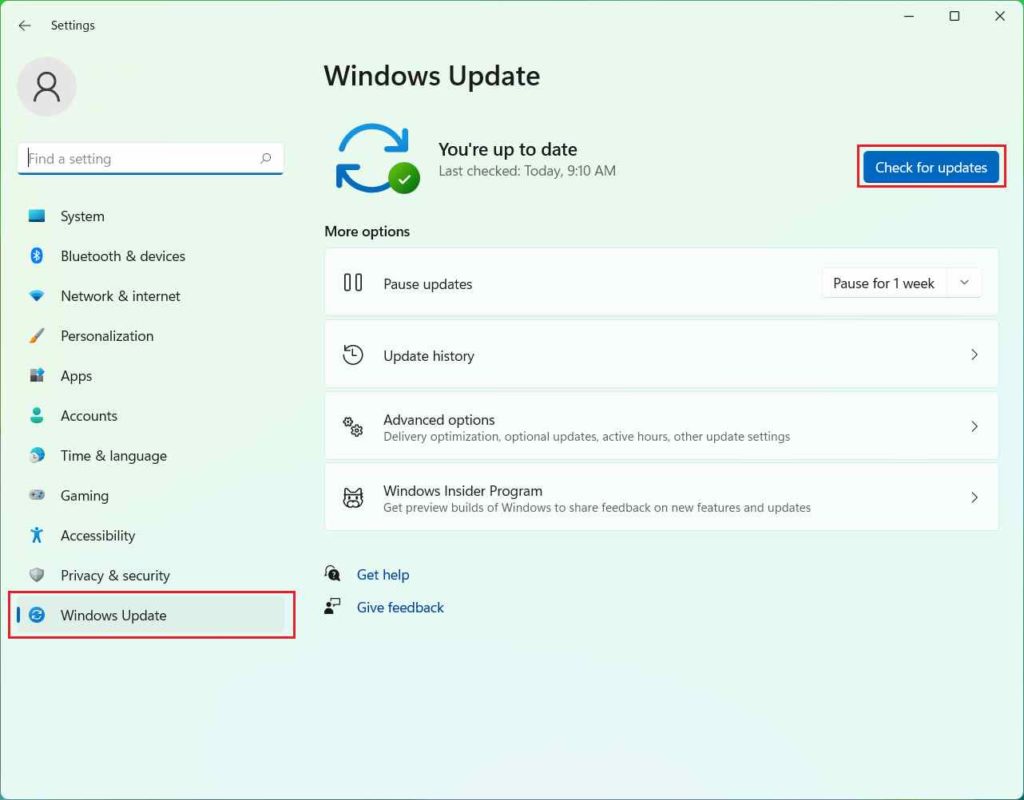
If an update is available, Windows will notify you. Upgrade your device right away with the latest Windows 11 version.
Conclusion
Here were a few simple yet effective solutions to resolve the “Quick Settings not working” issue on Windows 11. Quick Settings is a handy feature on Windows OS that allows you to toggle and tweak basic settings like volume, brightness, WiFi, Bluetooth, and Focus Assist in just a snap. You can use any of these methods to fix the Quick Settings panel on Windows. Follow us on social media – Facebook, Instagram and YouTube.
Good luck!