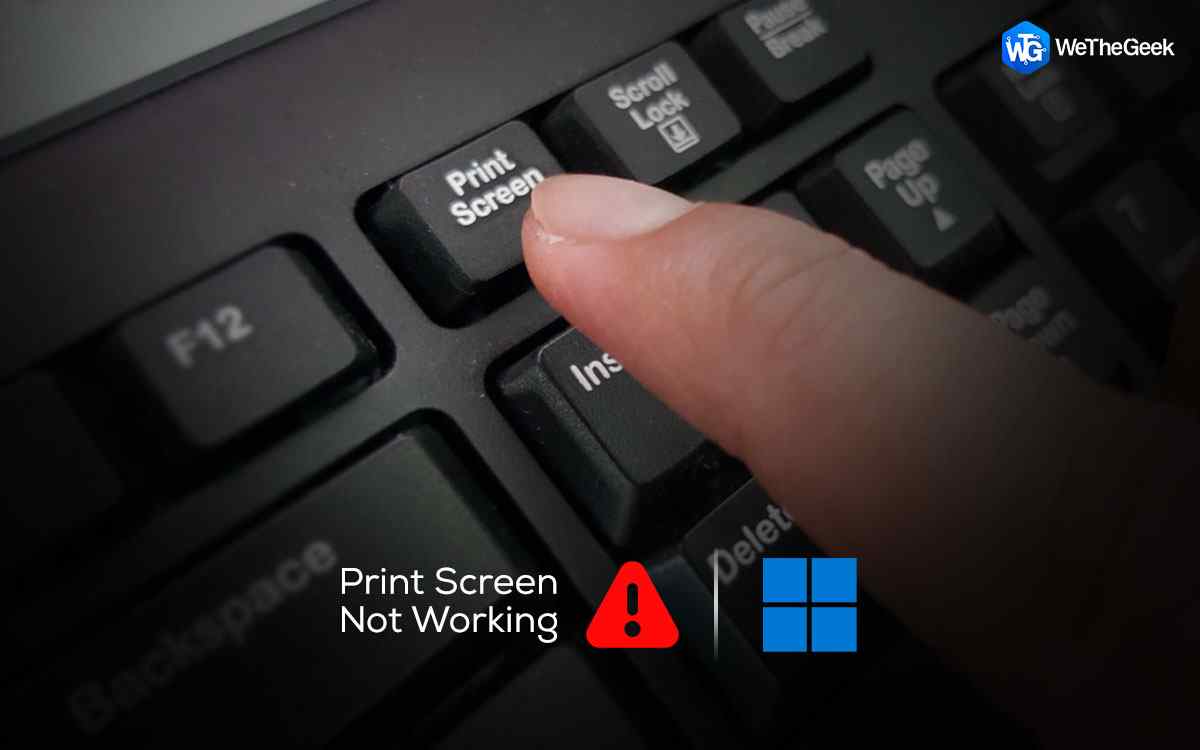
Recently upgraded your device to Windows 11? Unable to take a screenshot on Windows 11? Print screen not working? Well, you’re not alone. This is a pretty common issue reported by a lot of users where the print screen functionality is not functioning as expected.
There are a variety of ways that you can use to capture a screenshot on a Windows device. And among all, the print screen and snipping tool happen to be our two most favorites. No matter which device you use, whether a desktop or laptop, smartphone or a tablet, we do take a lot of screenshots, isn’t it? It is something that comes in handy along with each device.
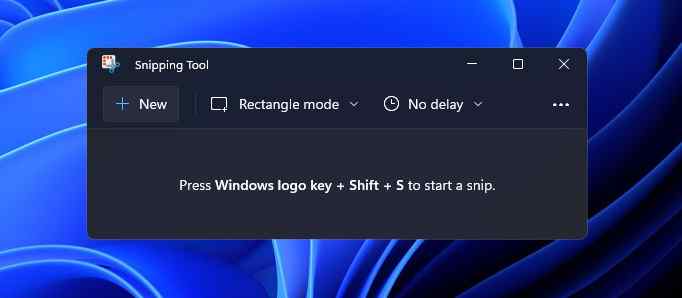
If you’re unable to take screenshots on Windows 11 using the Print screen or the Snipping Tool, here are a few resolutions that can come to your rescue. In this post, we have mentioned a bunch of troubleshooting solutions that you can use for fixing the “Print screen not working” issue on Windows.
Let’s get started.
Also read: 5 Ways To Take Screenshots On Windows 11
#1 Adjust Date and Time Settings
Misconfigured date and time settings can be a common reason that may trigger this issue on your device. By adjusting the date and time settings on your Windows 11 PC, you can easily troubleshoot any issue. Here’s what you need to do.
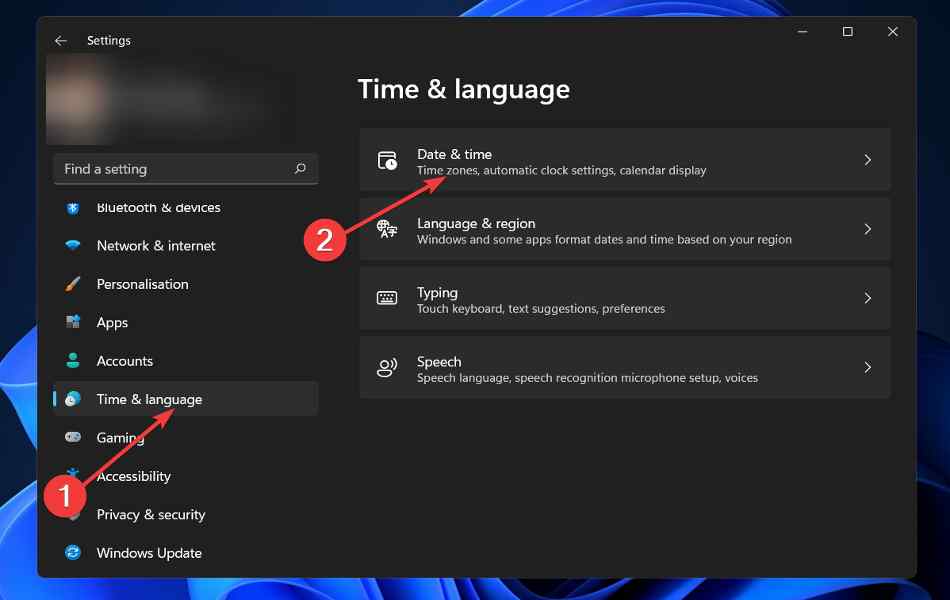
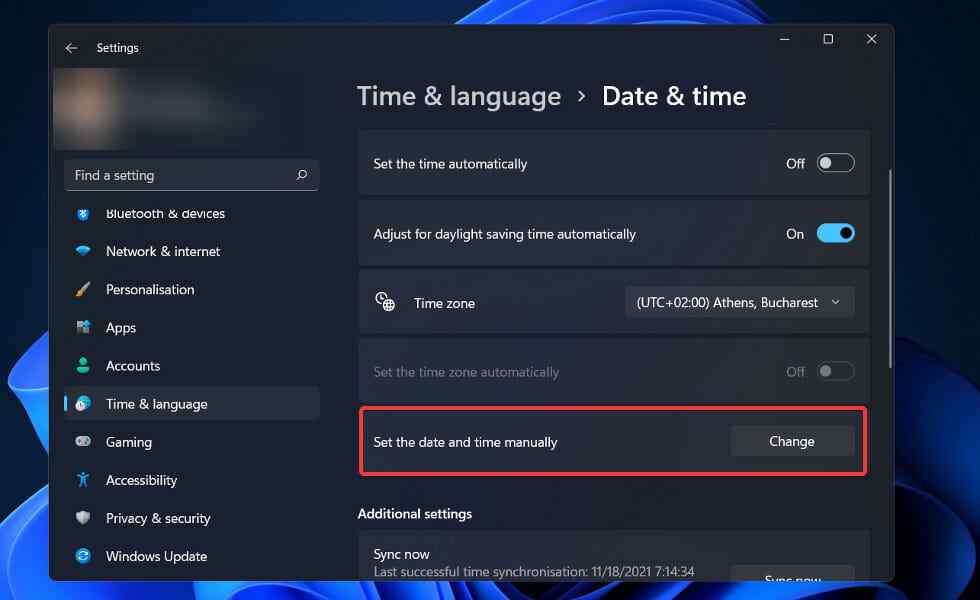
Tap the Windows icon placed on the Taskbar, open Settings.
Switch to the “Time and Language” section from the left menu pane. Select “Date and Time”.
First, disable the “Set the time automatically” option. And now tap on the “Set the date and time manually” option.
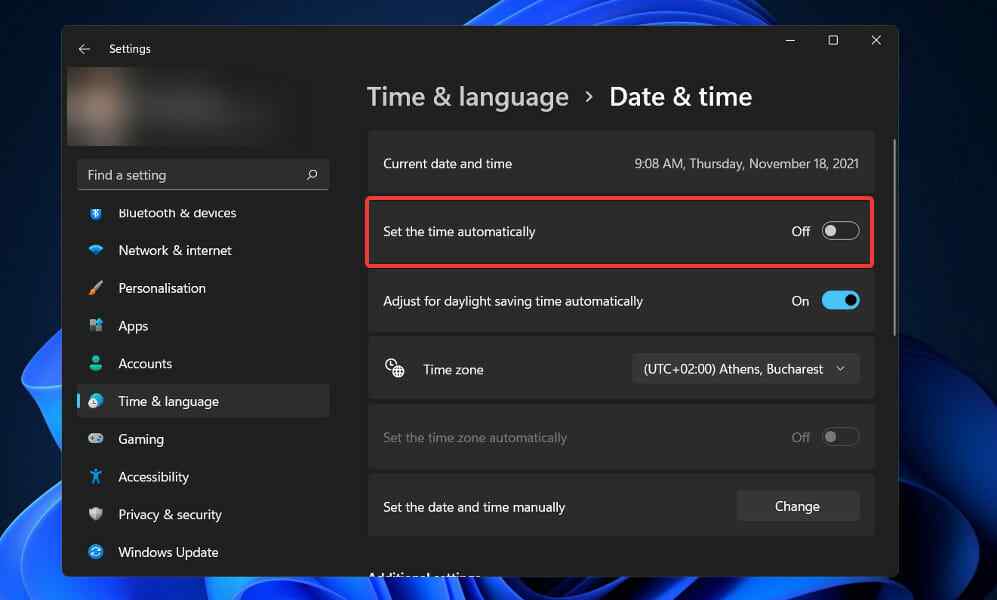
Set the date and time to the current time.
Once you manually reset the date and time on your device, the Snipping tool will automatically adjust to the newly changed settings. And in this way, you can easily overcome the “screenshot not working” issue on your device.
Also read: How to Print Screen on a Mac (4 ways to screenshot on Mac)
#2 Restart the Application via Task Manager
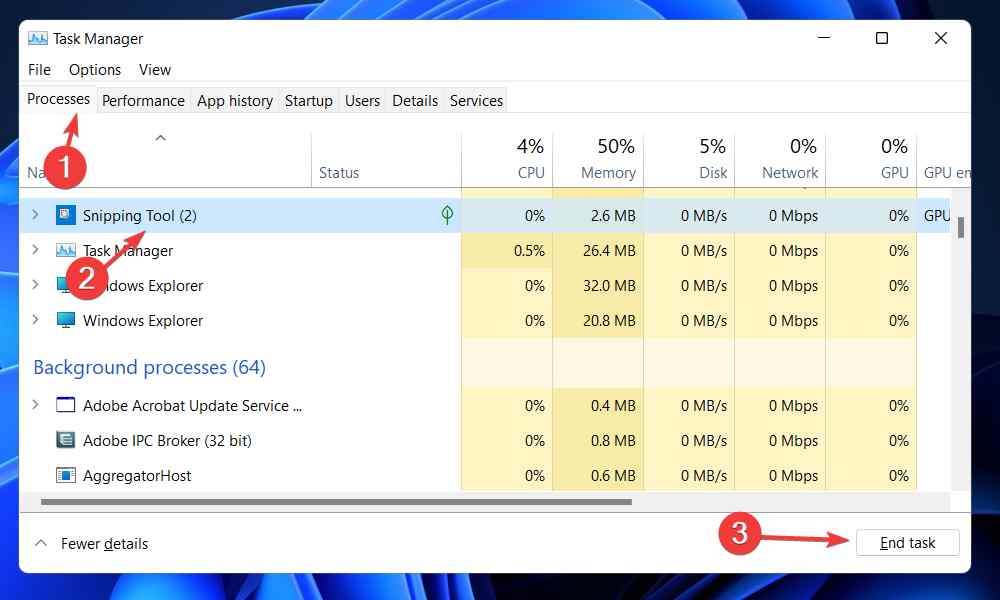
Tap the search icon placed on the Taskbar, search for “Task Manager” and hit Enter. Alternatively, you can also hit the Control + Shift + Escape key combination to directly launch Windows Task Manager.
In the Task Manager window, switch to the “Processes” tab. Look for “Snipping Tool”, right-click on it, and then hit the End Task button.
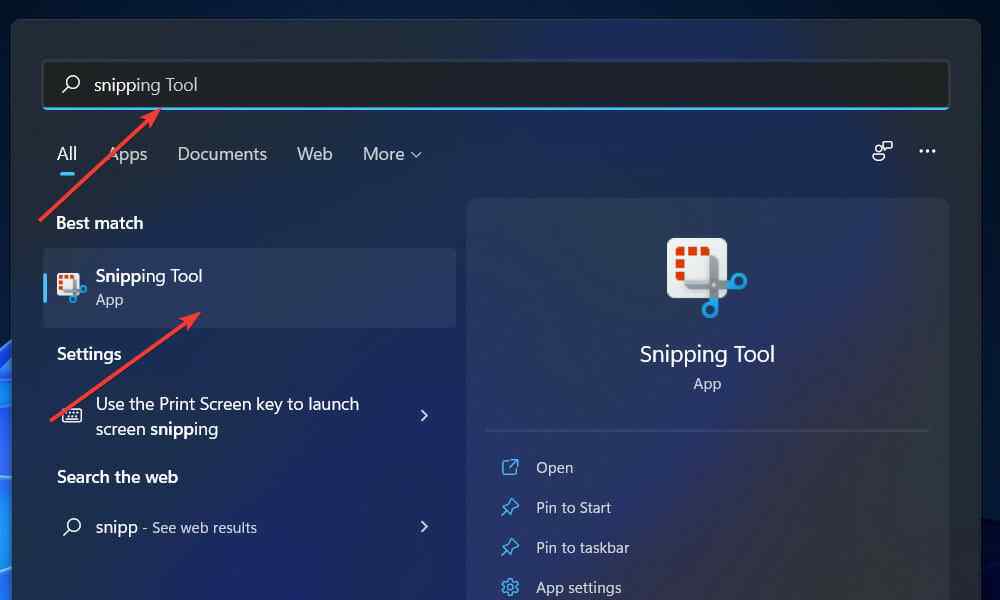
Now tap the search icon placed on the Taskbar, type “Snipping Tool” and launch the app.
Try capturing screenshots again after resetting the app to check whether the issue was resolved.
#3 Customize Settings of Snipping Tool app
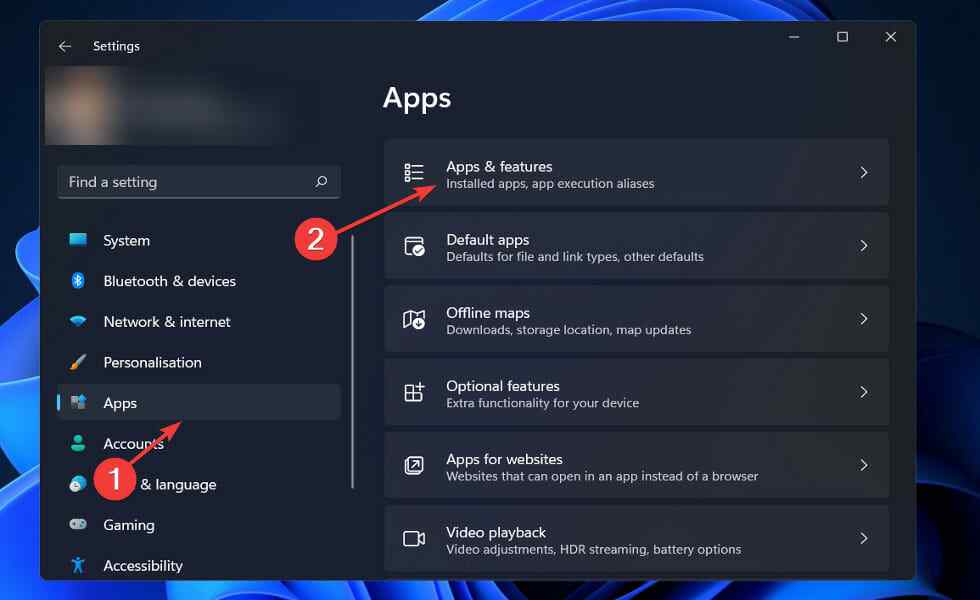
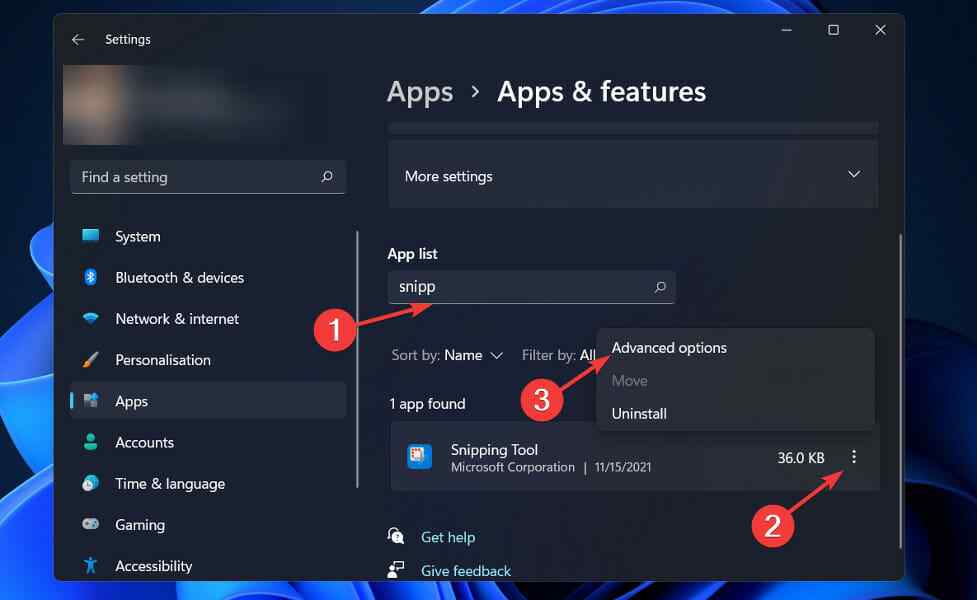
Open Settings> Apps> Apps and Features.
Scroll through the list of apps, select “Snipping Tool”. Right-click on it and select “Advanced Options”.
Set the “Let this app run in the background” option to “Always”.
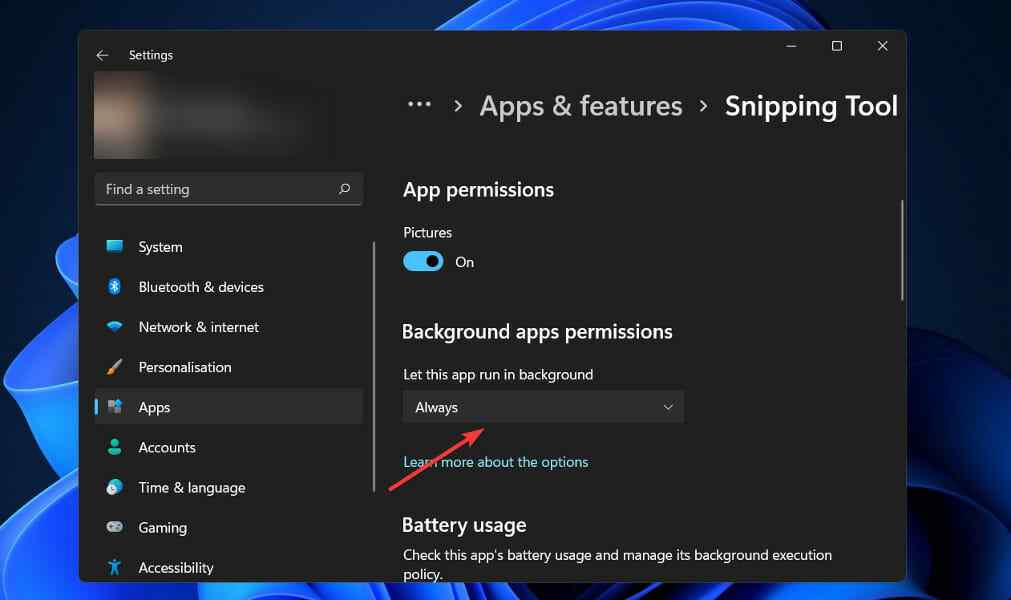
Exit all windows, reboot your device and see if you’re able to take screenshots without any hassle.
#4 Reset or Repair the Snipping Tool app
Tap the search icon placed on the Taskbar, type “Snipping Tool” and then select the “App settings” option.
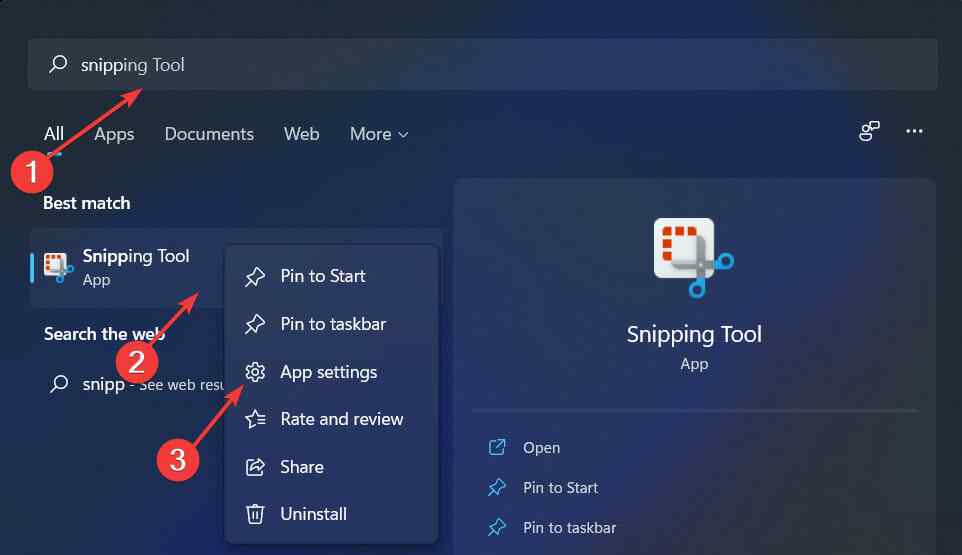
Hit on the “Repair” button. Follow the on-screen instructions until Windows repairs the Snipping tool application.
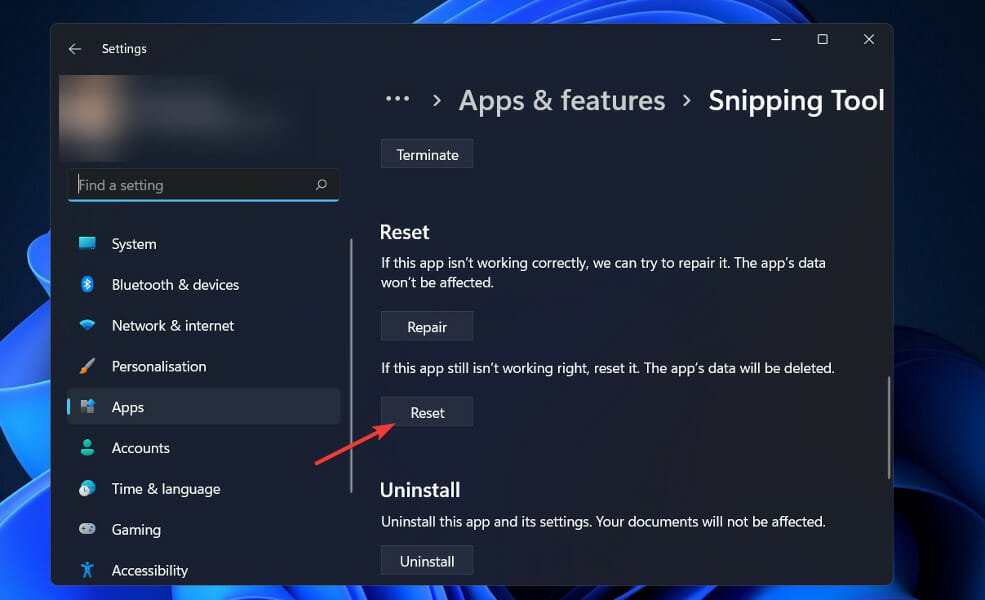
After the app has been repaired, try capturing a screenshot using the Snipping Tool to see whether the “Screenshot not working” issue was resolved.
Also read: How To Screenshot On Snapchat Without Them Knowing 2021: 8 Proven Ways
#5 Update the Keyboard Driver
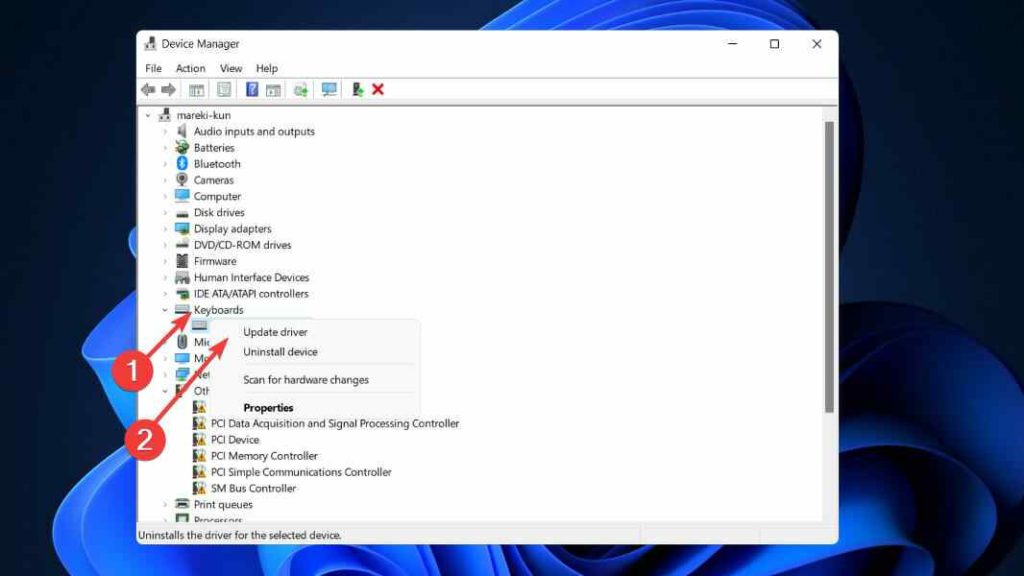
Open Windows Device Manager.
Scroll down and click on “Keyboards”. Right-click on the keyboard’s name and select the “Update Driver” option from the context menu.
Following the on-screen instructions, select the “Search automatically for drivers” option.
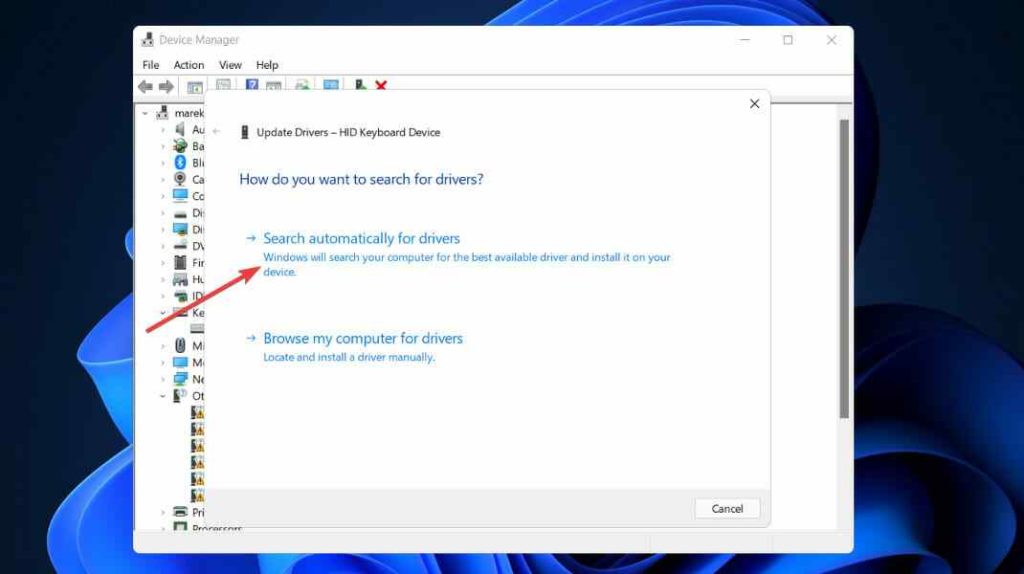
Once the keyboard drivers are successfully updated, try capturing a screenshot using the Print Screen key and see whether it helped.
Also read: Smart Driver Care VS Driver Easy: Which Is The Best Driver Updater Utility
#6 Run the SFC Scan
Launch the Command Prompt tool in Admin mode.
Type the following command and hit Enter to execute it:
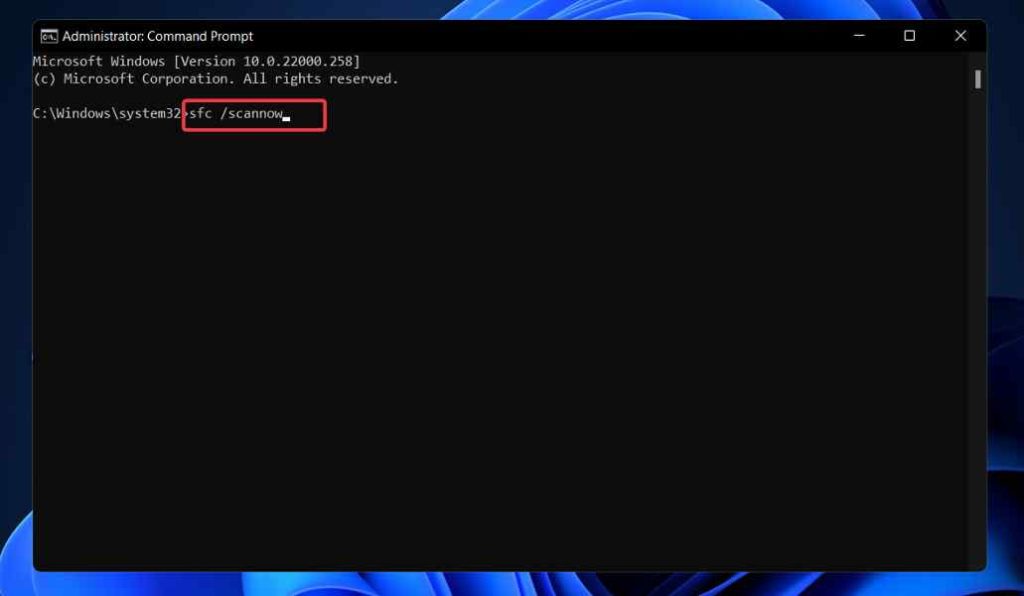
sfc/scannow
Wait for a few minutes until a complete scan is performed on your device to scan and fix corrupt system files and settings.
Conclusion
These were a few troubleshooting solutions that you can use to fix the “Print screen not working on Windows 11” issue. The Print Screen key comes in as a pretty handy choice for quickly capturing screenshots on Windows. You can use any of these workarounds to fix the issue that hindered you from using the Print Screen or the Snipping tool for capturing screenshots.
Good luck!