Have you ever been in the middle of an important work or online class when your Mac suddenly loses its Wi-Fi connection? It can be frustrating but don’t worry, you’re not alone. This is a common problem that many Mac users face. But before you panic, there are a few simple steps you can take to troubleshoot the Mac not connecting to the WiFi issue and get back online.
In this article, we’ll walk you through 8 steps to help you connect your Mac to a WiFi network so you can get back to what you were doing as soon as possible. But before jumping on the fixes let us take a look at some of the causes behind this issue.
Read Also: 10 Common MacBook Problems and How to Fix Them
Why is your Mac not Connecting to WiFi?
It can be frustrating when you need to get online, and your Mac just won’t connect to WiFi. There could be several reasons for this and some of these are mentioned below.
1. The first and most common reason for a Mac not connecting to Wi-Fi is an issue with the network itself. This could be a problem with the router, modem, or internet service provider.
2. Another reason for a Mac not connecting to Wi-Fi is a problem with the Mac’s Wi-Fi settings. This could include incorrect network information, outdated network settings, or a problem with Mac’s network adapter.
3. Another reason is that Mac’s software might be outdated. Software updates often include security patches and bug fixes that can help resolve connectivity issues.
4. Interference from other electronic devices can also cause problems with Wi-Fi connectivity. This can include anything from microwaves and cordless phones to baby monitors and other wireless devices.
5. The last cause can be the physical distance from the router. If the router is too far away or walls or other obstacles are blocking the signal, the Mac may not be able to connect to the network.
Now that you know the possible reasons behind the issue, let us now take look at the ways to fix this.
Read Also: What To Expect In New Macbook Pro
How to Fix Mac not connecting to WiFi Issue
This is a common problem that many Mac users face, and the good news is that it’s usually an easy fix. In this article, we’ll go through eight steps that you can take to get your Mac back online.
1. Verify your WiFi Connection
The first thing you should do is to make sure that your Wi-Fi connection is working properly. Check to see if other devices in your home can connect to the network. If they can’t, then the problem may be with your router or internet service provider.
In this case, try these tips:
1. One possible solution when your Mac won’t connect to Wi-Fi is to restart the router. This can be done by turning it off, waiting a moment, and then turning it back on. This can often resolve the issue.
2. Another thing to check is the connection cables. Make sure they are properly plugged in, and if they are, try using a different cable as the one you’re currently using may be damaged.
2. Restart your MacBook
Sometimes, a simple restart can fix the problem. Shut down your Mac and then turn it back on. When it starts up again, try connecting to your Wi-Fi network. To do so follow the steps below:
- From the top-left corner of your, Mac tap on the Apple logo.
- A drop-down menu will appear. Select Restart.
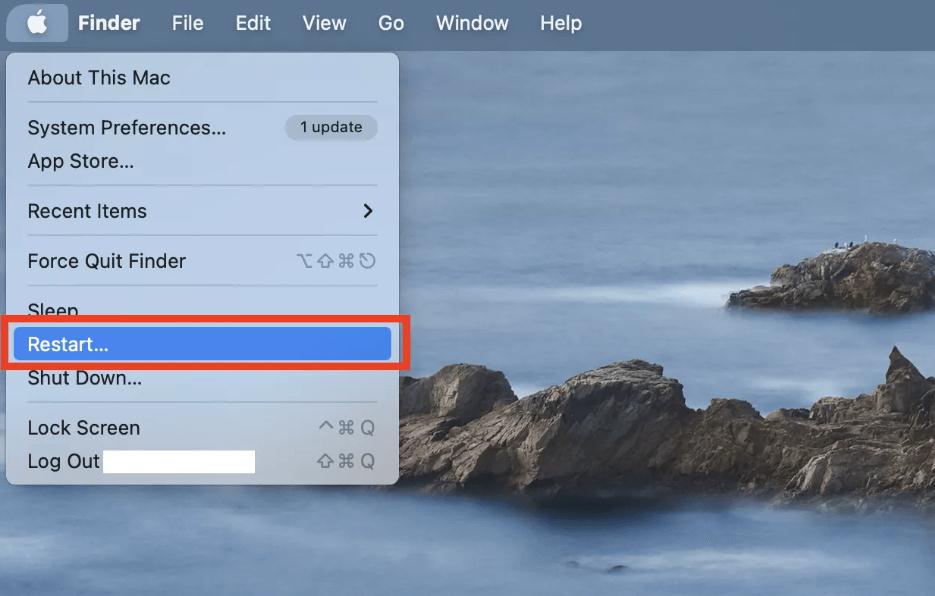
After restarting your device, try connecting to the WiFi network once again. This step may resolve the issue and get your Mac back online.
Read Also: 7 Essential Things You Need To Take Care with New MacBook
3. Check for Interference & Range
If you’re having trouble connecting to your Wi-Fi network, it could be because of interference from other devices. Try moving your Mac closer to your router or moving other devices away from it.
Remove any physical obstacles that may be blocking the signal between your Mac and the router. This could include walls, furniture, or other electronic devices that may be interfering with the connection.
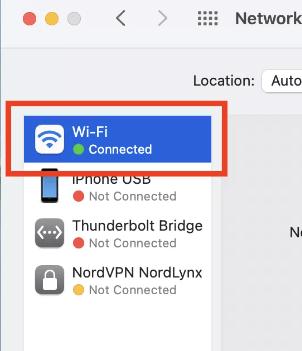
4. Forget & Reconnect to the WiFi Network
Sometimes, your Mac may have trouble connecting to a Wi-Fi network because it’s trying to connect to an old or forgotten network. To do so follow the steps below:
- Open your MacBook > tap on the Apple logo from the top right corner of the screen > go to System Preferences.
- Tap on Network.

- From the left side of the page tap on WiFi.
- Now click on the Advanced option from the lower-right corner of the pop-up window.

- Now just hit the Minus ‘-’ icon as shown below.

- Once the connection has been removed, click the plus sign ‘+’ to add it back again.

- Click on the OK button to confirm.
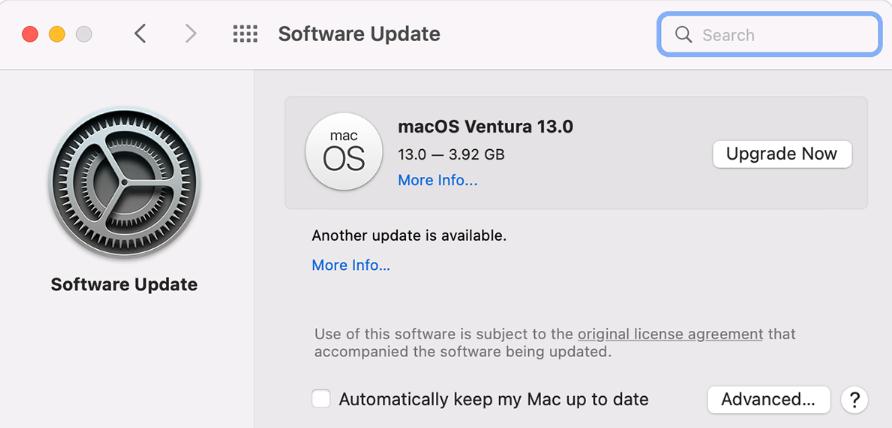
5. Update the OS of your MacBook
Make sure that your Mac is running the latest version of macOS. Go to the System Preferences and check for updates. If there are any updates available, install them. To do so follow the steps below:
- From the top-left corner of your, Mac tap on the Apple logo and go to System Preferences.
- From the left pane tap on General and click on Software Update from the right side.
- Click the Update Now/Upgrade Now button to install the update and resolve any connectivity problems if one is available.
Read Also: macOS: Sound not Working on Safari Browser? Here’re the fixes
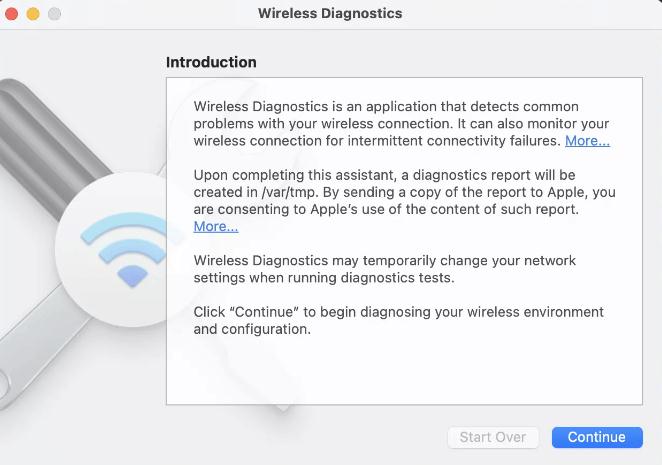
6. Run Wireless Diagnostic Tool
If your Mac still won’t connect to Wi-Fi, try using the built-in troubleshooting assistant, the Wireless Diagnostics tool. This tool, developed by Apple, can help identify and fix issues with your Wi-Fi network. Follow the steps below:
- Open your Mac and go to the Spotlight Search.
- Type in wireless diagnostics and tap on the first result form below.

- After choosing Wireless Diagnostics click on Continue.
- Just wait and let it scan your Mac.
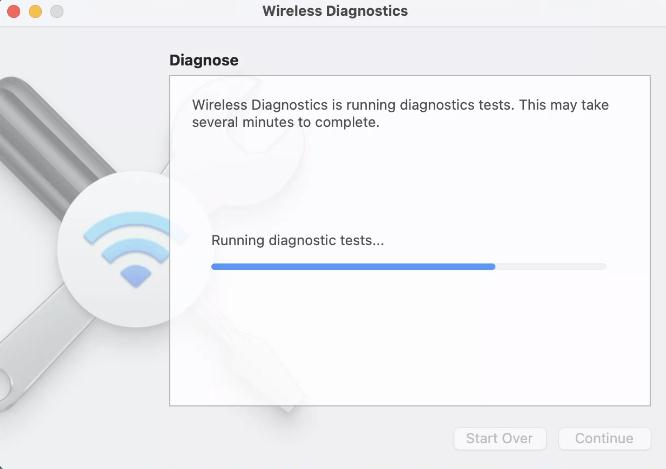
- Once finished follow the suggestions provided by the diagnostic tool to address any issues that caused the connectivity problem.
7. Turn Off your VPN
If you have any virtual private network (VPN) apps or network security software enabled on your Mac, they may be causing interference with your Wi-Fi connection. As a troubleshooting step, try disabling these programs temporarily and check if the connection issue is resolved.
8. Call your ISP (Internet Service Provider)
If all of the above steps have been attempted and your Mac still cannot connect to Wi-Fi, it may be necessary to reach out to your internet service provider for additional support. They can investigate any potential network outages in your area and dispatch a technician if required.
Read Also: 10 Lesser-Known & Hidden Features Of MacBook You Should Try
To Wrap This Up
So, this is how you can fix your Mac not connecting to the Wi-Fi issue. If your Mac won’t connect to Wi-Fi, there are a variety of steps you can take to troubleshoot and fix the problem. From checking your Wi-Fi connection to updating your software, there are many things you can try. Keep in mind that if none of the above steps work, you may need to contact your internet service provider or Apple support for further assistance.
And for such troubleshooting guides and tips & tricks related to Windows, Android, iOS, and macOS follow us on Facebook, Instagram, Twitter, and YouTube