
Teaching is not just confined to classrooms these days. No matter where you are, you can share your knowledge with your students. Not just knowledge, you can even share your feedback. And, in that, a screen recording tool can be of great help.
Below we are going to discuss, how a screen recording tool can take your teaching to the next level. You can, for example, create a pre-recorded tutorial of a lesson for those students who were absent from the class.
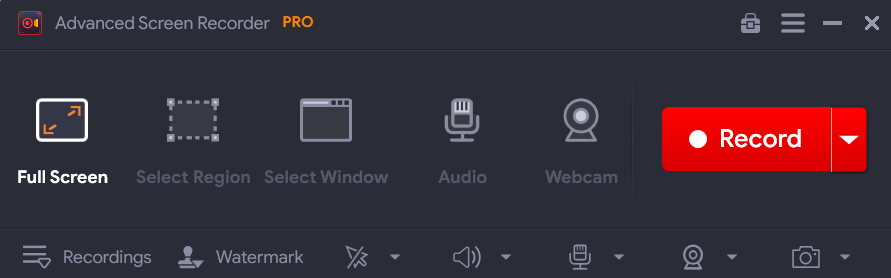
To explain how a screen recording tool can aid teaching, we are going to use Advanced Screen Recorder which is one of the best screen recording utilities for Windows.

How Can A Screen Recorder Help In Teaching
1. Giving Feeback To Students
With a screen recording tool, you can give comprehensive feedback to your students like never before. You could open a word document or scanned assignment and record yourself pinpointing the exact problematic areas. This way the students can refer to the recording time and again to improve their assignments and learn even better.
2. Annotate While Recording the Screen
Needn’t just use your mouse pointer as a way to pinpoint the problematic areas. Most screen recording tools, let you annotate while you are recording your screen. Using a variety of elements such as boxes, circles, arrows, lines, pointers, and many others you can make your feedback more comprehensive and engaging. You can even change the color of these elements.
How To Annotate Screen Recording Using Advanced Screen Recorder?
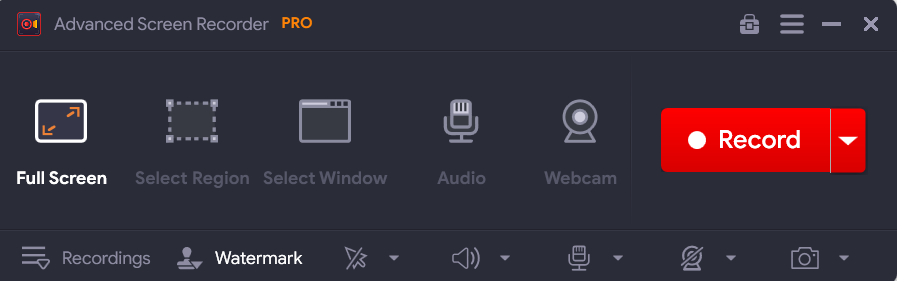
- Select a region of the screen that you want to record and click on the Record button.
- Select recording configuration and click on Start Recording.
- Click on the Screen pen as shown in the screenshot below.

- Choose an element that you want to use to annotate your live screen recording.
- You can now annotate on your screen.


3. Schedule Screen Recording
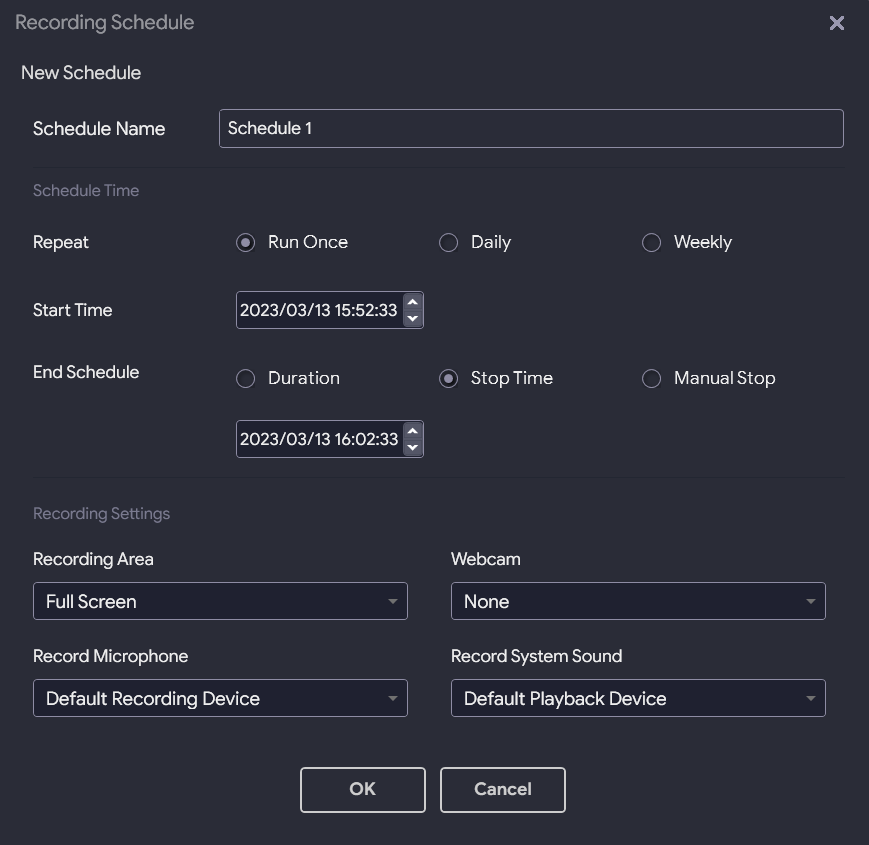
As a teacher, you are probably required to take multiple classes in a day. It would rather be a tedious job if your class has started and you are manually setting up screen recording every time. How about being able to schedule recordings? A screen recording tool can help you schedule recordings in a way that you can choose the start and end time, select the recording area, choose whether or not to overlay the webcam, and even choose the sound.
How To Schedule Screen Recording Using Advanced Screen Recorder?
1. Download Advanced Screen Recorder.
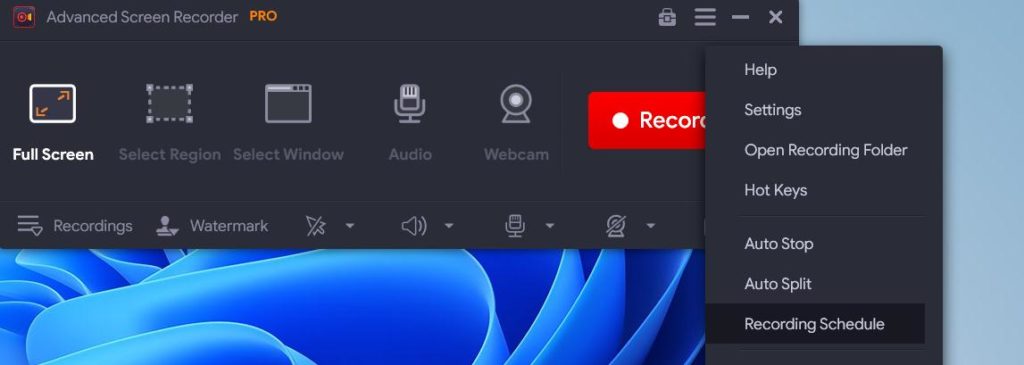
2. From the top-right click on the hamburger icon.
3. Click on Recording Schedule as shown in the screenshot below.
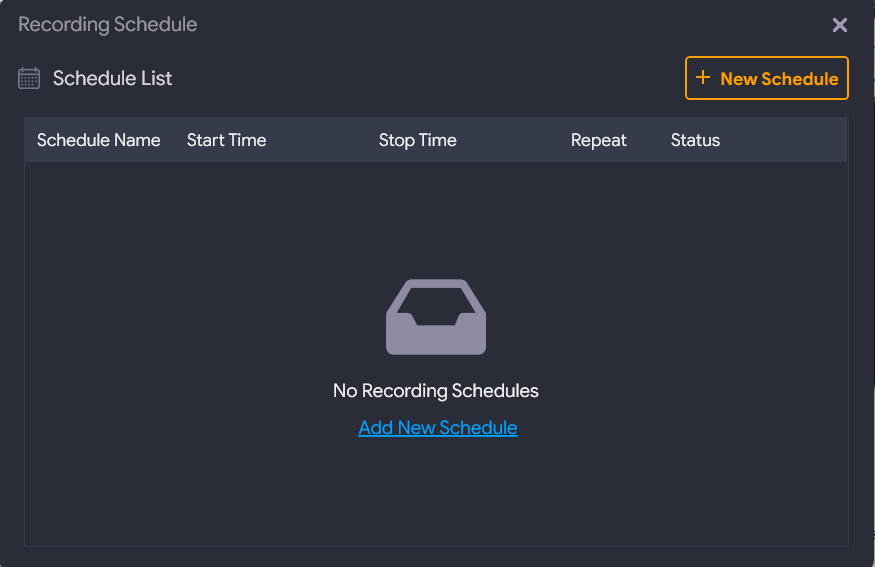
4. Click on Add New Schedule
5. Choose a start time, end time, recording area, and other fields, and schedule your recording.
4. Record Yourself During A Presentation
While you are recording the on-screen activities, you can also use screen recorder software to capture your webcam. This way students will also be able to see your emotional responses or get better learning inputs.
How To Record Webcam Using Advanced Screen Recorder?
- Click on the hamburger icon.
- Click on Settings.
- From the left select Webcam.
- From the right, click on the checkbox that says RecordWebcam overlay while recording.
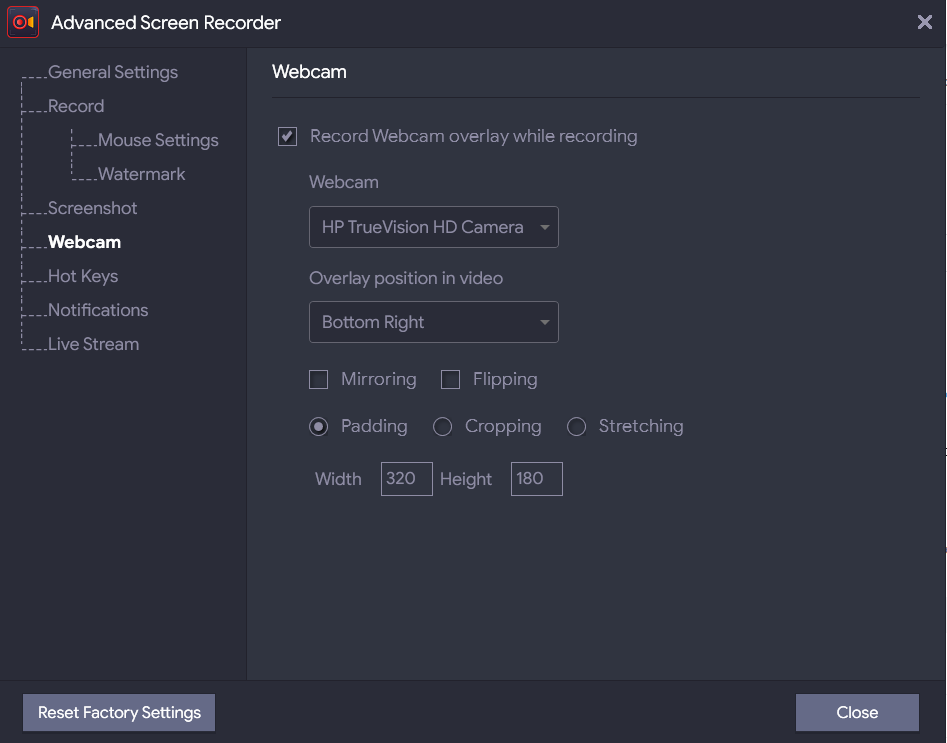
- Choose your webcam, overlay position, and other options. Click on Close.
- Head to the main interface and click on the Webcam icon and click on
5. Trim Down Specific Portions Of The Recorded Video
There are times when you might want to get rid of unwanted areas in your screen recording. For instance, the starting few minutes when there were disturbances or when you didn’t get it right the first time. A screen recording tool lets you trim areas from your screen recording.
Another instance where you can use the trimming capability of your screen recording software during teaching is when you have screen recorded a session where you have covered answers for all the questions of the test. You have nicely explained the various graphs, charts, and other elements that were part of the questions in the exam. You can trim areas that cover answers to specific questions and save them as separate files.
Bonus Point – Add Watermark On Your Videos
Conducting online teaching and using the screen recorder to record material for your school or organization? You can use a screen recording tool like Advanced Screen Recorder to add Watermark, here’s how –
1. Click on the Watermark option from the bottom of the interface.
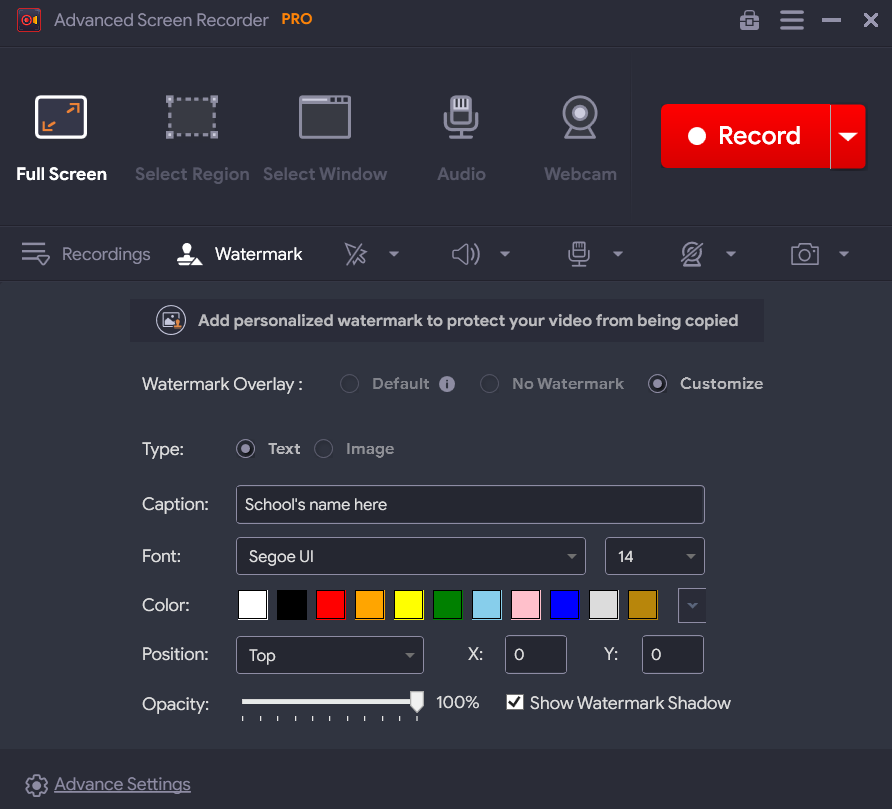
2. Click on the Customize radio button.
3. Now you will see that the fields below will become editable. You can type in your School’s/ University’s/ Organization’s name in the Caption area, change the font, color, and position of the watermark, and even increase or decrease its opacity.
Wrapping Up
Whether it be offline or online teaching, screen recorder software can be a nifty tool to have by your side. It can improve the way you provide feedback to students or even explain lessons to them. If this post resonated with you, do let us know in the comments section below. And, if you liked this post, make sure you share it with your fellow teachers. For more such content, keep reading WeTheGeek.