
Earlier on Windows, you could only change the size of one photo at a time using drawing or photo applications. However, with Windows 11, users can also resize numerous photos simultaneously using a free tool provided by Microsoft called PowerToys. You can use this tool in Windows 11 to resize multiple images simultaneously by following the instructions below.
How to Resize Multiple Images at Once in Windows 11
Use PowerToys to batch resize photographs or images if you need to resize a lot of them instead of doing it one at a time. You can resize several photos by following the procedures listed below.
Install Power Toys
Step 1: Download the PowerToys app from the Microsoft website. To install the software, launch the installer next.
Step 2: Launch the PowerToys application, then select the Image Resizer menu item on the left. Make sure the Enable Image Resizer option is activated after that.

When you right-click one or more images in Windows after turning on the PowerToys’ Image Resizer feature, a Resize Picture option will appear in the context menu.
Resize Several Images Simultaneously
Let’s look at how to use PowerToys in Windows 11 to resize many photos at once.
Step 1: Open File Explorer and navigate to the location of your image.
Step 2: Choose the image you want to resize. When you right-click a picture, you can choose Show More Options.
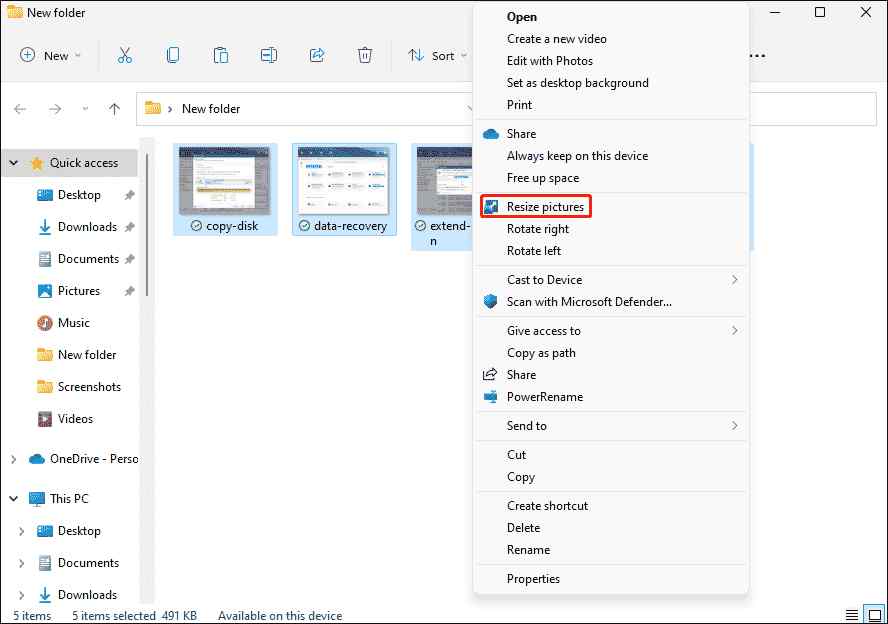
Step 3: Select Resize Pictures from the menu.
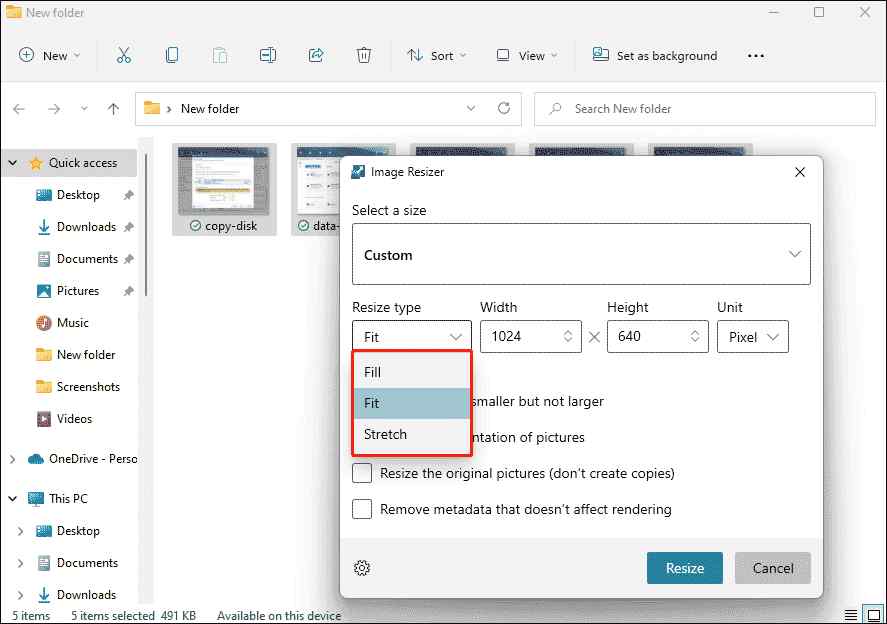
Step 4: Determine the size based on your requirements. Small, Medium, Large, and Phone are the fixed sizes offered. To manually change the image size, select Custom and input a desired width and height. You must specify the resize kind if you choose a custom size:
- Fill will enlarge or reduce the image’s width to fit the screen.
- The photo’s height will be adjusted by Fit so that it occupies the entire screen.
- Stretch may result in picture distortion because it will force the image to fill the entire screen.
Step 5: Select Resize from the menu. Once complete, a duplicate of the original image will be produced and placed in the same folder.
This will allow you to see how each image you selected has been scaled down.
Include A Preset Size In the Image Resizer
in order to avoid having to manually enter a specific size each time you resize the image, to add a preset size. The actions are listed below.
Step 1: Access the PowerToys Settings and go to the Image sizes section.
Step 2: Next to Presets under Image sizes, click Add a size.
Step 3: Select the edit icon next to the new size. Choose the appropriate kind, then type in the desired width and height.
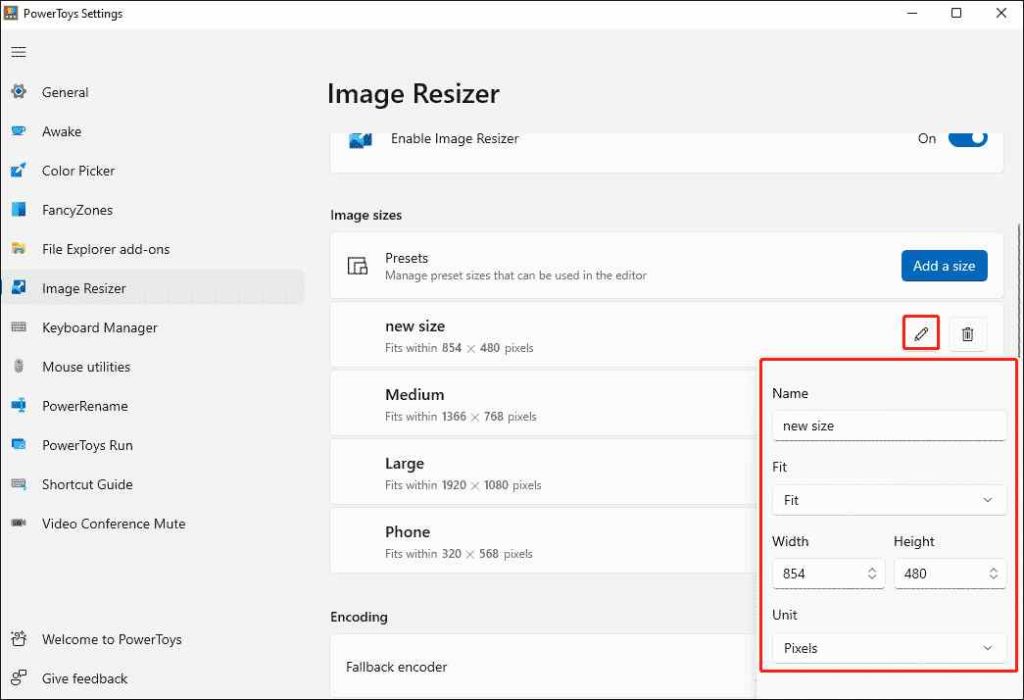
Step 4: The additional size will be an option in the image adjuster window when you decide to resize the image.
How to Resize Multiple Images at Once in Windows 11 Using Third-Party Image Resizer Tool?
Image Resizer is a great tool for mass scaling, rotating, flipping, renaming, and format changes of photos. Add an entire folder or just a few individual images to resize photos without losing visual quality.
Step 1: Get Image Resizer by clicking the download icon below or from the official website.


Step 2: Install the application according to the prompts on-screen. Give the system the required rights so that it can make modifications.
Step 3: Launch the application.
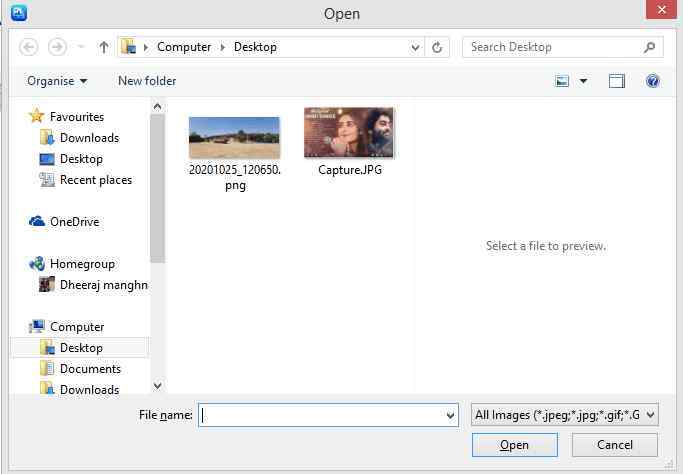
Step 4: Select Add Photos or Add Folder. The tool also allows you to drag and drop the photographs, making Image Resizer a user-friendly program.
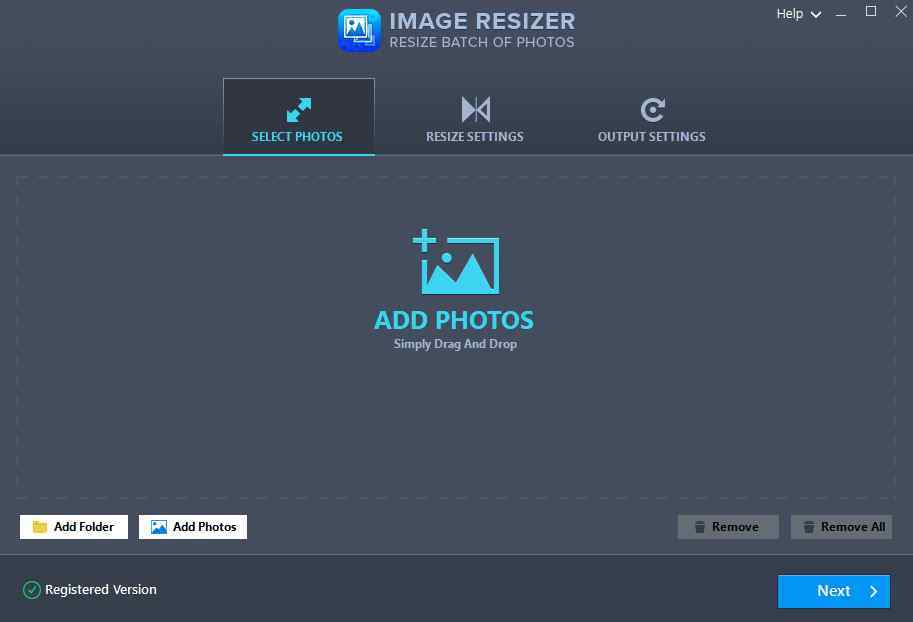
Step 5: All of the added photographs are automatically picked to make your job easier. If you’d prefer something different, adjust it by unticking the Select All button in the top right corner. Go to the Next button and click it to proceed.
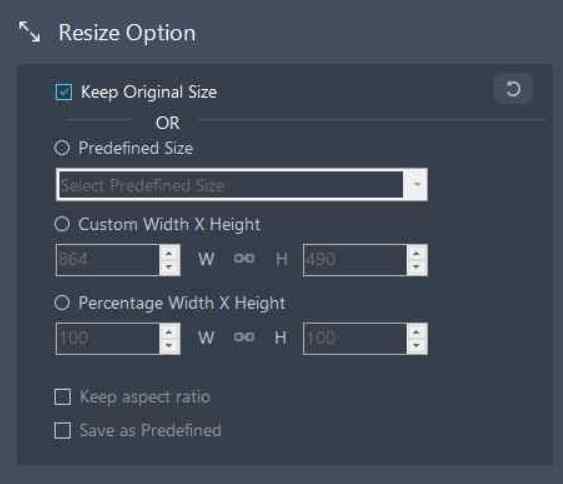
Step 6: Insert all of your image-altering dimensions on this subsequent page where it says Resize Settings. Click Predefined Size because Keep original size is the default selection.
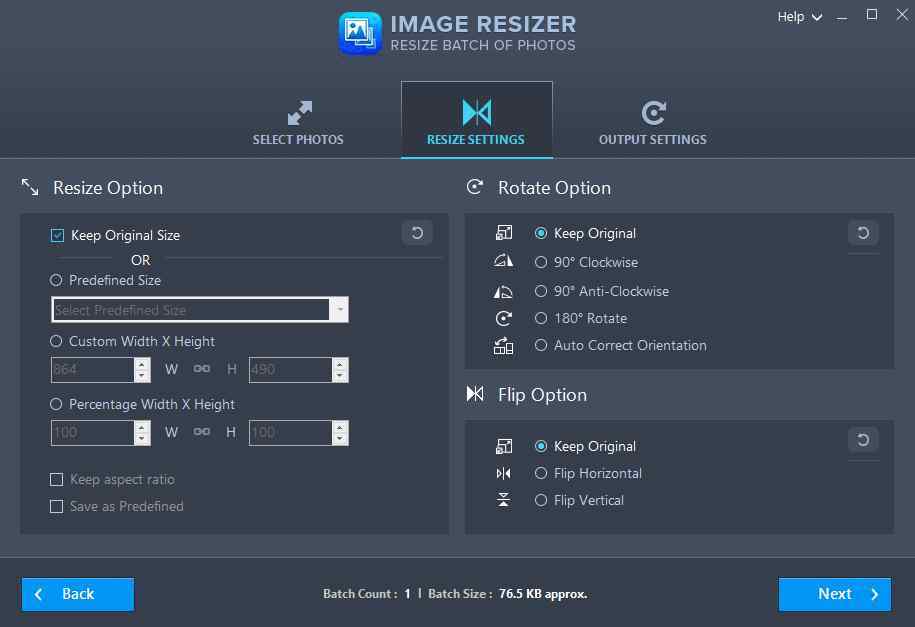
Step 7: You can choose an image’s custom width, height, and percentage or a predefined size.
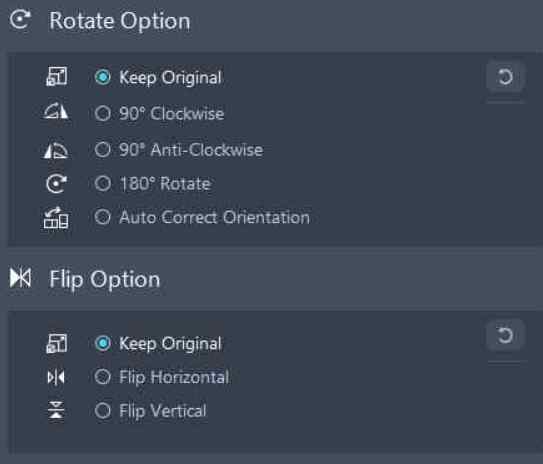
Step 8: If necessary, you can also make changes like flipping or rotating. Once you’ve made your choice, click Next.
Step 9: Ensure that the output format is also modified. You can choose to keep the original format by checking the box in the Output Settings. or change to the format below.
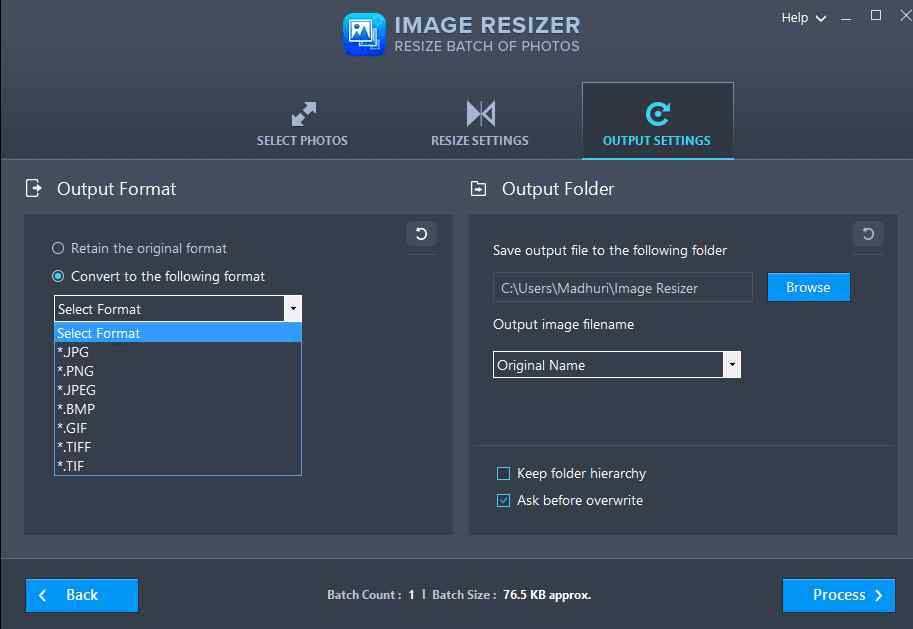
Step 10: Choose the location of the output file from the browser option on the left, and then enter it. Additionally, use a suffix or prefix to distinguish the newly resized photographs from the originals.
Step 11: At this point, click the Process button to start resizing a large number of photographs on your computer.
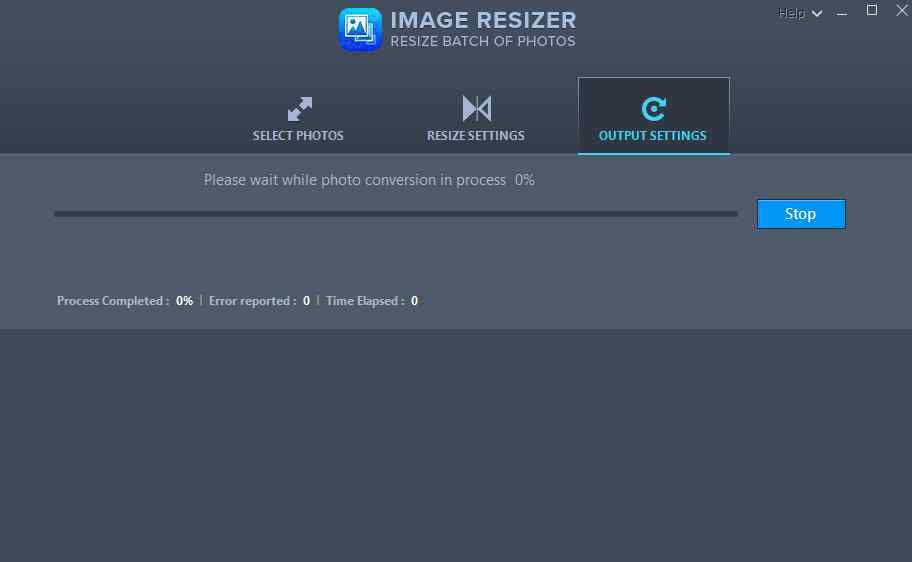
Step 12: As soon as it’s finished, you may access the folder containing the resized photographs by clicking on it.
The Final Word: How to Resize Multiple Images at Once in Windows 11 Using Power Toys?
Now you have two ways how to resize multiple images at once. You can either use Power Toys or the Image Resizer which provides many functions in addition to resizing multiple images.
Follow us on social media – Facebook, Instagram, and YouTube. Let us know of any queries or suggestions. We would love to get back to y