Upgraded your device to Windows 11? Well, if you’ve been experiencing a memory leak in Windows 11 recently, we might have a few useful solutions for you!
Many users have complained that they have been struggling with memory leak issues after upgrading to Windows 11. A memory leak occurs on Windows when a process or application does not free up system resources or RAM even if it is no longer needed. So, if a certain block of RAM is not released by an app or system process, it hogs up the RAM and thereby slows down your PC’s performance. In a worst-case scenario, memory leaks can also lead to system failure or crash. But don’t worry! You can easily fix this issue by following a few workarounds.

Image source: Gizmochina
In this post, we have listed a bunch of troubleshooting methods that you can use to fix the “File Explorer Memory Leak” issue on Windows.
Also read: Windows 10 File Explorer Not Working? How To Fix
How to Check if your System has a Memory Leak?
Before we proceed towards the solutions, here’s how you can check whether your system has a memory leak or not. Follow these quick steps:
Tap the search icon placed on the Taskbar, type “Resource Monitor” in the search bar, and hit Enter.
Once the Resource Monitor app launches on Windows 11, switch to the “Memory” tab.
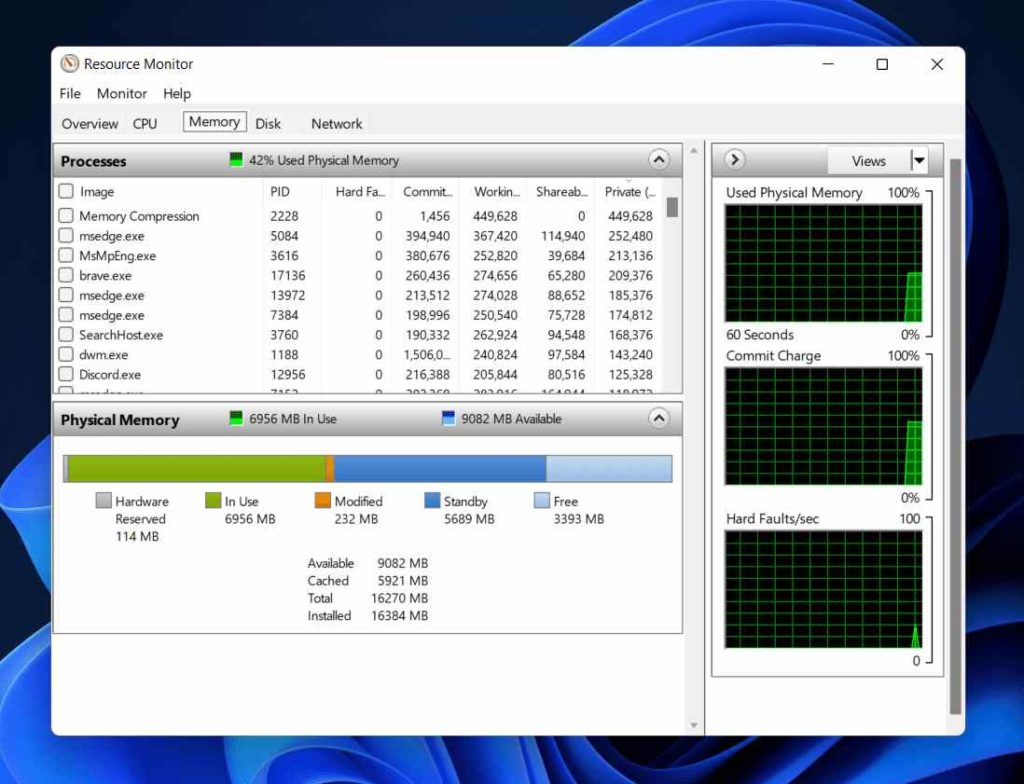
Now check the total physical memory that is currently in use. Closely analyze all the system resources, apps, and processes that are taking up maximum physical memory in use. Even check the “Explorer.exe” process and see if you find anything unusual.
Now, open the Task Manager app and switch to the “Processes” tab. Look for the “File Explorer” process, right-click on it and tap on “End Task”. After killing the explorer.exe process, head back again to the Resource Monitor and check whether it freed the physical memory resources after the termination.
Also read: How To Disable File Explorer Search History In Windows 11
How to Fix File Explorer Memory Leak Issue on Windows 11?
After identifying memory leak issues on your device, use the below-listed solutions to fix the problem.
#1 Kill the File Explorer App
Are too many File Explorer windows currently opened or in use? Right-click on the File Explorer icon placed on the Taskbar, select “Close all Windows”.
Now tap the search icon placed on the Taskbar, type “Task Manager” and hit Enter.
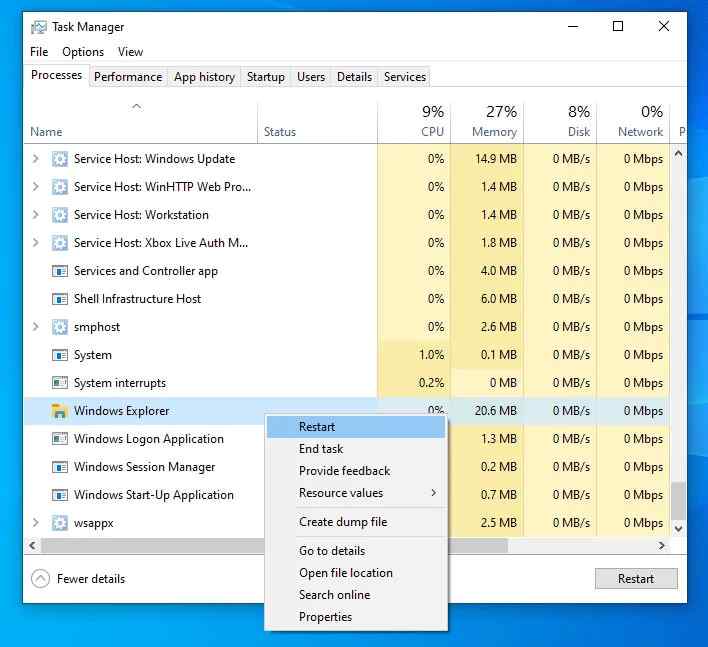
Head on to the “Processes” tab, look for the “Windows Explorer” process, and hit the “End Task” button to kill the application.
Reboot your device and check if the issue persists.
#2 Launch File Explorer as a Separate Process
After killing the File Explorer app, if your PC is still encountering memory leak issues, here’s something you can try.
Tap the search icon, type “File Explorer Options” in the search box, and hit Enter.
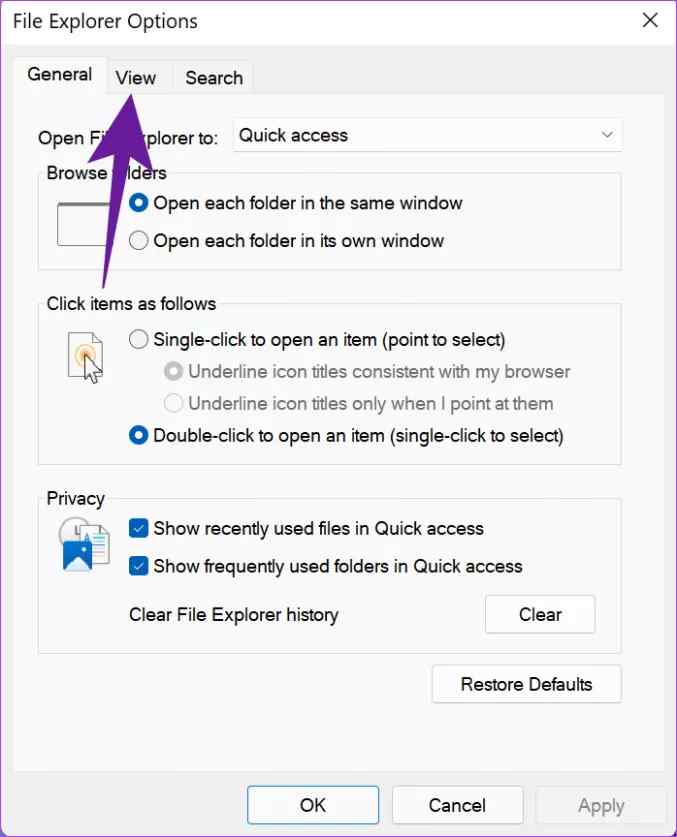
In the File Explorer Options window, switch to the “View” tab.
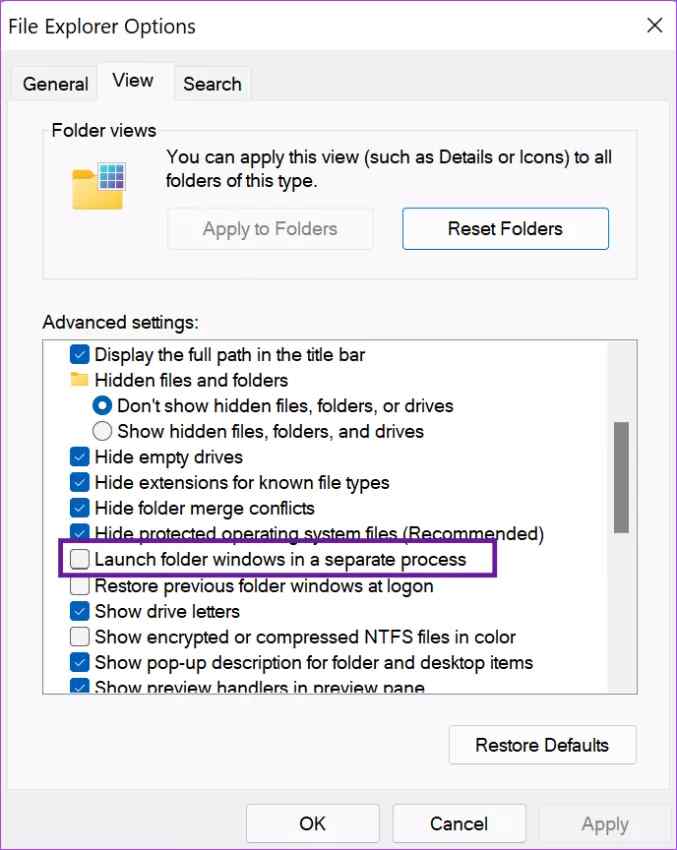
Check on the “Launch folder windows in a separate process” option on the list.
Hit on the OK and Apply buttons to save the recent changes.
Also read: Best Windows File Explorer Tips and Tricks To Make It More Useful
#3 Close Apps and Browser Tabs
Are you operating on too many active browser tabs and apps right now? Yes, you’re not alone. Most users have a habit of juggling through apps and tabs, and not closing them even when they’re not in use. Well, we would recommend you close the apps and tabs that are not in use to free up RAM and system resources.
After closing the irrelevant apps and browser tabs, open the Resource Monitor app and check for the issue of memory leak in Windows 11.
#4 Manage Startup Apps
Having too many startup apps and services can take up a considerable amount of RAM storage space on your device. We will now try to manage the startup apps on Windows to fix the File Explorer memory leak issue.
Open the Windows Settings app. Switch to the “Apps” section from the left menu pane.
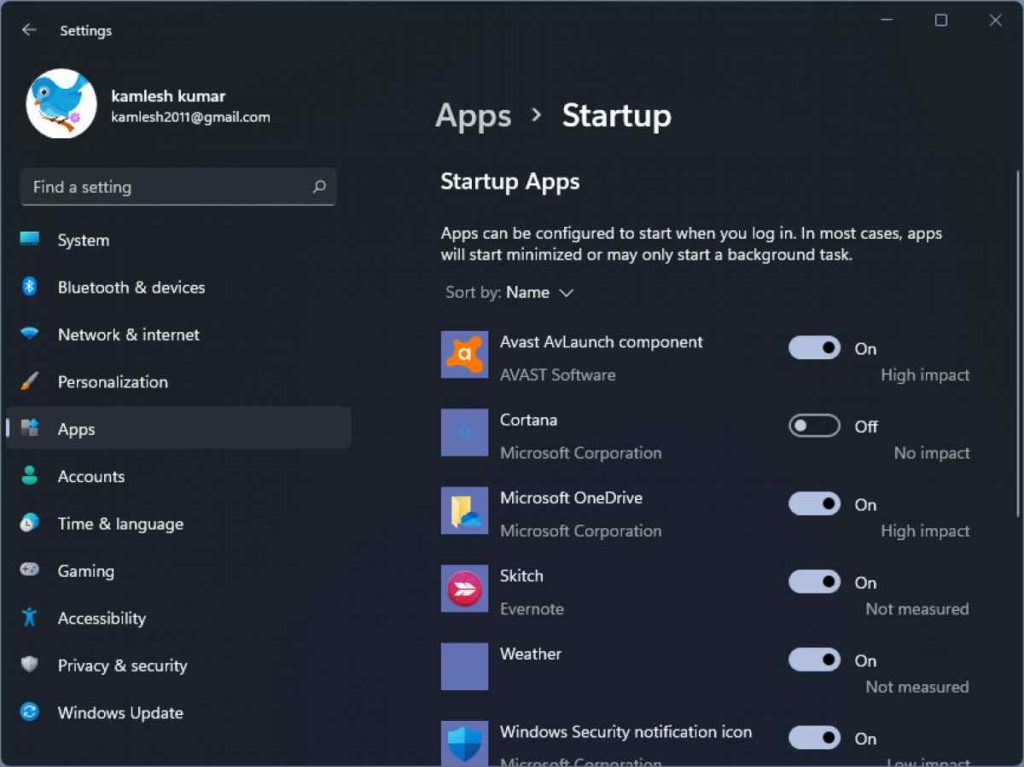
Tap on “Startup”.
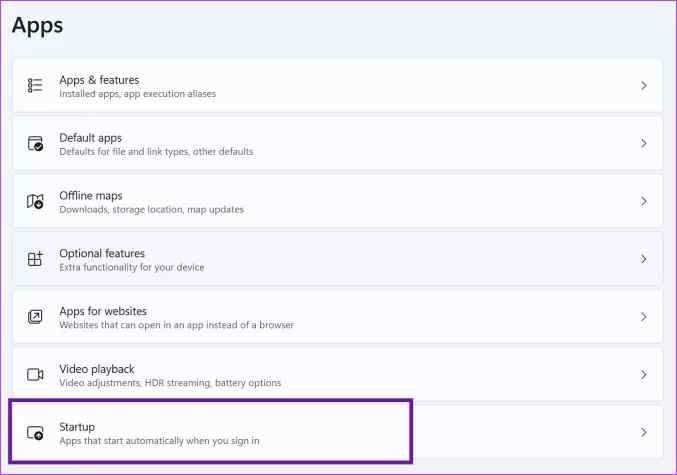
Image source: Gear up Windows 10
Now disable all the apps that you no longer require during startup to minimize the system load.
Only give access to a limited number of apps to load at startup to improve the boot time of your PC.
Also read: How To Fix Duplicate OneDrive folders In Explorer On Windows 10
#5 Update Windows
The next solution to fix the “File Explorer Memory Leak” issue on Windows 11 is checking for available updates. Running an outdated version of Windows can lead to several issues and may trigger memory leaks on your device. To check for available updates, here’s what you need to do:
Open the Windows Settings app, tap on the “Windows Update” option placed on the top-right corner.
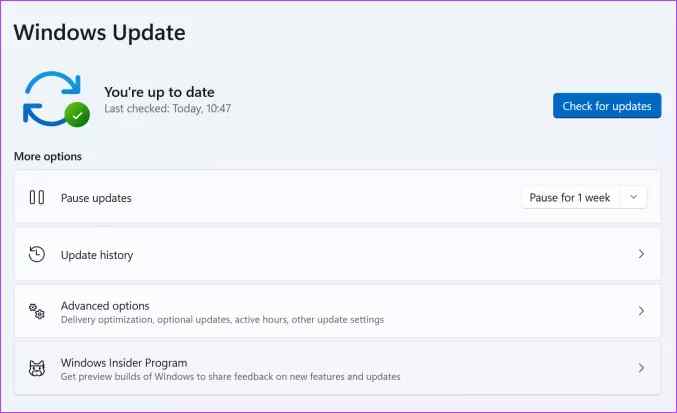
Hit the “Check for Updates” button to see if any latest update is available for your device. If an update is available, upgrade your device right away.
Conclusion
And it’s a wrap! Here were a few simple DIY workarounds that you can use for fixing the memory leak issues on Windows 11. Memory Leak is a critical problem that needs to be immediately addressed and solved. You can use any of the above-mentioned methods for fixing memory leaks in Windows 11. For any other queries or assistance, feel free to use the comments box. Follow us on social media – Facebook, Instagram and YouTube.