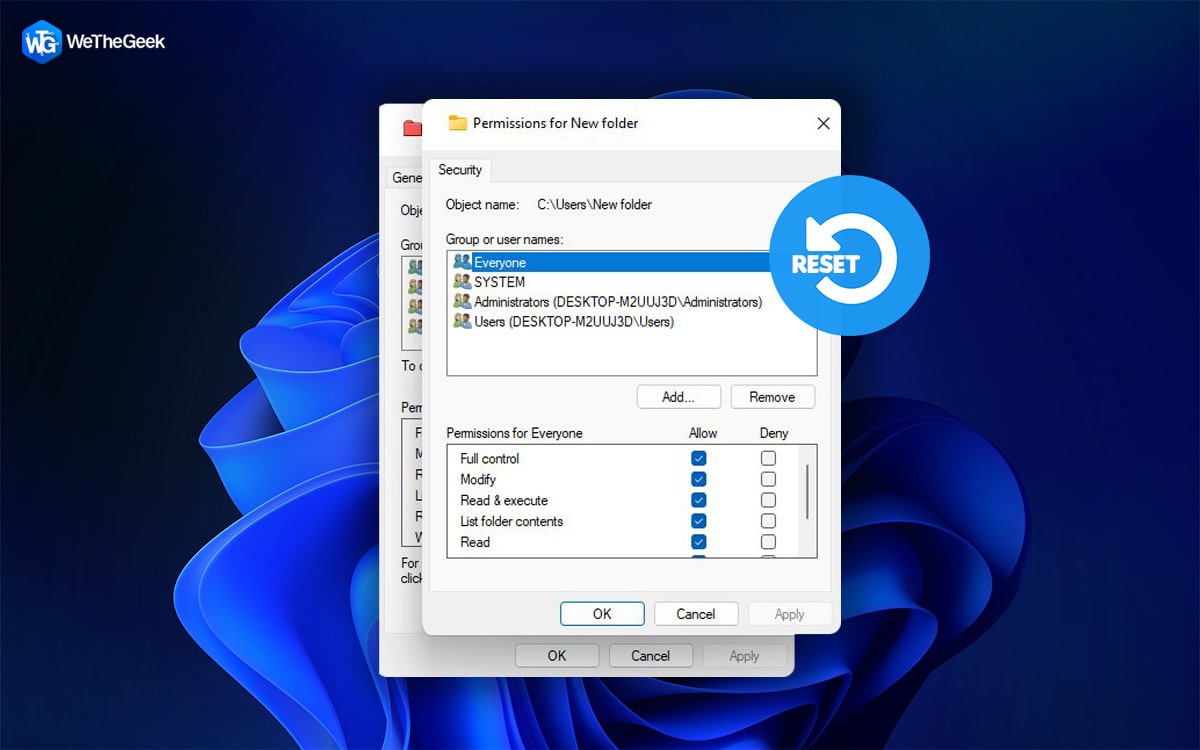
Are you facing a problem with apps or programs not functioning properly on your Windows computer? Resetting Windows Update permissions can provide the answer you’re looking for. You can restore user rights if you’re troubleshooting issues with user profiles. The icacls command, the Secedit command, and the Subinacl tool are three distinct ways to reset all user rights that are covered in this article.
Also Read: How To Remove User Account Control In Windows 11?
Method 1: Activate The icacls Command
You may examine, edit, and reset file system permissions on files and folders with the icacls command. You must first gain ownership of the folders on Windows to use this command to reset the Windows Update permissions. To do this you need to launch Windows elevated Command Prompt and enter a command. Here is what you need to do:
Step 1: Press Win + R to open the RUN box.
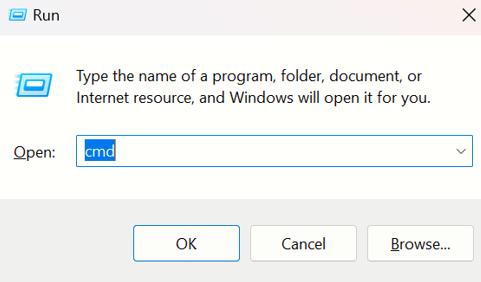
Step 2: Type cmd in the text space and press Ctrl + Shift + Enter to open the command prompt in administrator mode.
Step 3: Copy and paste the command mentioned below into the RUN box:
icacls * /t /q /c /reset
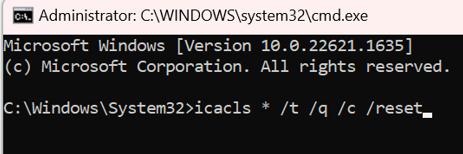
Step 4: To carry out the instruction, press Enter on your keyboard right now.
Note: Every folder, subfolder, and file contained in the current working directory will have their user permissions reset to their default values as a result.
Also Read: Windows 10 Latest Version Causing Users File To Delete Without Permission
Method 2: Activate The Secedit Command
Secedit is a command that Windows offers to set and assess system security. Run the command prompt with admin access, then type the relevant command.
Step 1: To access the RUN box, use Win + R.
Step 2: To open the command prompt in administrator mode, type cmd into the text field and click Ctrl + Shift + Enter.
Step 3: The following command should be copied and pasted into the RUN box:
secedit /configure /cfg %windir%\inf\defltbase.inf /db defltbase.sdb /verbose

Press Enter to carry out the command. Restarting your computer when the process is finished is recommended. By doing this, you can restore the system’s default user permissions.
Also Read: Cannot Add a New User Account on Windows 10/11? Here’s the Fix!
Method 3: Activate The SubInACL Tool
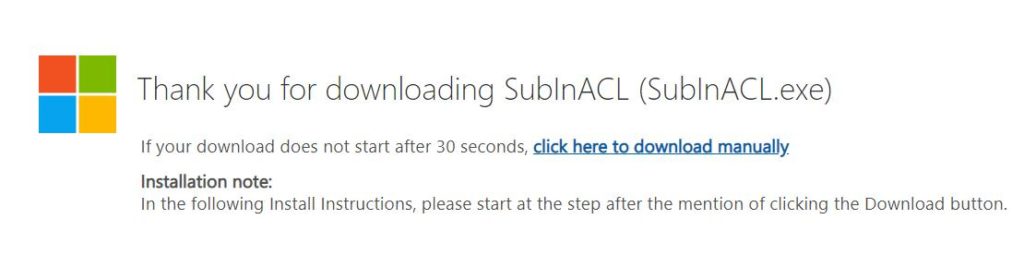
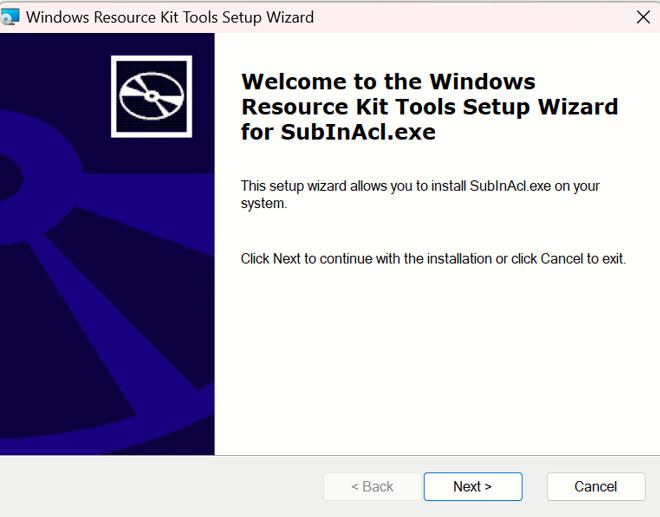
Microsoft’s website offers the Subinacl utility for download. The download begins immediately when you load the website. If not, click the link after a 30-second delay to manually download it. Double-click the installer package after it has been downloaded. The installation wizard will launch as a result. You can utilize the Subinacl tool if you’re not comfortable using the command prompt. Microsoft provides a command-line tool that can be used to reset user permissions. This is how you do it:
Step 1: Download the tool From Microsoft’s Website.
Step 2: Double-click on the file downloaded in Step 1.
Step 3: Follow the onscreen instructions on the installer window to install the SubInACL Tool.
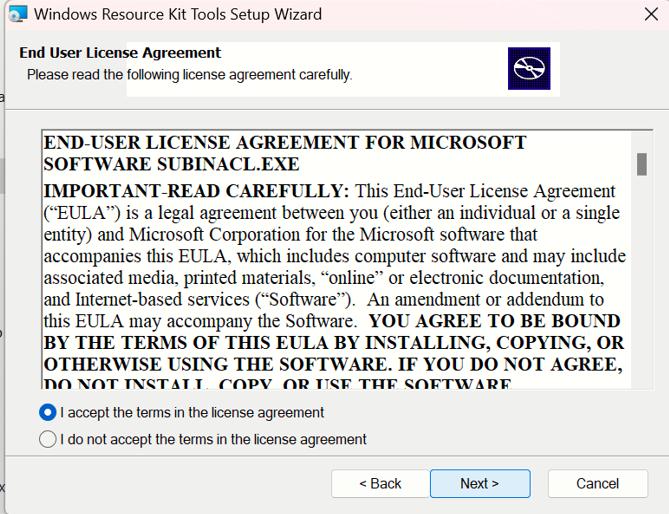
Step 4: Click the Next button and then accept the license agreement.
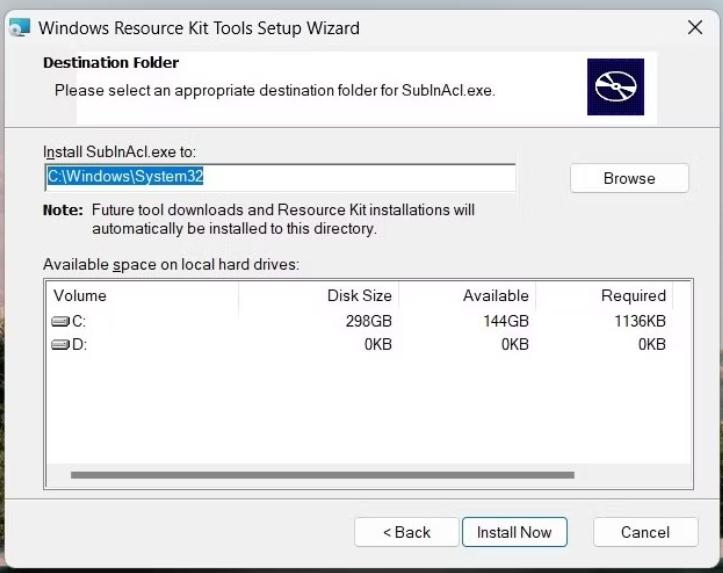
Step 5: You must specify your installation folder. In this case, we prefer you choose the following:
C:\Windows\System32
Step 6: Click on the Install Now button and wait for a few minutes for the installation process to complete.
Step 7: After the installation is done, press Win + S to open the Search box and then type Notepad. Click on the Notepad app under best match.
Step 8: Type the following command in the Notepad application. You can copy it from here and paste it into the application.
subinacl /subkeyreg HKEY_LOCAL_MACHINE /grant=administrators=f
subinacl /subkeyreg HKEY_CURRENT_USER /grant=administrators=f
subinacl /subkeyreg HKEY_CLASSES_ROOT /grant=administrators=f
subinacl /subdirectories %SystemDrive% /grant=administrators=f
subinacl /subkeyreg HKEY_LOCAL_MACHINE /grant=system=f
subinacl /subkeyreg HKEY_CURRENT_USER /grant=system=f
subinacl /subkeyreg HKEY_CLASSES_ROOT /grant=system=f
subinacl /subdirectories %SystemDrive% /grant=system=f
Step 9: Click on the File tab of the Notepad app and choose Save As.
Step 10: Select Desktop from the left pane to ensure that this file saves on your desktop.
Step 11: In the File Name section, type Reset.cmd.
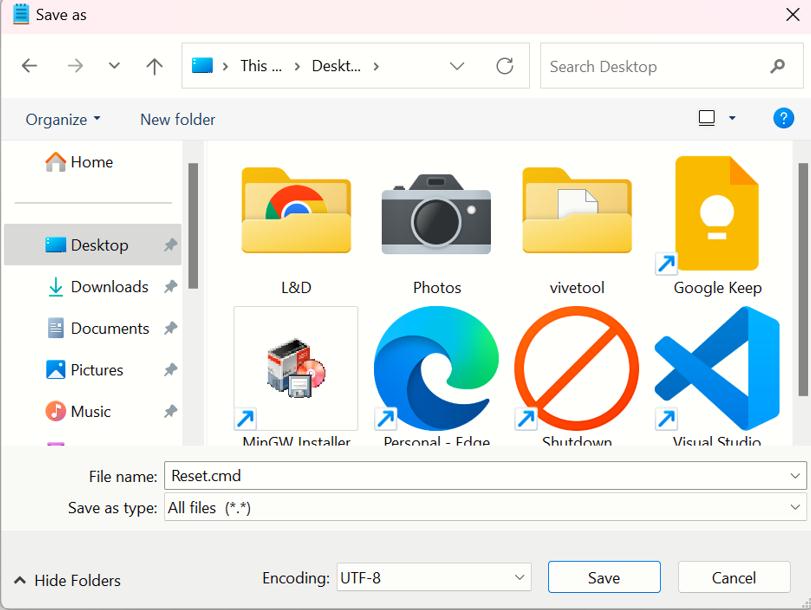
Step 12: In the Save as Type section, choose All Files from the dropdown option.
Step 13: Click on the Save button.
Step 14: Double-click this file to execute it and wait until the process completes.
Close any open program after finishing, and then restart your computer. The default settings for your Windows Update permissions will be restored. You can use any one of these three techniques to clear the Windows user permission settings.
Also Read: How to fix ‘The User Profile Service Failed the Logon
The Final Word On How To Reset All User Permissions To Default In Windows 11?
User permissions are very important for maintaining computer security. You must restore user permissions to their normal settings if you’re having problems with them. This post explains three techniques for resetting all user permissions on Windows. Depending on your preference, you can use the icacls command, Secedit command, or Subinacl tool.
Please let us know in the comments below if you have any questions or recommendations. We would be delighted to provide you with a resolution. We frequently publish advice, tricks, and solutions to common tech-related problems. You can also find us on Facebook, Twitter, YouTube, Instagram, Flipboard, and Pinterest.