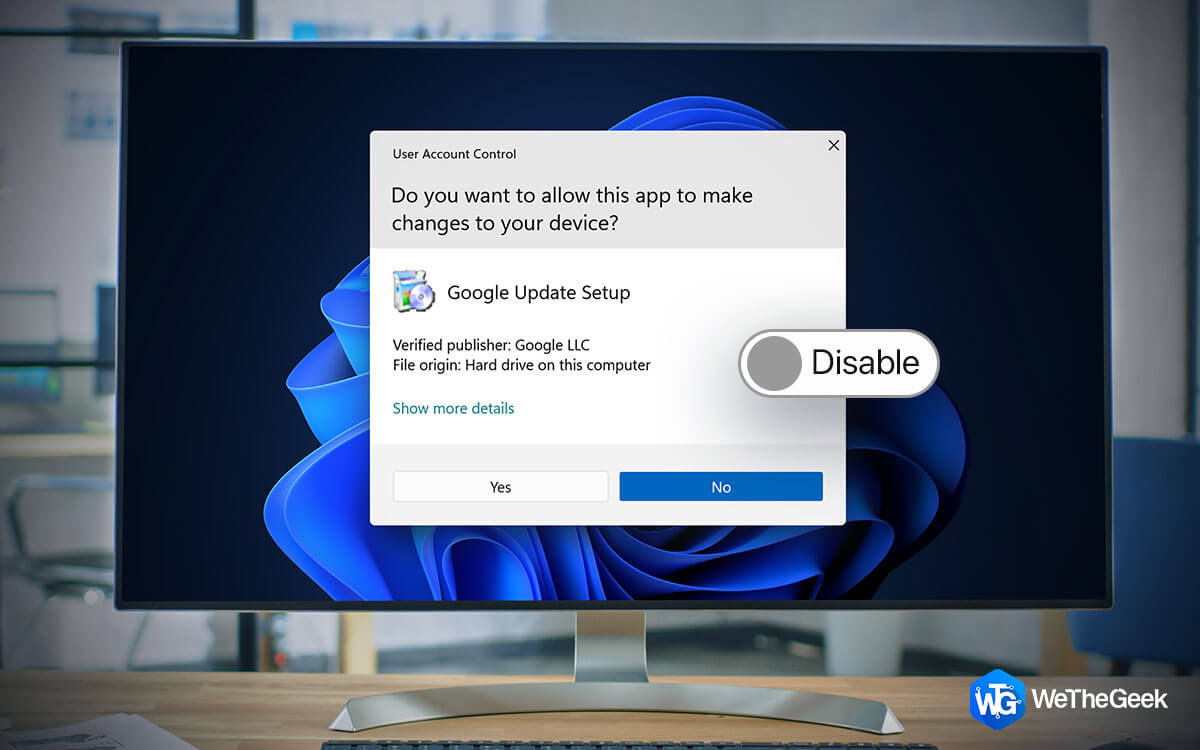
In Windows 11, the User Account Control (UAC) can be turned off in a variety of ways. UAC is a security measure that prompts users to approve modifications to the PC that various apps may attempt to make. A UAC prompt is displayed by default in Windows 11 and when an application tries to start with elevated privileges (as Administrator), it asks for the user’s permission. Some find this feature unnecessary. This post will explain how to turn off Windows 11 User Account Control.
Why Do Most People Consider User Account Control Not Important?
Most of us click on Yes
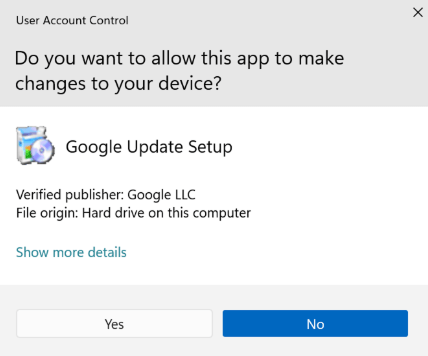
When we access the Windows Registry or Command Prompt in Admin mode, we get the UAC dialog box with Yes and No options. This box also appears when you run other programs as well. However, most of us do not even read the contents of the box and simply click on Yes. Hence, this dialog box consumes time and effort and can be removed.
Most of us use Real-Time Antivirus software
If you are using real-time antivirus software like Systweak antivirus or T9 antivirus then you do not need this feature as your PC is scanned on a real-time basis. This means that malicious files are detected even before they are executed.
Most Malware Disguise Themselves
Most people, even if they read the content on the UAC dialog box, will consider something like “Internet Optimizer” to be a benign application name and click “Confirm” at the UAC prompt. Once the machine has been infected by the malware, it’s too late. There is no way for Windows to identify and point out malware. Given this, it is challenging for anyone to ever profit from UAC.
How To Disable User Account Control In Windows 11?
Either the Settings app or the traditional Control Panel app can be used to disable UAC. You can disable the User Account Control feature in the Windows 11 Registry if the GUI approaches are not your thing. Let’s examine every technique available for disabling User Account Control.
1. Use The Control Panel And Settings To Disable UAC
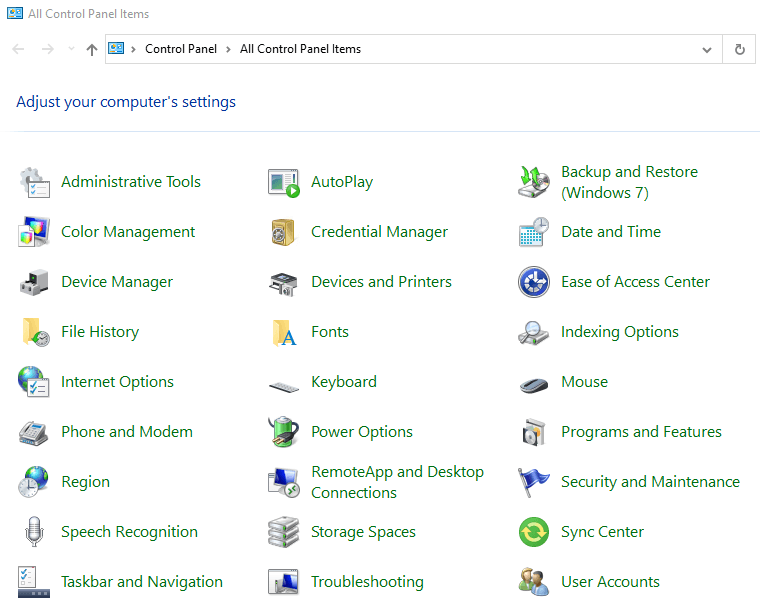
Step 1: Open the RUN box by pressing Windows + R, then type Control and press the Enter key.
Step 2: Click on Security and Maintenance.
Step 3: Click the Change User Account Control settings link on the left panel of the window.
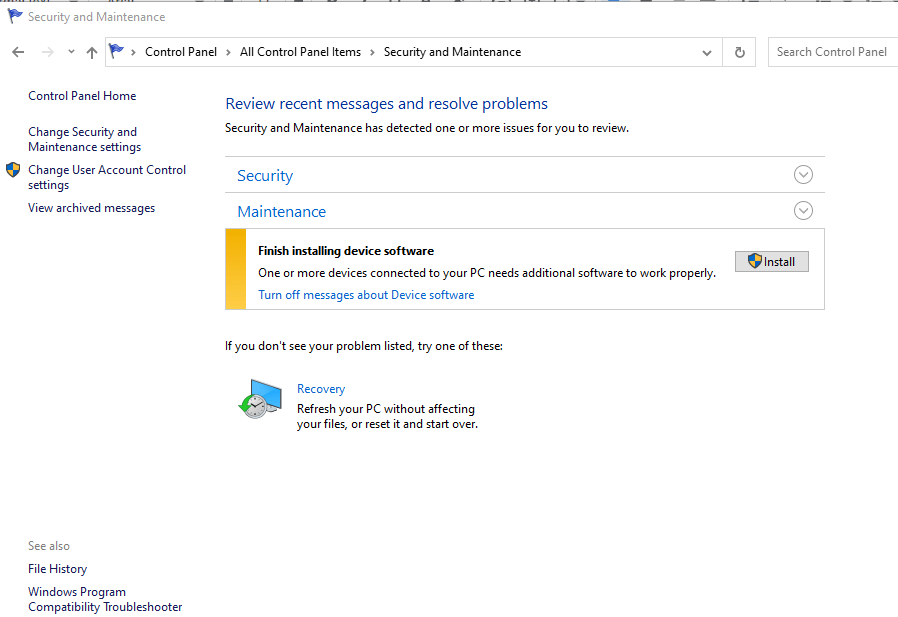
Step 4: Slide the slider all the way to the bottom to permanently disable User Account Control. Alternatively, you can move the slider to the top if you wish to maximize Windows security and prevent unintentional setting changes.
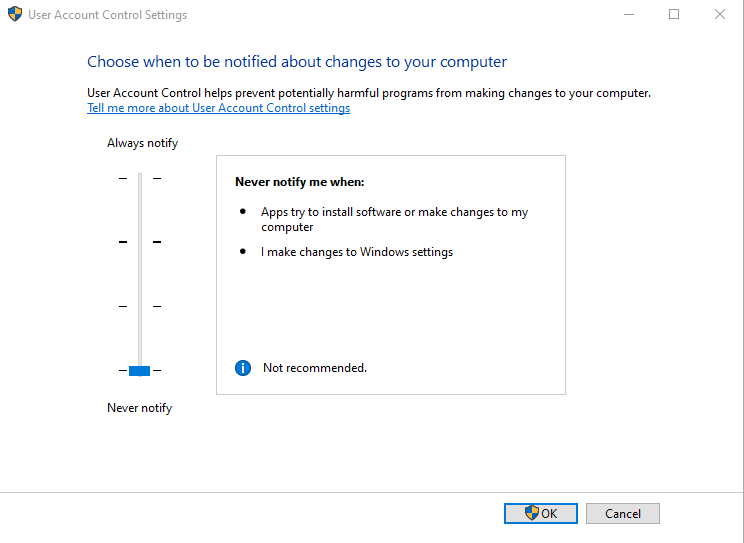
After that, Windows won’t alert you to modifications apps attempt to make to your machine or prompt you for confirmation.
Note: Microsoft does not advise turning off User Account Control.
2. Use The Registry And Settings To Disable UAC
Step 1: In Windows 11, press Win + R and type the Regedit command to launch Registry Editor.
Step 2: Navigate to the following path:
HKEY_LOCAL_MACHINE\SOFTWARE\Microsoft\Windows\CurrentVersion\Policies\System
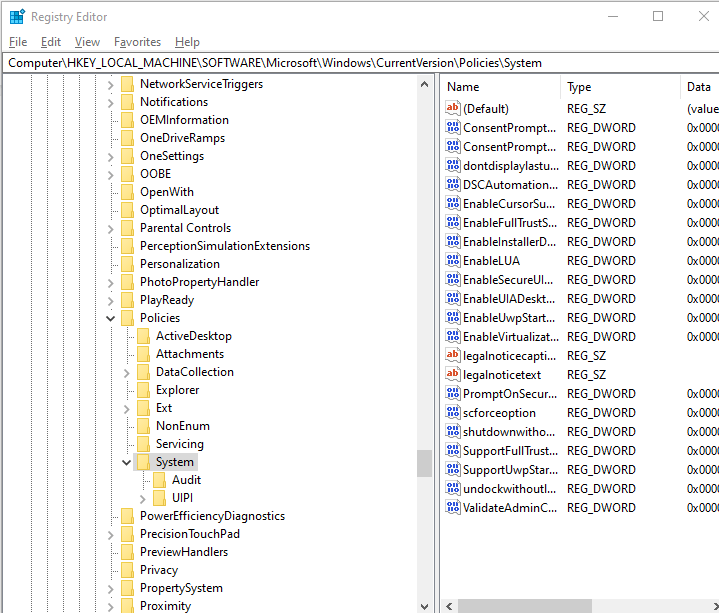
Note: The path can be copied and pasted into Registry Editor’s address bar.
Step 3: Find the EnableLUA value on the right side of the window.
Step 4: Update the value data from 1 to 0, then click OK.

Step 5: It is important to restart your PC for the changes to take effect.
You’re done now. User Account Control will be turned off in Windows.
3. Use The Group Policy Editor To Disable UAC.
Step 1: Press Win + R and type gpedit.msc in the Run box, followed by the Enter key.
Step 2: Visit the Computer Configuration > Windows Settings > Security Settings > Local Policies > Security Options section in the left pane.
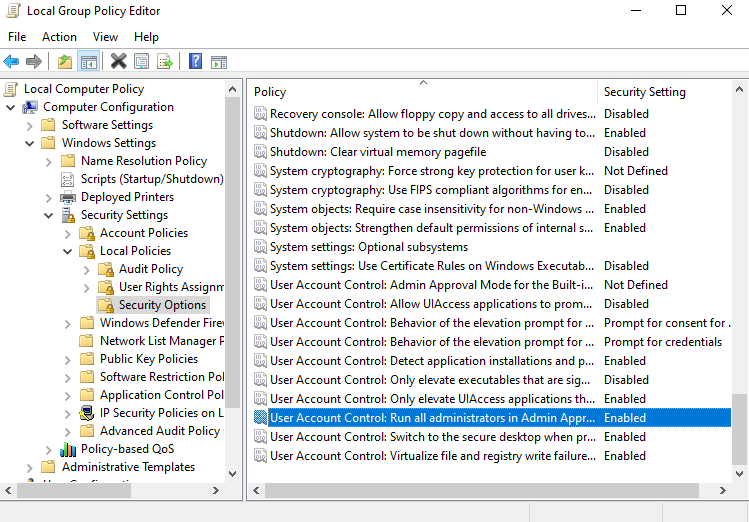
Step 3: Double-click User Account Control on the right: Run the admin approval mode for all administrators.
Step 4: Click on the Disabled button. Click on Apply followed by OK.
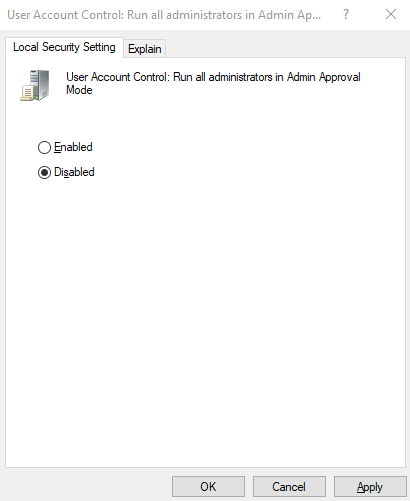
Step 5: The modifications take effect right away.
The Final Word
You now know how to stop Windows 11’s User Account Control prompts. As mentioned earlier, Microsoft recommends not disabling this feature due to security reasons. However, most of us just click on the Yes button when initiating our programs in admin mode and bypass this option. Hence it appears just as an extra click/step to most of us and thus can be disabled for most personal computers.
Please let us know in the comments below if you have any questions or recommendations. We would be delighted to provide you with a resolution. We frequently publish advice, tricks, and solutions to common tech-related problems. You can also find us on Facebook, Twitter, YouTube, Instagram, Flipboard, and Pinterest.