
Used by most people globally, Windows Defender is an in-built security application on Windows operating system. This program scans your PC for threats and removes infected files that can harm the system and damage important files. Regardless of popularity this program has its own drawbacks. For instance, sometimes it detects and deletes genuine files due to which certain software stops working. Lately this has become a common issue. Hence, here we discuss ways to recover genuine files deleted by Windows Defender.
Why Windows Defender deletes genuine files?
Unquestionable, Windows Defender is a very useful security tool. However, like other programs it too has certain loopholes. But the best part about Windows Defender is it does not delete any file. Once a file is identified as malicious by Windows Defender it is quarantined so that user can review them later. This is the time when user needs to decide if the file needs to permanently deleted or should be restored as it is mistakenly detected.
A piece of advice never use target drive after files are deleted as working on the same drive and saving data on it reduces data recovery chances.
Can files deleted by Windows Defender be recovered?
As Windows Defender does not outrightly delete files, you can certainly recover them as needed. Windows Defender just quarantines files for further reviewing, editing & modifying purposes. hence, before permanently deleting files, one can restore them easily.
How To Manually Recover Files Deleted By Windows Defender
To manually recover files deleted by Windows Defender follow the steps below:
Here we are taking Windows 10 as an example to show how to recover files deleted by Windows Defender
Steps To Restore Quarantined File By Windows Defender:
Step 1: Type Windows Security in search box.
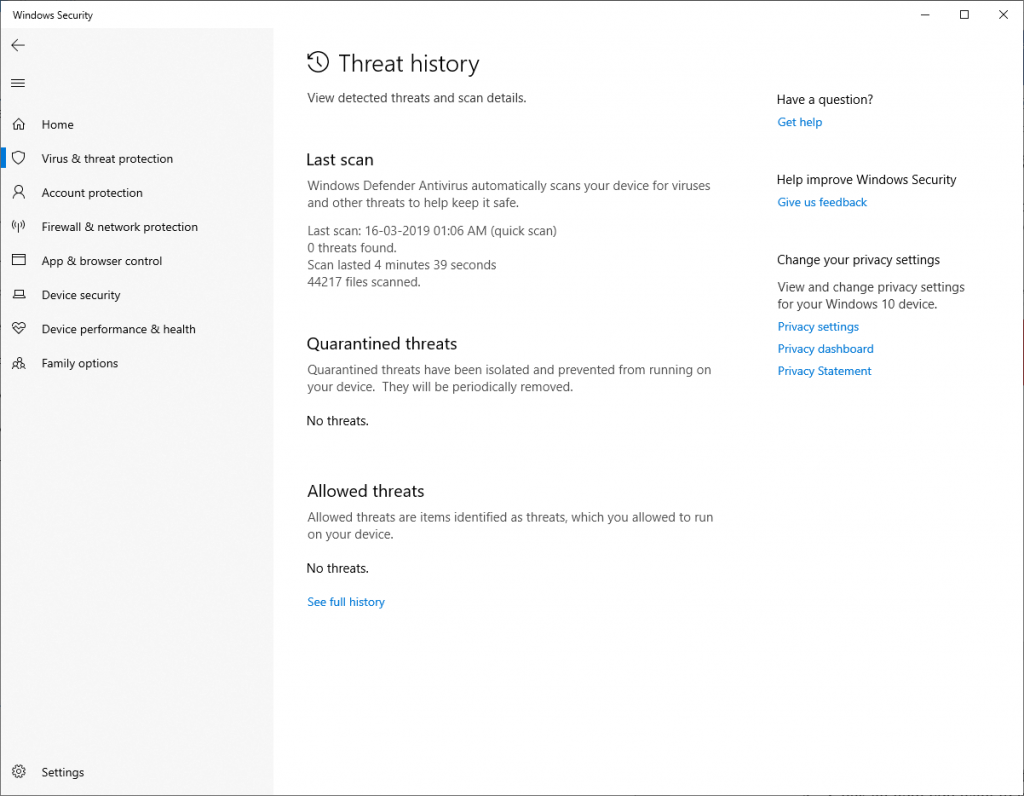
Step 2: Next, click on Virus & threat protection > Threat History.

Step 3: Here, under Quarantined threats, you’ll see number of threats > click See full history.
Step 4: Now, click and select the item you wish to retrieve and click Restore.
Note: This option will not work if your system is corrupted. Also, if you want to permanently delete a threat hit Remove.
Using the above-mentioned steps, you can restore a quarantined file. But if the file is removed you’ll need to take help of a data recovery tool.
How To Recover Files Deleted By Windows Defender?
When Windows Defender mistakenly deletes genuine files and user wants to restore them. In such a case data recovery tools act as a blessing. But for an average user with little technical knowledge using an highly advanced tool to recover deleted files isn’t easy. Therefore, for those who want an easy way to restore file here is Advanced Disk Recovery. A powerful data recovery tool that thoroughly scans your computer’s hard disk drive to identify and list files deleted by Windows Defender and accidentally deleted. What you need to do is to choose the area to be scanned along with drive to retrieve and save data. This drive can be a partition on your PC or any external storage devices. Once selected you need to select the file to restored and leave rest to Advanced Disk Recovery.

To recover files deleted by Windows Defender using Advanced Disk Recovery, follow these steps:
Advanced Disk Recovery performs two types of scans: Quick and Deep.
Quick Scan: uses Master File Table to find deleted files with same filename.
Deep Scan: uses file signatures to search for deleted files and folders.
After running the scan, you can preview deleted files and folders and restore them on location and device of your choice.
Steps To Recover Files Deleted By Windows Defender Using A Recovery Tool
Step 1. Download and install Advanced Disk Recovery on your Windows machine.
Step 2: Launch Advanced Disk Recovery > select the area to be scanned for deleted files and folders > select location where you want to save recovered files. It can be your hard drive or an external storage device.
Note: To get desired results, select the exact file location and hit Start Scan Now.
Step 3: Next, chose from the scan option i.e. Quick Scan or Deep Scan.
If you want to perform a quick scan from Master File Table select Quick Scan. However, if you want to perform a more thorough scan choose Deep Scan. Once the scan option is selected click Scan now.
Step 4: Once the scan is finished, you’ll see list of deleted files. Select the file to preview and restore. Apart from restoring files you customize display of scan results by hitting Filter Options. Once filters are set and you decide to preview or recover the file, select the option accordingly. To preview click Preview and to recover click Recover.
Step 5: Once you decide to restore the files hit Recover, you’ll then need to select the location where you want to save recovered file.
Note: Avoid restoring files on the same drive from where there were deleted. As this reduces chances of data recovery.
Once you hit Recover button, Advanced Disk Recovery will start recovering and saving selected deleted files.
Once done click on Finish to view to scan log.
Using these simple steps, you’ll be able to recover files deleted accidently and by Windows Defender. Advanced Disk Recovery is a nifty tool with advanced scan engine that will help you recover deleted files in a jiffy. This amazing tool can retrieve files deleted using shift + delete. It is a must to use tool.
You can download it today by clicking on Download Now button.
Watch this video to learn how Advanced Disk Recovery works-