
Windows 11 is amazing and there is no doubt about that. But all those changes can be overwhelming for some who would prefer a slow transition from Windows 10 to Windows 11 rather than a sudden jump. There are many differences between Windows 10 & Windows 11 but this post focuses on the right-click context menu change. If you do not like using the all-new context menu of Windows 11, then here are a few ways that can be used to get the old traditional Windows 10 context menu on Windows 11.
| Windows 10: Hi Windows 11, You do have great features and all but I think my right-click context menu is better than yours.
Windows 11: Well you know what Windows 10! Users can get the traditional context menu with just one extra mouse click. Let me show you how: |
How to Get Full Context Menus in Windows 11 – Easy Methods
To restore classic context menus in Windows 11 with one extra mouse click, users have to follow the following steps:
Step 1: Make a right-click on the desktop, folder, or file just as you would do it normally.
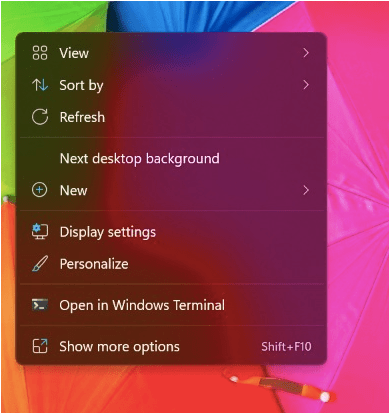
Step 2: The new Windows 11 context menu will appear with newer options. Click on the last option that is labeled as “Show More Options”.
Step 3: The classic right-click context menu will now appear on your screen.
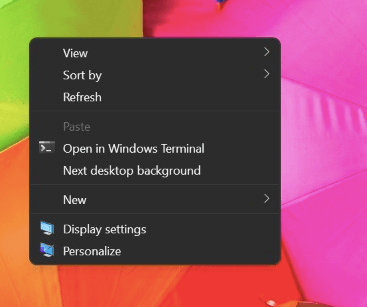
| Windows 11: That’s it! Now you can view the classic context menu on your Windows 11.
Windows 10: That is true!. But the original one-click process has now become a two-step process that is not appreciated by many users. Windows 11: For those who wish to revert to the old classic context menu permanently, there are a few easy steps that you can perform. Once you execute these steps once, you will always get the classic context menu on your Windows 11 at all times by default. |
How to Get Full Context Menus in Windows 11 – Permanent Method.
The above method is an easy method that requires an extra mouse click to view the old context menu style. This seems fine a few times but if you do not want to waste time and effort every time you make a right click then follow the below-mentioned steps to make the permanent change. You will have to
Important Note: The following steps involve tweaking your Windows Registry and it is strongly recommended that you take a backup of your Registry before attempting the below-mentioned changes.
| To take the backup of Windows Registry, open the hierarchical database and click on the Main Entry labeled as Computer. Then click on the File tab and choose Export from the dropdown menu and save the file to a different drive if possible. |
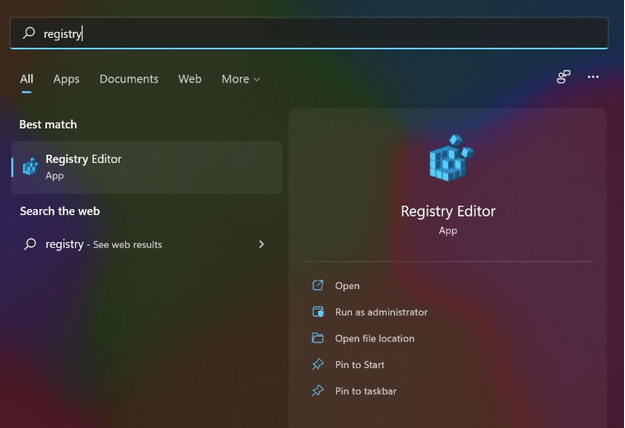
Step 1: Press Windows + S to open the Search box and type Registry Editor and click on Registry Editor App from the search result.
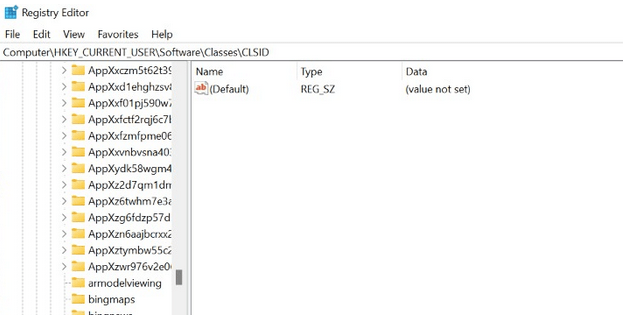
Step 2: Once the Windows Registry window opens, navigate to the following path.
HKEY_CURRENT_USER\Software\Classes\CLSID
Expert Tip: You can copy the above path and paste it into the address bar of your Windows 11 Registry app.
Step 3: With the above key highlighted, make a right-click in the right panel of the Windows Registry window and select New > Key. Paste the following name, including the curly brackets in the text box where you have to name the new key.
{86ca1aa0-34aa-4e8b-a509-50c905bae2a2}

Step 4: A new key will be created under the CLSID key and you have to click on this key in the left panel to highlight it.
Step 5: Now right-click on the right side again and select New > Key and paste the following name.
InprocServer32
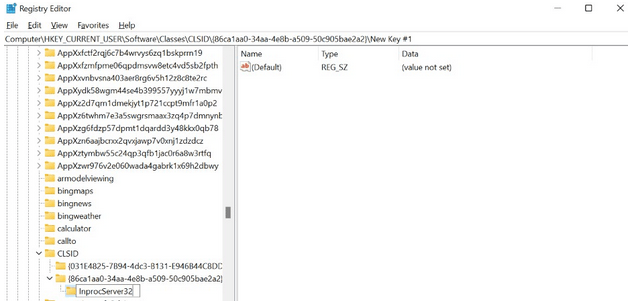
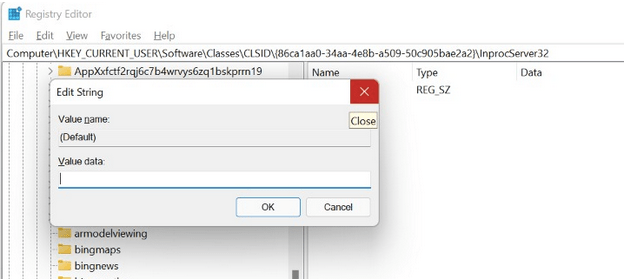
Step 6: A key (InprocServer32) will be created under the key created in Step 3. Click on this key and you will find a default key that is automatically created.
Step 7: Double click this key and then hit the Enter button on your Keyboard. This is done to set the value of this key to 0. Before this step, the default key would have “Value Not Listed” under the data column and after this step, it will be blank.
Step 8: Close the Registry Editor and restart the computer to find the old context menu back again in Windows 11 without having to click on Show More Options.
| Windows 10: That is Amazing! It seems easy to get the classic context menu on Windows 11. But what if someone wanted to revert to the new Windows 11 Context Menu?
Windows 11: Follow the steps above in the permanent method and delete the (InprocServer32) key and the new menu will be restored permanently. |
The Final Word On How To Get Full Context Menus in Windows 11.
The classic context menu is preferred by many due to its simplicity and number of options. The Windows 11 context menu is almost similar but those who are accustomed to the old menu can use any of the steps described above to change it back. If you wish to get used to the new trend and new menu then I suggest you use an extra mouse click to view the old context menu whenever necessary. Else if you don’t like it, then a permanent change can be done using the Windows Registry method.