
So, are you stuck with your Windows 10 Start menu? Are you are looking for some fixes? You might have applied all the conventional solutions like rebooting your system, checking for new OS updates, reinstalling some apps, clearing caches and so on. But unfortunately, nothing worked, right? Maybe it’s time to check out some other methods that can actually help you to come off the vicious loop of Windows 10 Start menu Not Working .
Without the start icon functionality on your Windows, you may get stuck at certain places and it becomes nearly impossible to do anything on your PC.
There can be multiple reasons why your Windows 10 Start menu not working.
Maybe because you have been recently upgraded to Windows 10 or you might have added a new program to your PC or maybe the regular Windows updates are triggering this issue. Therefore, one solution may not fix Windows 10 Start menu.
So, we came up with different fixes to repair Start menu Windows 10, you should definitely give the following methods a shot, because who knows which method works for you & your start button starts working again!
Here’s How To Repair Windows 10 Start Menu Not Working
Let’s look at these multiple methods that can help you to fix Windows 10 Start menu. Just follow the solutions one by one & see what fixes the error for you.
1. Old School Tips
These are some basic old-fashioned tips which can fix your problem. Because you might not know which shortcut saves you from taking a long route.
But if you have tried all of them, don’t waste your time & skip to the next methods.
- Restart Windows Explorer
The first & the foremost thing that strikes everyone’s mind when facing any kind of issue is rebooting the Windows Explorer. Even you can try these couple of clicks which may easily fix your problem.
To do so, follow the given steps:
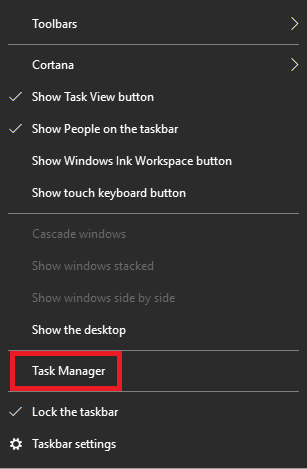
Step 1- Right click on the Taskbar and tap on Task Manager option.
Step 2- Place your cursor on Processes tab and search for ‘Windows Explorer’ option and Right Click to find an option “Restart”.
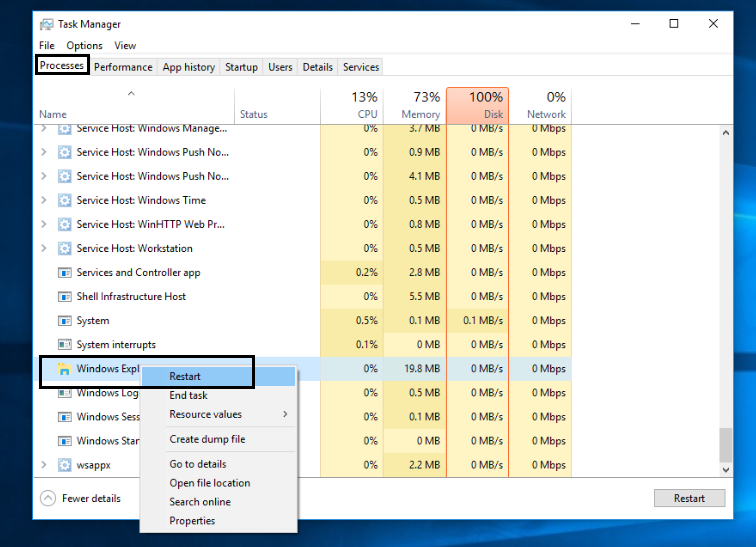
Step 3- Restart your Windows Explorer, and then press ‘Start Button’ to check if it has started working. If failed, go to the next fix.
- Run Windows Update
An unstable or corrupt version of Windows 10 is possibly the subject to fix. So, try running an update to fix Windows 10 Start menu.
To run Windows Update, follow the given steps:
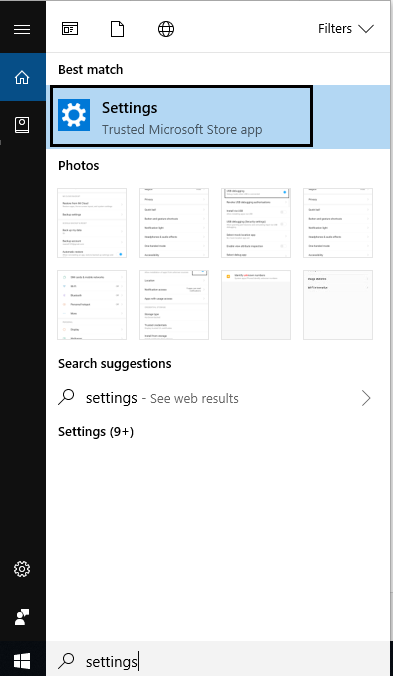
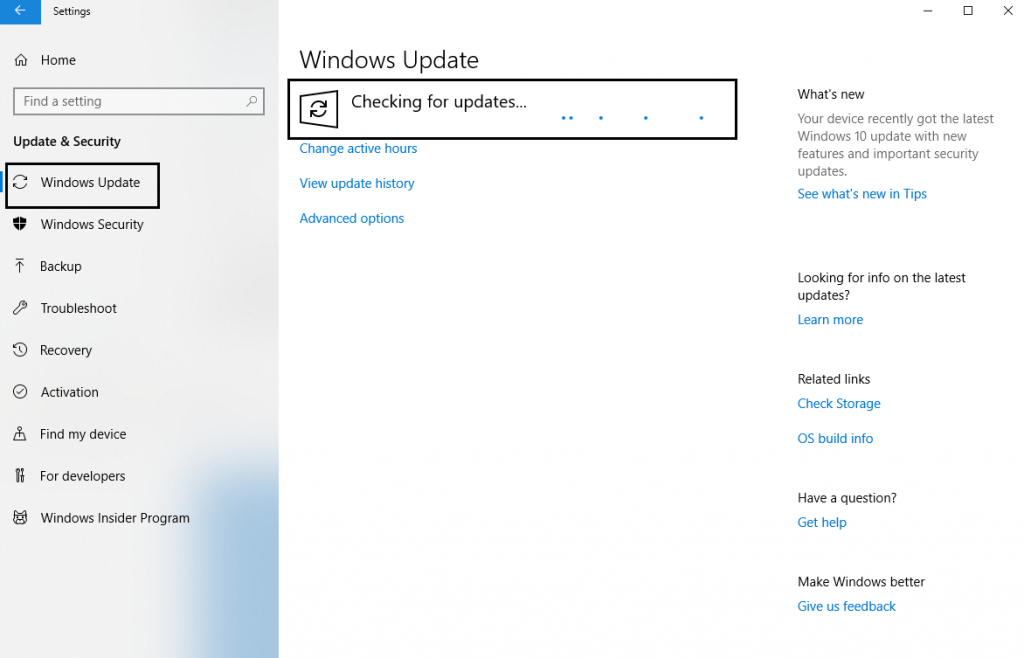
Step 1- Look for Settings option on the Search Bar.
Step 2- Go on Update & Security section.
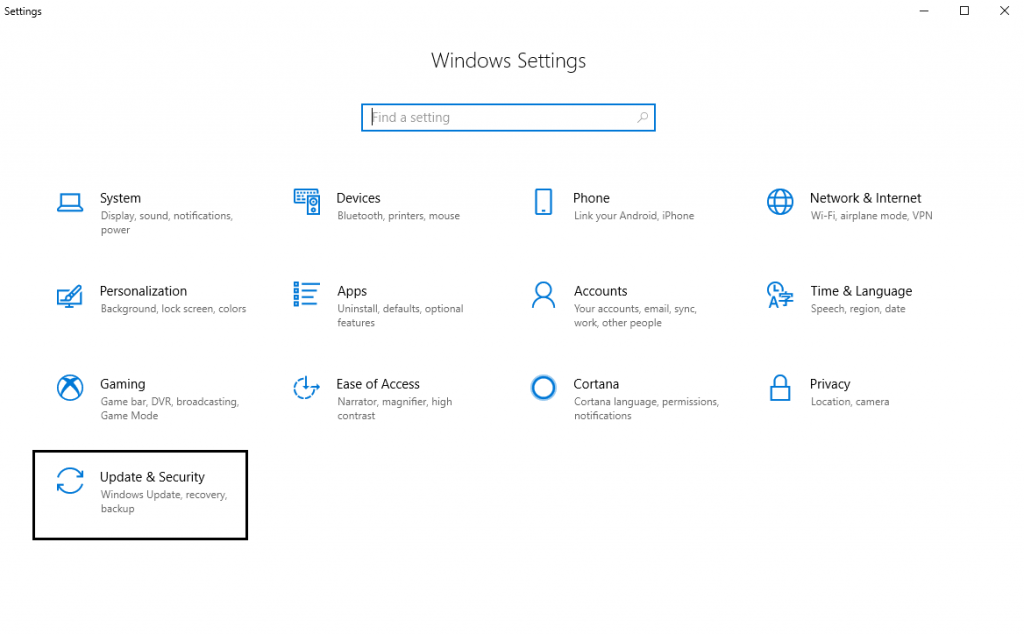
Step 3- Now visit ‘Windows Update’ option & check if any new updates are available to download. If you find any, then update your OS quickly.
- Run Start menu Troubleshooter
If the previous fix didn’t help you, then you might have to take further measures. Microsoft comes with an application known as Start menu troubleshooter to deal with all the generic problems related to Start menu.
It will check for the following issues:
- Detect if the Start menu or Cortana (your virtual assistant) is properly installed or not.
- Is there any problem with Registry key permissions.
- Check for any database corruptions and more stuff similar to this.
Install Start menu Troubleshooter > Launch it > Tap Next & observe if your problem is fixed by it or not.

- Use Command Prompt
To run command prompt, chase the steps below:
Step 1- Press Windows & S keys together on your keyboard & type ‘cmd’.
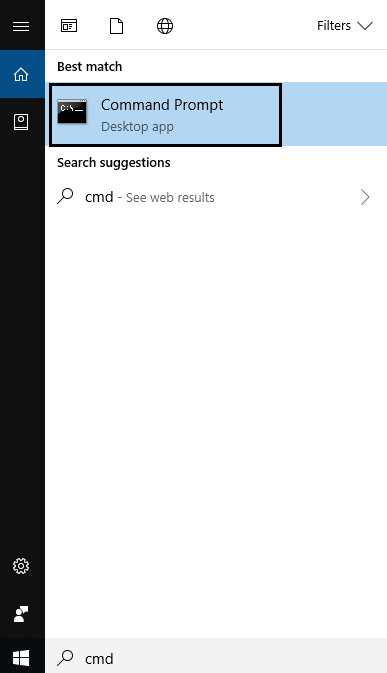
Step 2- Command Prompt option will appear on the top > Tap on it!
Step 3- And type the following commands:
- ‘Powershell’ and press Enter &
- Get-AppXPackage -AllUsers | Foreach {Add-AppxPackage-DisableDevelopmentMode -Register “$($_.InstallLocation)\xml”} and press Enter

Step 4- Wait for the command to run & it should likely help you to get rid of Windows 10 Start menu not working issue.
2. Run Application Identity Service
If those obvious stuff didn’t work for you, then it’s may be the time to dig deeper and try these further measures.
Application Identity Service is configured with another service known as AppLocker that decides which programs are eligible to run & which aren’t. Most of the times, this application doesn’t come into use, as its powerful enough to judge what is right for your system.
However, in certain situations forcing it to run can help in fixing Windows 10 Start menu as well.
To try running Application Identity Service, adhere to further steps:
Step 1- Press Windows Key & R on your keyboard.
Step 2- Run Window will appear, you have to enter ‘services.msc’ into the box > tap OK.
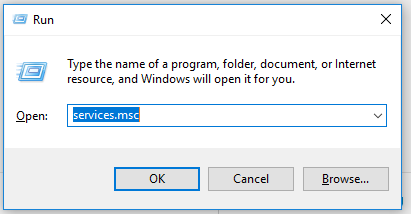
Step 3- Now a Service Window will pop up on the screen. Find ‘Application identity’ option > right-click & press Start.

Step 4- Now reboot your system & you’ll find your Start menu working again.
If you observe your Start menu still misbehaving, then you have to switch to the next method.
 Windows 10 Update Stuck or Frozen - How...Has your Windows update stuck or frozen during an update? It’s so damn annoying when your update has about to...
3. Check & Repair Corrupt Files
The most obvious reason behind your Windows 10 start button not working is may be because of corrupted Windows files. Therefore, try repairing corrupted Windows files by following the process below.
Launch Task Manager
Windows Task Manager provides information related to all the running applications, PC’s performance, network activity, storage/memory info & even you can adjust priorities & shut down Windows from here.
To launch Task Manager, follow the given steps:
Step 1- Just Press Ctrl+Alt+Delete at the same time & click on Task Manager.
Or
You can right-click on the taskbar & select Task Manager.
Step 2- Expand the Task Manager Window.
Step 3- Click on File option & tap on Run New Task.
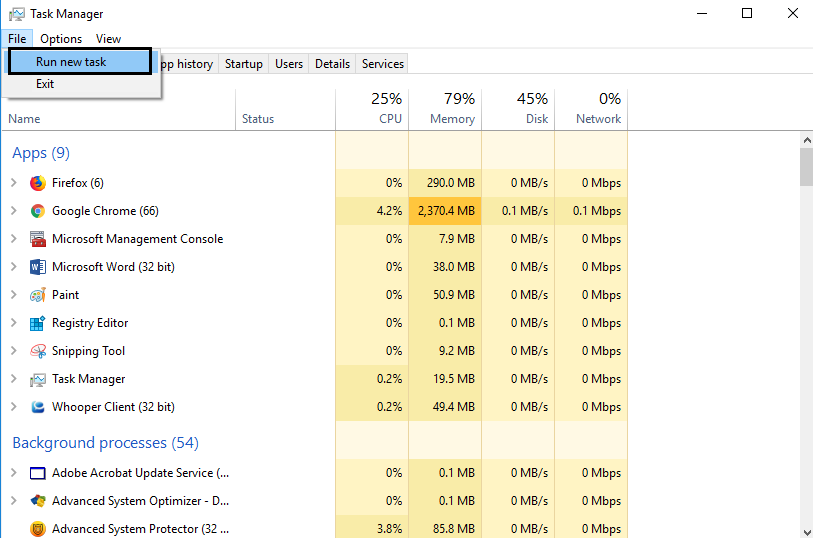
Step 4- A new dialog box will appear, enter ‘Powershell’ & tick the box ‘Create this task with administrative privileges’.
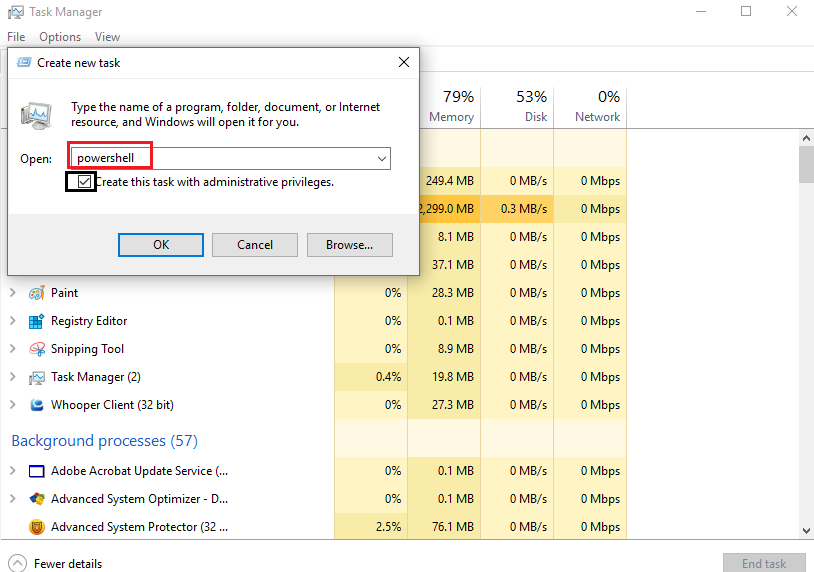
Step 5- Tap OK!
Step 6- Once the ‘Powershell’ Window is launched, type the command “sfc /scannow” and tap enter button on your keyboard. Scanning will begin!
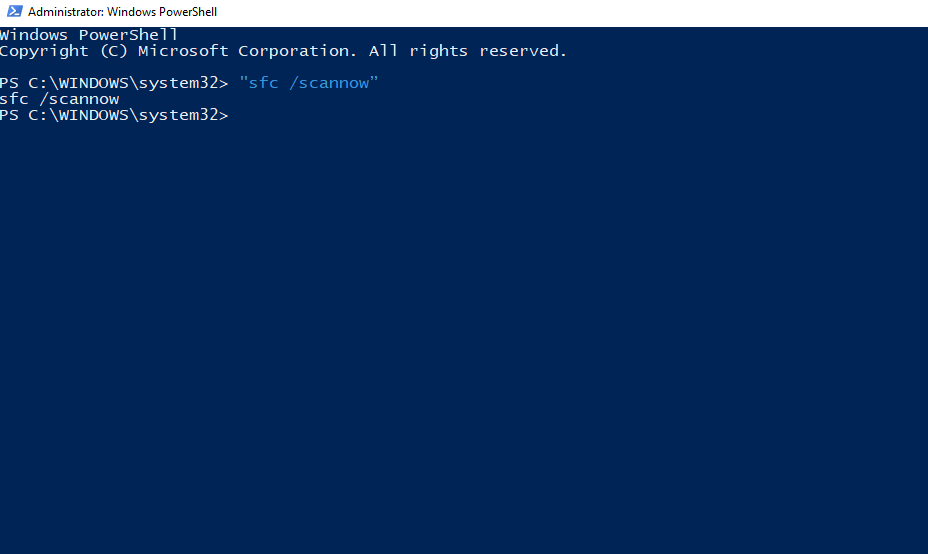
Step 7- Once the scanning process gets completed, you will end up with one of the three results: ‘Windows did not find Integrity Violations’ or
‘Windows Resource Protection found corrupt files & repaired them’ or
‘Windows Resource Protection found corrupt files but was unable to fix them’.
Step 8- If the first or second result pops up that means, there are no corrupt files on your system now. If the last result appears you have to go through one more step by typing the command “DISM /Online /Cleanup-Image /RestoreHealth” in Powershell window & press enter.
The whole process may take some time but will probably repair all the corrupted Windows files & will eventually repair Start menu Windows 10!
Also Read: How to Turn off SmartScreen Filter in Windows 10 or 8?
Note: There are times when the aforementioned process doesn’t turn out to be successful, and you may end up losing your precious data. In that certain cases, you might need to take the assistance of tools that can help you to recover your lost files/folder, photo, videos, music & other documents.
For those situations, one such tool we recommend using is ‘Advanced Disk Recovery’ which holds your hand to recover deleted data in a jiffy.
The application looks simple & intuitive and helps you to easily explore all the features in the tool. Here’s how you can get started with the application:
Step 1- Click on the link below to download & install the application ‘Advanced Disk Recovery’.

Step 2- Launch the software & choose the location from where you want to recover your lost data.
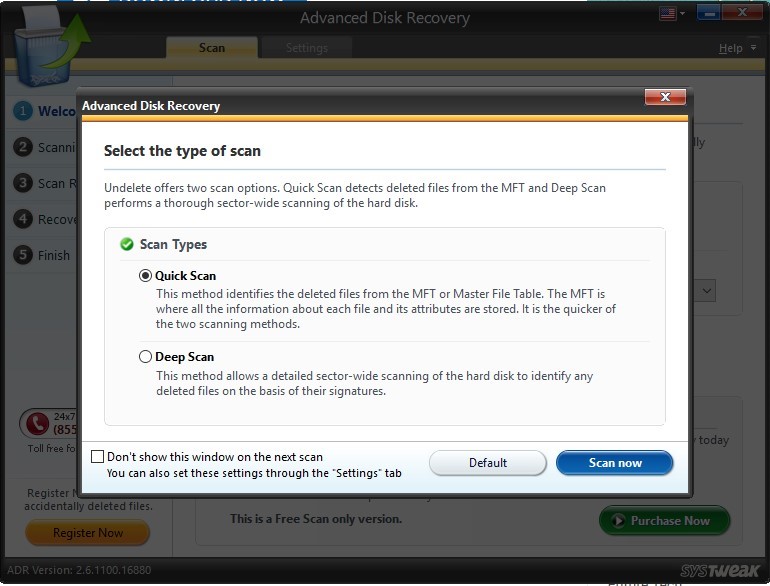
Step 3- Press ‘Start Scan Now’ option.
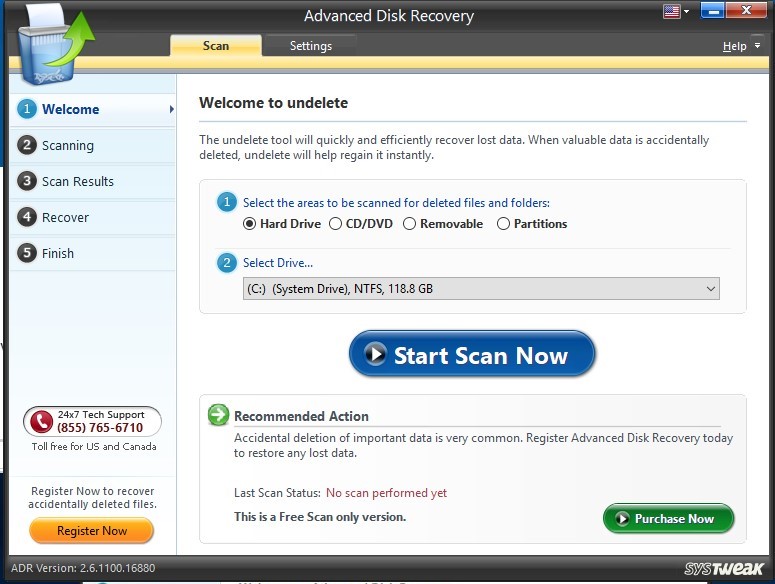
The app features two Scan Types: Quick Scan & Deep Scan, for quick scanning and profound scanning respectively.
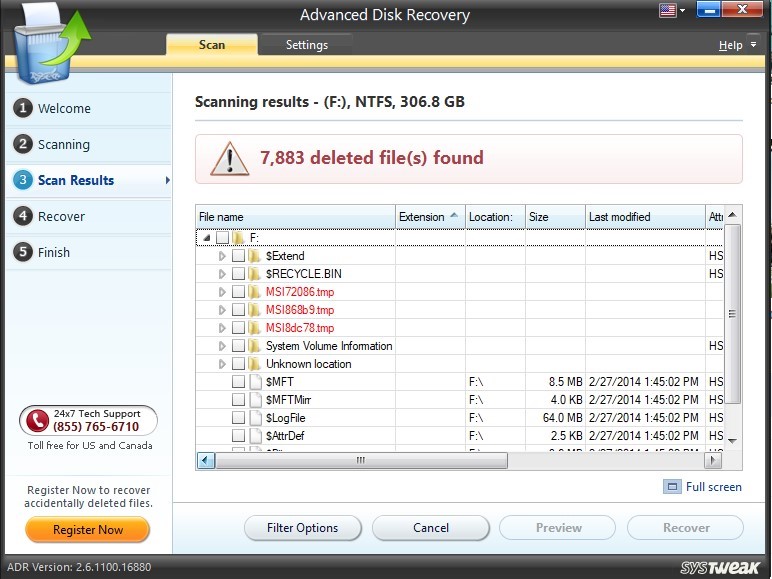
Step 4- Once the scanning process gets completed. A list of all your deleted or lost files appears in red font. Therefore, you can easily choose the ones you want to recover!
Step 5- Select the new location for restoring your files.
Advanced Disk Recovery works well on all type of files; therefore, you can locate & restore your lost files with just few clicks.
4. Create New User Account
This method is also listed on the Microsoft support page, therefore it’s worth trying.
Creating a new user account or another login will make your Start menu work.
Follow the steps to create new login:
Step 1- Launch Task Manager (Ctrl+Alt+Delete > Task Manager)
Step 2- Go to File option at the top-left corner > tap on Run new task.
Step 3- Type ‘Powershell’ & tick the box below that.
Step 4- Hit OK!
Step 5- The Powershell window will pop-up, write the following command – net user _____ (your new username) _____ (your new password) /add
(Refer the example below, JoeBloggs2- New Username & Password123- New Password)
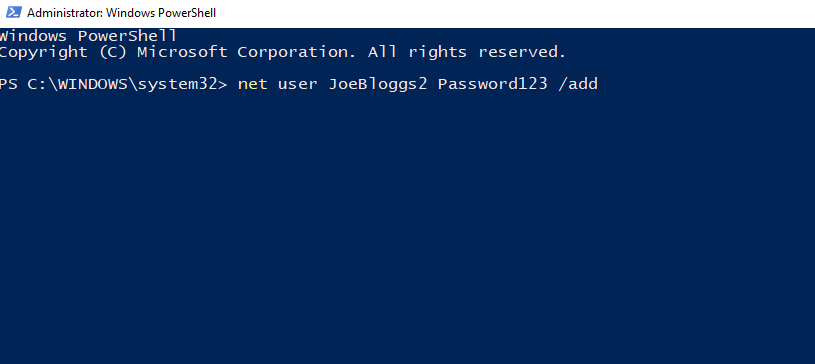
Step 6- Press Enter!
Step 7- Now reboot your PC and log in with your new credentials.
Now check your Start menu, it should have started working now.
Note: If you want you can change your new user account to a Microsoft account as well & transfer all your files & settings as per your own preference.
5. Tweak with Registry
If creating the new user account didn’t do the trick, this will. Before modifying your registry, make sure to backup first! Once you have backed up everything.
Step 1- Launch the registry editor on your PC by hitting Windows Key & R simultaneously.
Step 2- A box will pop up, enter ‘regedit’ into the box and press OK.

Step 3- Registry Editor Window will appear on the screen. Now navigate to the key
‘Computer\HKEY_LOCAL_MACHINE\SYSTEM\CurrentControlSet\Services\WpnUserService’
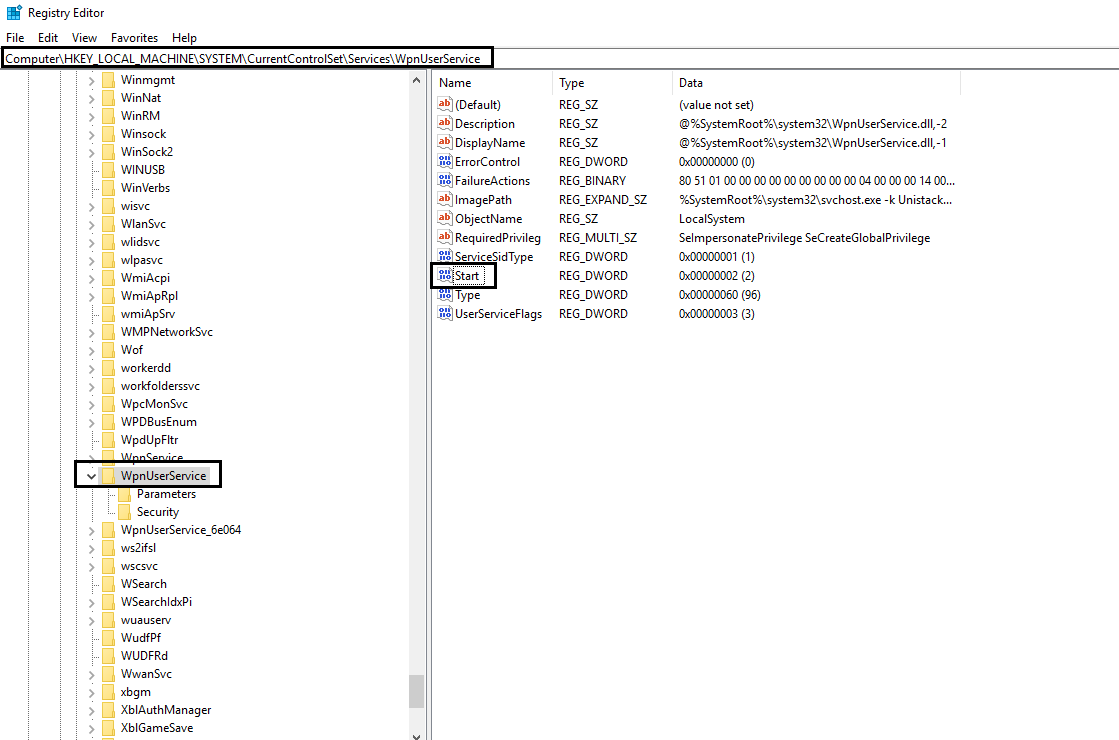
When you click on it, a screen will appear in the right-hand pane > Double-click on ‘Start’ and alter the value data to 4 and hit ‘OK’.
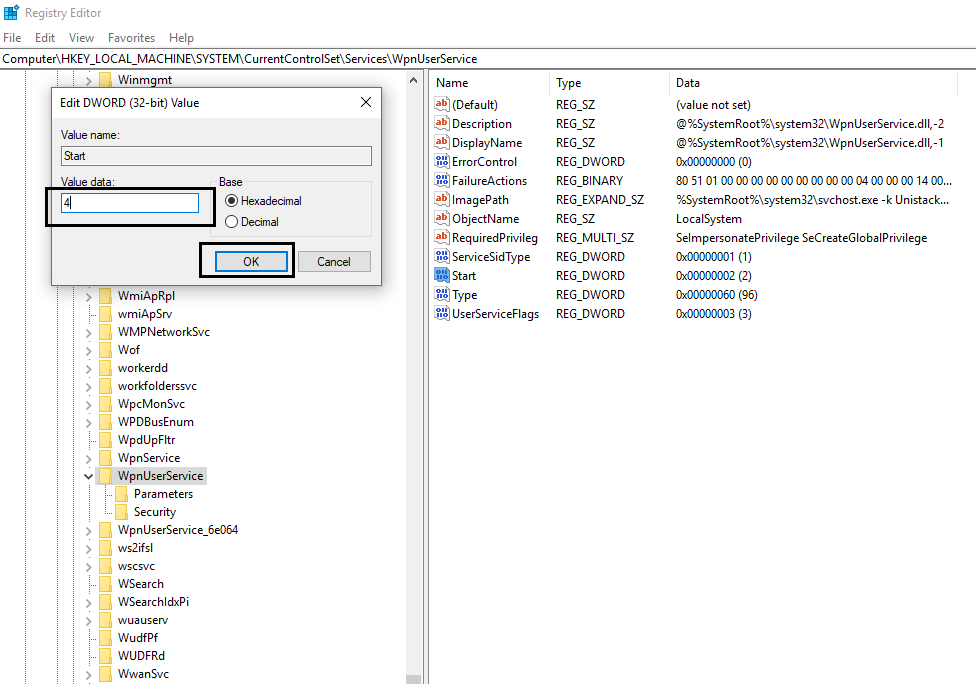
Step 4- Now reboot your system, to check the desired results.
This is possibly the best-known way to repair Start menu Windows 10.
Wrap Up: Fixed Windows 10 Start menu
If you have tried all of the above-mentioned solutions, and still struggling with your Start menu, then there’s another way out.
Reinstall all the Windows applications & perform refresh on your Windows 10!!!!!!
And if there’s any other solution you have discovered to fix Windows 10 Start menu or Windows 10 Start menu Not Working then do share with us in the comment section below!