
sluggish performance, unexpected crashes, long loading times among various others. In this post, we are going to discuss vulscan.exe, a file that has been troubling many users with high CPU usage.
Here we’ll understand what is Vulscan.exe and how you can fix the high CPU usage issues arising out of this file.
A Little About Vulscan Application
Vulscan application is a software component of LANDesk Management suite or Ivanti and stands for Vulnerability Scanner. It scans internal and external networks and alerts users when it perceives a vulnerability. It can be found inside the folder where you have installed LANDESK Management Suite.
While the Vulscan.exe is a genuine file, some users have reported issues and in this post, we’ll tell you the various steps you can undertake to resolve the issue.
How To Find If vulscan.exe Is Harmful or Not?
Since the file belongs to LANDESK, you should either find the name of Ivanti or LANDESK in the Digital Signature section. Here are the steps to check this: .
Step 1 – Press Ctrl + Shift + Esc to open the Task Manager.
Step 2 – Locate vulscan.exe, right-click on it, and select Properties.
Step 3 – Click on the Digital Signatures tab and check what is written under the Name of signer.
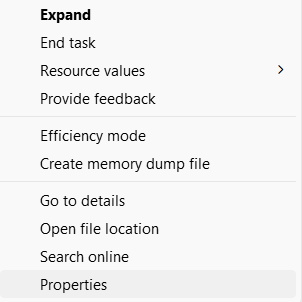
Step 4 – If you find Unable to verify, it means it is a threat. If not it is a genuine file/ process.

Best Ways To Fix vulscan.exe?
Solution No. 1 – Reinstall LANDESK
Step 1 – In the Windows search bar, type Control and click on Open from the right-hand side. This will open the Control Panel.
Step 2 – When the Control Panel opens, click on Programs and Features.
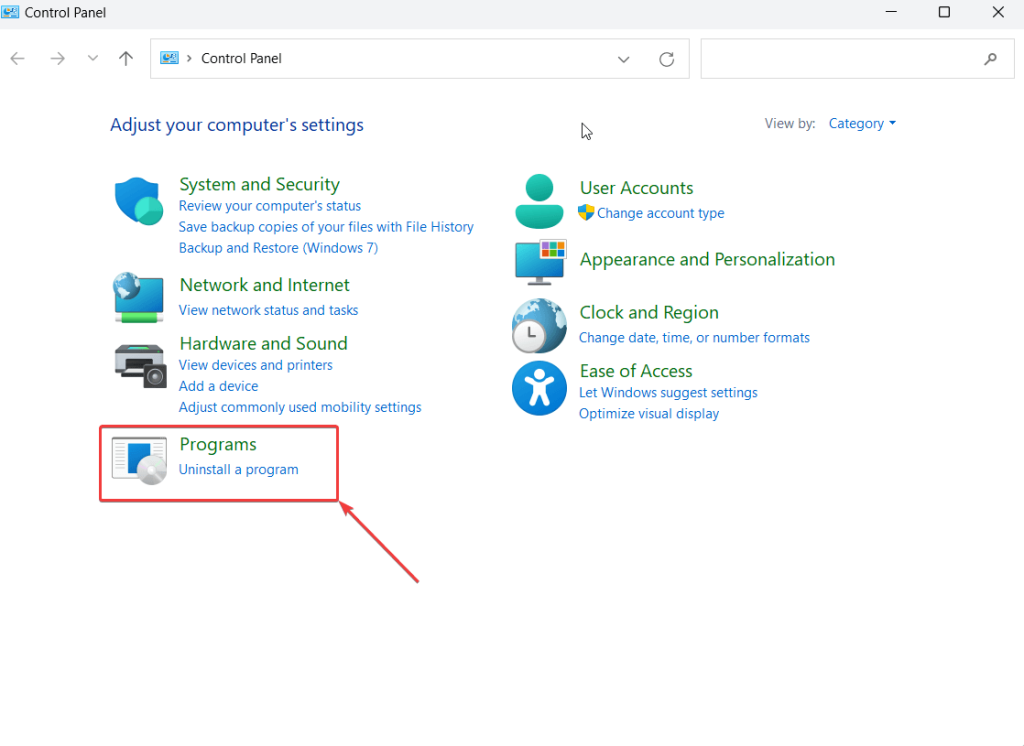
Step 3 – Select LANDESK and click on Uninstall from the top.

Step 4 – Restart your computer.
Step 5 – Visit the official website and download the program, install it on your PC, and check if the issue is resolved or not.
Solution No. 2 – Check for System Issues
You can check your system for common issues. We do understand that this is a task that can’t be done on a regular basis and no matter how hard you try, there might be some issues that will be left unchecked. Here you can use a tool like Advanced System Optimizer which is regarded as one of the best PC cleaners and optimizers.
You can check out our review of this tool where we have talked in detail about all its features, pricing, and various other aspects. To deal with Vulscan.exe, you can use its Smart PC Care feature. It conducts a comprehensive set of scans and checks your PC for various kinds of issues. It also lets you get rid of them with a single click in a matter of minutes Here’s how –
Step 1 – Download, install and run Advanced System Optimizer.

Step 2 – From the left-hand pane, click on Smart PC Care
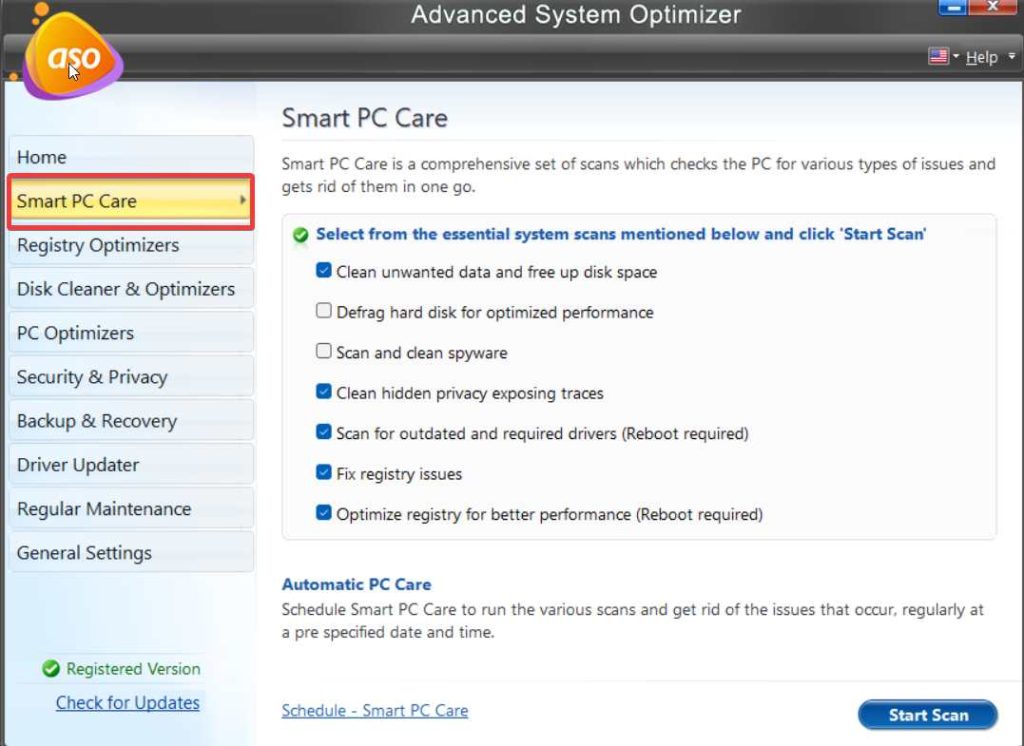
Step 3 – From the right-hand side, select the systems scans that you wish to perform.
Step 4 – Click on the Start Scan button from the bottom right-hand corner of the screen.
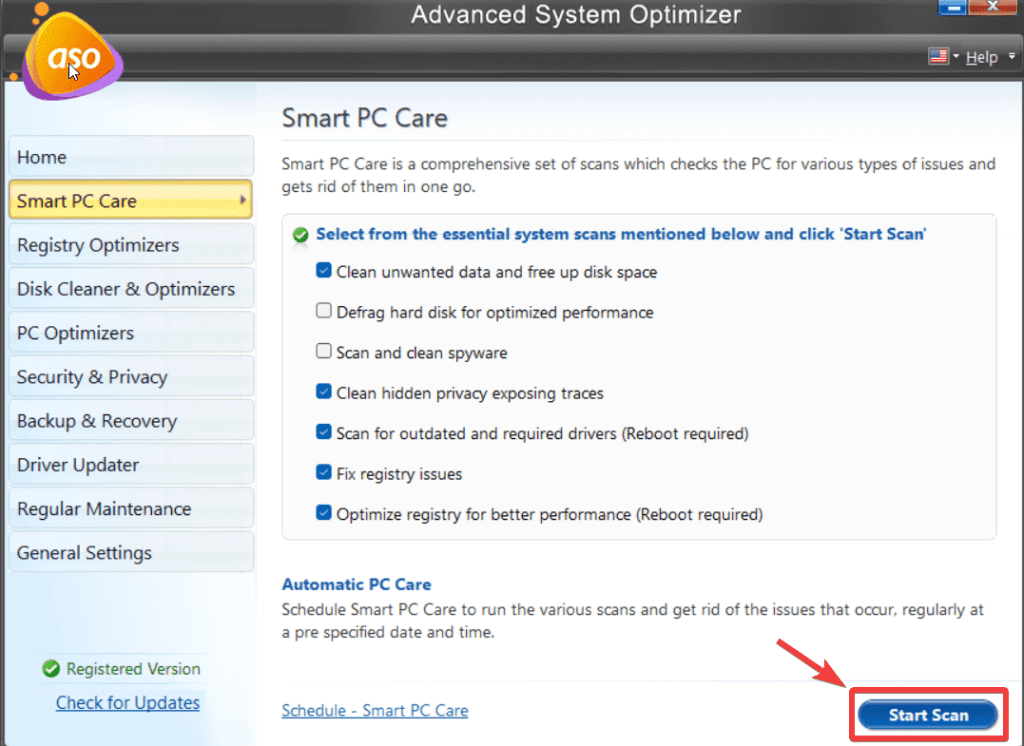
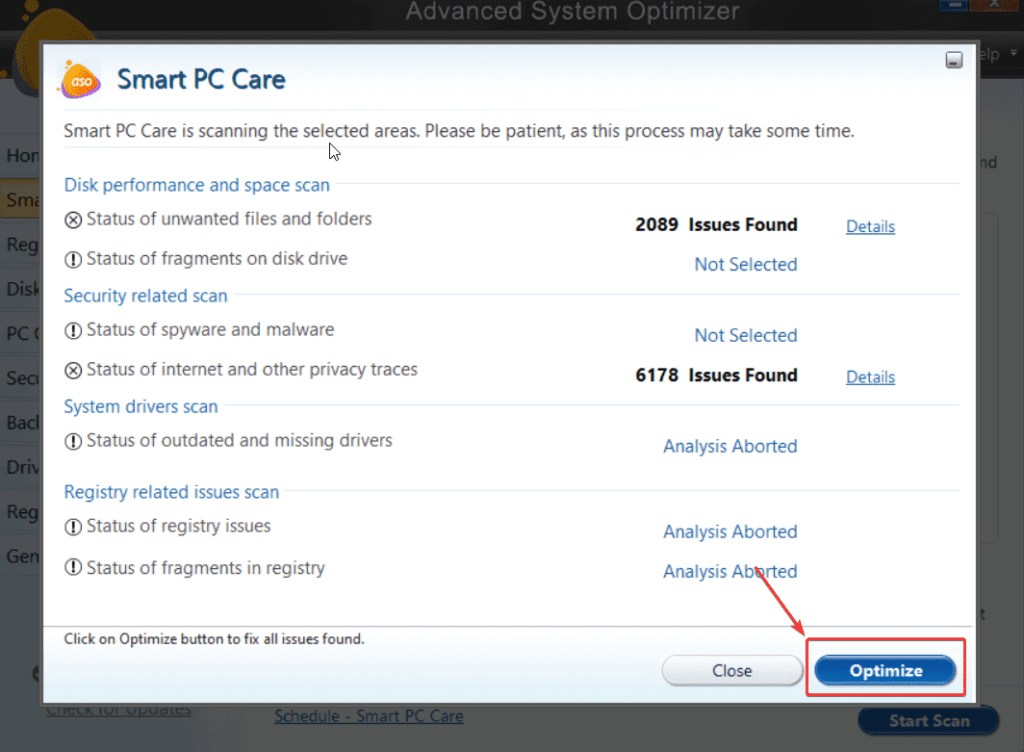
Step 5 – Wait for the scan to complete and click on Optimize.
Additionally, you can also check your computer for Malware.
Solution No. 3 – Perform a System Restore
If Vulscan.exe high CPU usage issue has occurred recently, you can revert to a pointwhen everything on your PC was working well. For this you can use a System Restore point (provided you have already created one. Here we have discussed how you can create a system restore point
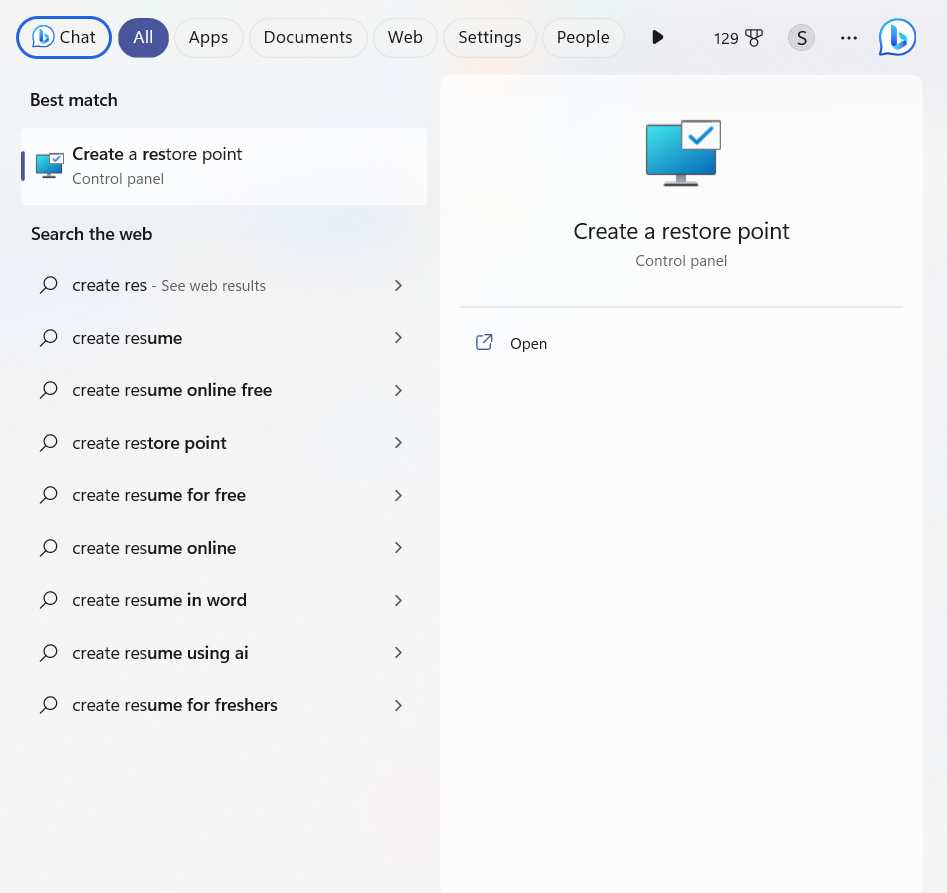
Step 1 – In the Windows search bar, type Create a restore point and click on Open.
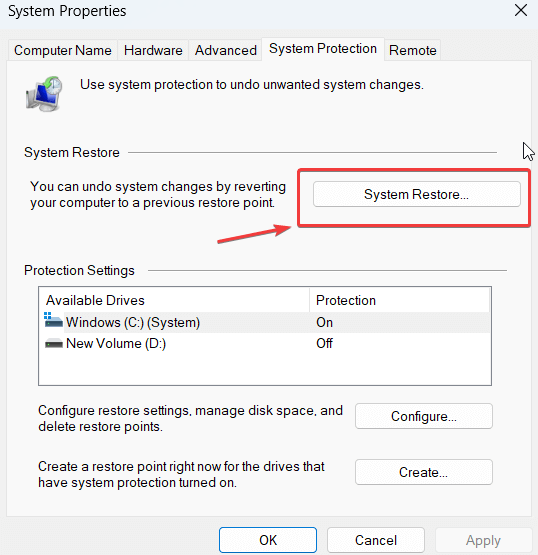
Step 2 – Under System Restore, click on the button of the same name and click on Next
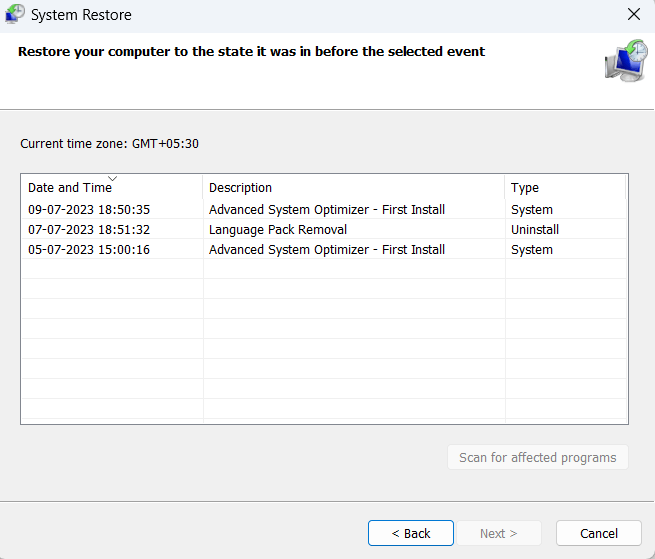
Step 3 – Select a restore point and again click on Next. Follow on-screen instructions.
Step 4 – Click on Finish
Wrapping Up | Stop Vulscan from Hogging Your CPU Resources
It’s always a prudent measure to fix high CPU usage issues even if they are caused by legit files and processes and Vulscan.exe is one of them. In such situations, a tool like Advanced System Optimizer can be of great help. We hope you found this post helpful. If you did do let us know in the comments section below.
You can also reach out to us on Facebook, Pinterest, YouTube, and Twitter.