
Trying to get on with your usual game time on the computer, but it’s interrupted with an error message on the screen stating, ” Unable to initialize DirectX 9 device.” Wondering why? Some people are not even familiar with the term, and they start thinking that their device is broken. Well, that can be true, and it surely needs a fix which helps you in the smooth functioning. In this post, we will talk about the DirectX error in Windows 11, and how to fix it in different ways. The foremost can be fixed with a reboot, or it can be a severe issue which is caused by a faulty driver.
What is DirectX 9, And Why Do I need it?
DirectX is a Microsoft technology which is used to display the application using rich in color multimedia on your screen. It helps in playing the 3D games, videos with the excellent sound you experience with the complete setup. The gamers using Windows 11 to play games, usually get this DirectX install error. It occurs while you are trying to initialize the game, and as it begins to show the first window, the error message is displayed.
How To Fix Unable To Initialize Directx 9 Device Error?
There are several errors which can interrupt your gameplay or the video you are trying to run on your computer. If the error is explicitly saying that Unable to initialize DirectX 9 device, it has to be fixed, the first attempt should be to reboot the device and then check once again as it could be a temporary thing. But if the DirectX error on Windows 11 keeps showing persistently, you will be needed to fix it. We are going to tell you all the possible ways to fix this in this section.
Method 1: Using Device Manager-
As for the DirectX install error, Windows needs to check for the device driver update manually. One will be required to use Device Manager, an inbuilt Windows tool used to view and control and operate the hardware attached to the operating system. Device drivers are the integral parts of the software as they help any equipment communicate with the operating system. If they become outdated, it can result in such error messages and cause disruptions in the performance of the system.
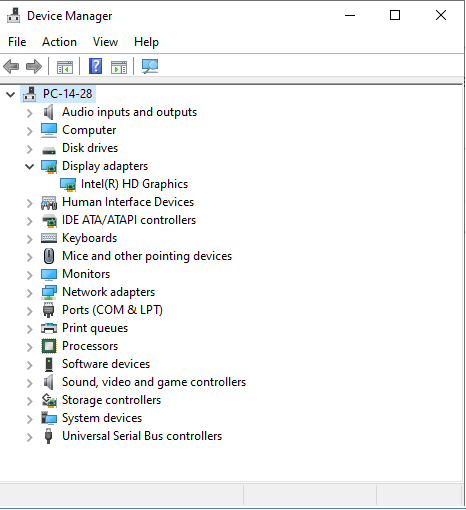
Step 1: Open Start Menu, type Device Manager on the search bar. Open Device Manager from the search results.
Step 2: In this newly opened Device Manager tab, go to Display Adapters. Click on it to see the graphics drivers.
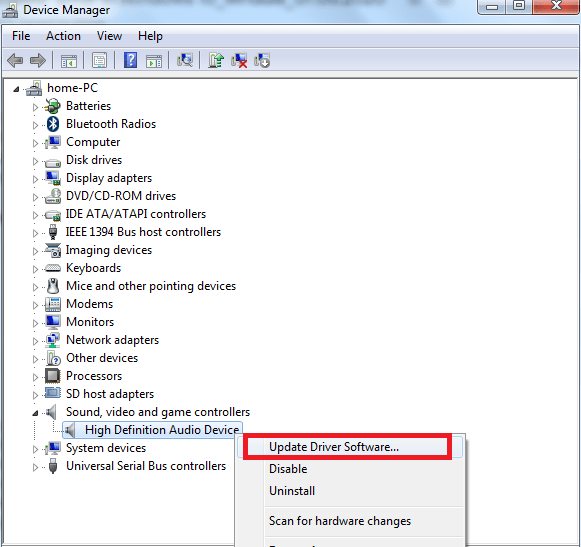
Step 3: Now select the graphics driver and then, right-click on it. This shows you multiple options – Update driver, Disable Driver, Uninstall driver, Scan for hardware changes. Click on Update driver.
Step 4: This method will take a few minutes, and the driver will be updated. Check for the DirectX install error now and if it still shows try the next steps.
Instead of clicking on Update Driver, click on Uninstall driver, now reboot Windows. Due to the missing driver, the system will look for it and install the relevant device driver on the computer.
If not, try the next method.
Also Read: PUBG crashes and problems with frames on NVIDIA card.
Method 2: Using Automatic Driver Updater- Smart Driver Care
Whenever there is a problem with the hardware not working properly with Windows, one must check for the device driver. The outdated drivers cause the hindrance and can trouble your smooth-running application. Here, we recommend you to use the all in one care for your device drivers in the form of Smart Driver Care. It is a tool which will automatically install the latest updates for all the drivers present on your computer. In this case of the error message- Unable to initialize DirectX 9 device appearing due to the failed driver.
So, in this secti0on, we will learn how to update the driver for the DirectX 9 device using a driver updater.

Smart driver Care is the ultimate driver updater tool as it will run automatic updates for your system. This will fix all the missing, outdated and incomplete driver updates for your computer. This helps in running the devices smoothly, and you will not be susceptible to errors. In the case of gamers, it can be frustrating and therefore, it is recommended that you get this reliable tool to keep the health of your graphic drivers in check.
Steps below will show you how Smart Driver Care works for your computer.
Step 1: Get Smart Driver Care for your Windows 11 with the download button below.

Step 2: Run the setup file and give the required permissions to the tool to make changes to the system. Once it’s installed completely, the Smart Driver Care application will launch.
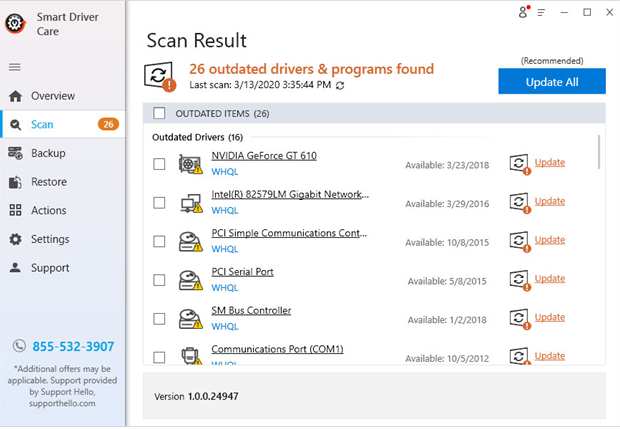
Step 3: The initial system scan runs for the complete analysis of the system. This forms a report in the list of all the device drivers which need to be fixed. You can check the graphics cards driver from it and click on the Update button.
The driver updater is capable of more and brings you a one-click solution for all with the Update All button. Here, you need to select all the enlisted device drivers and click on the Update All button.
This not only saves time but also helps to fix other underlying issues on the system caused by the outdated device drivers.
Step 4: Smart Driver Care will take a few minutes to look for the latest updates for drivers on its vast database and fix it.
A quick message will prompt showing drivers are updated, and the system needs to restart to apply changes. Give permission to restart the system and then relaunch your game. The DirectX install error will be gone now.
Additionally, you can check for the Windows features. Follow these steps-
Step 1: Open Start Menu, type Turn Windows and click on the Turn Windows features on or off.
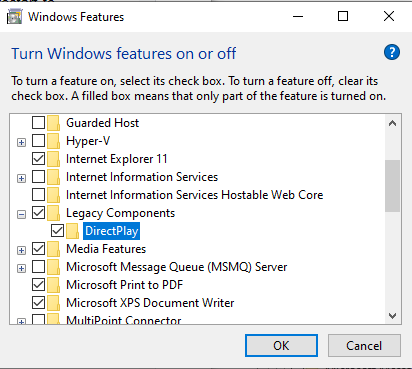
Step 2: Now, in this tab, locate Legacy Components, click on the plus sign to open more options.
Step 3: As you can see the DirectPlay option, click on the box in front of it to checkmark it.
This will help you fix the DirectX error in Windows, which is caused by one of the issues.
To Sum up:
After these methods, we are sure that you will not get the Unable to initialize DirectX 9 device message. The drivers are fixed with the automatic update with the help of Smart Driver Care. It will also take care of other device drivers present on your operating system and keep them up to date. It not only improves your system performance but takes care of your hardware. Still have issues, check with your technician and get the graphics card inspected, maybe it’s time to change it. Meanwhile, check these games which do not require graphics cards.
We hope this article helps in fixing the DirectX error on Windows 11. We would like to know your views on this post to make it more useful. Your suggestions and comments are welcome in the comment section below. Share the information with your friends and others by sharing the article on social media.
We Love To Hear From You!
We are on Facebook, Twitter, Instagram, and YouTube. For any queries or suggestions, please let us know in the comments section below. We love to get back to you with a solution. We regularly post the tips and tricks along with solutions to common issues related to technology.
Related Topics:
How to update Graphics Drivers in Windows 10.
How to update video drivers in Windows 10.