
Recycle Bin graying out is a problem that Windows users lament. Users are unable to restore lost data, access the recycle bin settings, or access the recycle bin itself. This blog will go into the problem’s causes and solutions.
Why Is The Recycle Bin Is Grayed Out?
Your computer’s Recycle Bin may be grayed out for a variety of reasons. Below are a few famous instances:
- Issues with user account permissions. Activities involving the recycle bin, such as opening, emptying, restoring, etc., occasionally call for administrative rights because they involve system changes. Therefore, if you don’t have administrator credentials on your account, the choice may be grayed out and unavailable.
- A Corrupted Recycle Bin. The problem might also arise if malware, viruses, or other harmful activity compromises or corrupts the Recycle Bin. It has an impact on how well it works and has the potential to break down.
These factors may vary depending on the device. However, you can resolve the issue by attempting the methods described in the next section.
Also Read: How To Change Recycle Bin Storage Settings On Windows 10?
Method 1: Change The Recycle Bin Value
The Windows Registry maintains all the settings of apps, tools, and features on your Windows PC. To resolve this issue we need to modify certain settings related to Recycle Bin.
Step 1: Press Win + R to open the RUN box.
Step 2: Type “Regedit” in the text space and click on the OK button.
Step 3: A User Account Control (UAC) prompt box will appear. Press the Yes button.
Step 4: The Registry Editor will now open where you have to navigate to the below-mentioned path.
Computer\HKEY_LOCAL_MACHINE\SOFTWARE\Microsoft\Windows\CurrentVersion\Policies\NonEnum
Note: You can copy and paste the above path in the address bar of the Registry Editor and then press the Enter key.
Step 5: Look at the right side pane and you will find many registry entries. Locate {645FF040-5081-101B-9F08-00AA002F954E}.
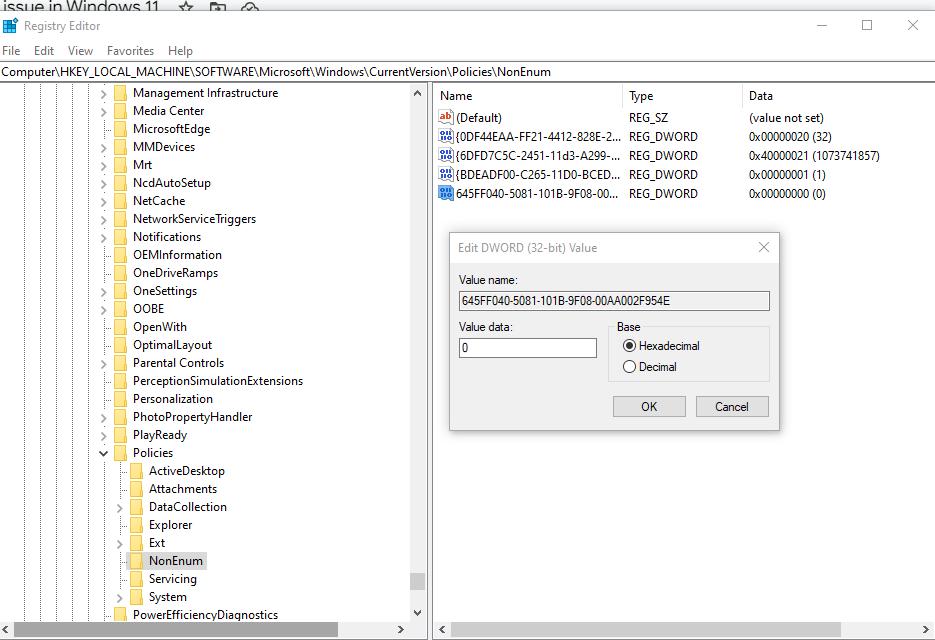
Step 6: Double-click on this entry and a small value data box will open where you have to input 0.
Step 7: Click on the OK button and exit the Registry editor.
Step 8: Restart the PC for the changes to take effect.
Also Read: How To Restore Lost Recycle Bin Icon On Windows 10
Method 2: Turn Off The Group Policy Of The Recycle Bin
A group policy allows you to delete the Recycle Bin symbol from your desktop. Disable that right away by following the below-mentioned steps.
Step 1: Press Win + R to open the RUN box.
Step 2: Type “gpedit.msc” in the text space and press the Enter key.
Step 3: Navigate to the following path in the Group Policy Editor Window.
User Configuration\Administrative Templates\Desktop
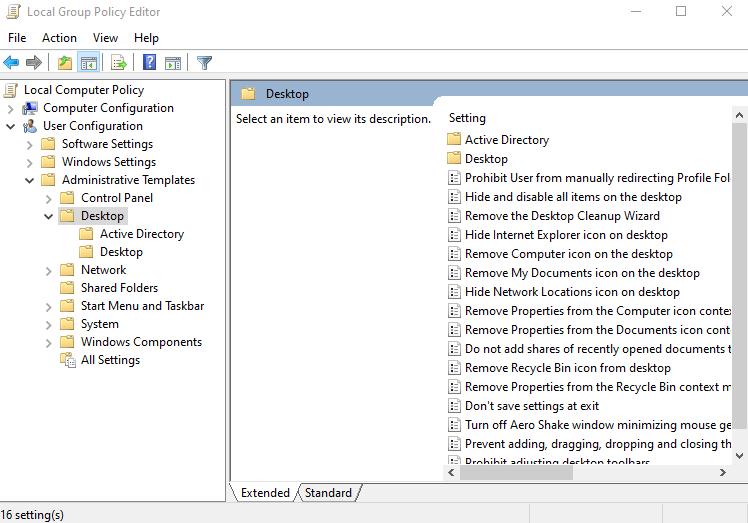
Step 4: Look at the right panel and locate the policy labeled as the “Remove Recycle Bin icon from the desktop”.
![]()
Step 5: Double-click on this policy and a new box will open.
Step 6: Click on the circular button next to “Not Configured”.
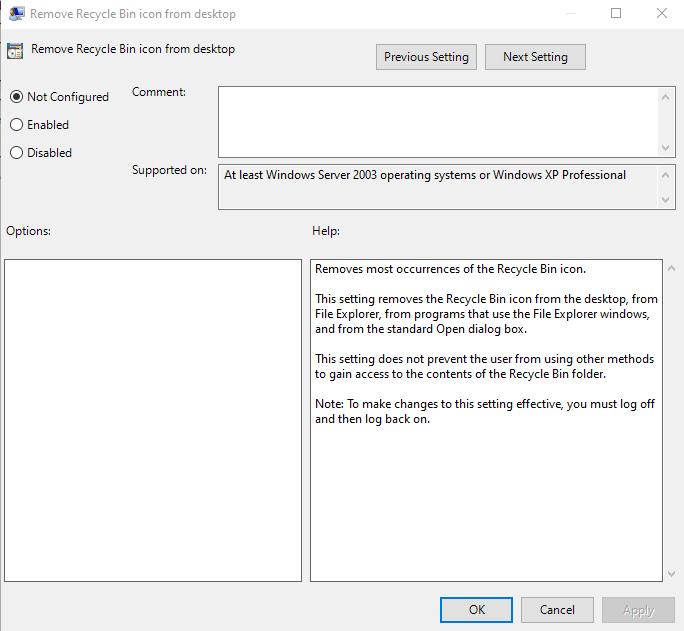
Step 7: Finally click on Apply and then click on OK.
Step 8: Exit the Group Policy Editor and reboot your PC.
Also Read: How to Fix The Recycle Bin Is Corrupted In Windows 10
Method 3: Make Changes With The Recycle Bin Icon
In this method, we will remove the Recycle Bin icon from the desktop and add it once again. Here are the steps:
Step 1: Press Win + I to launch Windows Settings.
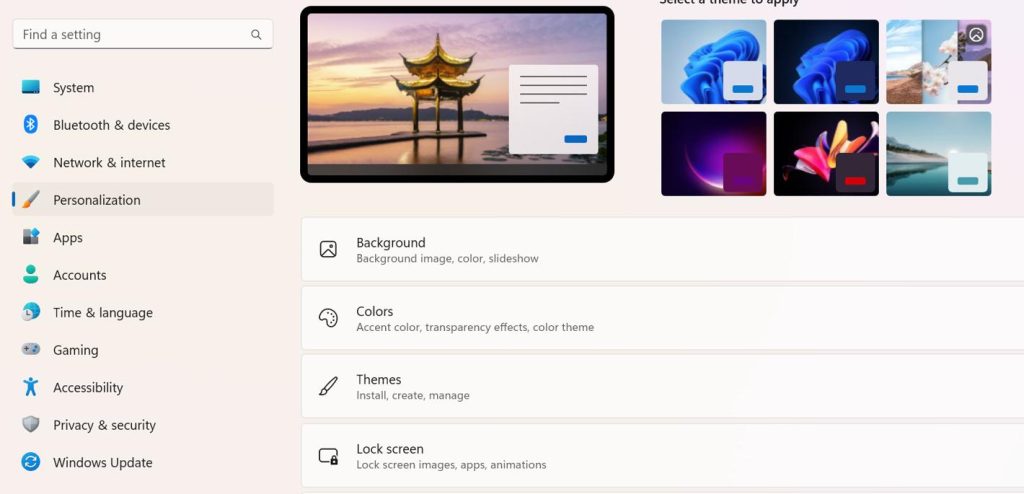
Step 2: Click on Personalization in the left pane and then click on Themes on the right.
Step 3: Scroll down in the right panel and click on Desktop icon settings.
![]()
Step 4: Remove the checkmark next to Recycle Bin and click on Apply followed by OK.
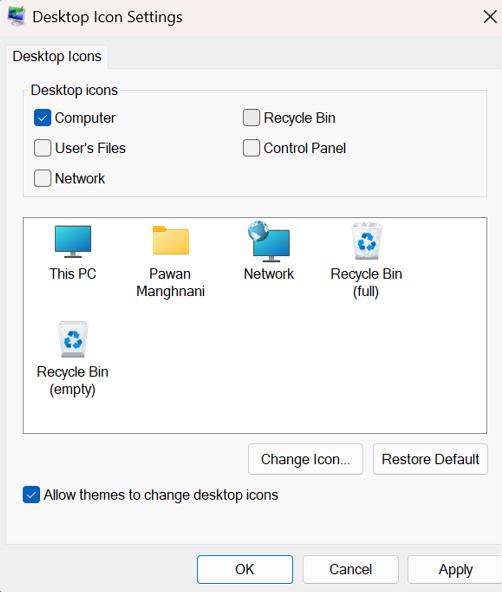
Note: This will remove the Recycle Bin Icon from the Desktop.
Step 5: Press Win + R again to open the RUN box.
Step 6: Type “desk.cpl ,,5” and click on OK button.
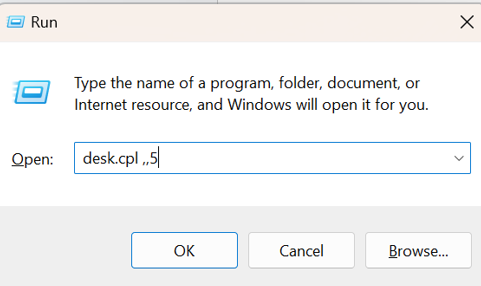
Step 7: Now, click on the checkbox next to the Recycle bin and click on the OK button.
![]()
Also Read: How To Bypass Recycle Bin In Windows 10?
Method 4: Empty The Recycle Bin
The final step you can try is to clean the Recycle Bin. There might be certain files present in the Recycle bin that might have caused this error. As the Recycle bin is grayed out, you will not be able to empty it the normal way. Here is what you need to do:
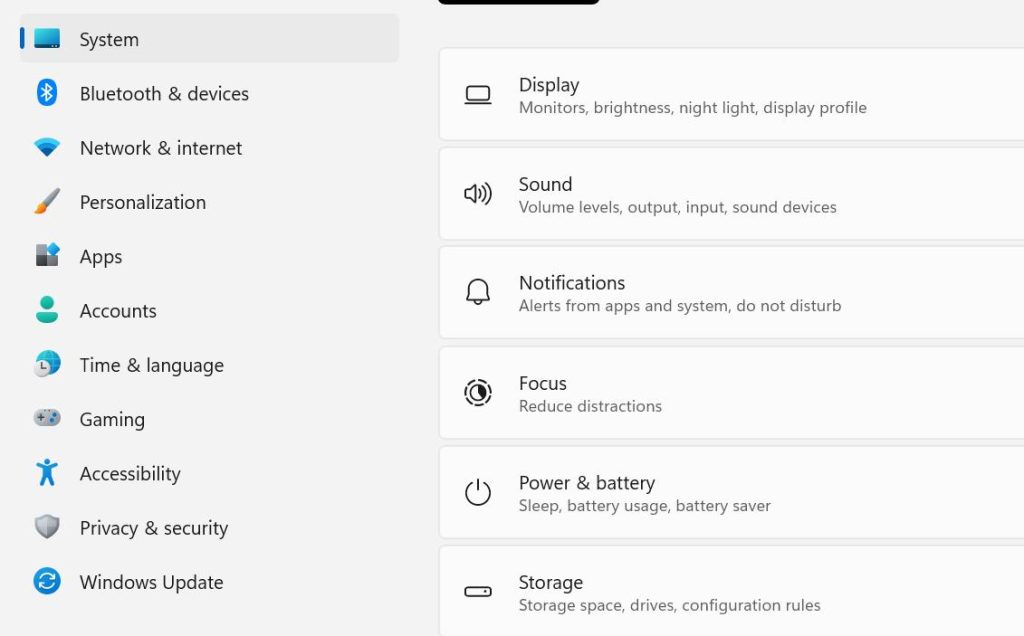
Step 1: Press Windows + I to open the Settings.
Step 2: Click the System tab on the left panel and then click on the Storage in the right panel.
Step 3: Click on the “Temporary Files” in the right section.
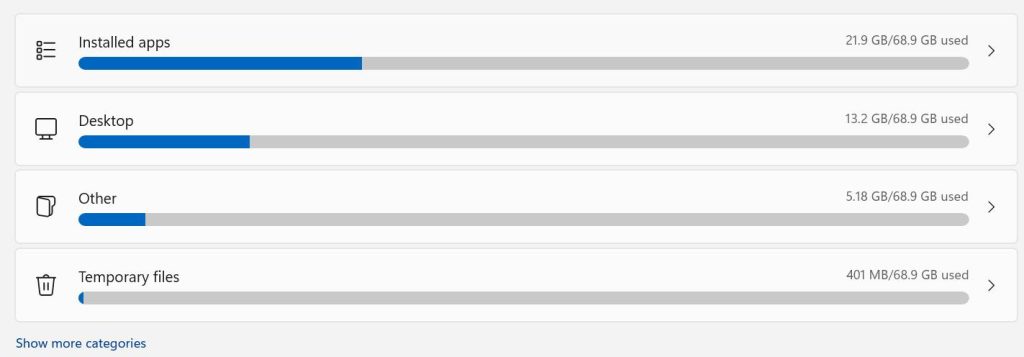
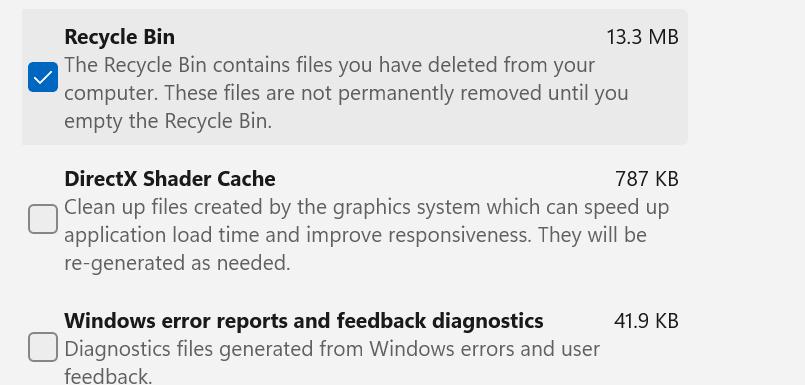
Step 4: Check the box next to the Recycle Bin and then click on the Remove files button.
Step 5: Press the Continue button.
Also Read: How to Fix Recycle Bin Association Error on Windows 10
The Final Word On How To Fix The “Recycle Bin Grayed Out” Issue In Windows 11?
We hope you can now fix the Recycle Bin Grayed Out issue on your Windows PC with the aforementioned steps. These expert-recommended methods are tried and tested and should be followed one by one.
Please let us know in the comments below if you have any questions or recommendations. We would be delighted to provide you with a resolution. We frequently publish advice, tricks, and solutions to common tech-related problems. You can also find us on Facebook, Twitter, YouTube, Instagram, Flipboard, and Pinterest.