In an age where our smartphones have become indispensable extensions of ourselves, the constant evolution of technology brings both convenience and complexity. With every software update, new features emerge, promising enhanced functionality and security. However, as Apple users may be aware, along with these advancements come occasional quirks and puzzling notifications.
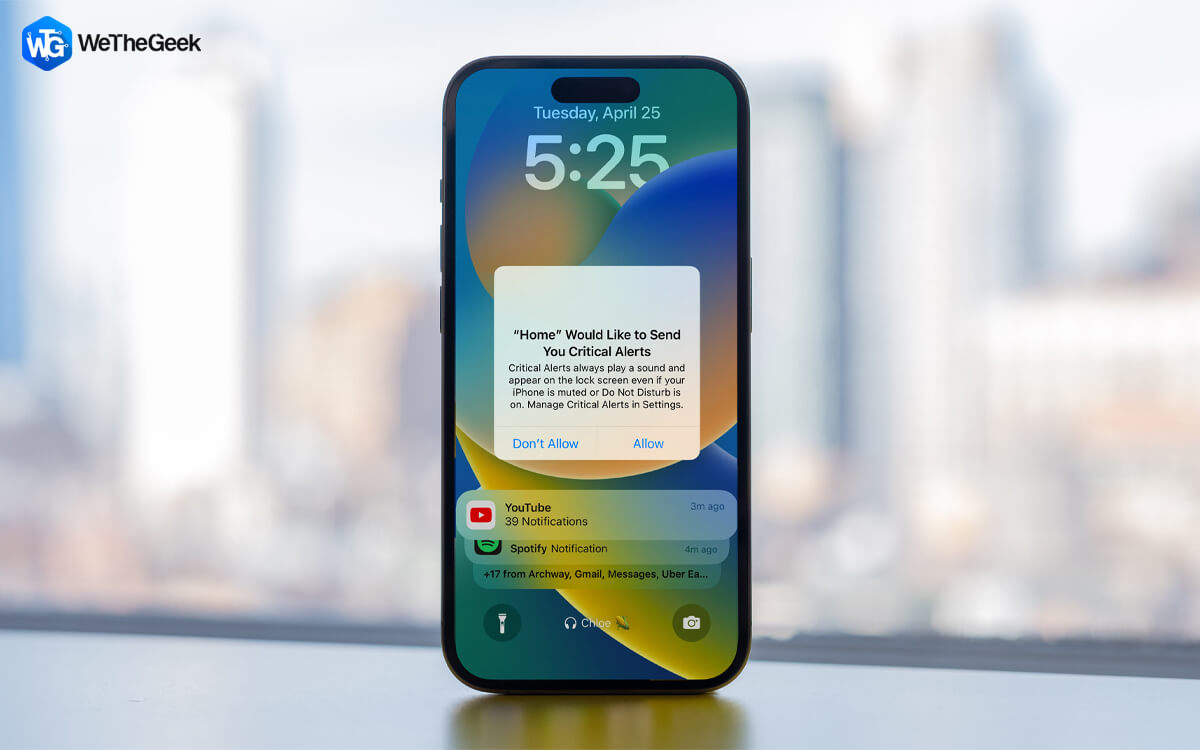
One such enigma that has left many iPhone users frustrated is the iPhone stuck on home critical alerts issue. Appearing seemingly out of nowhere, this notification can be both baffling and concerning. What exactly does it mean? Is it a cause for worry?
In this comprehensive guide, we have listed a variety of workarounds that you can use to fix the “Home would like to send you critical alerts iPhone” error. By the end of this guide, you’ll not only have a clear grasp of what this notification entails but also possess the tools to regain control over your iPhone’s alert settings.
Also Read: iOS 17 Drops Today – Here’s How to Update Your iPhone
Why is iPhone Home Stuck on Critical Alerts? (Top Reasons)
Here are some common reasons why your iPhone Home app may be stuck on critical alerts:
- Incorrect Notification Settings: Misconfigured notification settings for the Home app can lead to it continuously sending critical alerts.
- HomeKit Automation Issues: Malfunctioning or conflicting HomeKit automation may trigger continuous critical alerts.
- Third-Party Accessories: Incompatible or faulty third-party accessories connected to your HomeKit setup might cause critical alerts to be triggered erroneously.
- Software Glitches or Bugs: Software updates or glitches in the iOS system can sometimes lead to unexpected behavior in the Home app, including persistent critical alerts.
- HomePod or Apple TV Conflicts: Issues with HomePod or Apple TV acting as a home hub can result in miscommunication, leading to continuous critical alerts.
- Incomplete Setup or Migrations: If your HomeKit setup wasn’t completed properly or if there were issues during a migration from an old device, it could cause alert problems.
Also Read: How to Remove a Rapid Security Response Update from Your iPhone and Mac
How to Fix the “iPhone Stuck on Home Critical Alerts” Issue?
Curious about how to remove critical alert on iPhone? You’re in luck! In this article, we’ve compiled several effective solutions that will enable you to maintain your iPhone’s functionality.
Solution #1: Reboot your iPhone
A basic yet effective troubleshooting step is to reboot your device. This action can often resolve various software-related issues, including persistent critical alerts.
To do this, locate the power button on your device (typically on the side or top) and hold it down. Simultaneously, press either the volume up or down button. Continue holding both buttons until the “Slide to Power Off” option appears. Slide it to power off your device completely.
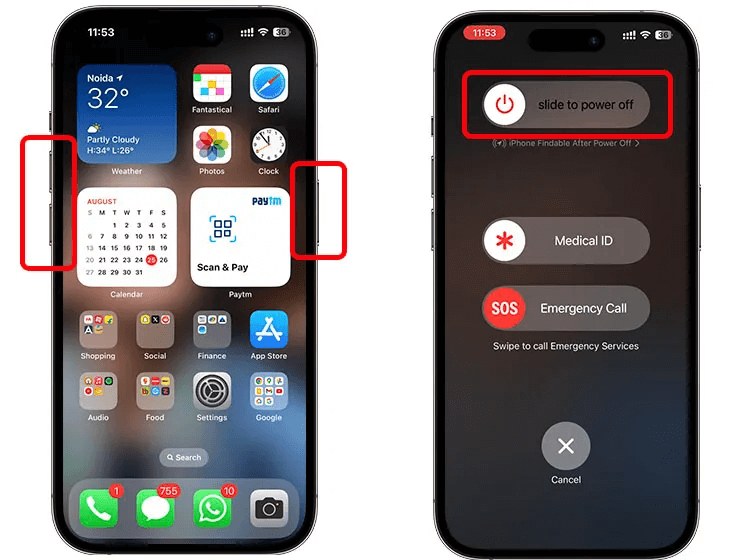
After a moment, restart your device by holding down the power button until the manufacturer’s logo appears. Once the device restarts, check if the critical alert iPhone issue persists. If it does, proceed to the next solution.
Also Read: Unable To Load Video On iPhone? Try These Fixes!
Solution #2: Force Restart your iPhone
If a simple reboot didn’t resolve the issue, a force restart might do the trick. This more thorough reset can help clear any temporary glitches causing persistent critical alerts on your device. Here’s how you can perform a force restart:
For iPhone 8 and later models:
- Quickly press and release the volume up button.
- Quickly press and release the volume down button.
- Press and hold the side button until you see the Apple logo.
For iPhone 7 and 7 Plus:
- Press and hold the volume down button and the sleep/wake (power) button simultaneously.
- Keep holding them until the Apple logo appears.
Once the device restarts, check if the iPhone stuck on home critical alert issue persists. If it does, proceed to the next solution.
Solution #3: Reset HomeKit Configuration
If critical alerts continue to persist, it may be necessary to reset your HomeKit configuration. This process involves removing and re-adding your accessories and settings within the Home app.
Here’s a step-by-step guide:
Step 1: Open the “Home” app on your iPhone. Tap on the “Home” tab at the bottom left corner.
Step 2: Scroll down and tap on “Home Settings.”

Step 3: Scroll to the bottom and select “Remove Home.”
Please note that this action will delete all your accessories and settings associated with the Home app. You will need to reconfigure and re-add all accessories after performing this reset. Once you’ve reset the HomeKit configuration, check if the critical alerts issue is resolved.
Also Read: How to Fix iPhone Contacts Disappeared or Deleted
Solution #4: Put Your iPhone in DFU Mode
If the previous solutions haven’t resolved the issue, using Device Firmware Upgrade mode may be a more advanced step to consider. DFU mode allows you to reinstall the device’s firmware, potentially addressing any underlying software issues. Here’s how to put your iPhone into DFU mode:
Step 1: Connect your iPhone to your computer using a USB cable and open iTunes (on macOS Catalina or later, use Finder).
Step 2: Quickly press and release the volume up button.
Step 3: Now, quickly press and release the volume down button.
Step 4: Press and hold the side button until the screen goes black.
DFU mode will erase all data on your iPhone, so make sure to back up your important files beforehand. After the process is complete, set up your iPhone as a new device and check if the iPhone stuck on home critical alerts persists.
Solution #5: Update the iOS Using iTunes
Ensuring that your iOS software is up-to-date is crucial for resolving various software-related issues, including persistent critical alerts. If you’ve been experiencing this problem, it’s recommended to update your device using iTunes. Here’s how you can do it:
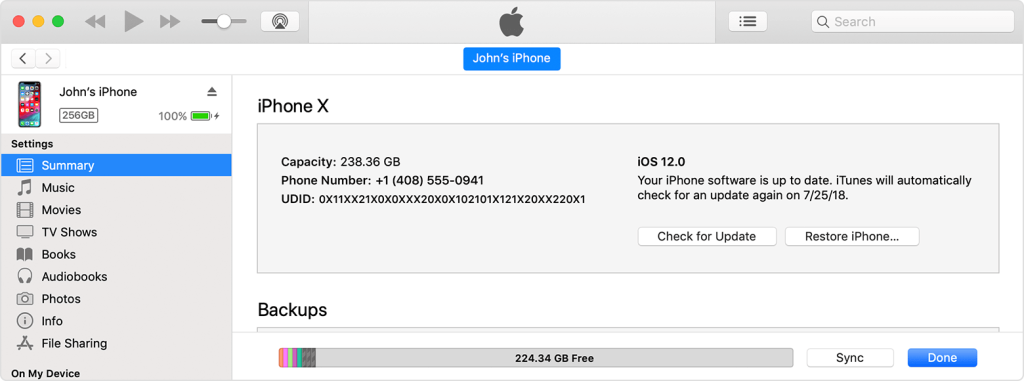
Step 1: Connect your iPhone to your computer using a USB cable and open iTunes (on macOS Catalina or later, use Finder).
Step 2: In iTunes/Finder, select your device. Go to the “Summary” tab. Click on “Check for Update.”
Step 3: If an update is available, click “Download and Update.” Follow the on-screen instructions to complete the update process.
Please ensure that you have a stable internet connection during the update process, and ensure that your device is sufficiently charged or connected to power.
Once the update is complete, check if the critical alerts issue persists. If it does, consider exploring additional troubleshooting steps or contacting Apple Support for further assistance.
Solution #6: Manually Turn OFF Critical Alerts
If you’re still encountering the iPhone stuck on home critical alert notifications, you can manually disable them to regain control over your notifications. Follow these steps:
Step 1: Open the “Settings” app on your iPhone. Scroll down and tap on “Notifications.” Select “Home.”
Step 2: Scroll down and locate the “Critical Alerts” option.
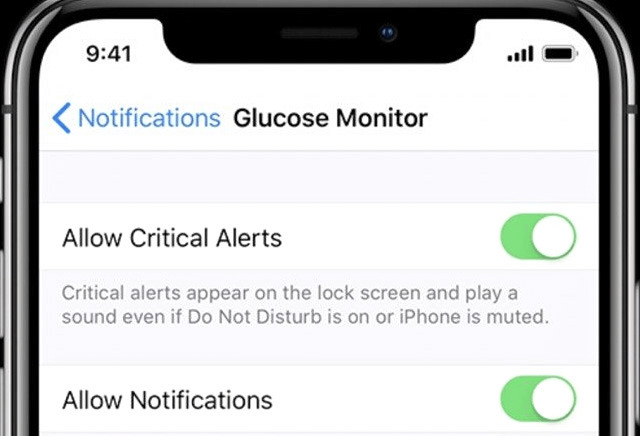
Step 3: Toggle the switch next to “Allow Critical Alerts” to turn it off.
By manually disabling critical alerts, you’ll no longer receive notifications of this type from the Home app. This allows you to tailor your notifications to your specific preferences.
Also Read: How To Fix iPhone Stuck In SOS Mode
Conclusion
In conclusion, addressing persistent critical alerts iPhone issues requires a systematic approach. From basic reboots to more advanced steps like DFU mode, we’ve covered a range of solutions. Remember, it’s essential to back up your data before attempting any major changes.
By following these steps, you can regain control over your device’s notifications and enjoy a seamless iPhone experience. If the issue persists, don’t hesitate to seek help from Apple Support. Here’s to a hassle-free and fully functional iPhone! Follow us on social media – Facebook, Instagram and YouTube.