
A new storage access and transport protocol called NVMe, or Non-Volatile Memory Express, was created to speed up data transfer in PCIe-based solid-state drives (SSDs). One of the leading producers of NVMe SSDs is Samsung. Compared to SATA SSDs, which have a maximum performance limit of 550MB/s, Samsung’s NVMeTM SSDs can achieve transfer speeds of over 3,500MB/s.
Also Read: How To Fix External Hard Drive Not Showing Up In Windows 11
Where Can I Find The Windows 11/10 Samsung NVMe Driver?
Samsung drivers are readily available for download from Samsung’s official website. While Windows has a built-in driver that enables your Samsung NVMeTM SSD to function from the start, installing the Samsung NVMeTM Driver made especially for Samsung NVMeTM SSDs is advised to improve system compatibility and achieve optimal performance.
Also Read: How to Fix Seagate External Hard Drive Not Working Issue
How To Initiate NVMe Driver For Windows 10 Installation Process Manually?
The NVMe driver can be manually downloaded from the SSD manufacturer. The exact instructions will vary based on the SSD brand you own. Visit the Samsung website if you own a Samsung NVMe SSD. After that, look for the driver online to download and install it on your PC.
Step 1: Navigate to the official Samsung Support Center Website.
Step 2: Look for the NVMe SSD driver and click on the Download Files option.
Step 3: You have to click on the Download option in line with NVMe Driver.
Step 4: Once the file has been downloaded, double-click on it to execute it.
Step 5: If the UAC(User Account Control) prompt appears then click on Yes.
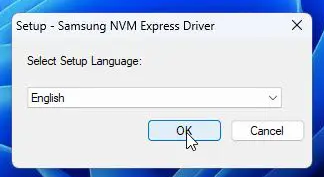
Step 6: Next you will get a popup for selecting the language. Click on the OK button.
Step 7: Then, click on next and follow the onscreen instructions to install the driver.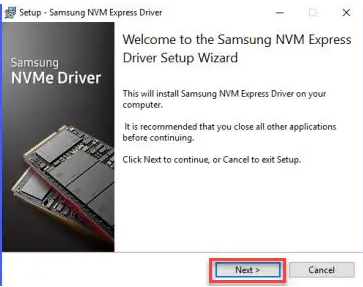
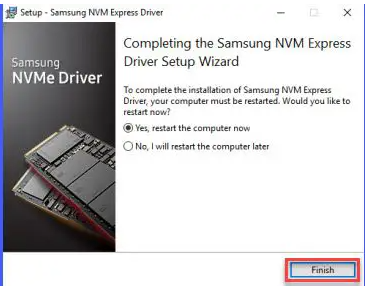
Step 8: You will be asked to restart your PC at the end of the installation process.
Also Read: Fix – A Media Driver Your Computer Needs Is Missing
How To Facilitate NVMe Driver For Windows 10 Installation Process Automatically?
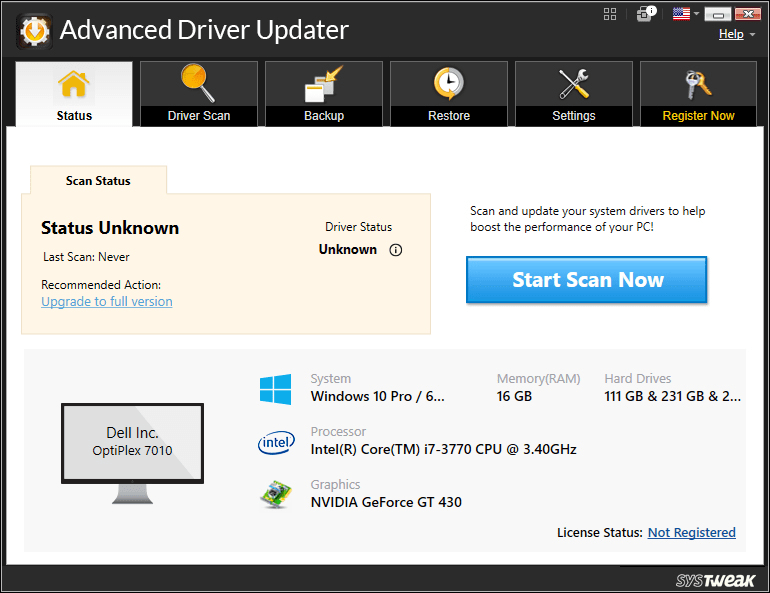
Advanced Driver Updater can automatically download the driver for your NVMe SSD if you lack the time, patience, or technical abilities to do so manually. Your system will be automatically identified by Advanced Driver Updater, which will then locate the appropriate drivers. It’s not necessary to be aware of the specific operating system that your computer is running, nor is it necessary to take the chance of downloading and installing the incorrect driver or to fear making an installation error. Here are the steps:
Step 1: Download and install Advanced Driver Updater on your computer.

Avail the Christmas sale offer and get a 50% discount on Advanced Driver Updater.
Step 2: After installing it, open the app and click on the Start Scan Now button.
Step 3: Now a list of outdated, missing, and corrupted drives will appear on the screen within the app interface.
Step 4: Locate the NVMe driver and click on the Update button next to it.
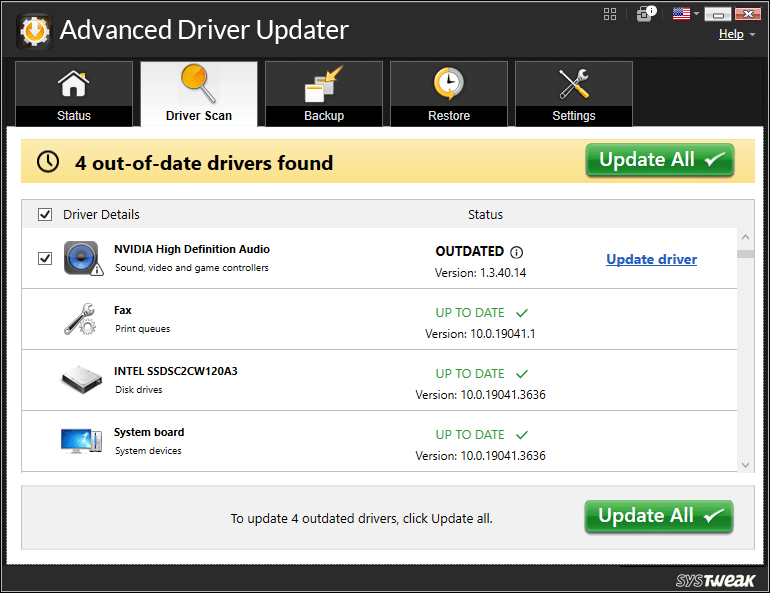
Step 5: Wait until the update process continues and reboot your PC.

Also Read: 5 Best Tools for Low-Level HDD Formatting | Easily Format Your Hard Drive Disk
The Final Word On How To Download And Install NVMe Driver In Windows
It is not required to install Samsung’s NVMe drivers, although doing so can enhance system compatibility and performance on your Windows 11/10 computer. The NVMe driver that comes with Windows is compatible with the majority of NVMe SSDs, including Samsung models. To get the most out of your Samsung NVMe SSD, install the NVMe driver from Samsung. You can also find us on Facebook, Twitter, YouTube, Instagram, Flipboard, and Pinterest.