
If Microsoft Compatibility Telemetry process is taking up a lot of CPU resources on your Windows 10 PC, then you are not the only one. Checked the Task Manager and it displays CPU usage more than 50% for Microsoft Compatibility Telemetry on Windows 10? Now on Task Manager check for these processes Customer Experience Improvement Programme, Application Experience. Wondering what all are you seeing and how it is helping in the system work?
What Is Microsoft Compatibility Telemetry?
Microsoft Compatibility telemetry is a service by Microsoft that collects data from all the processes and devices running on your computer. It prepares a report with technical data of all Windows-related software and devices. This is in turn used to analyze the errors and help in reducing issues for your computer.
If the performance of your computer is affected by this, then you must disable Microsoft Compatibility Telemetry to solve this issue.
Tried to disable them but the process reappeared in the Task Manager after a while? This is a common issue and disabling it temporarily will not work, therefore we will work on finding a permanent solution to it. In this article, we have discussed ways that we can use to fix Microsoft Compatibility Telemetry.
Disable Microsoft Compatibility Telemetry-
High CPU usage by a process not only slows down your computer but also hamper other operations as well, creating performance issues in the process. If you are running a process that requires a large part of RAM or you simply want optimum performance for it, you must disable Microsoft Compatibility Telemetry on Windows 10.
Methods to help you with fixing this issue are listed below, try them out.
Method 1: Using Group Policy Editor-
Step 1: To make changes to the Group Policy, you need to press Windows key + R for Run command. Type the command “gpedit.msc” to open Group Policy Editor.

Step 2: Go to Computer Configuration> Administrative Templates> Windows Components> Data collection and Preview Builds.
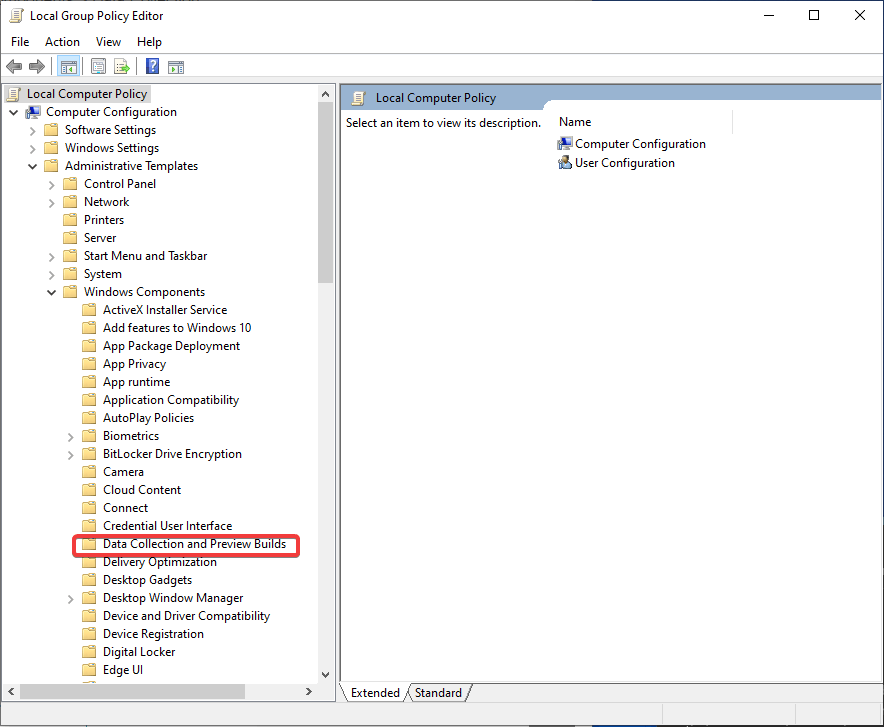
Step 3: Click on Data Collection and Preview Builds to see the options on the right side panel.
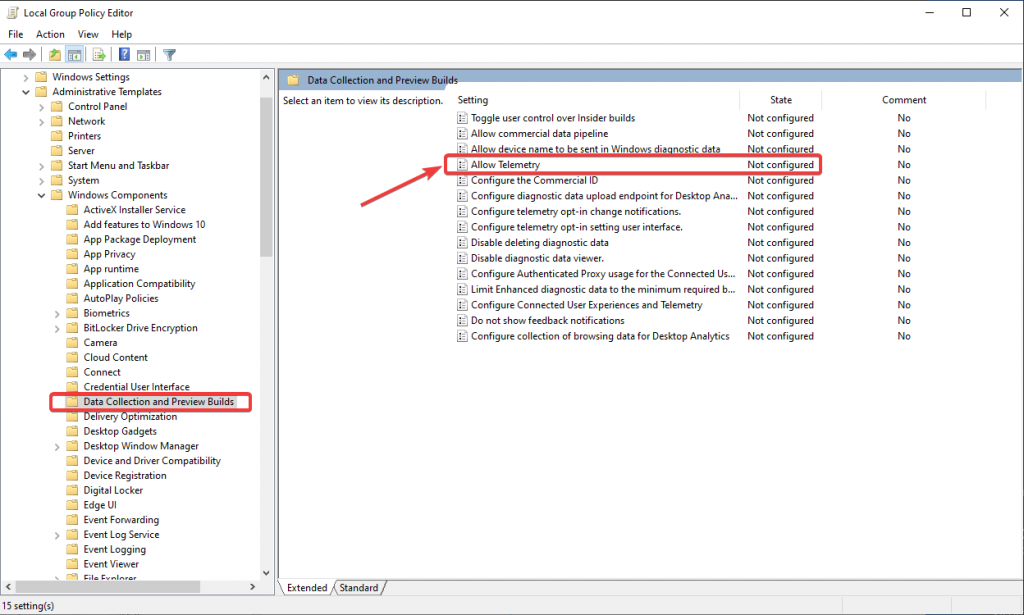
Under the Settings, you can see the Allow Telemetry, right-click and you will get options, go to Edit.
Step 4: On the next window, click on the radio button beside Disabled option.

Click Apply and then OK to apply the changes for the setting. This is to disable Microsoft Compatibility Telemetry for Windows 10.
Method 2: Using Registry Editor-
We use this method to fix Microsoft Compatibility Telemetry running on high CPU resources.
Disclaimer: Before making any changes in the Registry entries, please make sure you take a back up. Also, move ahead with this method only if you are well acquainted with your system configurations. To take a backup, go to the Registry Editor and click on Export and create a file with a name and date you can remember and save it in a location that will not be affected by the following changes. For getting the backup file, you can click on Import and select the same folder which will annulify any edits.
Step 1: Press Windows key + R and type ‘regedit’ in the Run Command and press the Enter key.

Step 2: In the Registry Editor tab, go to Computer> HKEY_LOCAL_MACHINE> Software> Policies> Microsoft> Windows> DataCollection.

Step 3: Select DataCollection and go to the right-side panel. To create a new key right-click anywhere in the panel. Choose from the options – DWORD (32 bit).

Step 4: Right-click on the new key and click Rename. Name it Allow Telemetry.
Step 5: Right-click and select Modify to change the value. Make the Value to ‘0’. Click on Ok.

Conclusion:
When Task Manager is showing high CPU usage for the process Microsoft Compatibility Telemetry, you need to make changes to free up the CPU resources. In this article we showed you the few methods to be used to disable Microsoft Compatibility in Windows. This will help you change the status of the CPU process and your system runs on optimum resources.
Please let us know your opinions in the comments section below. Also, subscribe to our newsletter to keep getting regular updates of the tech world. Also, follow us on social media- Facebook, Twitter, LinkedIn, and YouTube.