
Is your iPhone constantly changing phone screen by turning its light to dim or bright on its own? This is because of your iOS device’s auto-brightness setting enabled.
Depending on the light and surroundings of the location you are in, the brightness of your iOS13 device keeps on changing and could irritate some people with its auto-brightness controls. We have got you the best possible ways to control or disable auto-brightness feature in iOS13. But, before moving ahead you should know the reason why brightness keeps on changing.
The reason behind this is the iPhone’s ambient light sensors. The light sensors used in iPhone are quite similar to those of other smart devices to auto adjust the screen light depending on the available light. It adjusts the light according to day and night, outdoor and indoor lights etc. While staying outdoors, the screen needs more brightness and while staying indoors your phone will work efficiently with the lowest brightness possible, hence the brightness keeps on changing.
So, Should You Turn Off Auto-Brightness On iPhone?
As per Apple, a user should always turn on Auto-Brightness so as to ensure longer battery life and battery backup in a single charge. A lot of users even after turning-off Auto-Brightness on iPhone, keeps phone’s brightness to the highest level even in the indoors or dark rooms. This could drain your battery even after OLED displays are efficient in power consumption. Not only does it affect the battery life of your device, but it also affects the longevity of the display.
So, it is advised to keep Auto-Brightness turned-on, but in case, you have ever felt uncomfortable with auto controls, you are free to disable auto-brightness in iPhone. On the contrary, you can always use manual brightness controls with the brightness slider in the Control Center or Settings menu.
How To Turn Off Auto Brightness?
If you are already an iPhone user, you might be well aware of the steps to control Auto-Brightness. But for an iOS novice, this might be a bit tricky to find Auto-Brightness option right into display settings.
So, for such users, here’s a quick guide to disable auto-brightness iPhone.
The feature of Auto-Brightness is usually displayed under the tab Brightness in majority of devices, but Apple has hidden this under Accessibility tab.
To locate Auto-Brightness in your iOS device, follow the steps below:
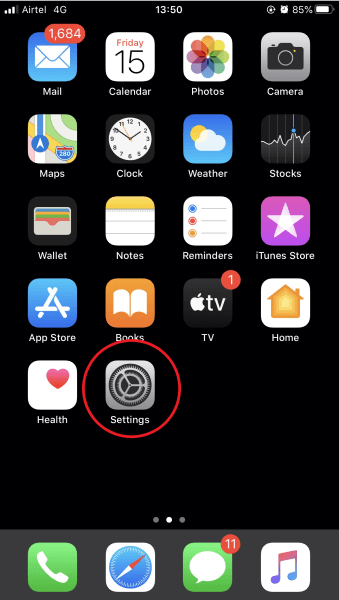
- Go to Settings.
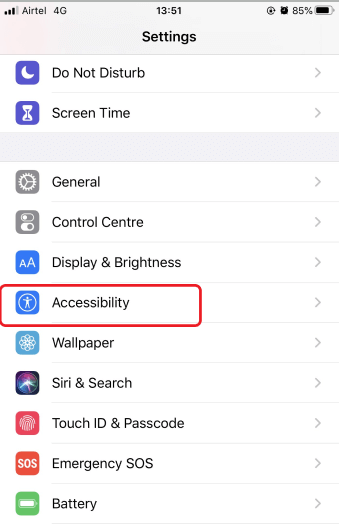
- Now, scroll down to Accessibility.
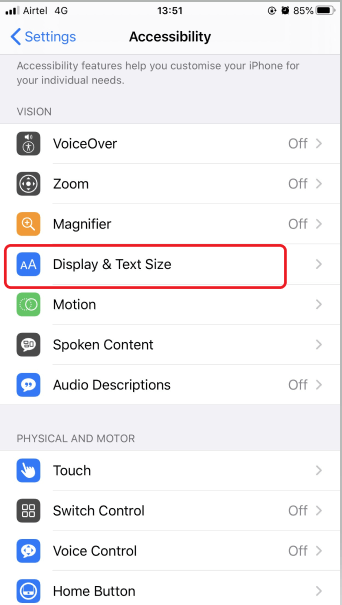
- Search for Display & Text Size under Vision tab.
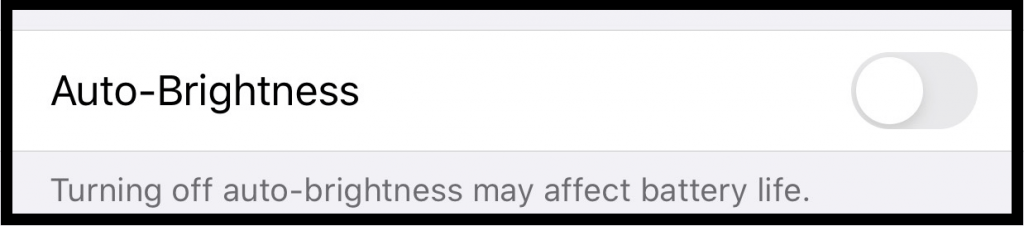
- Scroll till you find Auto-Brightness with its toggle ON.
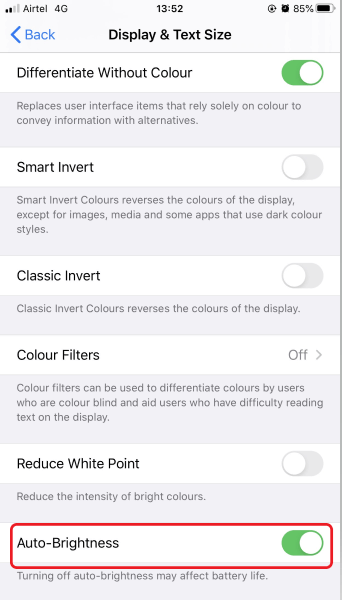
- Now toggle it off to disable Auto-Brightness on your iOS device and it’s done.
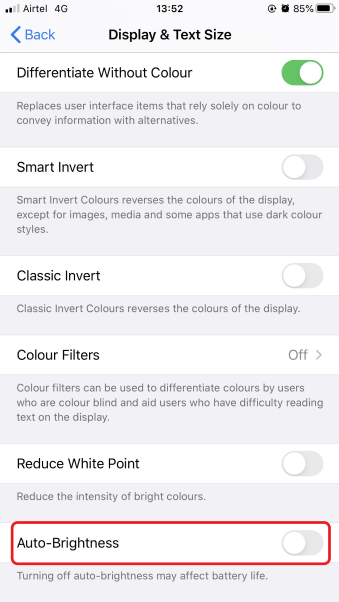
This will now turn your phone on for manual brightness controls, and you’ll be able to cross-check the brightness levels by holding your device under different lighting conditions. It will not change after Auto-Brightness is turned off.
Also, you can pull down the Control Center and adjust brightness slider manually using the sun sign brightness icon. It will let you adjust the display backlit of your iPhone as per your requirements. To manually adjust brightness level from the Control Centre, you can follow the steps below:
- Open Control Center by swiping upward from any corner of the device.
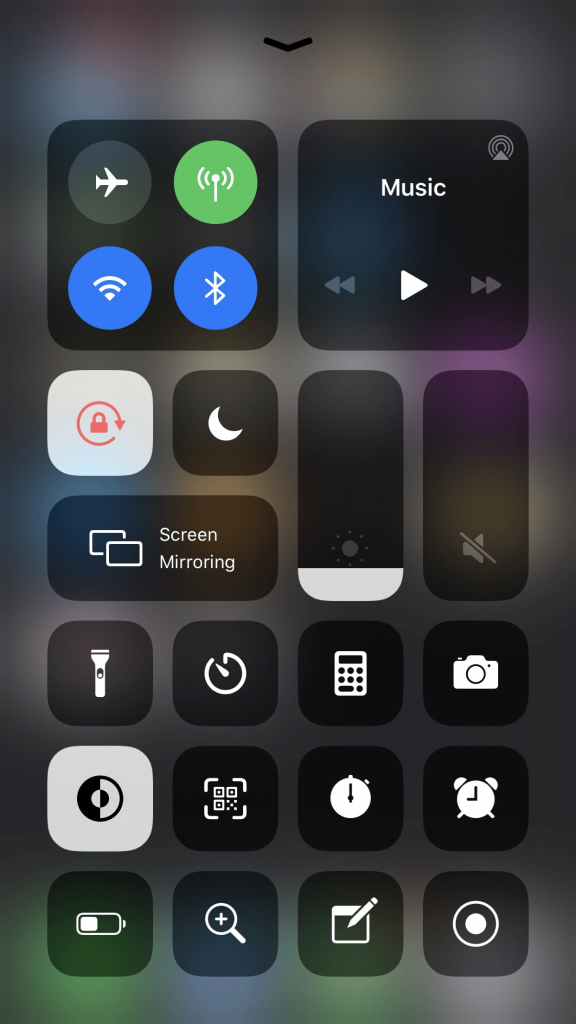
- Force tap on the brightness slider.
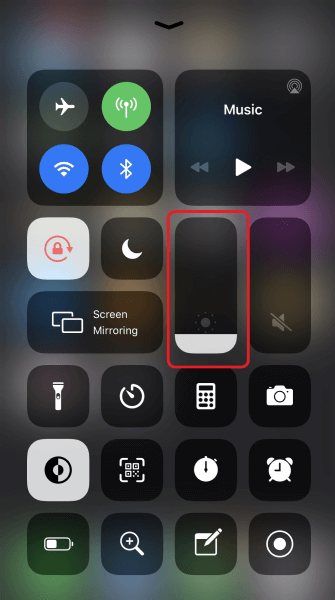
- It will display three options: Dark Mode, Night Shift and True Tone.
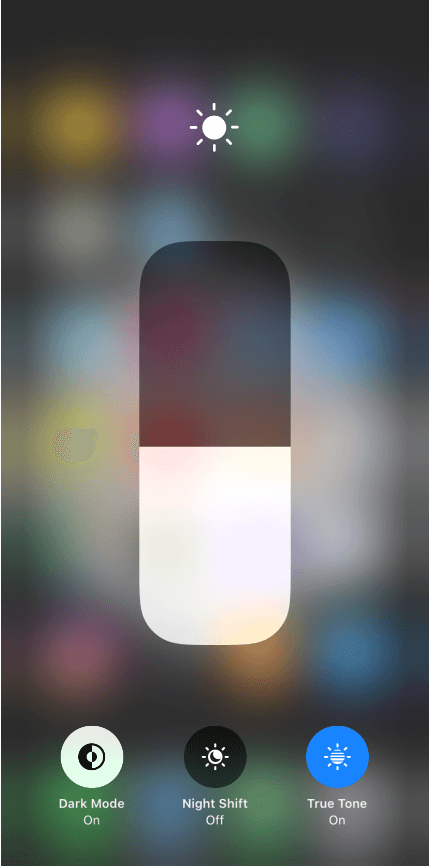
This will let you choose from these options to customize your device’s brightness levels. Dark Mode and Night modes are commonly used options but iPhone lets you choose True Tone display to add a mild warm tint to your screen.
Well, this is it! Give a try to these ways if you’re new to using an iPhone. This brief guide will surely be helpful for you letting you know the possible ways to control brightness levels.
How do you feel using an iPhone with both auto-brightness on and off? Do you see any change? Let us know in the comments section below. Subscribe to our newsletter and follow us on Social Media for tech-related content.