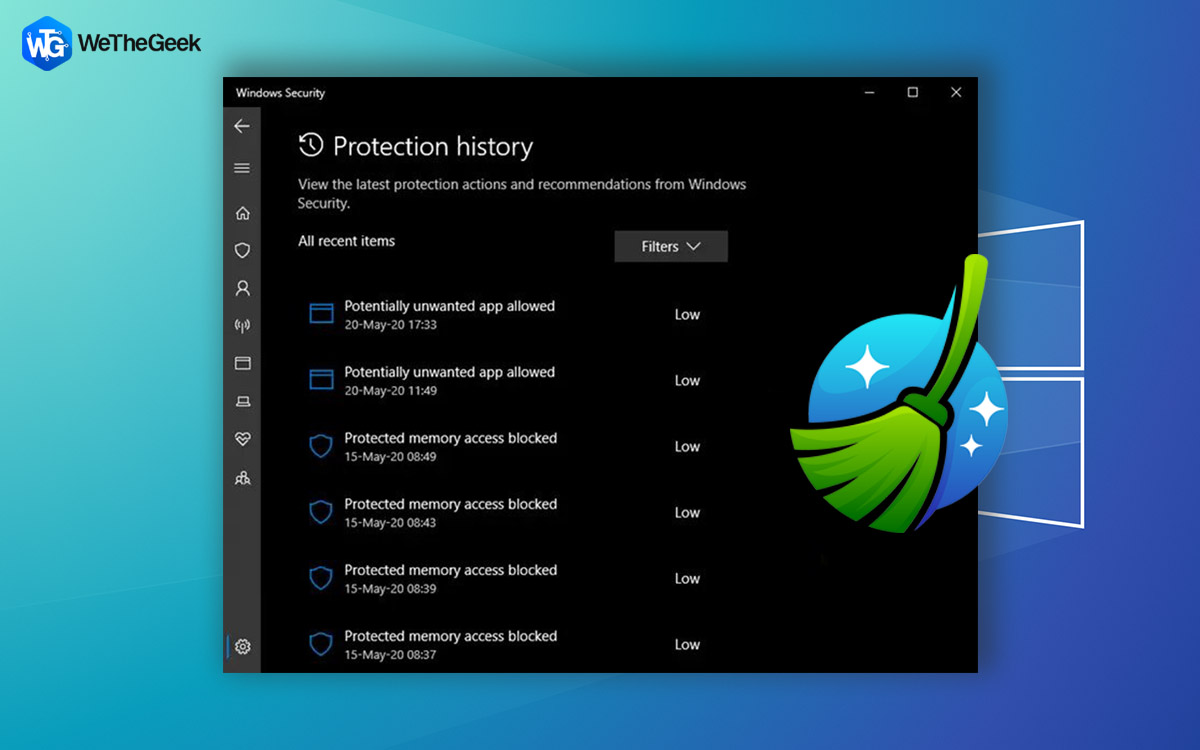
Your Windows computer comes with Windows Defender, Microsoft’s antivirus program that guards against threats and attacks from viruses and other malware. It keeps a log of its scans and activities in the folder designated as Protection History. When Protection History is deleted, you could have more control over the process. So let’s look at the four methods you can delete your protection history.
Also Read Virus & Threat Protection Showing “Engine Unavailable”! What To Do?
How To Remove The Microsoft Defender Protection History On Windows 11
Method 1: Use The File Explorer
By using File Explorer to purge the files of Service folder within Windows Defender, you can manually remove the Protection History. This is how:
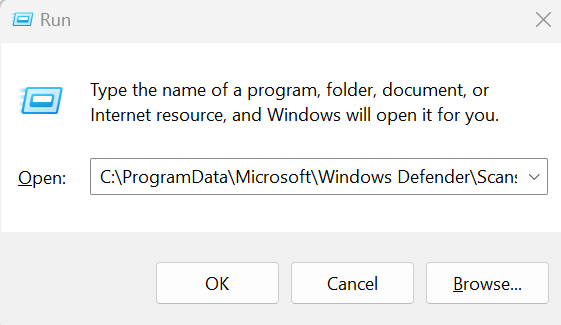
Step 1: To open Run, press the Win + R keys together.
Step 2: Copy the path mentioned below, paste it in the text space, then press OK:
C:\ProgramData\Microsoft\Windows Defender\Scans\History
Step 3: When you access the Local Drive, if ProgramData is invisible, choose View and checkmark the box beside Hidden items.
Step 4: Select all of the files in the Service folder by opening it. Delete all files in this folder and exit the File Explorer.
Step 5: Now, press Win + S and type Windows Security to launch it.
Step 6: Click Manage settings in Virus & threat protection.
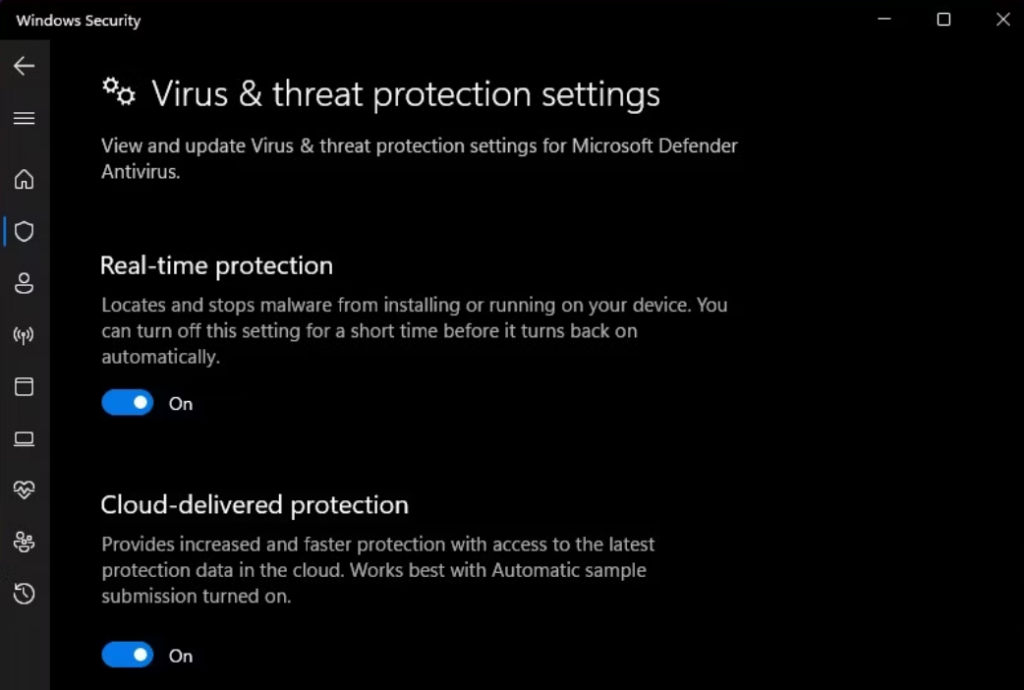
Step 7: For Real-Time protection and Cloud-delivered protection, change button to Off mode and then back to On.
Also Read: How to Fix the Windows Defender “The Service Couldn’t Be Started” Error
Method 2: Use Event Viewer
The Event Viewer software, a helpful tool for reviewing your device’s event logs, also allows you to manually remove Defender Protection History. This is how:
Step 1: To open Event Viewer, first perform a search for it and select the application result under Best Match.
Step 2: Expand Applications and Services Logs on the left pane under Event Viewer (Local).
Step 3: To access Microsoft folder, click arrow near to Applications and Services Logs.
Step 4: To access the Windows files in the middle panel, click Windows in left panel.
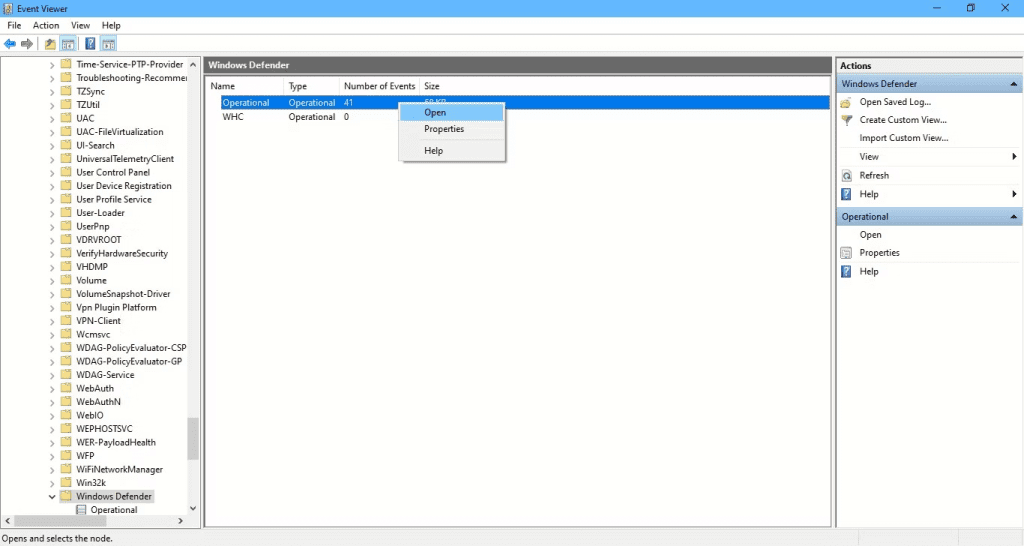
Step 5: To locate Windows Defender, scroll down the middle pane’s file list.
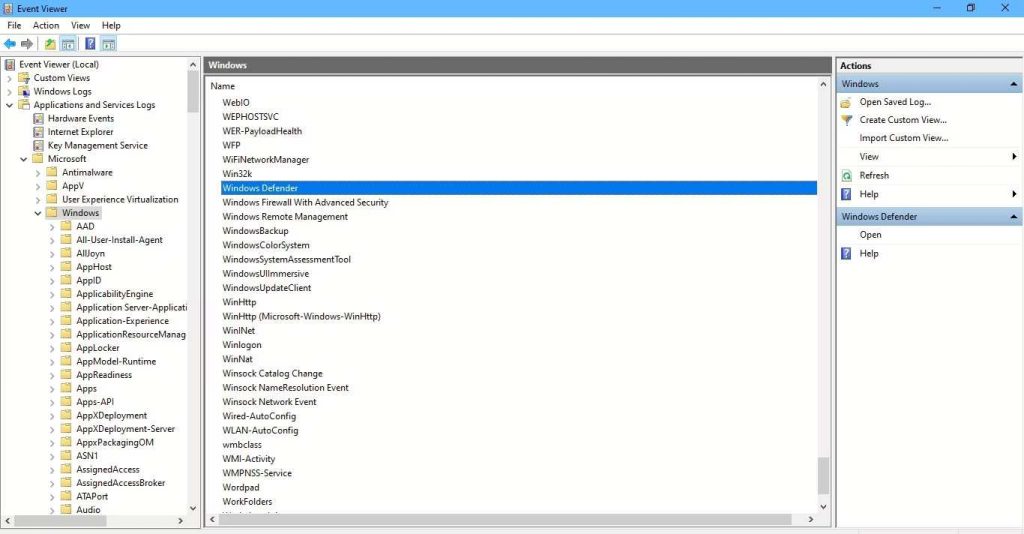
Step 6: Click Windows Defender twice.
Step 7: To examine all of the previous logs, right-click Operational and choose Open.
Step 8: Now you may select Clear Log by doing a right-click on Operational in the left pane.
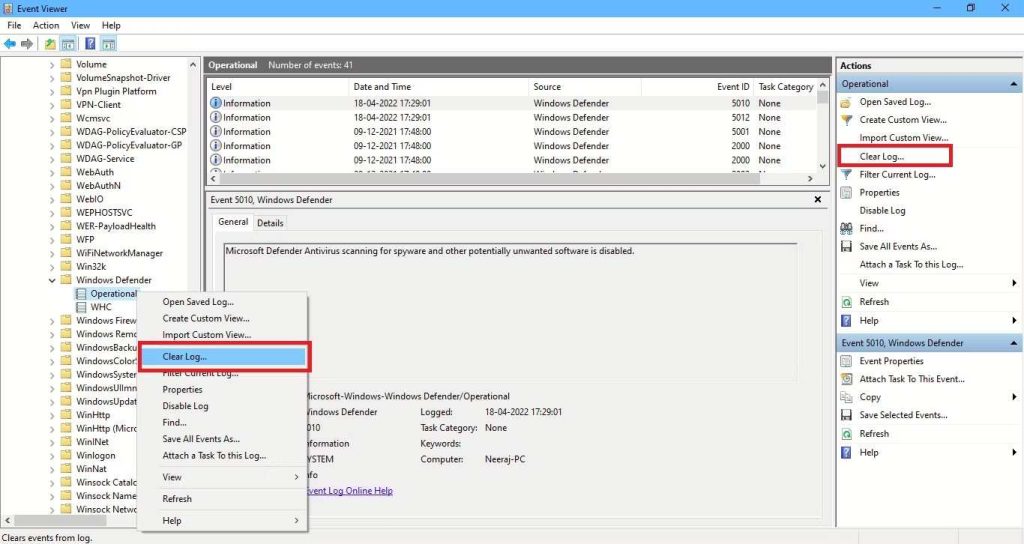
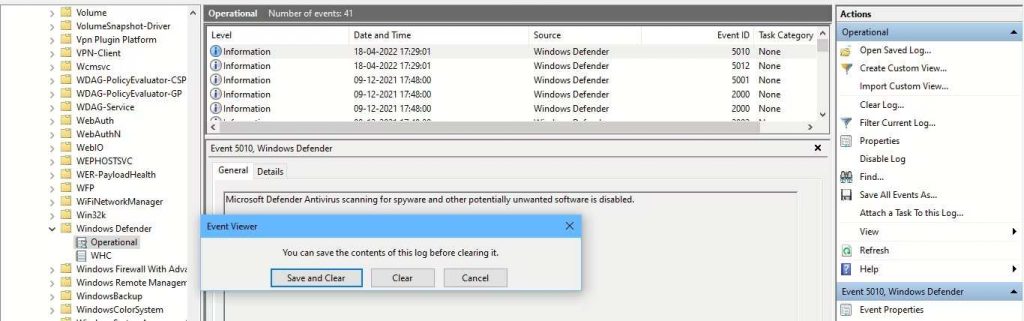
Step 9: Select Save and Clear if you want to protect the protection history records for later use before deleting them.
Also Read: How To Permanently Disable Microsoft Defender In Windows 11
Method 3: Use The PowerShell
To automatically clear Protection History after a predetermined number of days using PowerShell, follow these steps:
Step 1: Enter “PowerShell” in Windows search.
Step 2: Right click on “Windows PowerShell” and select “Run as administrator“.
Step 3: Click “Yes” on User Account Control (UAC) prompt.
Step 4: The Administrator PowerShell window will launch. You can copy & paste the below-mentioned command and press Enter:
Set-MpPreference -ScanPurgeItemsAfterDelay 5
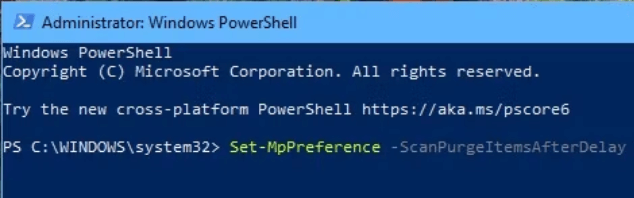
The number 5 in the command determines the duration (in days) before protection history logs are cleared. Modify the number to set your desired timeframe for clearing protection history, and it will be removed automatically.
Also Read: How To Use Microsoft Safety Scanner To Scan For Malware?
Method 4: Use The Group Policy Editor
To open the Local Group Policy Editor and access the Windows Defender Antivirus settings, follow these steps:
Step 1: Press the Windows + R keys to launch Run box.
Step 2: Enter “gpedit.msc” in the Run box and press Enter. This will launch Local Group Policy Editor.
Step 3: In Local Group Policy Editor window, navigate to “Computer Configuration” and expand it.
Step 4: Inside the “Computer Configuration” folder, locate and click on “Administrative Templates“. This will display a list of components in the middle panel of the Group Policy Editor.
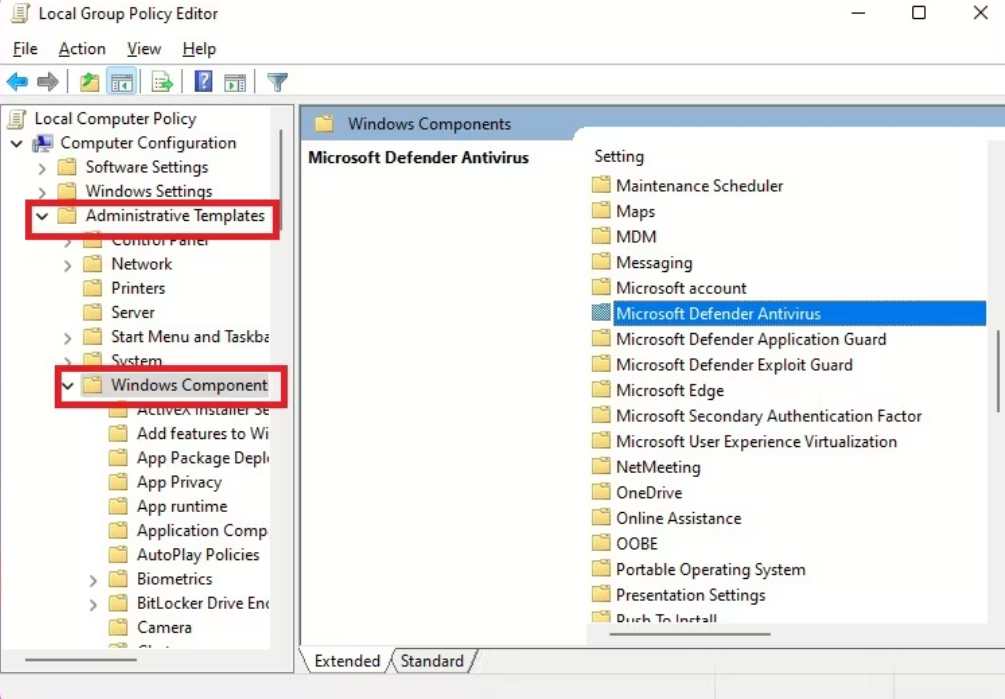
Step 5: Scroll down the list until you find “Windows Defender Antivirus” and click twice on it.
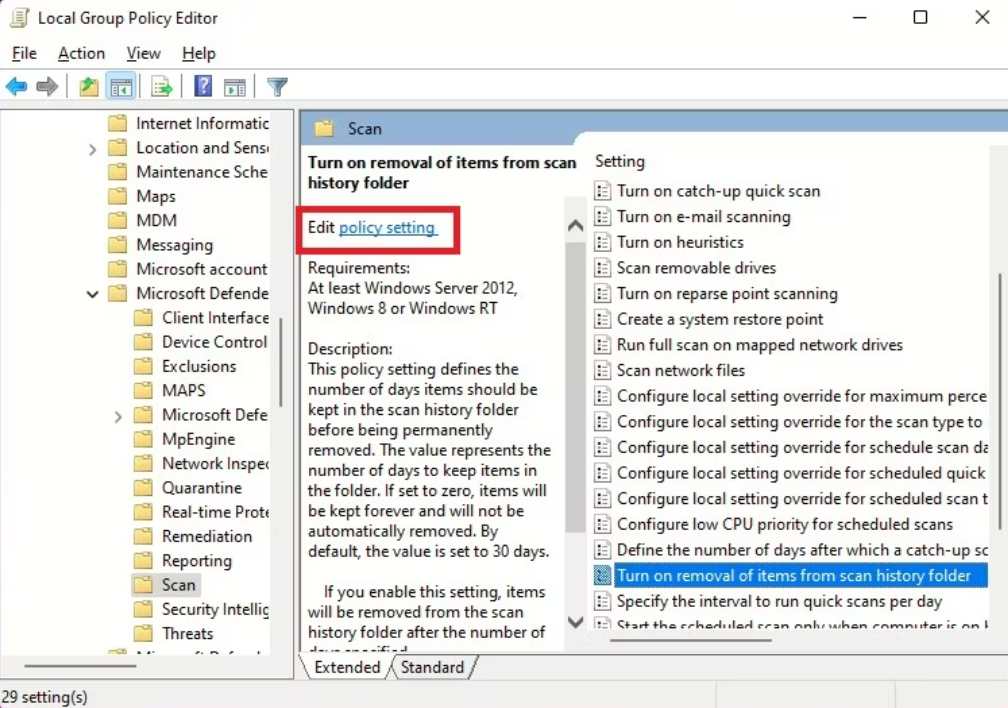
Step 6: In the list where the Defender items are mentioned, click twice on the “Scan” folder.
Step 7: Look in right panel, click twice on the “Turn on removal of items from scan history” policy setting.
Step 8: The policy window will open. By default, it will show “Not Configured” To fix the number of days for item removal, toggle the button next to “Enabled”

Step 9: The default number of days is set to 30. If you want to change this, enter the desired number of days.
Note: Setting the number of days to zero will keep items forever and prevent automatic removal.
Step 10: After specifying the desired number of days, click on “Apply” and then “OK“.
Now, the items in the scan history folder will be automatically deleted after the specified number of days.
Also Read: What To Do If Windows Defender Keeps Saying Threats Found
The Final Word On How To Remove The Microsoft Defender Protection History On Windows 11
If you wish to manually clear the Protection History in Microsoft Defender, you have several options discussed above. Please let us know in the comments below if you have any questions or recommendations. We would be delighted to provide you with a resolution. We frequently publish advice, tricks, and solutions to common tech-related problems. You can also find us on Facebook, Twitter, YouTube, Instagram, Flipboard, and Pinterest.