
Headphones not detected on Windows 11? Is your Windows PC unable to recognize your headphone device? Yes, this can indeed be annoying.
Whether you want to jam on your favorite tunes or connect for video conferencing with colleagues, headphones have become a crucial part of our modern-day lifestyle. Even professional video editors use a headphone to get better sound effects. Over time, headphones have become lighter, compact, trendy, and stylish. So, everyone wants a piece of it, whether for personal or professional use.

If your headphones are not detected on your Windows 11 PC, here are a few workarounds that you can use. In this post, we have listed various solutions that you can try to fix the “Headphones not detected” issue on Windows 11.
Let’s get started.
Also read: Best Noise-Canceling Headphones 2022
How To Fix Headphones not Detected on Windows 11
Solution 1: Manually Update the Audio Drivers
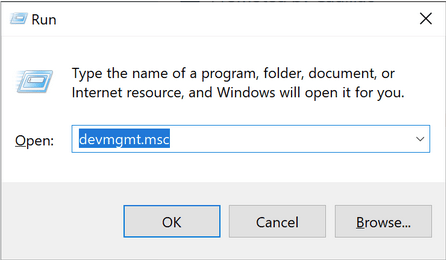
Press the Windows + R key combination to open the Run dialog box. Type “devmgmt.msc” and hit Enter to launch the Device Manager app.
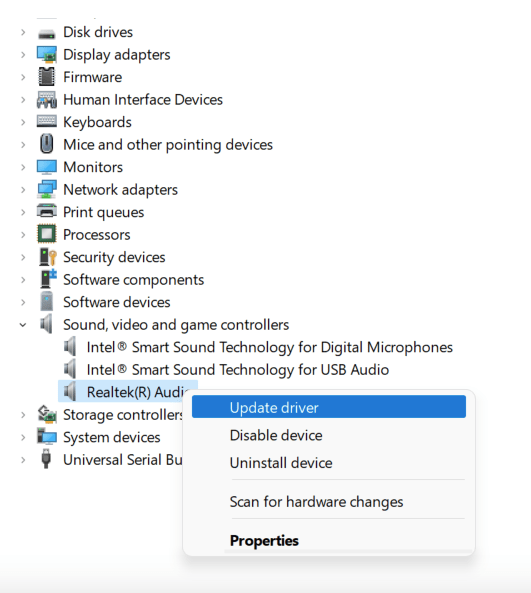
In the Device Manager window, tap on “Sound, video, and game controllers.” Right-click on each entry under this section and select “Update Driver.”
After updating the sound drivers, reboot your machine, and reconnect your headphones to check if the issue was resolved.
Download and Install Advanced Driver Updater
Manually updating the drivers sounds like too much hard work. Isn’t it? If you want to save your precious time, download and install the Advanced Driver Updater utility tool on your Windows PC. The Advanced Driver Updater tool automatically scans your device and allows you to install and update drivers on Windows in just a few clicks. Here’s what you need to do.
Download and install the Advanced Driver Updater tool on your Windows 11 device. Launch the app. Hit on the “Start Scan Now” button to get started.

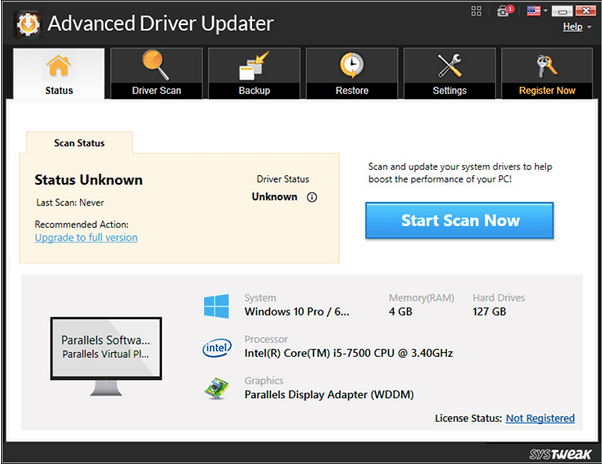
Advanced Driver Updater will list all the outdated drivers on the window in a few seconds. Hit the “Update All” button to update all the outdated, missing, and corrupt drivers.

Also read: How to Connect Bluetooth Headphones To Computer Through Windows Action Center.
Solution 2: Disable the Front Panel Jack Detection
Here comes another workaround to fix the “Headphones not detected on Windows 11” issue.
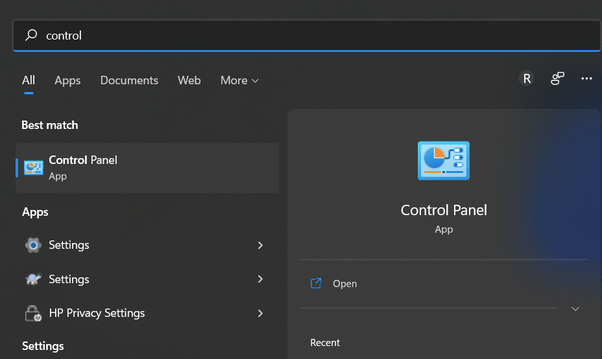
Press the search icon placed on the Taskbar, type “Control Panel,” and hit Enter.
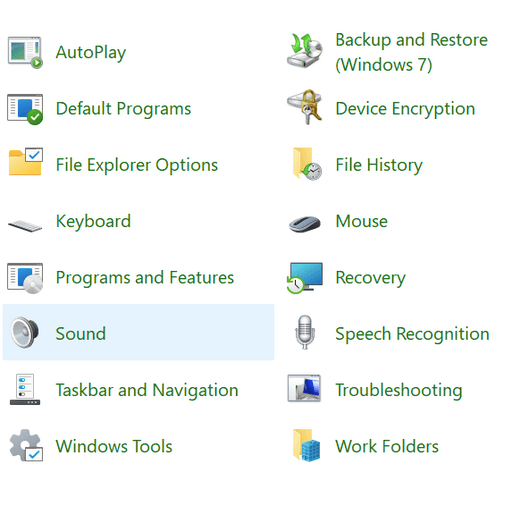
In the Control Panel window, tap on “Sound.”
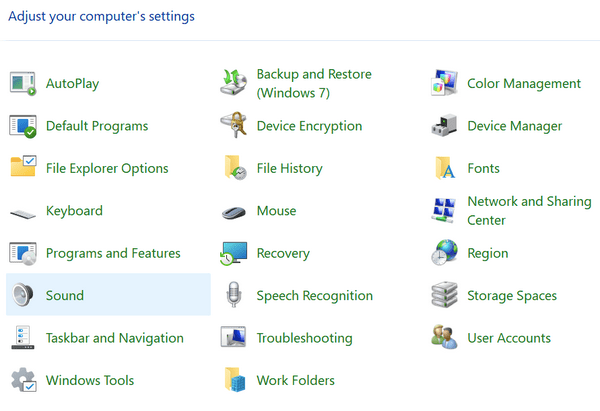
The Sound properties window will now appear on the screen. Select “Realtek HD Headphones.” Double-tap on it to open Properties.
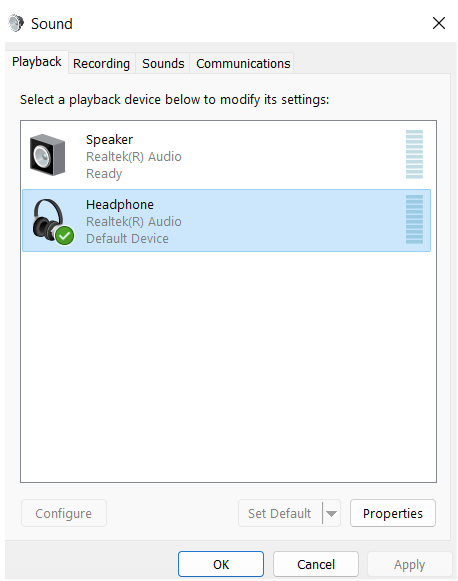
Head to “Connector Settings” and disable the “Front Panel Jack Detection.”
Also read: How To Enable Equalizer in Groove Music in Windows 10
Solution 3: Change the Default Sound Format
Launch the Control Panel app and select “Sound.”
In the Sound Properties window, switch to the “Playback” tab and double-tap on the default playback device.
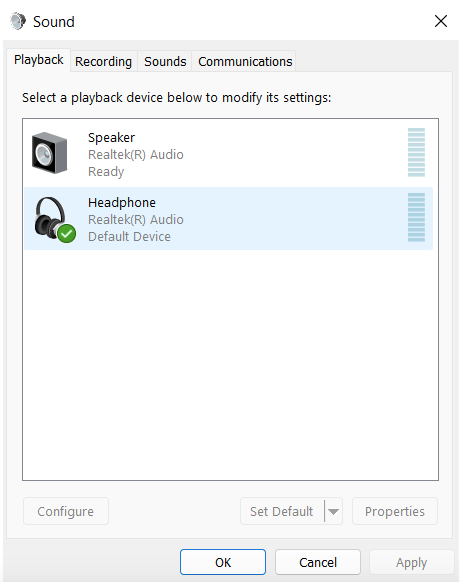
In the Speaker Properties window, switch to the “Advanced” tab. Use the drop-down menu to change the default sound format of the device.
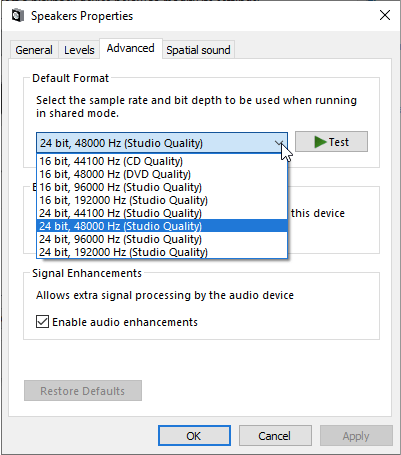
Hit on the OK and Apply button to save changes.
If your device cannot detect the headphones, changing the default sound format may help fix the issue. We hope this hack works!
Also read: Dolby Atmos Not Working on Windows 10? Here’s the Fix!
Solution 4: Clean the Audio Jack and Reconnect the Headphones
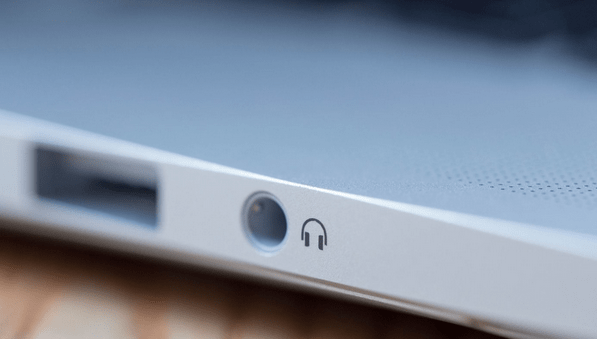
Since we frequently use our laptops, there’s a chance that the audio port may gather some dust or debris. Hence, if you are using wired headphones, you can try cleaning the audio jack on your laptop. After cleaning the audio jack, reconnect your headphones and check if it resolved the issue.
Solution 5: Run the Audio Troubleshooter
Press the Windows icon placed on the Taskbar and select “Settings.”
Switch to the System tab and then tap on “Troubleshoot.” Tap on “Other Troubleshooters.”
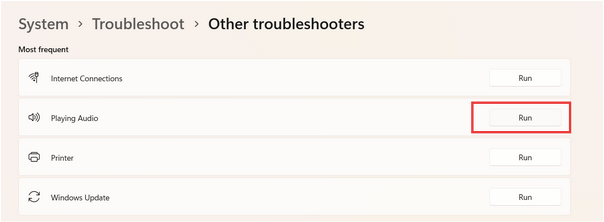
Scroll through the list of built-in troubleshooters to look for “Playing Audio.” Hit on the Run button placed next to it to run the audio troubleshooter on your Windows 11 PC.
Conclusion
Here are a few simple methods to resolve the “Headphones not detected on Windows 11” issue. So, if your device is unable to recognize the headphones, you can use any of the above-listed solutions to get past this hindrance. Also, if you use Bluetooth-enabled headphones, you can try updating the Bluetooth drivers or enabling and disabling the Bluetooth again to troubleshoot.
Do let us know which method did the trick for you. Feel free to share your thoughts in the comments section!