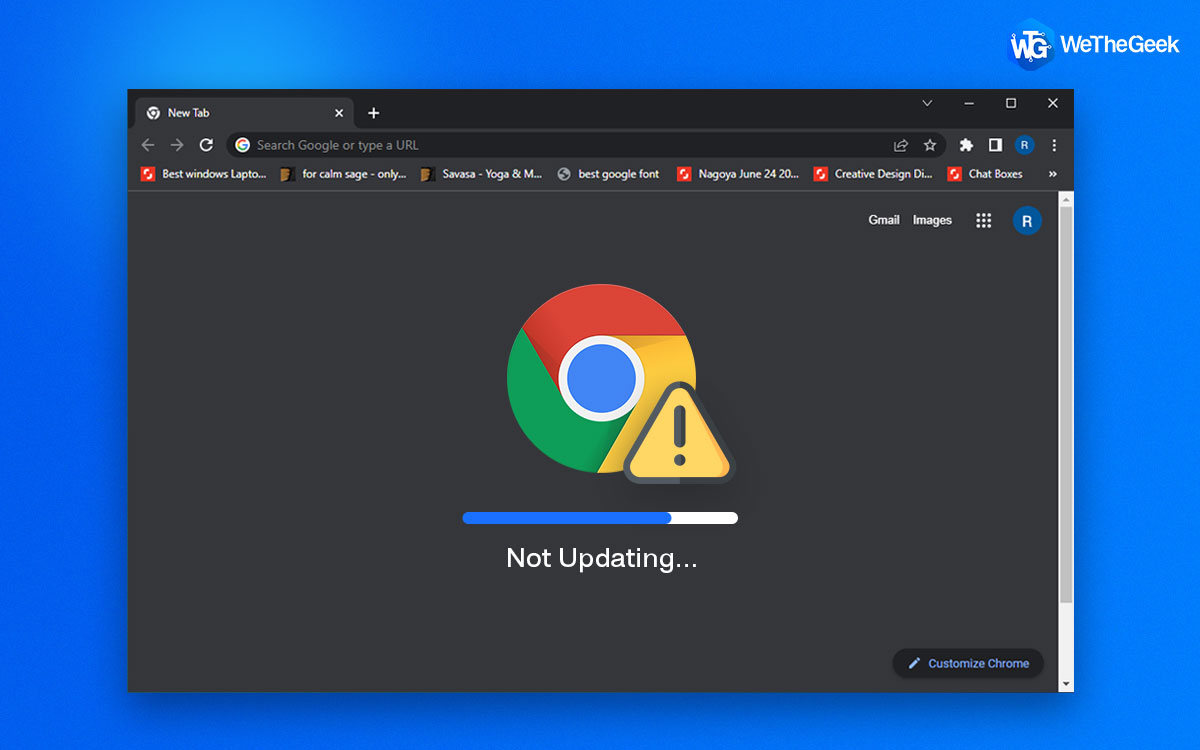
With every update, Chrome ensures that users get the latest security features and experience enhanced speed and performance. In fact, Chrome recently rolled out version 100 on March 29th, 2022, and apart from a brand new logo, it has introduced various development features, security improvements, and much more. With this version, it has fixed 28 security vulnerabilities with nine of them marked as high severity. However, some users are unable to update Google Chrome and there could be various reasons such as –
- Obsolete DNS cache
- Presence of malware
- Windows Defender firewall interfering
- Accumulation of web browser cache
- Missing Google Chrome files
And, there are many others. In this post, let’s have a look at some of the best ways to fix “Chrome not updating” on Windows 11/10 computers –
How To Update Google Chrome?
Unable to update Google Chrome? Here are some ways to fix the issue. After each of these methods –
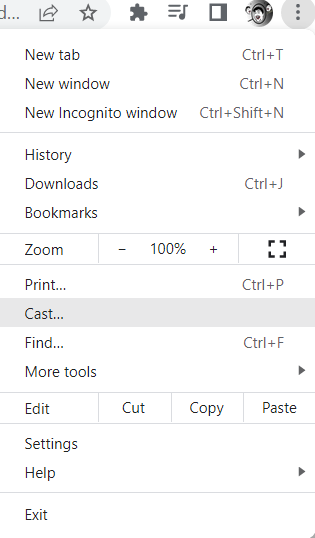
1. Click on the three vertical dots
![]()
2. Click on Help and then on About Google Chrome
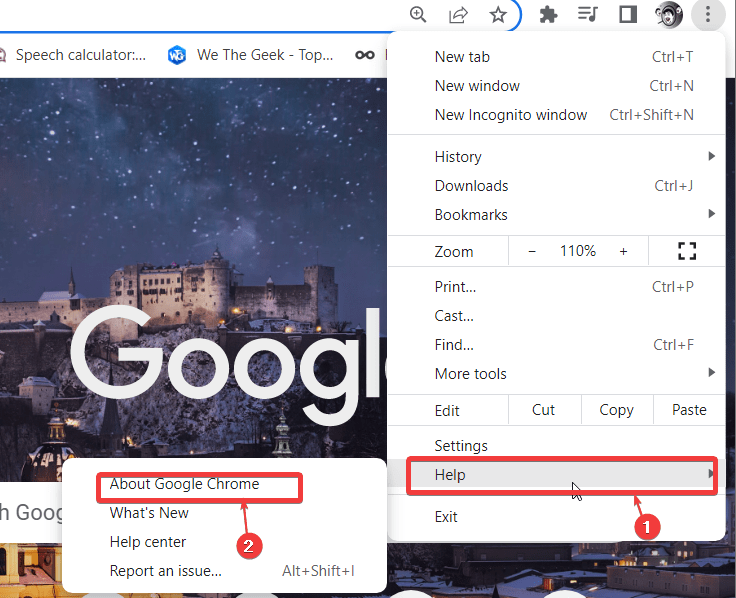
3. Check if Google Chrome gets updated to the latest version or not
How To Resolve Google Chrome Not Updating Issue
1. Restart Your Computer
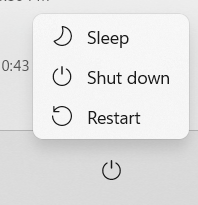
If there are any minute bugs that are Google Chrome from updating on your Windows 11/10 PC, then a quick restart would resolve those and you should be able to update Google Chrome hassle-freely. But, before that, make sure you quit Google Chrome and bookmark or save any opened important tabs.
2. Check If You Have A Faulty Internet Connection
Can’t update Google Chrome? Chances are you have a faulty internet connection. In that scenario, you can run some preliminary checks such as checking internet reception on other devices and checking the router. You can also try the fixes mentioned in this post. One of the things you can do is execute the inbuilt network troubleshooter. Here are the steps for the same –
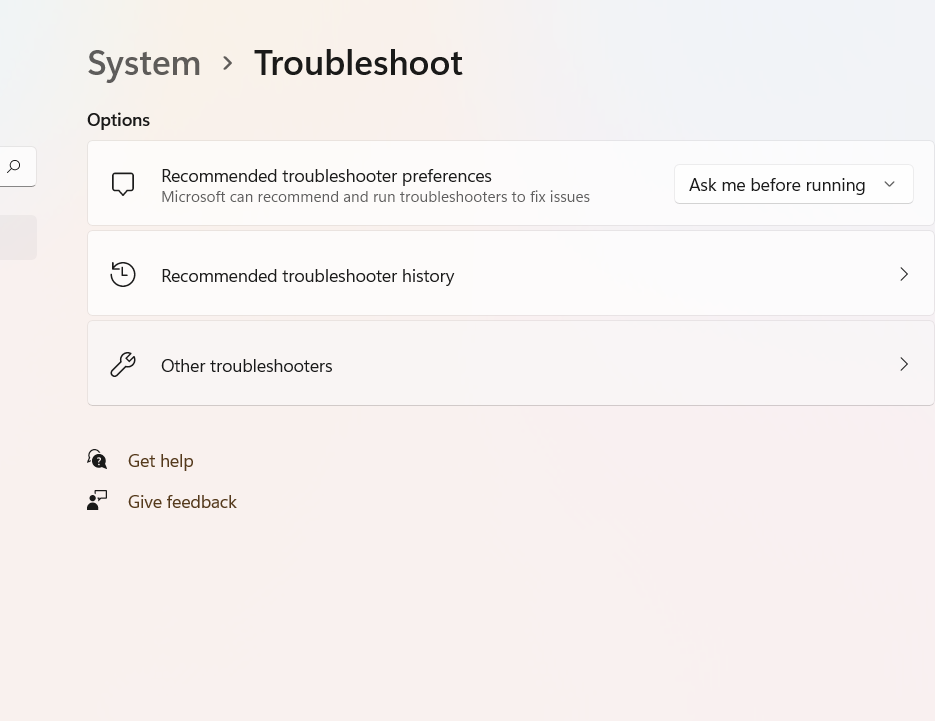
- Press Windows + I key combination and open Settings
- From the left-hand side, click on System if not already selected
- From the right-hand side, click on Troubleshoot

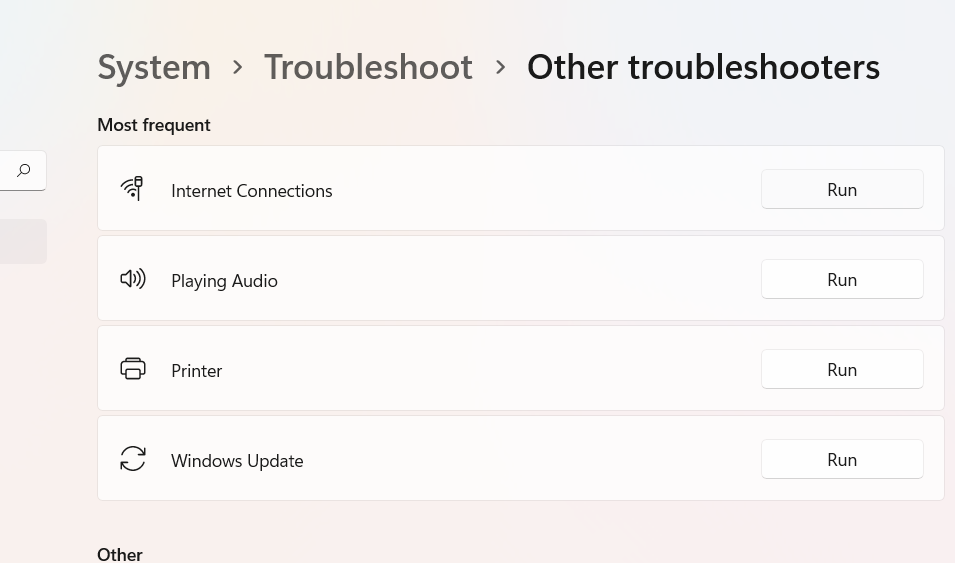
- Click on Other Troubleshooters
- Under Most Frequent, click on the Run button next to Internet Connections
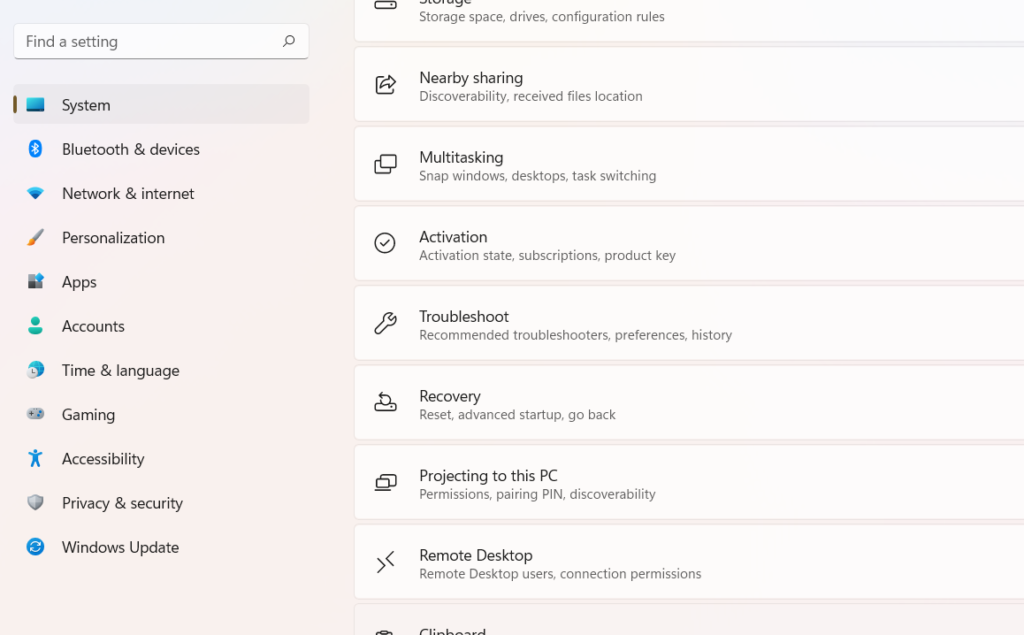
After you have followed the on-screen instructions, check if you can now update Google Chrome.
3. Flush DNS Cache
An outdated DNS or Domain Name System cache can prevent Google Chrome from connecting to Google’s update servers. Flushing the DNS cache can help in fixing this issue and hence you will be able to update Google Chrome. Here are the steps for the same –
- In the Windows search bar, type cmd
- From the right-hand side select Run as administrator
- When the Command Prompt window opens, type ipconfig /flushdns and press Enter
Now, check if you are able to update Google Chrome or not.
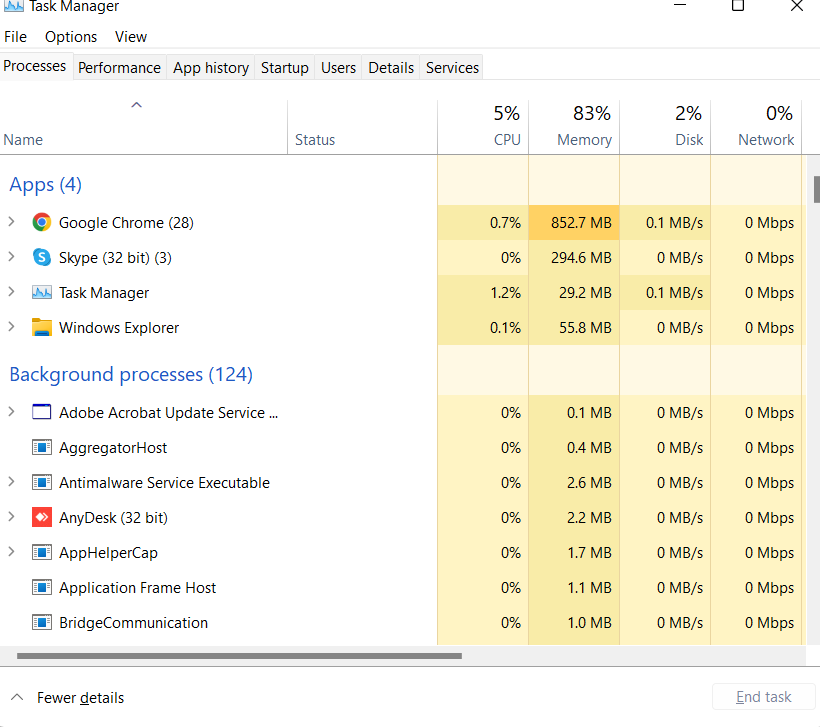
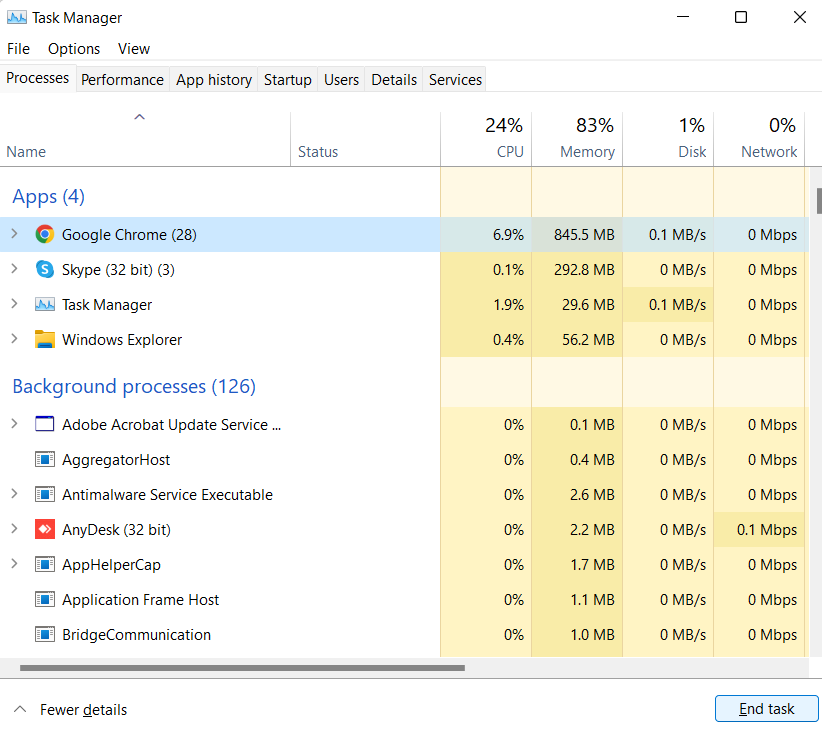
4. Close Chrome Via Task Manager
One of the ways that has helped users get over the issue is running the Task Manager to exit Chrome. For this –
- Press ctrl + shift + esc to open the Task Manager
- Select Google Chrome
- Click on the End Task button at the bottom-right corner of the screen
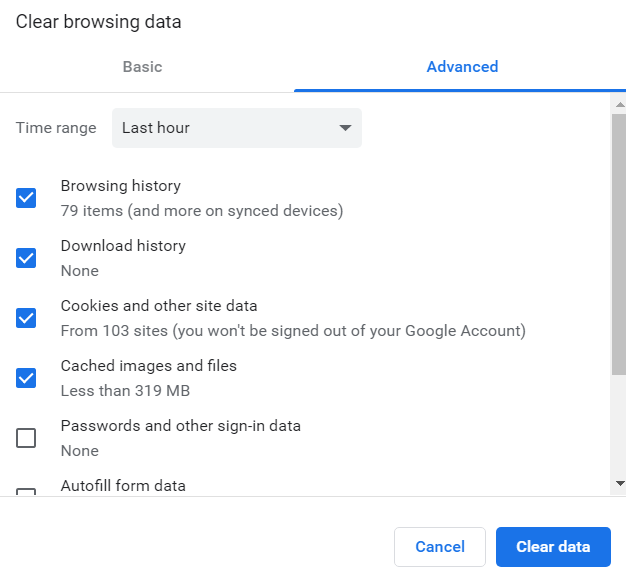
5. Clear Chrome Cache
An overstuffed browser cache can mess up updates. Also, your stuffed browser cache might also be hiding corrupt cache entries as well which if not looked into can lead to further issues. So, here’s how you can clear your browser cache on Google Chrome –
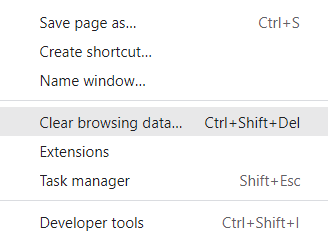
- Click on the three vertical dots and then click on More Tools
- Next, click on Clear Browsing Data
- Click on the Advanced tab and then click on the blue-colored Clear data button from the bottom-right
6. Enable Google Update Services
There are chances that Google Update Services are disabled on your Windows computer which is the reason why Chrome is not updating on your computer. Check and enable the services for the updates to take place in Google Chrome –
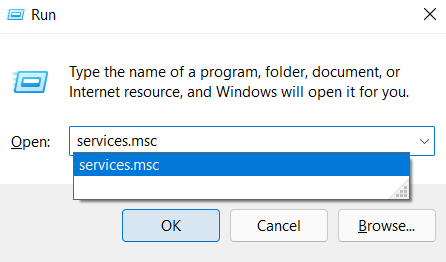
- Press Windows + R button to open the Run dialog box
- When the dialog box pops up, type services.msc and press Enter
- When the Services window opens, scroll down and locate Google Update Service (gupdate)
- Click on the Startup type dropdown and then select Automatic (Delayed Start), if not already selected
- Click on Apply and then OK
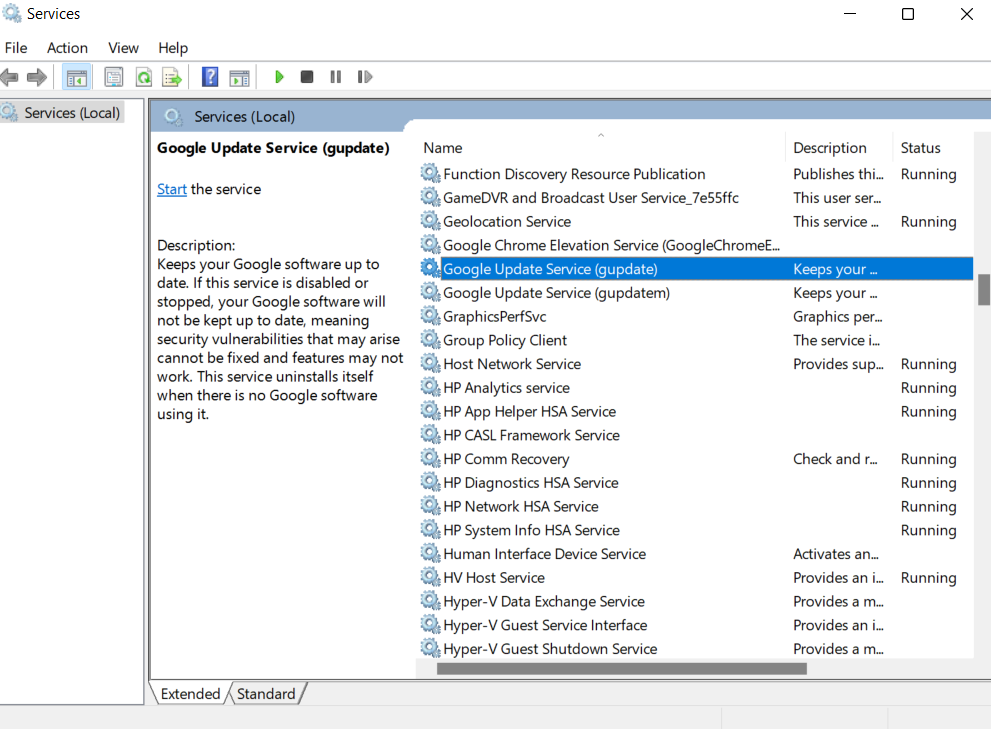
Check if now you can update Google Chrome or not.
7. Reset Chrome
As the name suggests, this method will reset Chrome to its original settings and there are high chances that you might just then be able to fix “Chrome not updating on Windows”. For this –
1. Open Google Chrome
2. In the address bar, type chrome://settings/reset
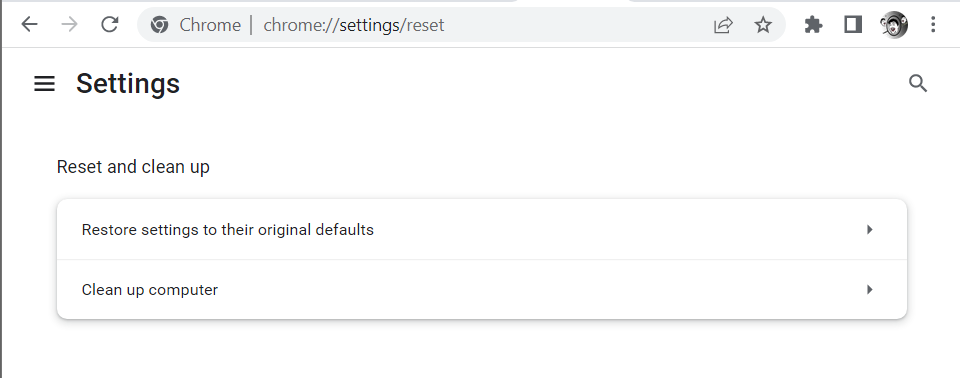
3. Click on Restore settings to their original defaults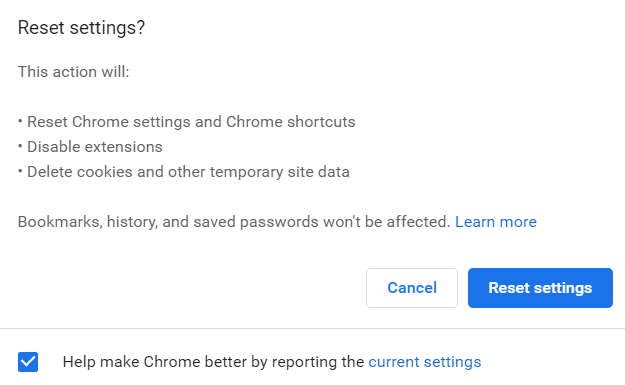
4. Click on the blue-colored Reset settings
8. Uninstall and Reinstall Chrome
Quite possible you are unable to update Google Chrome because of some missing files. This can be resolved by uninstalling Google Chrome and reinstalling it. Here we’d like to emphasize the importance of completely uninstalling Google Chrome first because this would ensure a smooth reinstallation. For this, you can choose from some of the best uninstaller software. Prior to that, you can use the Control Panel to uninstall Google Chrome –
1. In the Windows search bar. type control panel and click on Open from the right-hand side
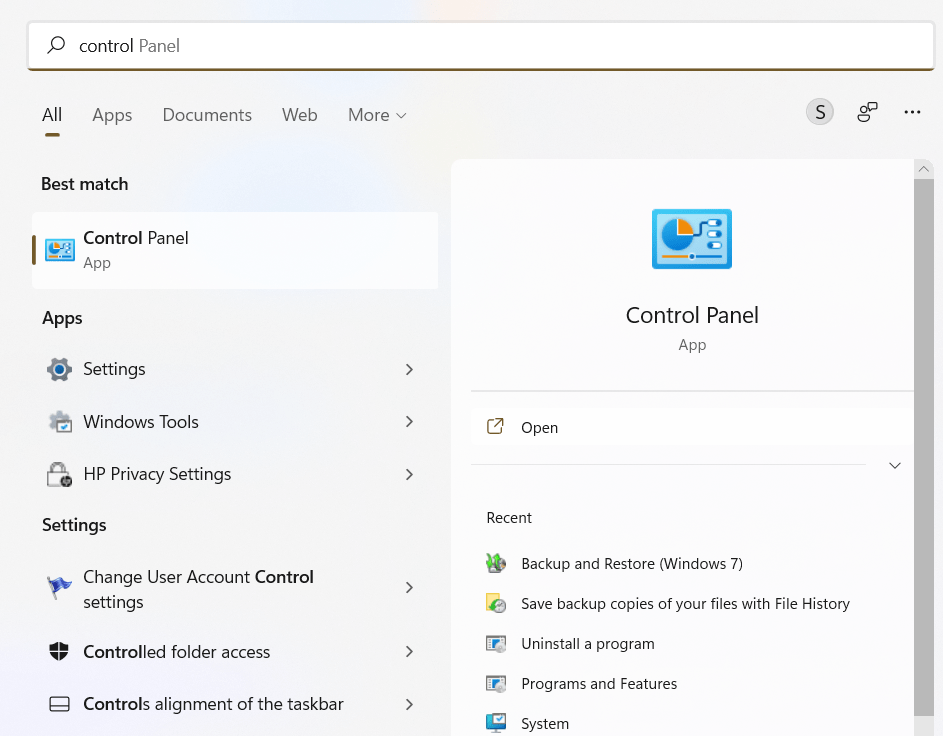
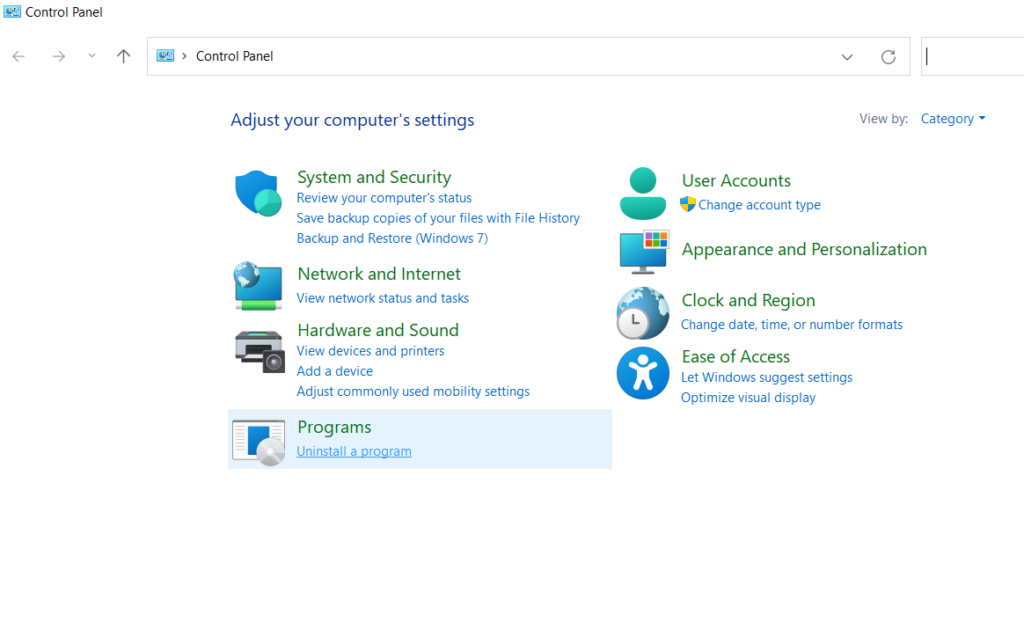
2. Under Programs, click on Uninstall a program
3. From the list of programs, click on Google Chrome and then click on the Uninstall button from the top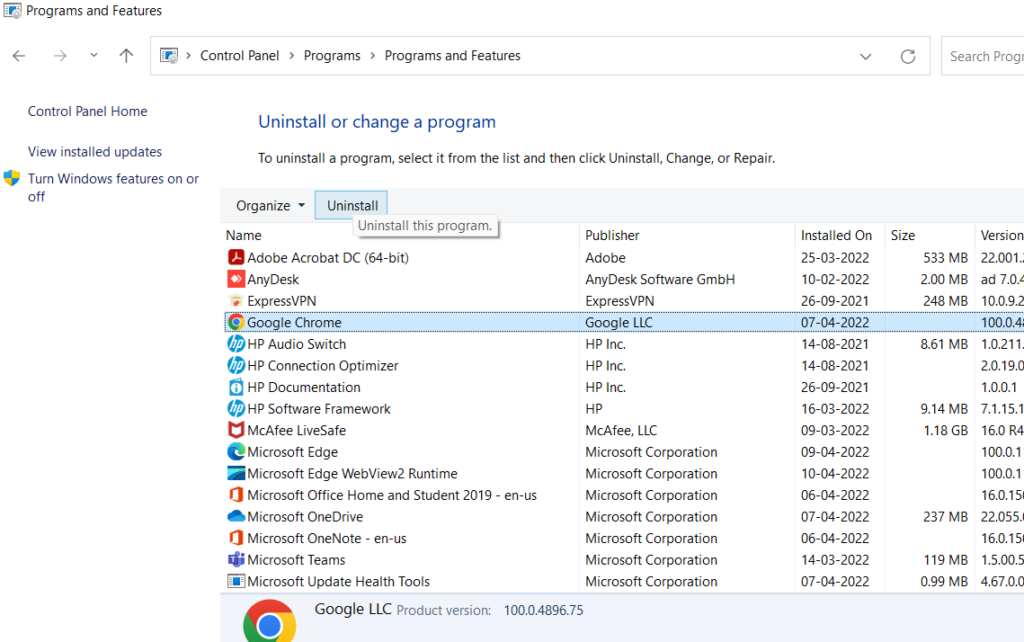
4. Download and install Google Chrome
You should now be able to get your hands on the latest version of Google Chrome.
9. Check For Malware
Your Chrome update problem could be pointing towards an impending malware. It is always recommended to have an Antivirus by your side because an Antivirus can identify and remove malware in real-time before it causes any further damage. Since we are talking of Windows, Systweak Antivirus is one Antivirus program that you can lay your trust on. Let’s quickly have a look at some of its best features –
- It runs in the background without affecting your PC’s performance
- Provides multiple scanning modes
- Provides web security
- Constantly updates itself with the latest malware definitions so that no malware can hideaway
- Tracks the malware in real-time before it can pounce on your PC functionality and data
- You can schedule scanning at your desired time
- Lightweight on resources
Also Read: How To Choose The Right Antivirus Program?
How To Use Systweak Antivirus To Detect Malware
1. Download, run and install Systweak Antivirus

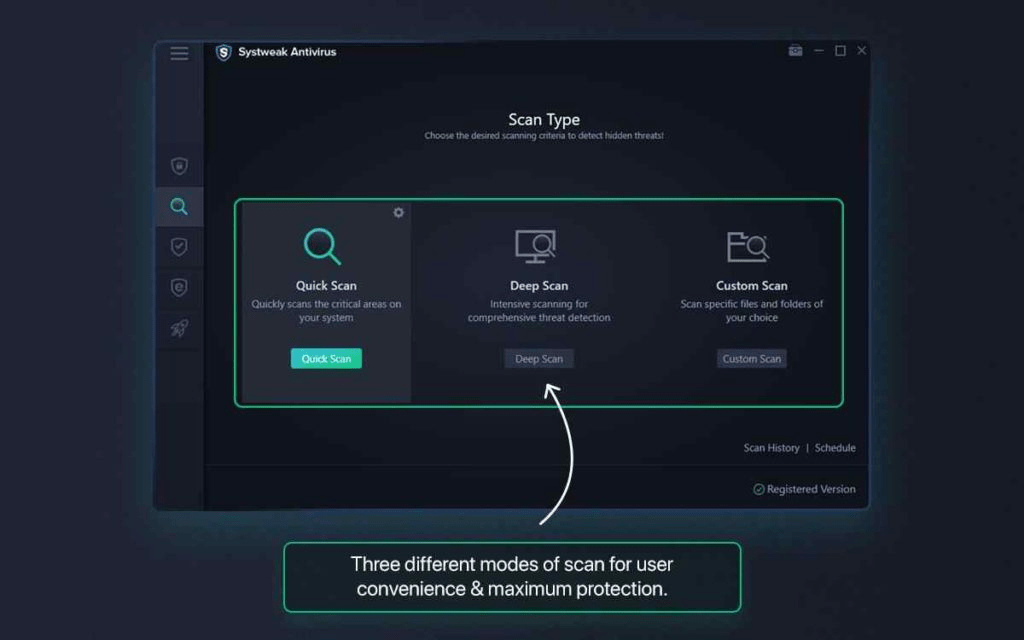
2. Click on the magnifying glass icon from the left-hand side of the screen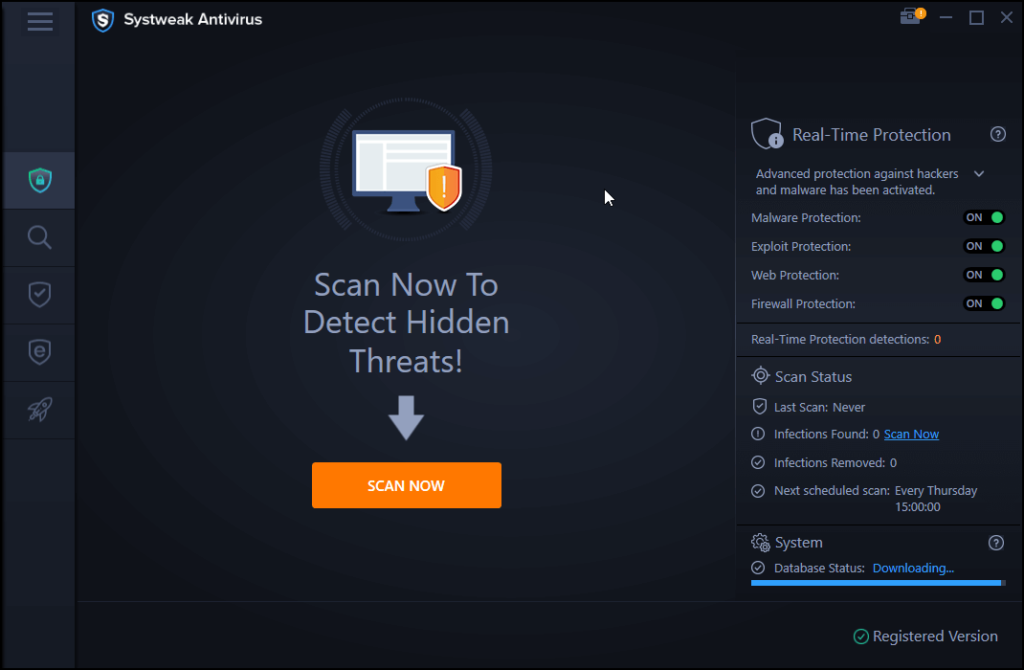
3. Select the mode of scan
Systweak Antivirus will track any malicious threat and remove them.
Also Read: Here is A comprehensive review of Systweak Antivirus.
Wrapping Up
Hopefully, by now you must have resolved the Google Chrome not updating issue. If yes, do let us know which of the above fixes helped you out in the comments section. For more such content – tech reviews, troubleshooting guides, app listicles, and much more, keep reading WeTheGeek.