The Compact View is one of the numerous new features that Windows 11 has added to its File Explorer. Users who preferred the earlier File Explorer interface, which had less space between objects, are the main beneficiaries of this functionality. In order to enable the compact view in File Explorer on Windows 11, we’ll share three methods with you.
How To Enable Compact View In File Explorer On Windows 11
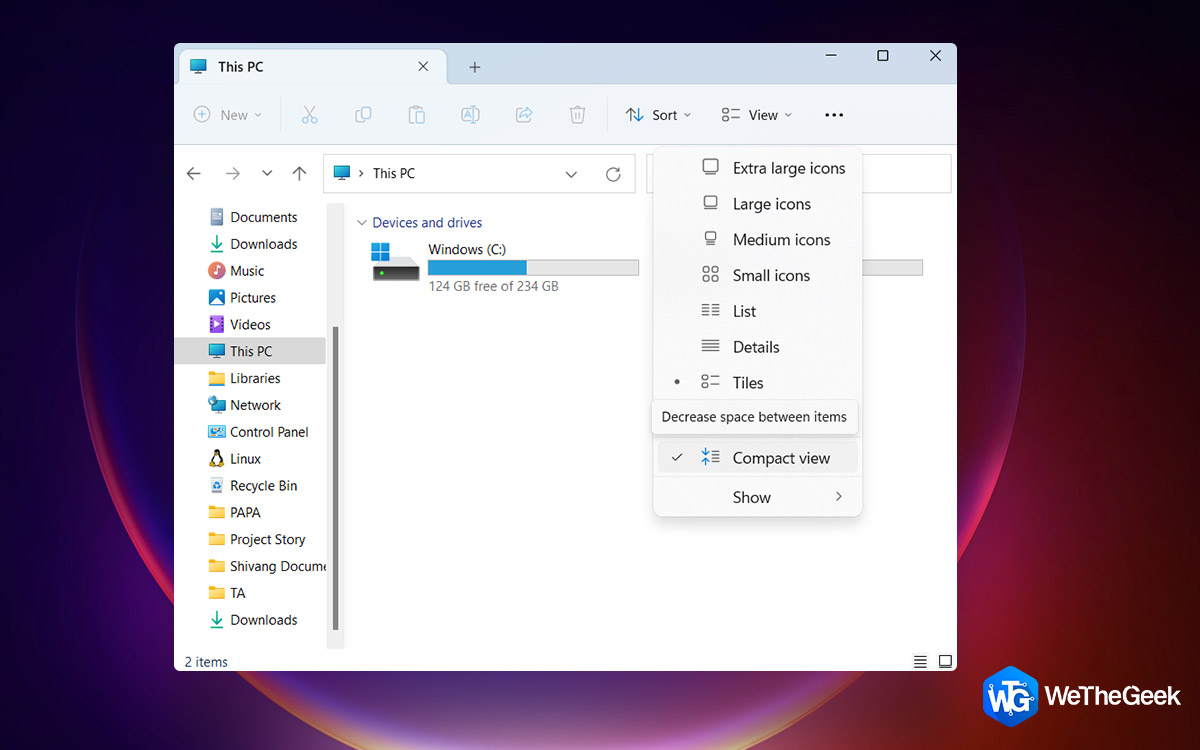
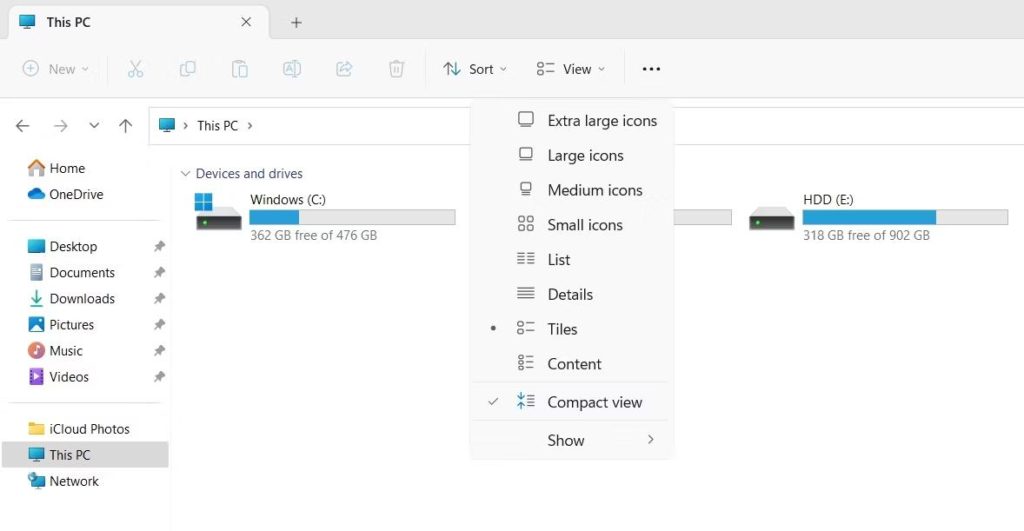
Method 1: Enable Compact View Using The Command Bar
Using the command bar in File Explorer is the simplest approach to enable or disable the condensed view. What you must do is as follows:
Step 1: Open File Explorer, then select View from the top menu.
Step 2: To enable it, select the Compact view option.
Step 3: To make the changes effective, your computer might need to be restarted.
Also Read: How To Fix Slow File Explorer In Windows 11
Method 2: Enable Compact View Using The Folder Options
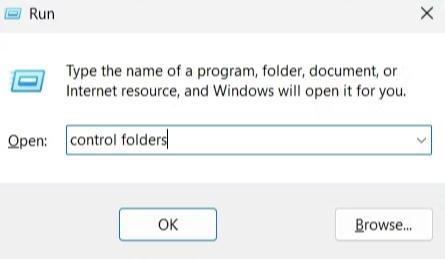
You can use Folder options to complete the task if the command bar’s condensed view option is absent. Although there are several ways to open the Folder option, using the Run dialogue box is the easiest.
Step 1: Using the Win + R hotkeys, open the Run dialogue box.
Step 2: Type control folders, and hit Enter to display the Folder option.
Step 3: Check the Decrease space between the item (compact view) box on the Folder option’s View tab.
Step 4: To save the changes, click Apply > OK after that.
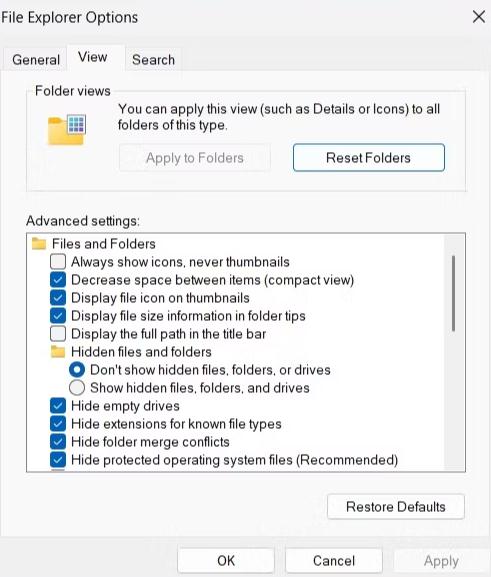
As a result, File Explorer should show fewer gaps between your files.
Also Read: How To Fix Can’t Create a New Folder on Windows 11
Method 3: Enable Compact View Using The Windows Registry
Important Windows settings are stored in Registry files on your computer. Advanced Windows users can utilize the Registry Editor to enable File Explorer’s condensed view. The registry can be dangerous to alter. Therefore, before following the methods below, make sure to set a restore point or backup your registry files.
Also Read: Important Points to Take Care While Editing Windows Registry
Step 1: To access the search menu, press Win + S.
Step 2: Enter there and select Run as administrator from the menu.
Step 3: The UAC prompt will appear. Click Yes on the prompt box.
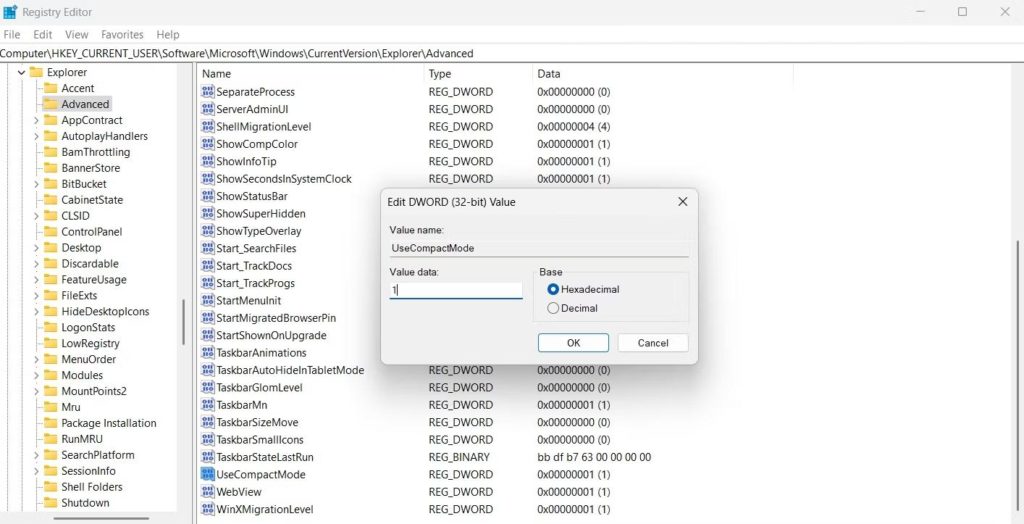
Step 4: Navigate to the following place in the Registry Editor:
HKEY_CURRENT_USER\Software\Microsoft\Windows\CurrentVersion\Explorer\Advanced
Note: You can copy and paste the entire path in the address box below the tab options of your Windows Registry Editor.
Step 5: In the right pane, look for and double-click the UseCompactMode entry.
Step 6: In Value data, enter 1, then press OK. The Compact View will then be enabled.
Note: You can also enter 0 in the Value data field to disable, then click OK.
Also Read: How To Fix Registry Editor not Working on Windows 11
The Final Word On How To Enable Compact View In File Explorer On Windows 11
Although the updated File Explorer is fantastic, many users still prefer the previous version’s less padded design. Either of the ways described above can be used to enable the compact view option, which will remove unnecessary space between objects in File Explorer.
Please let us know in the comments below if you have any questions or recommendations. We would be delighted to provide you with a resolution. We frequently publish advice, tricks, and solutions to common tech-related problems. You can also find us on Facebook, Twitter, YouTube, Instagram, Flipboard, and Pinterest.
Suggested Reading: