
You can easily find files and folders with File Explorer’s search tool. You can save the search results for later use when you search. When retrieved later, this stored search will automatically update to include any newly discovered files that match the search criteria.
How To Save A Windows File Explorer Search For Future Use
Any search in File Explorer can produce results that can be saved in Windows 10 or 11. Here are the steps to do the same.
Step 1: Launch File Explorer and enter your search term into the search box on the top right.
Step 2: In the search results pane, right-click any space. If the preview pane is enabled, do the same.

Step 3: After selecting Save Search from the context menu, give the saved search a meaningful name. The search term you typed will be the default name.
Step 4:To make the search more accessible, you can modify the search’s Author and add Tags.
Step 5: To complete the procedure, click Save.

Step 6: The default location for saving File Explorer searches is “C: Users\\Searches.” If you’d like, you can alter the save location.
Step 7: The search results are kept in a virtual folder pinned to Quick Access, the Start menu, or the Taskbar. As a result, it will be simpler to locate and use in the future.
How To Use The Saved Windows File Explorer Search Query Again
The Windows Search Subsystem can access the search because it is produced from an XML file. You may access any saved searches in File Explorer by opening the folder. This implies that when you access the search folder, if a new file or folder name matches the original search query, it will be included in the results. This also means that if your search query is the same as the one you’ve used, you don’t need to save fresh searches.
Disk Analyzer Pro: A Perfect Tool To Analyze The Content Of Your PC
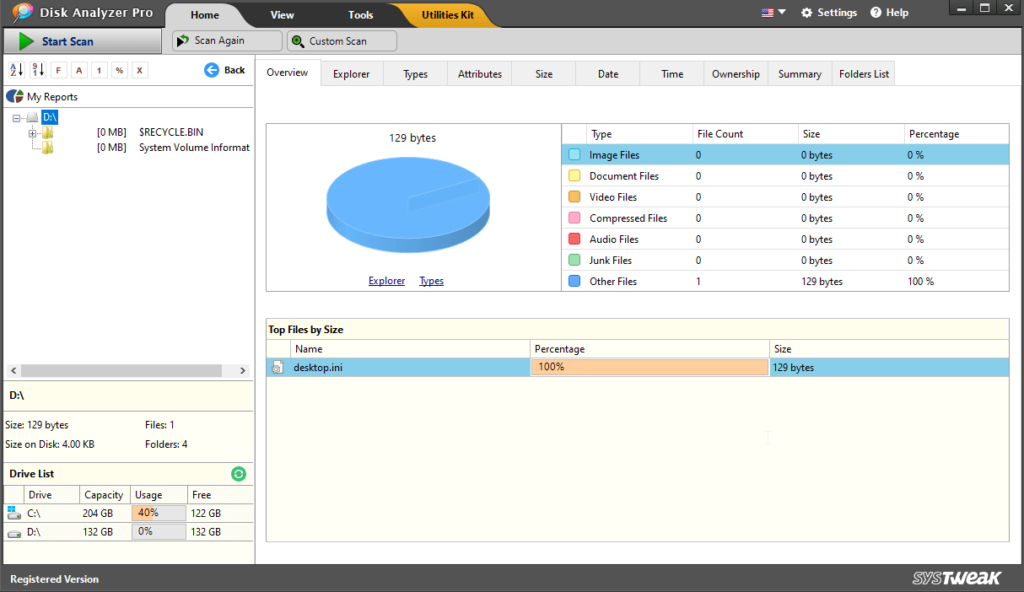
If you know the file name you are searching for, then the above method is perfect. However, if you do not remember the file name, it would be very difficult to pull out the file from thousands of files stored on your PC. In this case, it is recommended to use a tool like Disk Analyzer Pro that will scan your PC and group your files into various categories like Video, Audio, Images, Documents, etc.
This app also performs basic optimization functions like removing junk files and eliminating duplicate and zero-byte files. Here are some of the features of this fantastic tool.


Disk usage reports are accessible: You may categorize and organize your storage space into different file types with Disk Analyzer Pro. Thanks to this categorization, the user can quickly review and decide which files are necessary to keep and which can be removed.
Duplicate files are found: In addition to classifying them, Disk Analyzer Pro may also show you a list of duplicate files on your hard drive. This tool might free up space on your computer by eliminating all duplicates while keeping the originals.
One can find junk and temporary files: Every computer creates garbage and temporary files, which take up space on your hard disk. Disk Analyzer Pro cleans up your PC by deleting unnecessary and outdated files.
Searches through large, outdated files: This tool can find old files that haven’t been accessed in a while and big files that take up a lot of hard drive space. You may free up a lot of space on your hard disk by deleting all of your huge and outdated files.
A range of file formats is available for exporting reports on disk space: Your disk management reports can be saved in HTML, CSV (comma-delimited), or XML format. Do a time-based inquiry to find out how rapidly your hard disk fills up, or import them into several tools for more analysis.
Use specific search criteria: You can modify your search criteria when using Disk Analyzer Pro to search for unnecessary files and folders that are taking up disk space.
The Final Word: How To Save A Windows File Explorer Search For Future Use
It’s quite helpful to have the option to save search results from File Explorer. Additionally, the findings’ automatic updating to incorporate pertinent new files increases their utility. You’ll utilize this straightforward trick over and time again.
Follow us on social media – Facebook, Instagram, and YouTube. Please contact us with any questions or ideas. We would be delighted to provide you with a resolution. We frequently publish advice, solutions, and guidance for common technological prob