During the setup process, Windows never prompts you to enter a PC name and organization. That’s because Windows aims to make the login process effortless. The OS automatically retrieves the information from your associated Microsoft account without asking for your permission. In many cases, you will only see the name as “user name” and the name of the organization as “org name.”
The identity of the registered owner isn’t particularly important, however, certain applications might utilize this data to tailor the user experience. If you bought the computer from another owner, you may want to modify the name in particular. Being said that, here is how to alter that information on Windows PC.
Also Read: How to Change a Google Drive File Owner
How To Change The Owner Details On Windows PC
The following instructions stated below works on almost all popular Windows OSes.
Task 1: Check The Current Owner And Organisation
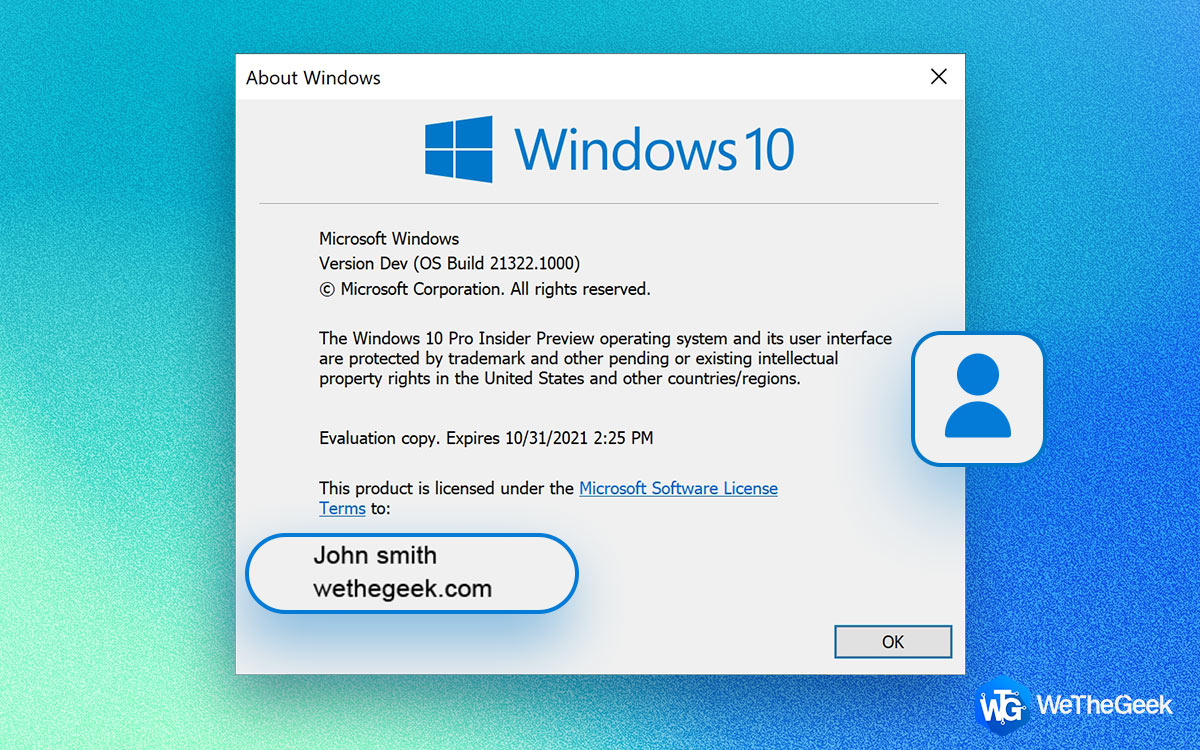
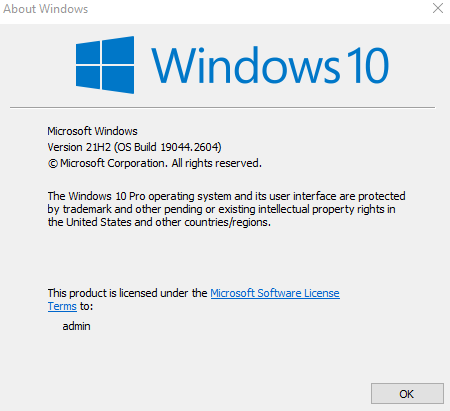
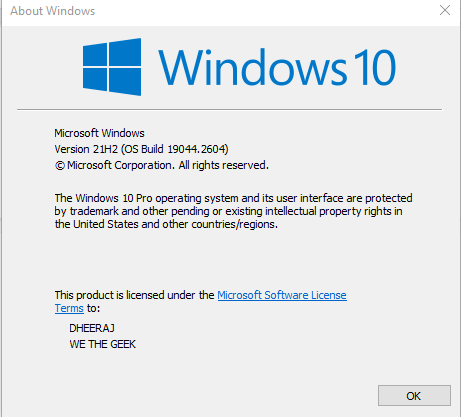
Step 1 = Before you change the owner’s details, lets learn how to find it in the first place. Press Win + S to open the search box and type WINVER followed by the Enter key.
You might want to read: How You Can Take Ownership Of Windows 10 Folder And Files
Task 2: Take A Backup Of Your Registry
The process to change the owner’s and organization’s name on your PC is by making a couple of changes through Windows Registry. Hence, it is important to backup your Windows Registry before making any modifications. Here are the steps to take a backup of your Registry:
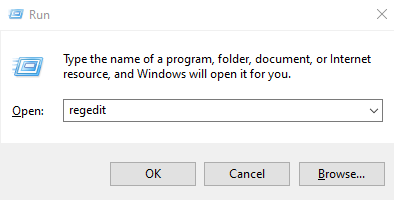
Step 1: Press Win + R on your keyboard to open the RUN box.
Step 2: Type regedit in the text space and press the OK button.
Step 3: Click on the Yes Button if you get a UAC prompt box.
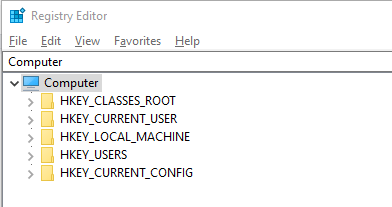
Step 4: Once the Windows Registry box opens, click on ‘Computer’ (first key on the left pane).
It is important you click on ‘Computer’ before exporting the file as it will take a complete backup of all Registry entries and Keys.
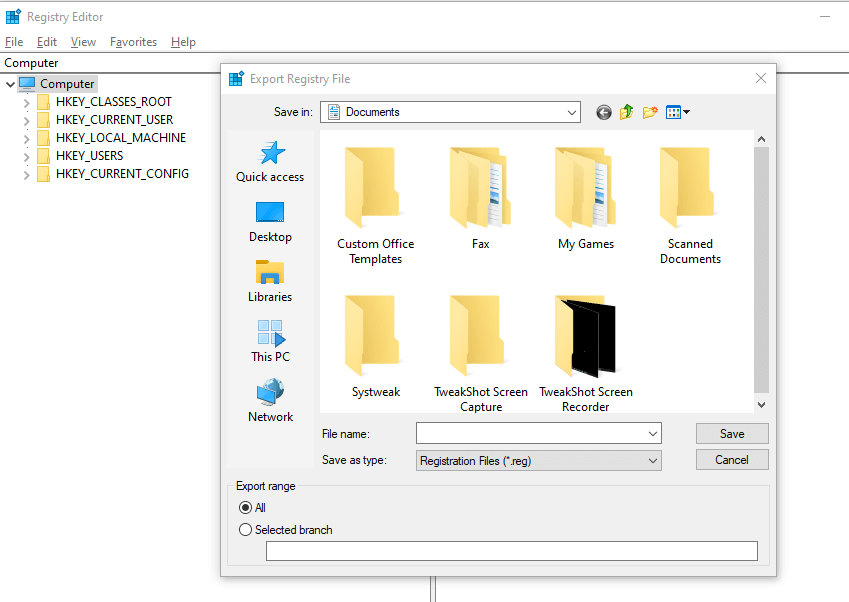
Step 5: With the ‘Computer’ key highlighted, click on the File tab and choose Export from the dropdown menu.

Step 6: Provide a file name and choose the location to save your Registry backup.
This backup will help you restore your computer to its current state in case you make an error while altering your Registry.
Also Read: How To Fix Registry Editor not Working on Windows 11
Task 3: Change The Registered Owner Name Of The PC
Step 1: Launch the Registry Editor.
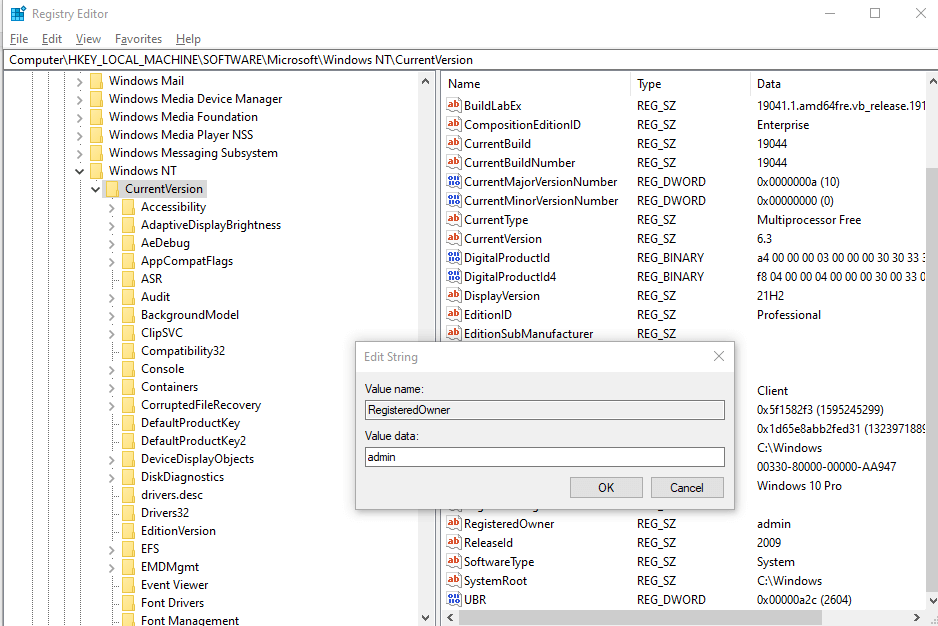
Step 2: Navigate to the following path by copying and pasting the path mentioned below into the address bar of your Windows Registry App.

Step 3: Press the Enter key to navigate to the required key in the left panel which is “CurrentVersion” in this case.
Step 4: In the right panel, look for “RegisteredOwner” and double-click it.
Step 5: A small box will open where you will have to type the desired name in the text box under Value Data.
Step 6: Repeat the above step for the key labeled as “RegisteredOrganization”.
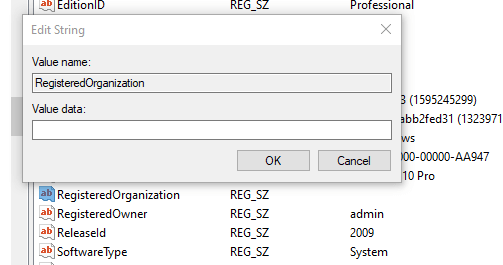
If you do not find these keys then you can create them easily.
Make a right-click on the white portion of the right panel after you navigate to the “CurrentVersion” key on the left. Choose New followed by String Value and rename it “RegisteredOwner”. Create another String Value and rename it as “RegisteredOrganization”. Provide the Owner name and organization name by double-clicking it and adding the information under Value data.
Step 7: Reboot your PC and open Winver gain to check the modified information.
Also Read: Important Points to Take Care While Editing Windows Registry
The Final Word On How To Change The Owner Details On Windows PC
Ideally, the procedure will be successful, and the names you wanted to see are now visible. Additionally, if you purchased your PC from someone else, you might think about customizing Windows to your preferences.
Please let us know in the comments below if you have any questions or recommendations. We would be delighted to provide you with a resolution. We frequently publish advice, tricks, and solutions to common tech-related problems. You can also find us on Facebook, Twitter, YouTube, Instagram, Flipboard, and Pinterest.
Suggested Reading: