
Did you just get stuck with the “A device which does not exist was specified” error on Windows 11? Well, don’t worry. This error message is usually triggered while accessing an external storage device or using disk partitions. It can also appear on Windows when there is a problem with a hardware device, such as a printer, scanner, or USB drive.

What Causes This Error?
The “A device which does not exist was specified” external hard drive error message can be triggered by several factors. Some of the common causes are:
- Hardware issues: The error message may appear if there is a problem with the hardware device itself. For example, if the device is damaged or malfunctioning, it may not be detected by your computer, leading to an error message.
- Outdated drivers: If the drivers for the hardware device are outdated, it can cause the error message to appear. This is because the device may not be recognized by your computer, or the drivers may not be compatible with the operating system.
- Corrupted system files: The error message may also be caused by corrupted system files or registry entries. This can happen if your computer experiences a sudden power outage, or if there is a virus or malware on your computer.
- Conflicts with other devices: If multiple devices are connected to your computer, there may be conflicts between them that can cause the error message to appear.
Hence, it is important to identify the root cause of the error to fix it effectively. Try the below-listed solutions to fix the error via simple troubleshooting.
Let’s dive in!
Also Read: How To Fix External Hard Drive Not Showing Up In Windows 11
How to Fix the “A Device Which Does Not Exist Was Specified” Error?
Solution 1: Switch to a Different USB Port
If you are encountering an error related to an external storage device, try reconnecting the USB drive. The port you initially used to connect the drive may be malfunctioning. To determine if this is the case, plug the USB drive into a different port and check if the same error occurs.
For internal drives, it’s important to check the drive’s internal connections. If you have a desktop PC, you’ll need to open the case to access the internal components. Ensure that none of the connection cables are loose or disconnected. This can often resolve issues related to internal drives. If you’re unsure about any of the steps involved in opening your desktop PC, it’s recommended to consult with a professional to avoid causing any damage.
Also read: How to Recover Files from External Hard Drive Not Detected
Solution 2: Run the SFC Tool
The SFC (System File Checker) tool is a built-in Windows utility that helps to identify and repair corrupted or missing system files. Follow these steps to run the SFC tool on your Windows 11 PC.
Step 1: Tap on the search icon placed on the Taskbar. Type “Command Prompt” in the search box and select the “Run as administrator” option.

Step 2: In the Terminal window, copy and paste the following command and hit Enter to execute it:
sfc/scannow
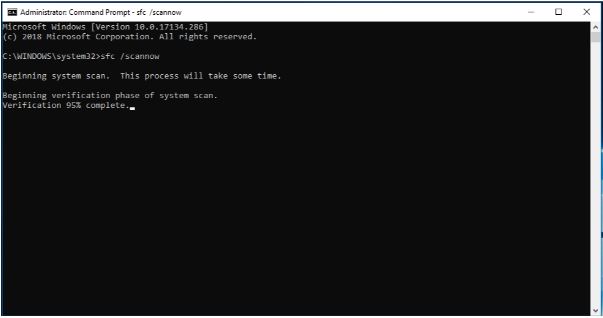
Step 3: Wait for the scan to complete. This can take some time, so be patient and avoid interrupting the process. Once the scan is finished, the SFC tool will attempt to repair any corrupted or missing system files.
If the error you’re experiencing is related to system files, running the SFC tool can help fix the issue.
Also read: FIX: USB 3.0 External Drive not Recognized on Windows 11/10
Solution 3: Change The Drive Letter
Changing the affected external drive’s letter can help you resolve the error quickly. You can use the Disk Management tool to perform this task. Here’s what you need to do:
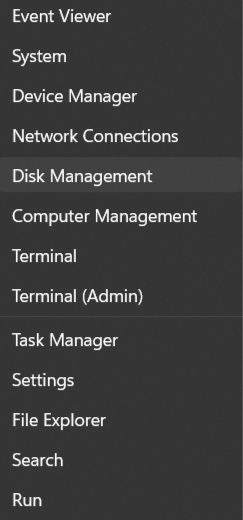
Step 1: Right-click the Windows icon, and select “Disk Management” from the context menu.
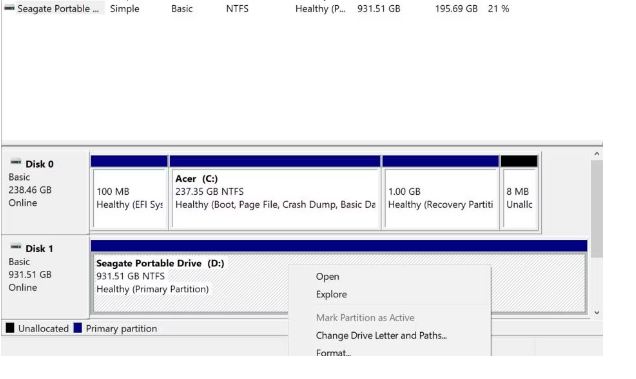
Step 2: Now, right-click on the drive and select “Change Drive Letter and Paths”.
Step 3: Tap on the “Change” button. Use the drop-down menu to choose a new drive letter for the affected drive.
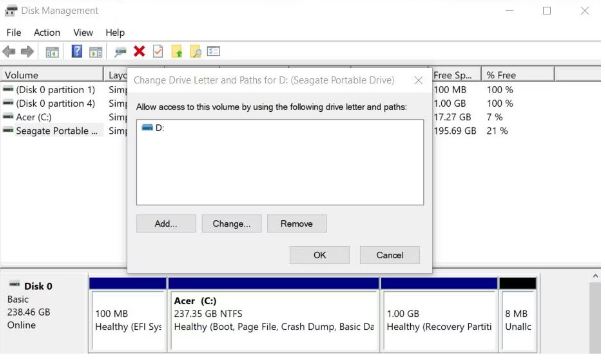
Step 4: Tap on the OK button to confirm and that’s it!
Step 5: After assigning a new drive letter to the affected drive, reboot your device and check if the issue was resolved.
Also Read: How To Recover Data From An External Hard Disk Not Detected
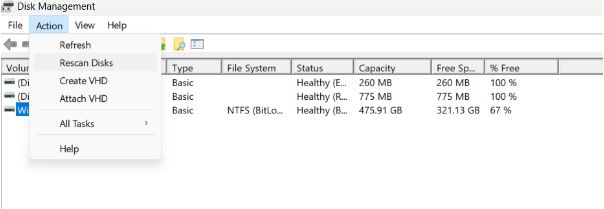
Solution 4: Rescan Disks
Step 1: Open the Disk Management window. Select the external drive from the list. Tap on the “Action” menu and select “Rescan Disks”.
Step 2: Once the operation is completed, exit all windows, reboot your device, and check if the issue persists.
Solution 5: Allow Full Control to the Drive
By making a few quick changes to the external drive’s settings, you will be able to resolve the “A device which does not exist was specified” error. Here’s what you need to do:
Step 1: Open the File Explorer app, right-click on the external drive, and select “Properties”.
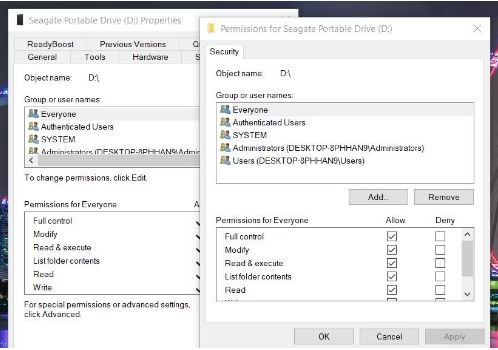
Step 2: Switch to the “Security” tab. And now, check on all the “Allow” boxes.
Step 3: Hit on the Apply and OK buttons to save the recent changes.
Solution 6: Reinstall the External Drive
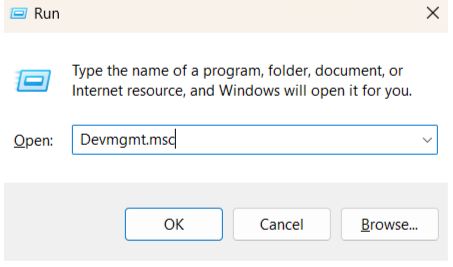
Step 1: Press the Win + R key combination to open the Run dialog box. Type “Devmgmt.msc” and hit Enter.
Step 2: In the Device Manager window, select “Disk Drives”. Right-click on the external drive and select “Uninstall Device”.
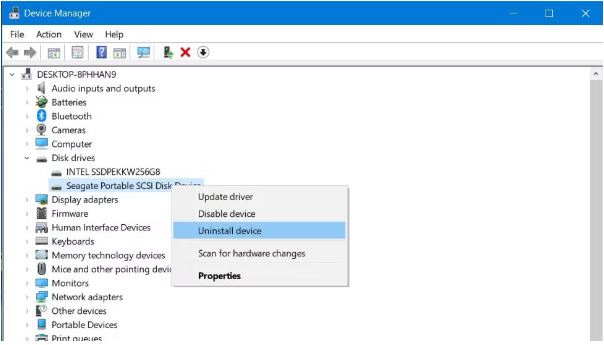
Step 3: Hit on the “Uninstall” button to confirm your action.
Step 4: Disconnect the external drive and then reconnect it to start afresh.
Also Read: Solutions: Cannot Open External Hard Drive and Files/Folders
Conclusion
Dealing with the “A device which does not exist was specified” error on Windows 11 can be frustrating to deal with, but there are several effective solutions to fix it.
First, try disconnecting and reconnecting any external devices or USB drives, and check for any loose internal connections in a desktop PC. Additionally, running the SFC tool can help repair corrupted or missing system files that may be causing the error.
By following these steps, you can troubleshoot and resolve the external hard drive error on Windows 11 and get back to using your device without any interruptions.
Was this post helpful? Feel free to share your thoughts in the comments box!