
Is your Windows PC unable to recognize a USB 3.0 external hard drive? Not able to see the connected device in the File Explorer? Well, you’re not alone. Most users have run into this problem when the system was unable to detect an external drive connected to a USB 3.0 port. In this post, we have listed a variety of solutions that will allow you to resolve this issue. Read on!
USB 2.0 VS USB 3.0: What is the Difference?
USB devices are a crucial part of our day-to-day lives. Isn’t it? USB sticks are one of the most-handy modes of storing or transferring data from one device to another. So, what exactly is the difference between USB 2.0 and USB 3.0. Compared to USB 2.0, USB 3.0 is a lot faster. You can think of USB 3.0 as a super speed USB that uses 9 pins and transfers data at a maximum rate of 5 Gbps. On the other hand, USB 2.0 uses 4 connecter pins and offers a transfer rate of 480 Mbps.
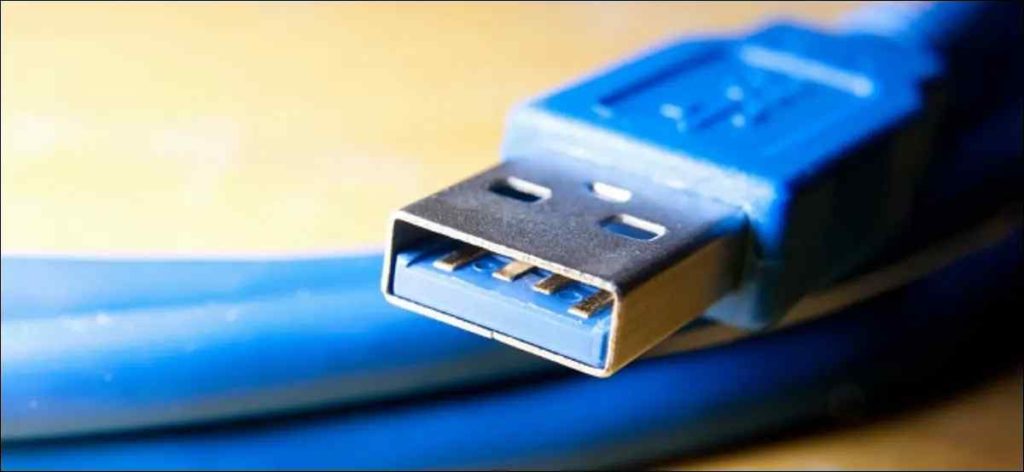
Image source: How to Geek
Differentiating a USB 3.0 port and cable is quite simple. USB 3.0 is found in a blue color block and is comparatively a faster option than USB 2.0.
Try Some General Troubleshooting:
If your Windows PC is unable to recognize a USB 3.0 external hard drive, you can easily troubleshoot this issue on your own. Before you proceed towards the solutions, here are a few general troubleshooting tips that you can try.
● Reboot your PC.
● Disconnect all external devices and then reconnect again.
● Unplug the USB cable, wait for a while and then plug it again.
● Make sure all the physical connections are in place.
● Try connecting to an alternative USB port.
● Use an alternative external hard drive.
Also read: How To Fix External Hard Drive Not Showing Up In Windows 11
How to Fix the “USB 3.0 Not Recognized” on Windows 11/10
Solution 1: Update Universal Serial Bus Controllers Drivers
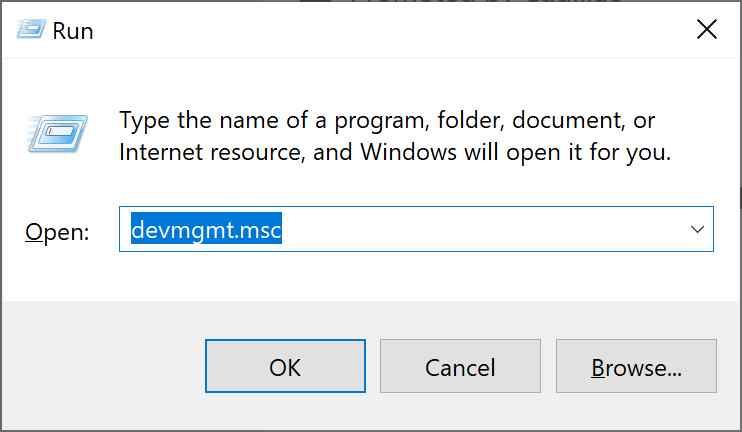
Press the Windows + R key combination, type “Devmgmt.msc” in the textbox, and hit Enter.
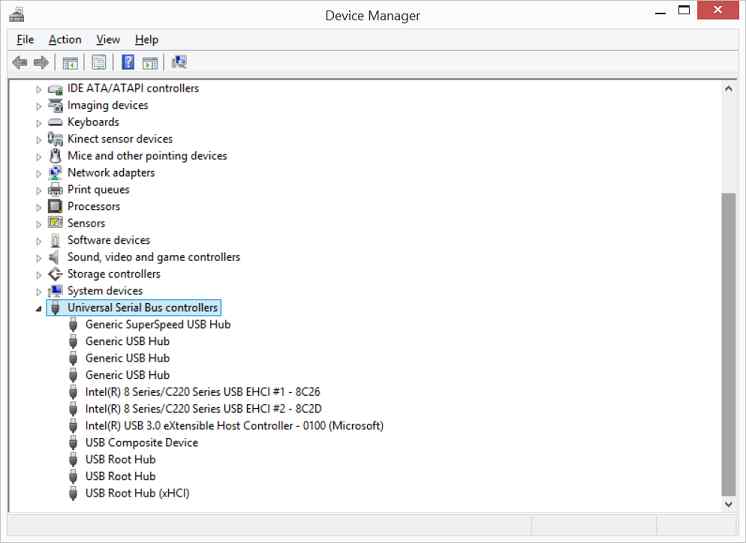
In the Device Manager window, tap on the “Universal Serial Bus Controllers” option.
Right-click on the USB device, select “Update Driver”.
Perform the same set of steps for each entry listed under the Universal Serial Bus Controller category to reinstall drivers.
Also read: {FIXED}: External Hard Drive Not Showing Full Capacity On Windows (2022)
Solution 2: Disable The USB Selective Suspend Setting
The USB Selective Suspend Setting is a useful mechanism of how Windows conserves power and allows you to efficiently utilize the device’s battery. When this feature is enabled, Windows puts some ports in an idle mode, and the system resources are only allocated to an individual port. To make sure that all the ports are active, we will disable the USB Selective Suspend Setting and check if this hack works in resolving the issue.
Launch the Control Panel app on your Windows 11 PC.

Tap on “Power Options”.
Select “Change Plan Settings”. Tap on the “Change Advanced Power Settings” option.

In the Power Options popup, tap on USB Setting> USB Selective Suspend Setting and then set it as “Disabled”.

Hit on the OK and Apply buttons to save the recent changes.
Also read: How to Reformat External Hard Drive on Windows and Mac
Solution 3: Change The Drive Letter
Press the Windows + R key combination, type “Diskmgmt.msc” in the textbox, and hit Enter to launch the Disk Management app.
In the Disk Management window, locate your external drive and then right-click on it and tap “Change Drive Letter and Paths”.

Hit on the “Change” button.

Use the drop-down menu to pick and assign a new drive letter to the external hard drive.

Tap on OK when done.
Solution 4: Edit The Registry
Press the Windows + R key combination, type “Devmgmt.msc” and hit Enter to launch the Device Manager app.
Scroll down and tap on “Universal Serial Bus Controllers”. Right-click on “USB Mass Storage Device” and select “Properties”.
In the Properties window, switch to the “Details” tab.

Tap on the “Device Instance Path”. Now copy the value that is listed underneath.
The next step is to open the Registry Editor. Press the Windows + R key combination to fire up the Run dialog box. Type “Regedit” and press Enter.

In the Registry Editor window, navigate to the following location:
ComputerHKEY_LOCAL_MACHINESYSTEMCurrentControlSetEnumUSBVIDDevice Parameters
Once you arrive in this folder, use the value that you copied from the Device Manager app.

On the right side of the window, look for the “EnhancedPowerManagementEnabled” file. Right-click on it to open Properties. By default, the value data must be shown as 1. Change this to 0 and save the recent changes.
Also read: Fix External Hard Drive Keeps Disconnecting Issue In Windows 10
The Final Word On How to Fix the “USB 3.0 Not Recognized” on Windows 11/10
Here were the 4 most effective solutions to fix the “USB 3.0 not recognized” error on Windows. You can use any of these solutions to resolve this issue where your Windows PC is unable to detect an external hard drive connected to a USB 3.0 port. Do let us know which solution worked out the best for you! Follow us on social media – Facebook, Instagram and YouTube.