
You’re using PowerShell to execute some commands when all of a sudden an error notification appears saying, “PowerShell cannot be loaded because running scripts is disabled on this system.” Are you curious about the root of this problem and its solutions? We’ll walk you through several quick fixes which can assist you resolve this problem for good.
Also Read: How To Fix PowerShell Keeps Popping Up on Windows 11
Different Methods On How To Fix The Windows “PowerShell Cannot Be Loaded Because Running Scripts Is Disabled” Error
Method 1: Launch PowerShell In Admin Mode
Granting PowerShell with Administrator authority will help users to carry out their tasks successfully because the PowerShell app now has full access to system files and resources.
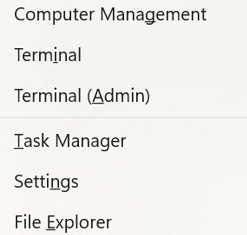
Step 1: Press Win + X to launch the Windows Power menu.
Step 2: Select Terminal (Admin).
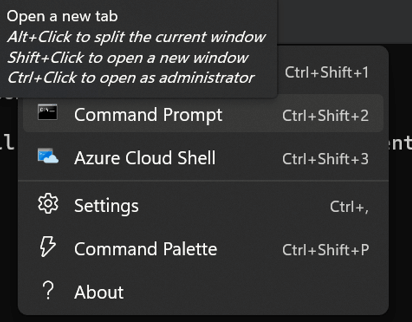
Step 3: The Terminal window will now open in an elevated mode.
Step 4: Any tool window that opens here will have administrative rights. Click on the down arrow to select Windows PowerShell and launch it.
Also Read: How To Recover Files Deleted By PowerShell On Windows Computer
Method 2: Alter The Execution Policy Of The Windows PowerShell
Execution Policy cab be described as a security feature that regulates how PowerShell scripts are executed on your PC. It establishes which script types can be executed and also notifies the ones are to be avoided. For instance, the “running scripts is disabled” issue can appear if the “RemoteSigned”, “AllSigned”, or “Restricted” policies are enabled. The only thing you would need to do to fix the issue is to switch the execution policy to “ByPass” or “Unrestricted”. Here is how to do it:
Step 1: Hit Win + X to launch the Power Menu.
Step 2: Select Terminal (Admin) and open the PowerShell window.
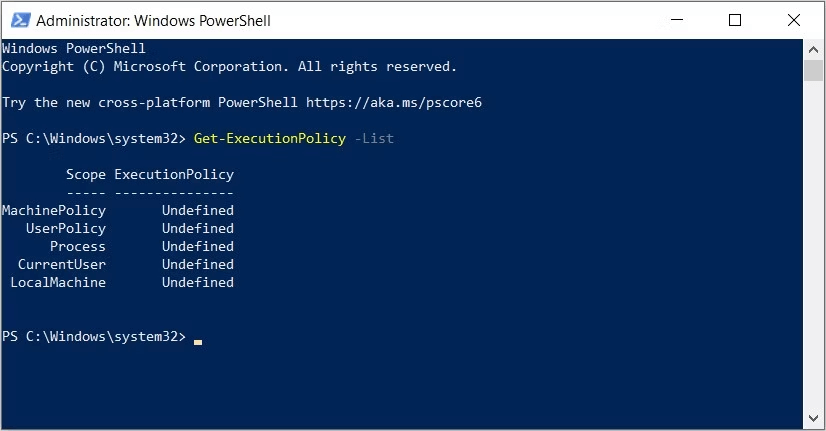
Step 3: Input the following command and then hit the Enter key.
Get-ExecutionPolicy -List
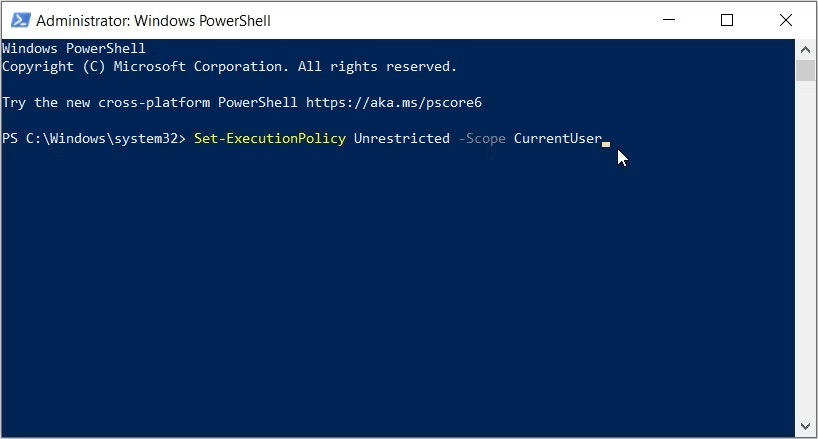
Step 4: Alter the execution policy by executing the subsequent command:
Set-ExecutionPolicy Unrestricted -Scope CurrentUser
Step 5: Exit the Terminal window and reboot your computer.
Also Read: How to Update Powershell on Windows 11
Method 3: Use The Group Policy Editor
Altering the execution policy is also made simple via the Local Group Policy Editor (LGPE). You can use this utility to modify different system settings or solve a wide range of PC problems. Here’s how to modify the LGPE’s execution policy:
Step 1: In the Start menu search box, enter “Edit group policy” and then click on the best match.
Step 2: Navigate to the following path:
Computer Configuration -> Administrative Templates -> Windows Components -> Windows PowerShell.
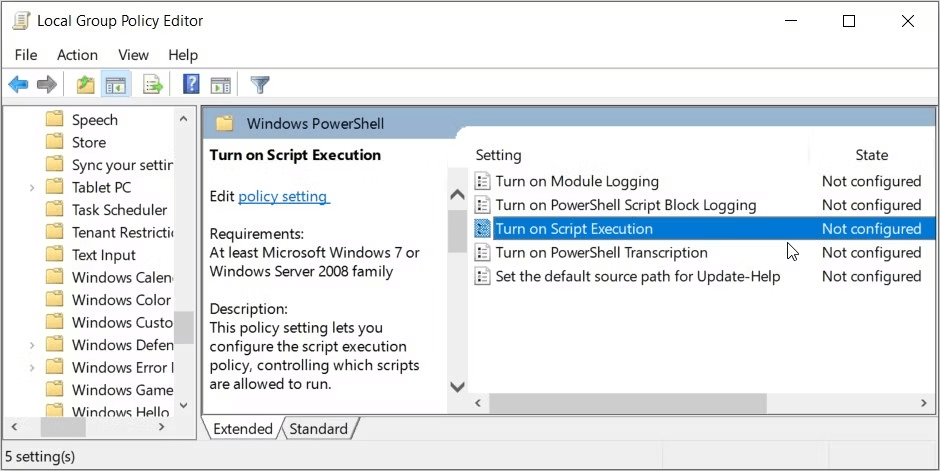
Step 3: Double-click the item labeled Turn on Script Execution.
Step 4: Select the Enabled checkbox.
Step 5: From there, pick Allow local scripts and remote signed scripts from the Execution Policy drop-down option.
Step 6: To save these changes, press Apply and then press OK.
Also Read: How to Zip/Unzip Files Using Powershell on Windows
Method 4: Use The Windows Registry
Try modifying the execution policy using the Registry Editor if the other techniques didn’t work. Using the Registry Editor, follow these steps to modify the execution policy:
Step 1: Hit Win + R to launch the RUN box.
Step 2: To launch the Registry Editor, type Regedit and hit Enter.
Step 3: Enter the ensuing command by pasting it into the address bar:
HKEY_LOCAL_MACHINE\SOFTWARE\Microsoft\PowerShell\1\ShellIds\Microsoft.PowerShell
Step 4: On the right-hand side, look for the ExecutionPolicy value.
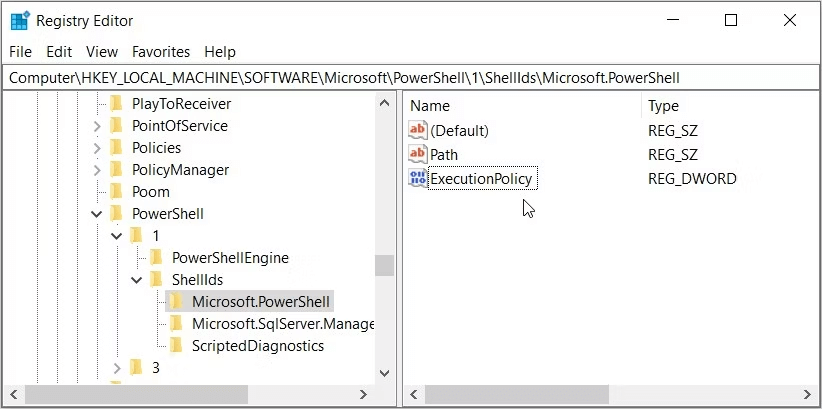
Step 5: Double-click the value for ExecutionPolicy.
Step 6: In the “Value data” area, enter ByPass. PowerShell will be able to run the script without restrictions as a result.
Step 7: Press OK to save the changes after typing the value in the “Value data” box.
Step 8: Restart your device after closing the Registry Editor.
Also Read: How to Install Apps from Command Prompt or PowerShell
The Final Word On How To Fix The Windows “PowerShell Cannot Be Loaded Because Running Scripts Is Disabled” Error
When you unexpectedly can’t run specific tasks in Windows PowerShell, it might be very aggravating. But if you encounter the “scripts is disabled” problem, the fixes we’ve discussed ought to be useful.
Please let us know in the comments below if you have any questions or recommendations. We would be delighted to provide you with a resolution. We frequently publish advice, tricks, and solutions to common tech-related problems. You can also find us on Facebook, Twitter, YouTube, Instagram, Flipboard, and Pinterest.