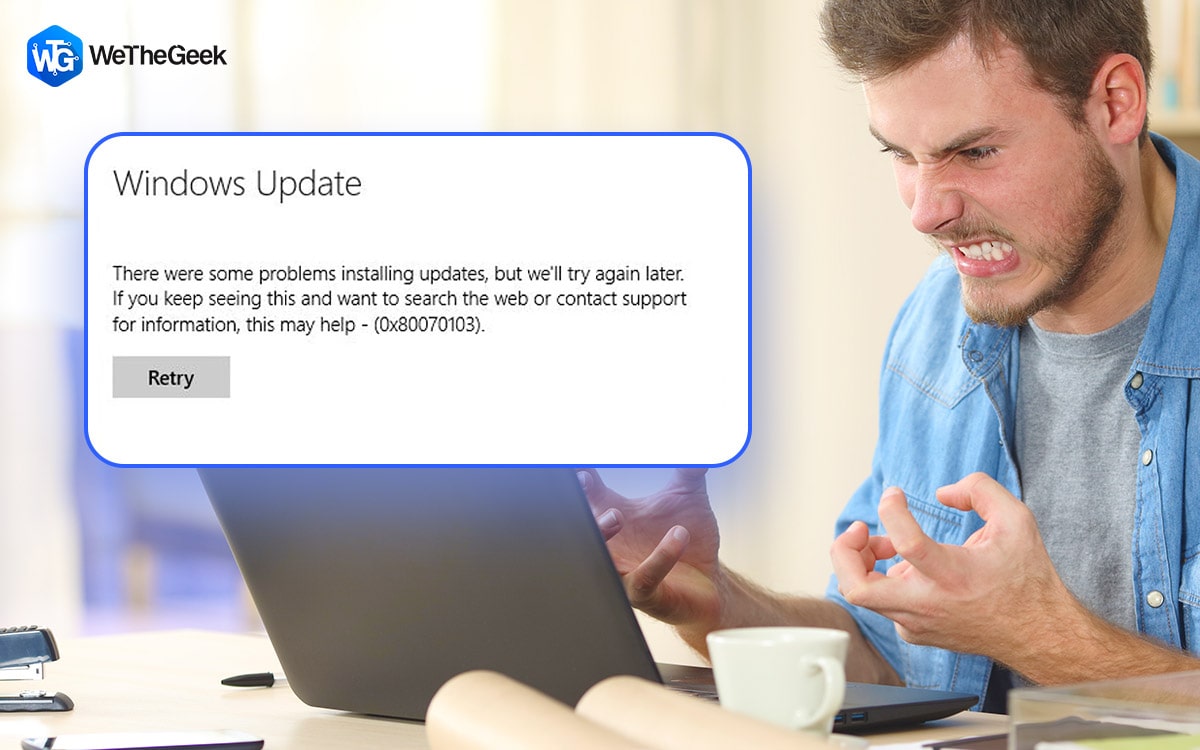
Error code 0x80070103 is a prevalent issue when it comes to Windows updates or installations on Windows 11. The problem usually displays as “Install error” and affects every update that is currently available. This article offers solutions for the Windows 11 install issue 0x80070103.
Also Read: How To Fix Windows Update Install Error 0xc1900223
Why Does Install Error 0x80070103 Occur In Windows 11?
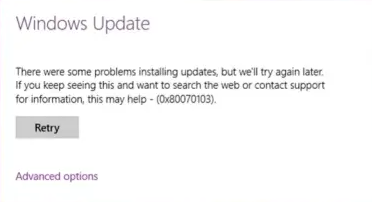
Some Windows users claim that when they attempt to upgrade their version of Windows 11, they see an “install error 0x80070103.” When Windows 11 tries to install a driver that is already installed on the system or is incompatible with it via Windows Update, this problem frequently occurs. Your Windows 11 may also be affected by other issues, such as:
- Damaged or corrupt system files.
- Outdated or missing drivers.
- Corrupt or damaged cache data.
- The update service is no longer active.
Also Read: How To Fix Error 0x80300024 When Installing Windows
Prerequisites Before Troubleshooting Install Error 0x80070103
The install error 0x80070103 is majorly related to driver anomalies. Hence it is advised to try and update all your drivers first before troubleshooting this error. Here are two ways to update the drivers in your PC:
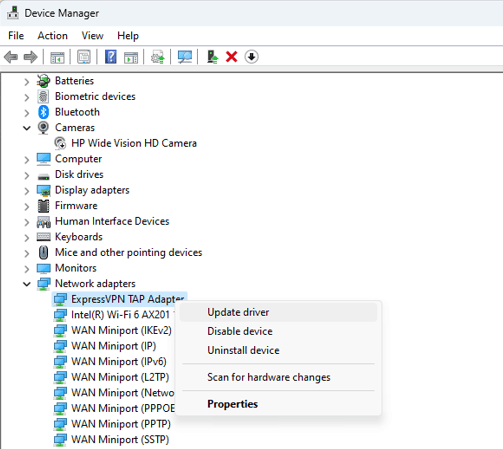
- Use The Device Manager
Windows has an inbuilt driver updater program known as the Device Manager that can help you update your installed drivers by downloading the latest updates on the Microsoft Server. Here is what you need to do:
Step 1: Press Win + X to launch the Power menu and choose Device Manager.
Step 2: A list of drivers will appear where you have to look for drivers with a yellow exclamation mark.
Step 3: Make a right click on those drivers and select Update from the context menu.
Step 4: Follow the onscreen instructions to complete the download and install process.
Step 5: Reboot your PC to let the changes take effect.
- Use Advanced Driver Updater
Another easier way to update your drivers is to use a third-party application known as Advanced Driver Updater which will do the job within a few clicks.
Step 1: Download and install Advanced Driver Updater.
Step 2: Launch the app and click on the Start Scan Now button.

Step 3: A list of driver anomalies will be presented to you. Click on the Update button next to the driver you wish to update.
Note: If you purchase the Pro version of this software then you can click on the Update All button and update all your drivers in one go.

Step 4: After the update process is over, reboot your computer.
Expert Recommended Methods On Fixing “Install Error 0x80070103” In Windows 11
Method 1: Pause Windows Updates
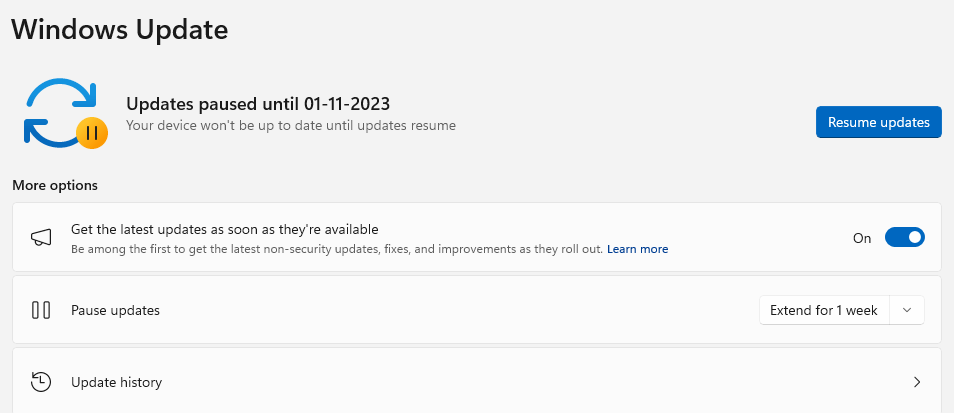
Try this straightforward solution first, then opt for the more advanced ones below. On the update that failed to install, select Retry from the drop-down menu. You can also try to pause the updates for some time and restart it. If the issue persists then move to the next method.
Also Read: How To Fix “Windows Cannot Install Required Files: 0x8007025d Error Code”?
Method 2: Try Updating Manually
You can use the Microsoft Update Catalog to manually download and install the update.
Step 1: Press Win + I to open the Settings.
Step 2: Click on the Windows Update tab in the left panel.
Step 3: Click on Update History in the right panel. Look for the failed update number that begins with “KB” and number.
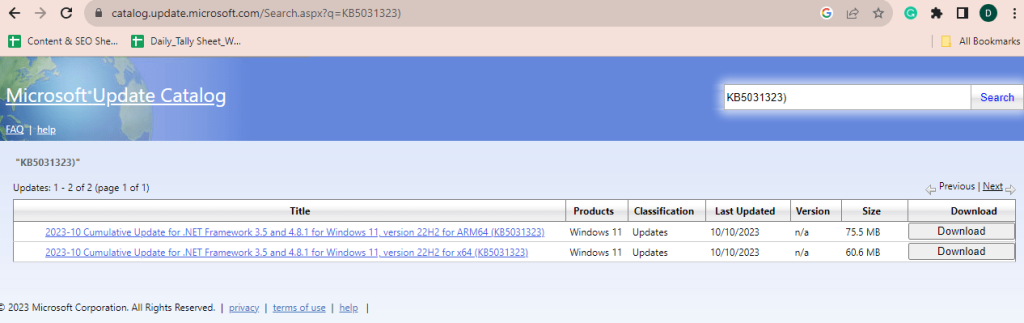
Step 4: Copy the update number and paste it into the search box on the Microsoft Update Catalog website.
Step 5: Download the update and double-click on the file to install it.
Also Read: How To Fix The Error 1310 Installation Issue In Windows 11
Method 3: Activate The Windows Troubleshooter
A useful built-in application called Windows Update Troubleshooter helps you to find and fix faults caused by corrupted updates. As a result, you can attempt to run the troubleshooter to resolve the “install error 0x80070103 in Windows 11”.
Step 1: Press Windows + I to launch the Settings application.
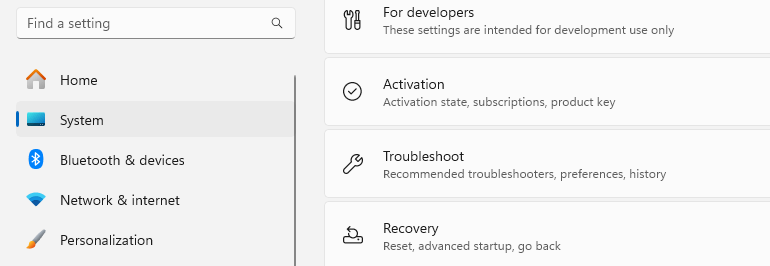
Step 2: Select the System tab from the left panel and click Troubleshoot on the right section.
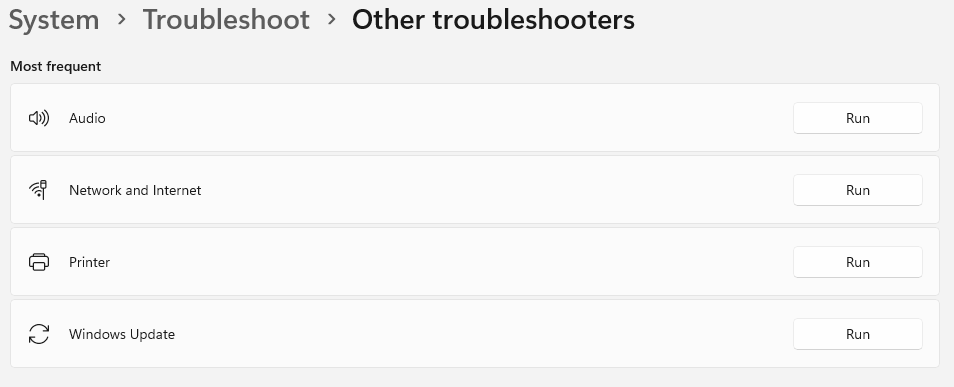
Step 3: To expand all troubleshooters, choose Other troubleshooters.
Step 4: Locate the Windows Update troubleshooter and click the Run button.
Step 5: This troubleshooter will now look for problems involving the Windows Update components.
Step 6: If a fix is found, click Apply this fix and adhere to the on-screen instructions to finish the patch.
Also Read: How To Fix “This Installation Is Forbidden by System Policy” Error On Windows
Method 4: Reboot Services
The Install error 0x80070103 on Windows 11 can occasionally be fixed by just restarting the Windows Update service. The steps are as follows:
Step 1: To launch the Run dialog box, press the Windows and R keys simultaneously.
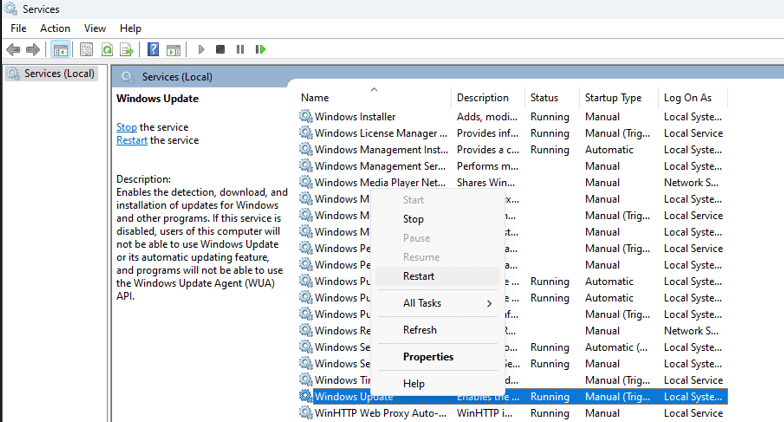
Step 2: Enter “services.msc” and press OK to launch the Services application.
Step 3: Locate and right-click Windows Update in the list of services and choose Stop.
Step 4: Next, give Windows Update another right-click and this time select Restart.
After completing the steps, restart the computer to see whether the install error 0x80070103 has been fixed.
Also Read: How To Fix “There Is A Problem With This Windows Installer Package” Error?
Method 5: Install All Windows Updates
Windows occasionally generates updates for updating drivers independently, in addition to installing big updates. This fix may work since the 0x80070103 error is linked to driver-related issues. Try to adhere to the steps below:
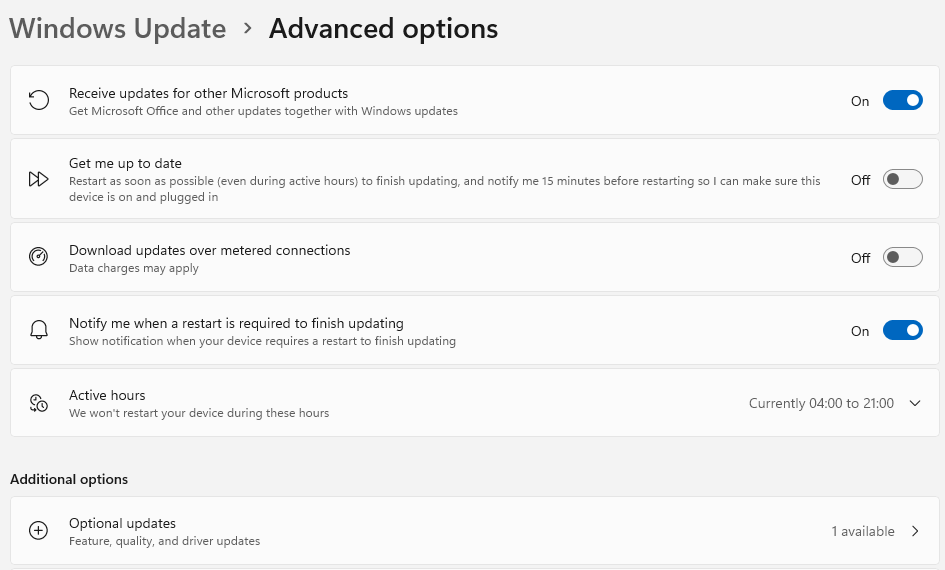
Step 1: To access the Settings window, press Windows + I.
Step 2: Click the Windows Update option in the left panel’s bottom corner and then choose Advanced options in the Settings window’s right panel.
Step 3: Click on Optional updates.
Step 4: Choose which optional updates or drivers you wish to install and press the Download & install button.
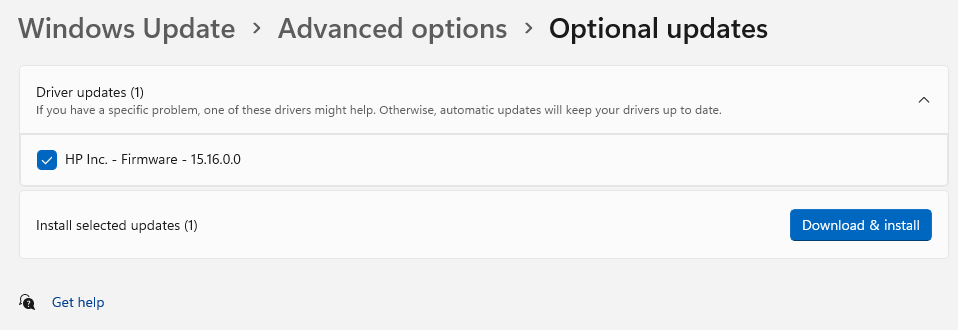
Step 5: Following that, Windows 11 will download and install your chosen updates automatically.
Note: You will have to restart your PC to apply these changes.
Also Read: How To Fix Printer Driver Package Cannot Be Installed Error
Method 6: Use SFC And DISM
System files can often contribute to the occurence of installation error code 0x80070103. To address this issue, you might try performing an SFC (System File Checker) or DISM (Deployment Image Servicing and Management) scan to inspect and restore your system files. Here’s how to go about it:
Step 1: Type cmd into the taskbar search box.
Step 2: Right-click the Command Prompt application and choose Run as administrator.
Step 3: In the elevated command prompt, use the sfc /scannow command.
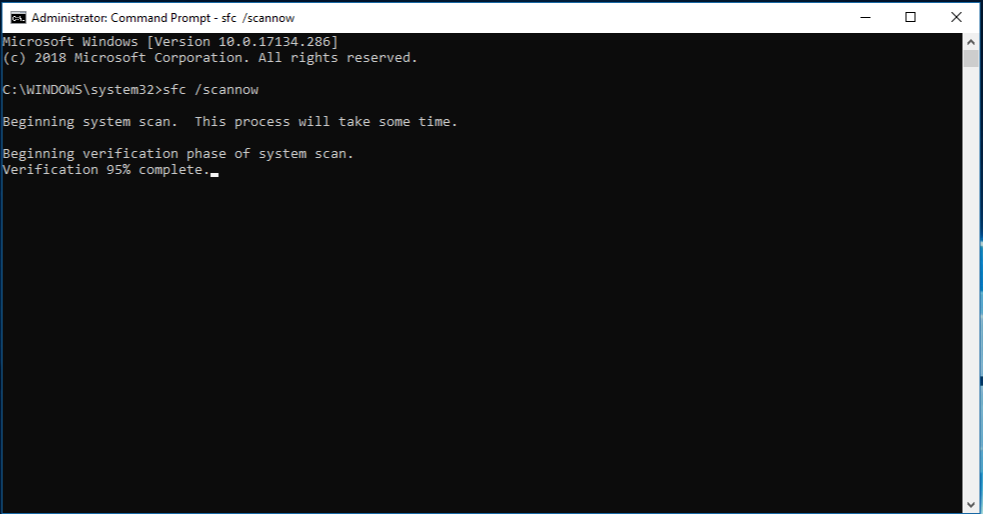
Note: Please be patient as this procedure may take some time to scan.
Step 4: Try executing the command below on the elevated Command Prompt window if the SFC scan is unsuccessful.
Dism / Online /Cleanup-Image /CheckHealth
Dism / Online /Cleanup-Image /ScanHealth
Dism / Online /Cleanup-Image /RestoreHealth
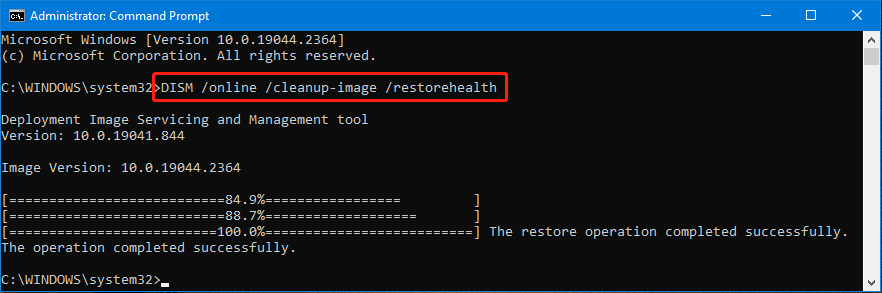
Once finished, restart your computer to see whether the install problem 0x80070103 is resolved.
Also Read: How To Fix Device Driver Software Was Not Successfully Installed Error In Windows 10?
Method 7: Remove The SoftwareDistribution Folder
Many experts suggest removing the SoftwareDistribution Folder as a solution to this error. However, you cannot simply delete the folder without stopping the services related to this folder. You may follow these instructions to fix the error 0x80070103 in Windows 11.
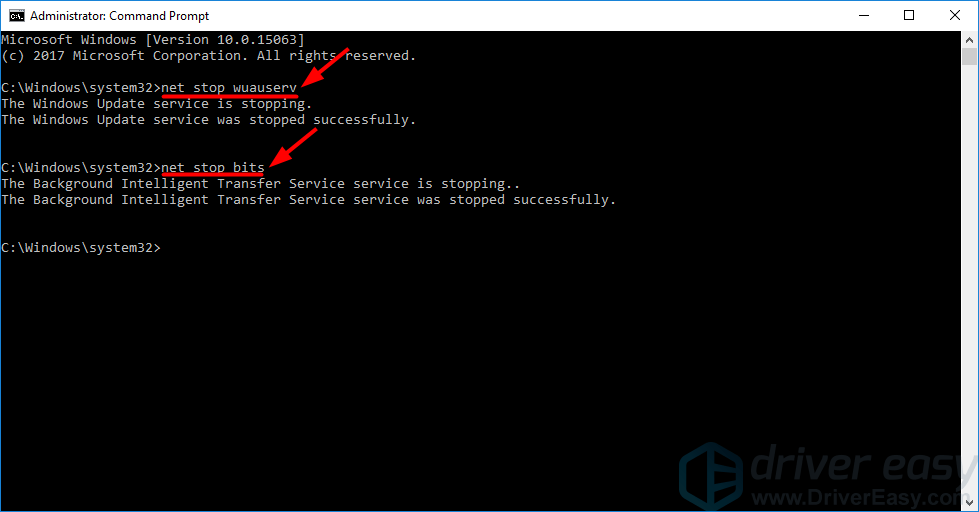
Step 1: In the Search menu, type Command Prompt. Right-click it and select “Run as administrator”.
Step 2: Execute each of the following instructions, followed by Enter.
net stop wuauserv
net stop cryptSvc
net stop bits
net stop msiserver
Step 3: Navigate to C:\Windows\SoftwareDistribution and press the Ctrl+A keys to select every file and folder. Press the Delete button on your keyboard to delete all the contents of this folder.
Step 4: Launch the Command Prompt again in admin mode and enter the below-mentioned commands followed by the Enter key after each command.
net start wuauserv
net start cryptSvc
net start bits
net start msiserver
Also Read: How to Fix Windows Update Standalone Installer Error (0x80096002)
Don’t Let Error 0x80070103 Ruin Your Windows 11 Experience!
Try the suggestions above if you get the error code while updating your Operating System, and you may quickly resolve the issue. Method 2 worked for us to instantly get rid of the problem. If you know any other workarounds that can help to troubleshoot the issue, feel free to drop your suggestions in the comments section below!
Please leave a comment if you were able to fix the update problem using our workaround shared below. You can also find us on Facebook, Twitter, YouTube, Instagram, Flipboard, and Pinterest.