
Yes, then you must be wondering what this process is and why it is excessively consuming CPU resources, right?
With that said, you have come to the right place; in this post, we will discuss what Wininit.Exe is and why it consumes enough CPU resources.
What is Wininit.exe Windows process?
Wininit stands for Windows Initialization, and .exe is the extension for an executable file. The file is a genuine Windows Start-up application, and it allows programs to run at boot time. Being a critical system service file, it needs to run in the background; hence, we do not recommend disabling or killing Wininit.exe. Moreover, this file creates a Winlogon, Winsta0, and %windir%\temp folder in the system.
 Additional Tip
Pro Tip: If you suspect Wininit process is consuming High CPU resources as it is infected, try scanning the system for infections. For this, we suggest using Systweak Antivirus, the best antivirus that provides real-time protection, malware protection, exploit protection. Moreover, it scans startup items for infections and helps remove them if infected. To use it, click here to download.
Is Wininit.exe a virus or safe to use?
Wininit.exe, if saved at C:\Windows\System32 folder, then it is safe to use. However, there can be malware disguising as Wininit process; in such a case, users need to scan the system for infections. But before that, you need to know the file location for this head to Task Manager and check the file location.
How to check the file location of Wininit.exe?
To check file location, follow the steps below:
1. Press Windows + X
2. Select Task Manager from the context menu
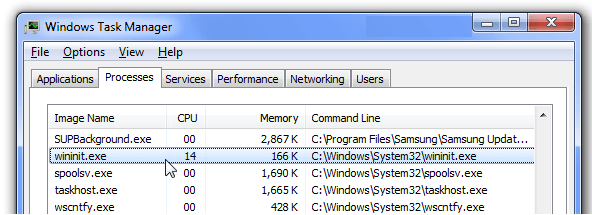
3. Here, look for Wininit.exe.
4. Select it > right click > open file location
5. This will take you to the location where Wininit.exe saved. If the location is not C:\Windows\System32 folder, then the file is not legitimate.
In such a case, you must scan your system for virus infection. For this, downloading and using Systweak Antivirus for Windows is recommended.
To use Systweak Antivirus and clean infections from the system, causing Wininit.exe High CPU usage to follow the steps below:
1. Download, install, and run Systweak Antivirus.

2. Click Scan Types and select Deep Scan.
Note: Deep Scan thoroughly scans your system for infection; hence, it is time-consuming. Therefore, we suggest you perform it when the system is in an idle state. Additionally, wait for the process to complete and do not interrupt in between.
3. Once the scan is done, clean all the infections.
4. Restart your system and check if the Wininit.exe High CPU problem is resolved or not.
If not, we also suggest performing a Clean Boot. We recommend this so that you can identify problems creating third party programs. To do so, follow the steps below:
1. Press Windows + R
2. Type msconfig in the window > ok
3. Click the Services tab and check the box next to Hide all Microsoft services > Disable all
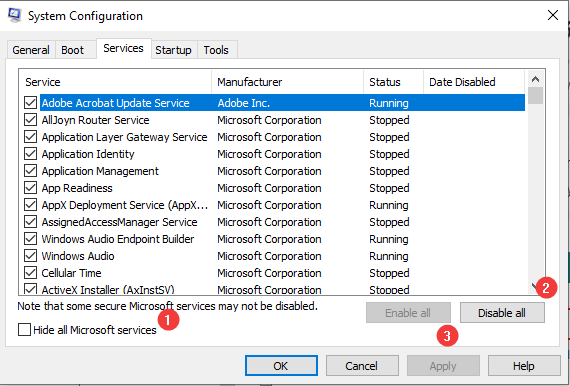
4. Click Apply
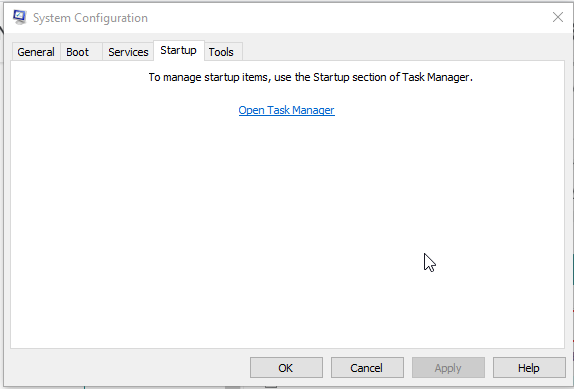
5. Next hit Startup tab > Open Task Manager
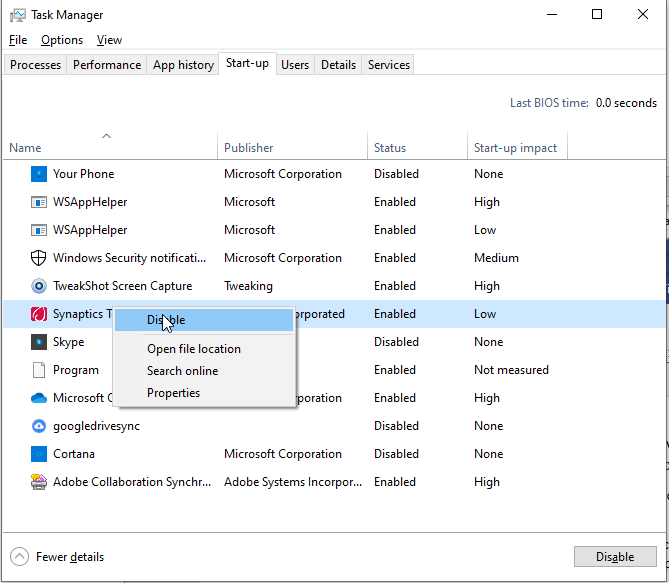
6. Here select the start-up services one by one > right-click > Disable. Do this for all the applications.
7. Once done, click Services tab > Apply > ok
8. Exit the window and reboot the system.
Now check if Wininit.exe using excessive High CPU problems is resolved or not. If the problem persists, we suggest a booting system in Safe Mode. To learn how to do that, click here. This will help identify the software creating problems.
We hope the Wininit.exe problem is resolved using the fixes we discussed. Do let us know which fix worked for you in the comments section.
FAQ
Q1. What Is Wininit.exe And Why Is It Running?
Windows Initialization process Wininit.exe is a process responsible for running applications at boot time. It is a critical Windows process, and removing it may cause system errors.
Q2. How to Delete or remove Wininit.exe?
Note: We do not recommend deleting Wininit.exe from the system. Doing so may harm the system process.
However, if it is infected, you can delete it using an antivirus utility or head to the Windows registry to delete it. To do so, follow the steps below:
1. Press Windows + R
2. Type regedit > Ok
3. Here, navigate to
KEY_LOCAL_MACHINE\SOFTWARE\Microsoft\Windows\CurrentVersion\Run
4. Now look for wininit =%System%\wininit.exe
5. Right-click and delete this file.
This will remove the malware-infected Wininit.exe causing high CPU usage.
Note: If you are not comfortable doing so manually, we suggest using the Registry Cleaning module offered by Advanced System Optimizer. To know more about this tool, read the complete review. Moreover, you can click the link to download this tool.