
Volume is an important aspect of your Windows desktop or laptop. However, time and again, users have reported issues with Volume controls on Windows PC. One such issue is the “Volume bar stuck on the top left corner of the screen. If this issue strikes a chord, you may just be able to find a solution, so read on!
What Happens When the Volume Bar Is Stuck On The Screen In Windows?
Consider this real-life incident that a user reported –
As I switched on my laptop, I saw the volume icon at the top left corner of the screen completely obstructing the other icons. I tried to move it, I even pressed the volume keys on my laptop, but to no avail. It was just stuck there. It‘s still there, what do I do?
As can be inferred from the incident above when the volume bar is stuck at the top left corner of the screen, it first blocks the icons. You cannot move the volume bar or increase/decrease the levels. Now, that we have an idea of the problem, let’s get down and resolve it.
What To Do When The Volume Bar Is Stuck on The Screen?
1. Restart Windows and Adjust the Volume
A fix that has worked out for many users is restarting the computer first and then increasing the audio level via sound properties. Here are the steps to do that –
- Restart your computer
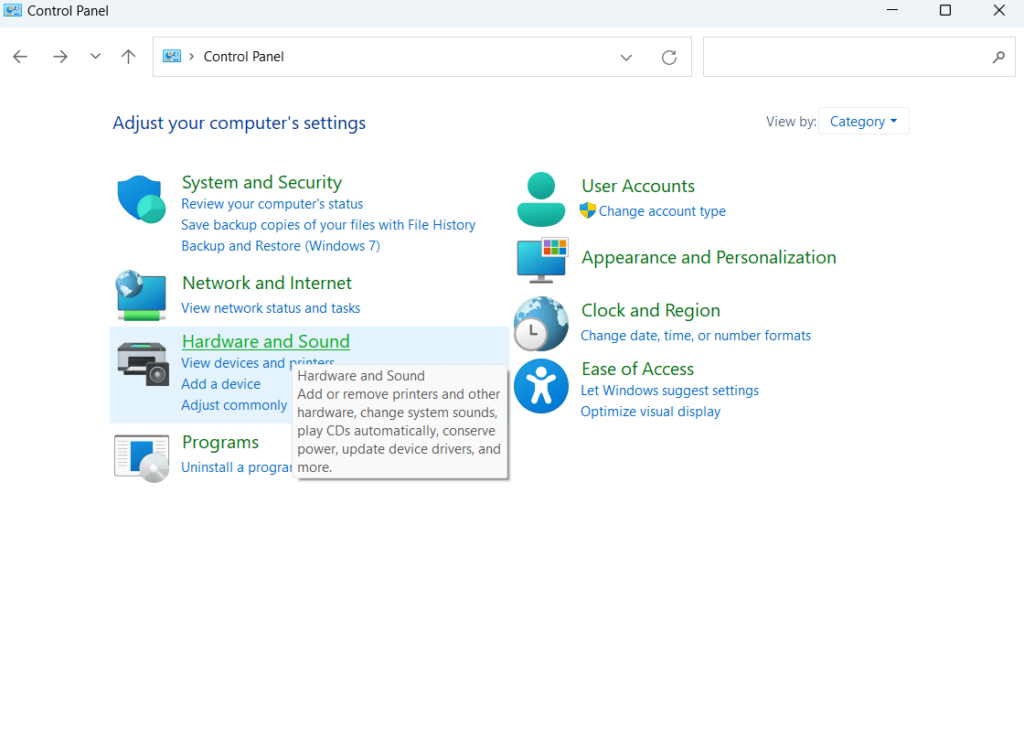
- Once the computer restarts, open Control Panel by typing Control in the Windows search bar and selecting Open from the right.
- Click on Hardware and Sound.

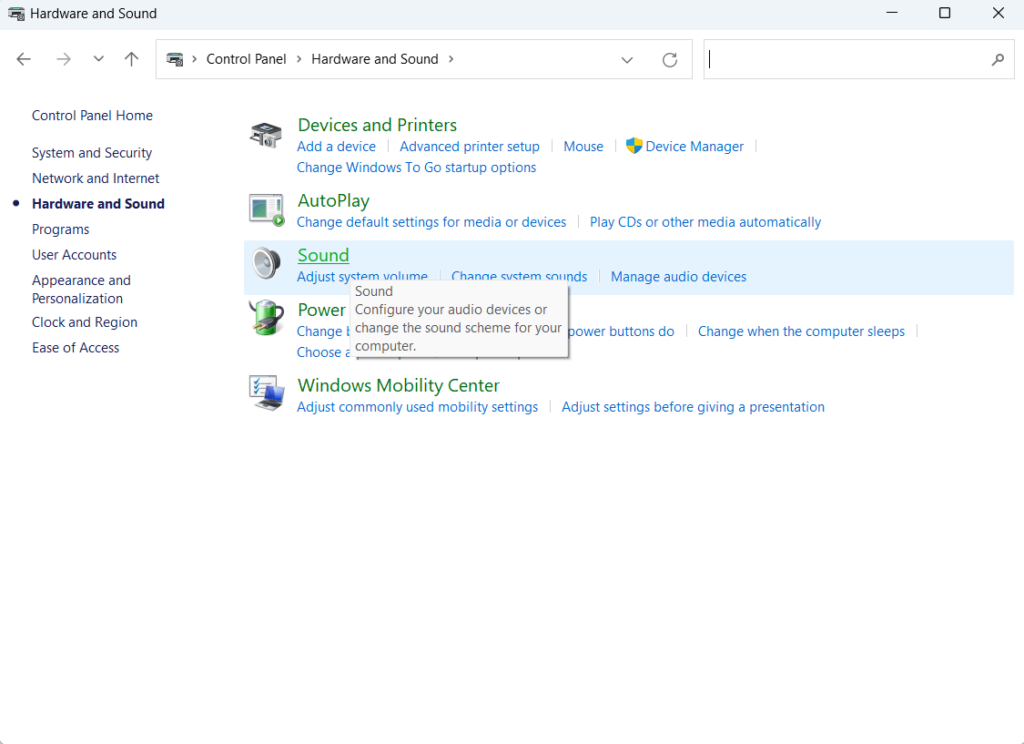
- Click on Sound.
- Right-click on your device and select Properties.
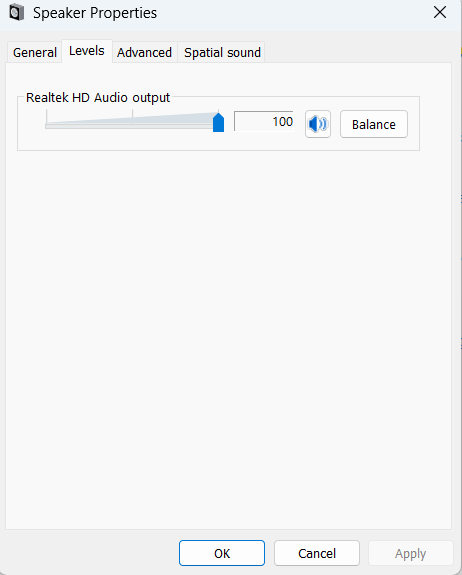
- Click on Levels.
- Raise the volume level by dragging the slider to the right.
- Click on OK.

2. Update Sound Drivers
Outdated or corrupt sound drivers are often the culprit behind sound issues and in case your volume bar is stuck at the top left corner of your screen, the same could be the issue. You can either manually update sound drivers or an even better option is to use a driver updater tool like Advanced Driver Updater which comes with a large database of drivers.
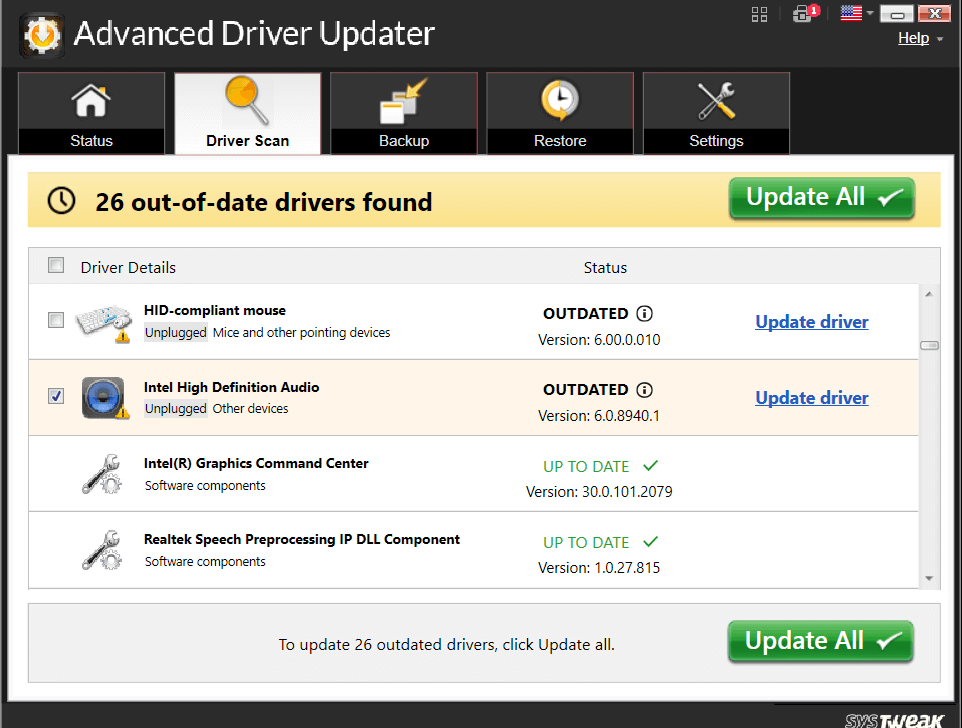
Here’s how you can use Advanced Driver Updater to update sound drivers on your Windows 11/10 computer –
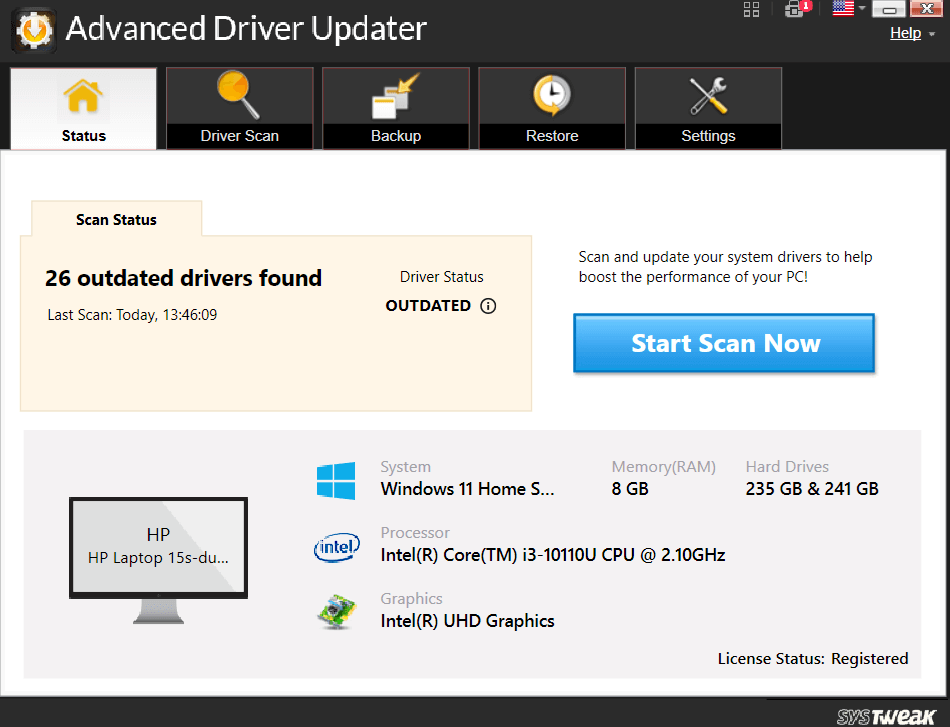
- Download, install and run Advanced Driver Updater.
- Click on the Start Scan Now button and wait for the scan to complete.
- First, uncheck all the other drivers by clicking on the checkbox at the top.
- Locate your sound driver and click on the checkbox on the left.
- Click on the Update driver and follow the on-screen instructions.

Apart from updating drivers Advanced Driver Updater also lets you –
- Backup selected drivers.
- Schedule driver scan at a desired time.
- Roll back an earlier version of a driver.
- Exclude drivers from the driver scan.
You can get more insight into these features in our in-depth review of Advanced Driver Updater.
3. Perform A Clean Boot
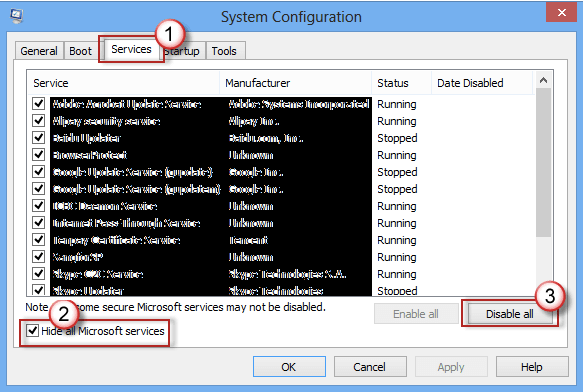
Performing a Clean Boot is often a solution that can help you find the problematic application or process which is causing the issue. It operates your Windows with a minimal set of startup programs and drivers. This way you can zero down on the exact background process which might be interfering with the normal functionalities of your PC.
4. Change Notification Time
Surprisingly changing the notification time seems to have worked out for some Windows users who had volume control stuck at the top left corner of the screen. Needless to say, this might work out for you too. Here are the steps –
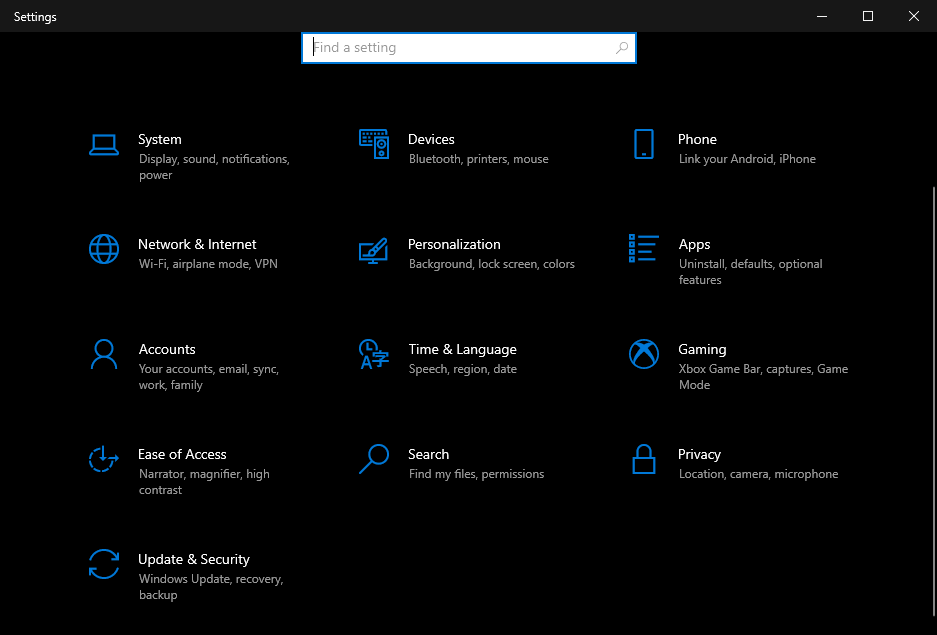
- Go to Settings by pressing Windows + I.
- Click on Ease of Access.
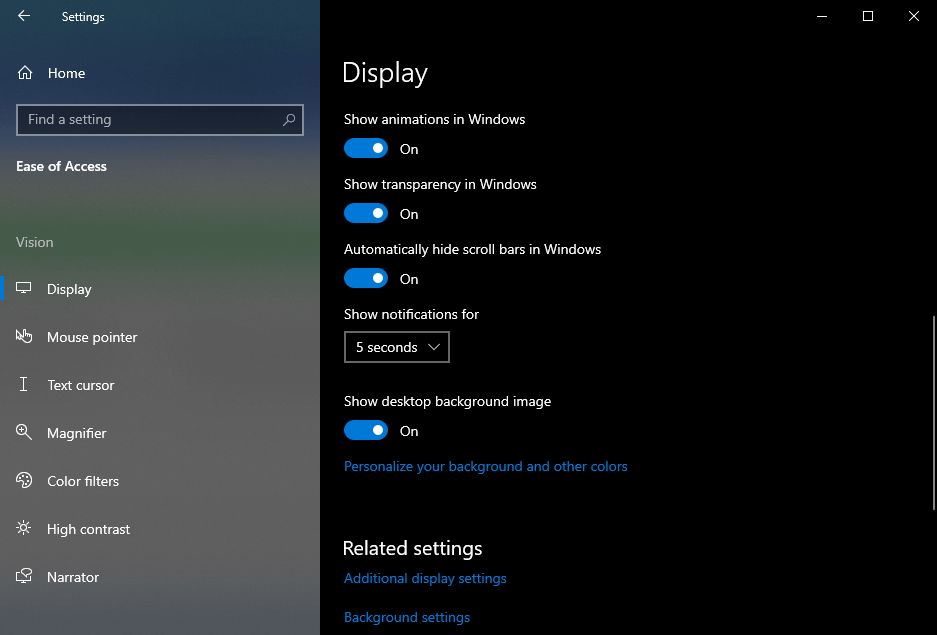
- From the left-hand side, click on Other options
- From Show notifications for dropdown, select 5 seconds
5. Run Windows Audio Troubleshooter
In case your Volume bar is still stuck and nothing else seems to work you can count on your Windows own Audio Troubleshooter. It can help identify the issue and even suggest steps that can help you get over the issue –
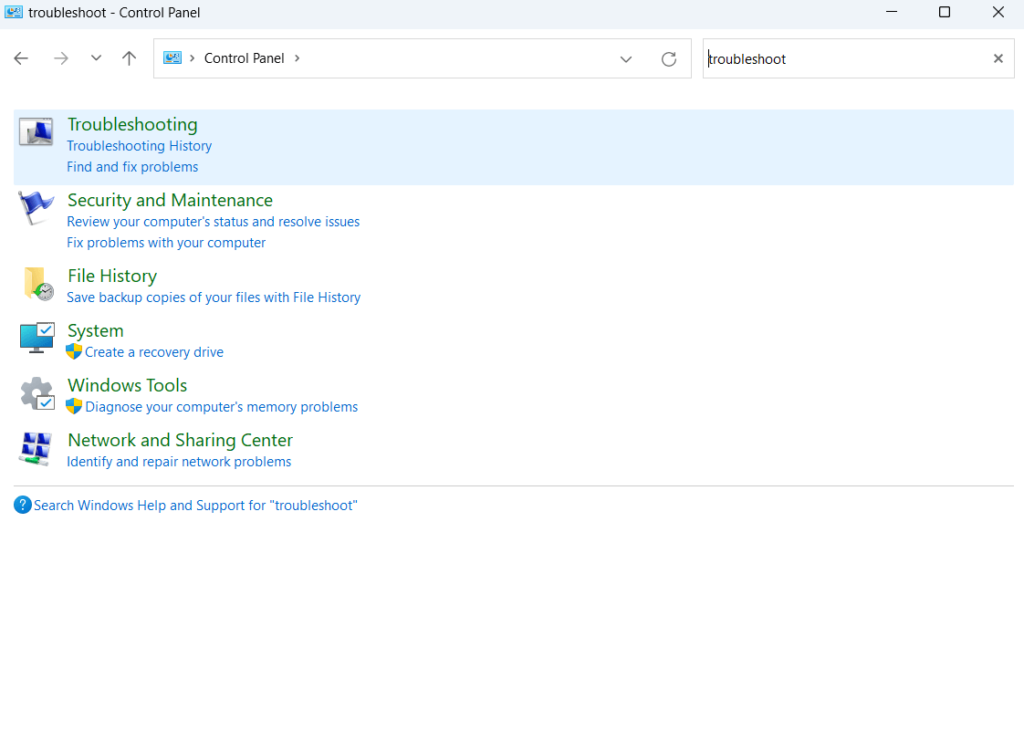
- Open Control Panel
- In the search bar, type Troubleshoot
- Select Hardware and Sound.
- Click on Playing Audio.
- Click on the Apply repairs automatically checkbox.
- Once done, restart your computer.
Wrapping Up
We hope that you have now been able to get the volume bar out of your sight. If yes, which of the above solutions helped you out, do let us know in the comments section below. For more such content, keep reading WeTheGeek. You can also find us on Pinterest, Facebook, YouTube, Twitter, Flipboard, and Instagram.