
If you are facing issues while surfing on the internet and receive Unable to contact DHCP Server, then you will no longer be able to browse the internet. The network interface controller in your PC is no longer able to communicate with the DHCP server and any further actions on the internet may seem fruitless. The exact reason for this issue cannot be easily determined but there are a few fixes that can resolve the inability to contact DHCP servers not working in Windows PC.
Best Ways to Fix ‘Unable to Contact your DHCP server’ in Windows 10
The following methods have been recommended by experts that will help to resolve DHCP servers not working on Windows PC.
Method 1. Turn Off IPv6
The DHCP server not working issue occurs if the IPv6 is enabled and there is no local gateway to connect to. In this case, it is best to disable IPv6 feature by following these steps:
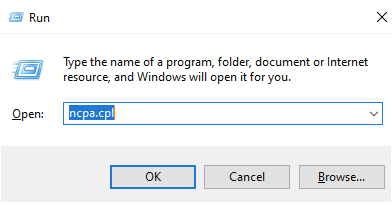
Step 1: Press Windows + R to invoke the RUN box and type ncpa.cpl followed by Enter.
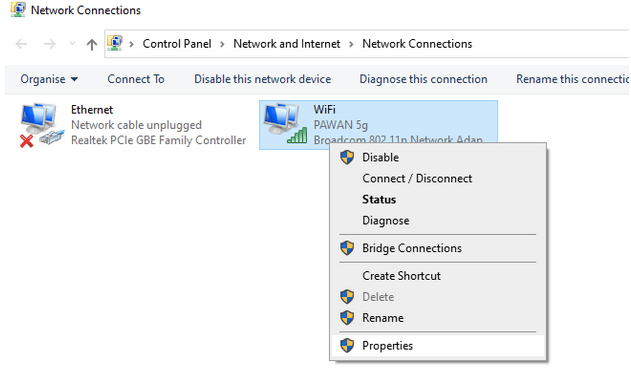
Step 2: A new window will open where you have to right-click on the Internet Connection, you use and then choose Properties from the context menu.
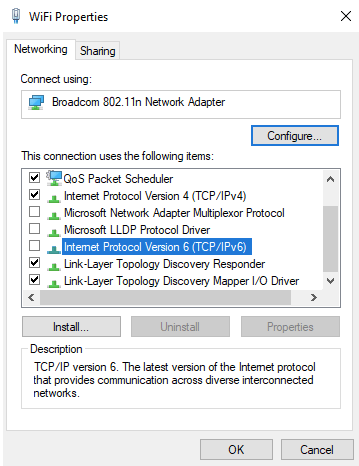
Step 3: Next, click on the Networking tab in the box that appears and then locate Internet Protocol version 6 (IPv6) and uncheck the box next to it.
Step 4: Click on the OK button and reboot your PC.
Once your PC has restarted, open your browser and check if you can browse the internet without facing the ‘unable to contact your DHCP server’ error.
Method 2: Restart DHCP Service
Every Windows feature has a service attached to it which runs in the background. If you are facing the DHCP server not working error, then the server related to DHCP must have been accidentally disabled. Here are the steps to check the service status and get it up and running.
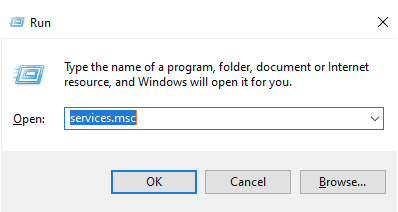
Step 1: Press Windows + R to open the RUN box and then type services.msc followed by the Enter key.
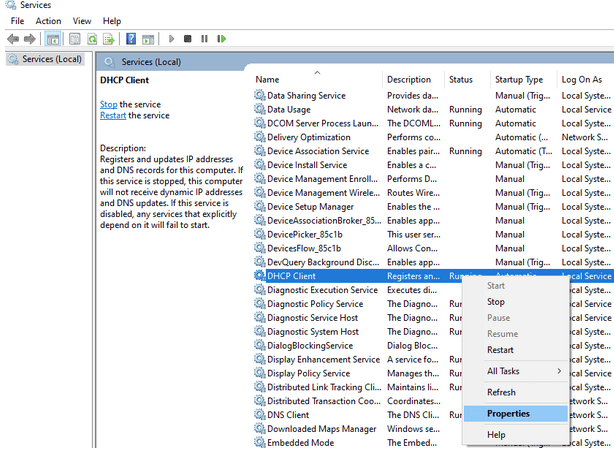
Step 2: A new window will open, listing all the services running your Windows PC in an alphabetical order. Locate the DHCP Client Service and make a right-click on it.
Step 3: Select Properties from the context menu of DHCP Client Service and check the status of the service.
Step 4: Click on the Stop button if the Service is running or leave it if already stopped.
Step 5: NOw, Click on the drop down menu next to Startup Type and select Automatic.
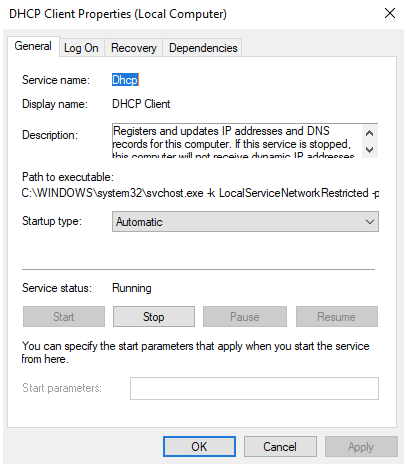
Step 6: Now click on the Start button and then click on Apply followed by OK.
Method 3: Reset TCP/IP
If the issue of ‘unable to contact your DHCP server’ persists then you can try to reset your TCP/IP by the following steps.
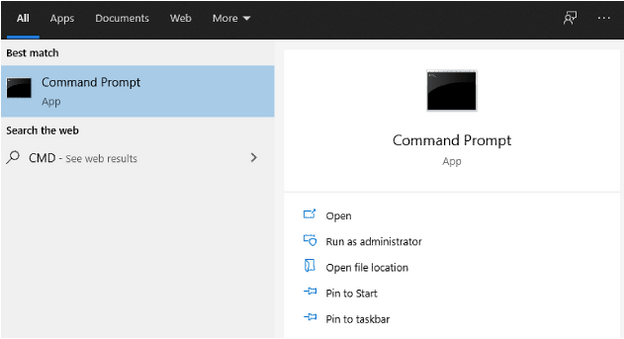
Step 1: Press Windows + S and type CMD.
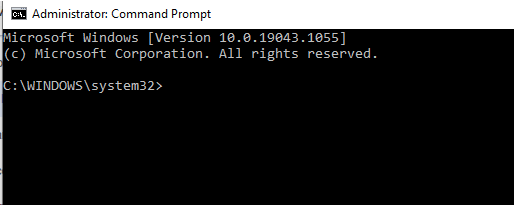
Step 2: The Command Prompt (app) will appear as the Best Match search results. Click on Run as Administrator and a black & white window will open.
Step 3: Type the following commands in the Command Prompt window, one by one followed by Enter key after each command.
netsh winsock reset
netsh int ip reset
ipconfig /release
ipconfig /renew
ipconfig /flushdns
Note: Your internet connection will be disconnected until the next restart.
Step 4: Restart your computer and check if the DHCP server not working error is resolved.
Method 4: Update Network Drivers.
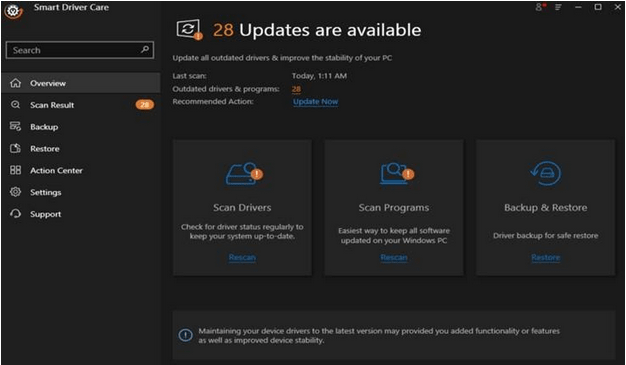
The final resolution to fix ‘unable to contact your DHCP server’ is to update the Network Driver. This can be done through a third-party driver updater software like Smart Driver Care. Here are the steps to follow:
Step 1: Download Smart Driver Care by using the download button listed below:

Step 2: Now, run the downloaded file and carry out the on-screen instructions to initiate the installation process.
Step 3: After the installation process completes, open the program and click on the Scan Now button under the Drivers sections.
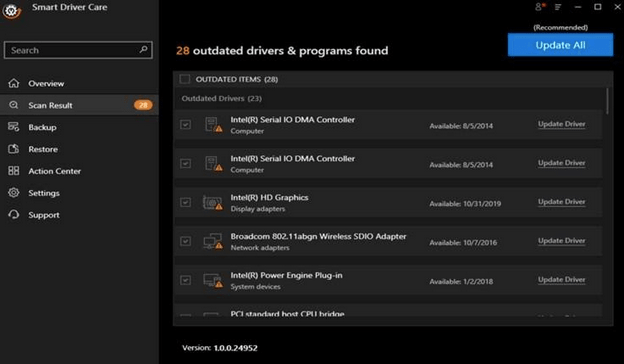
Step 4: The list of driver issues will appear on the screen.
Step 5: Click on the Update Driver link beside your network driver error.
Step 6: Wait until the process completes and reboot your system.
The Final Word On How To Fix ‘Unable to Contact your DHCP server’ in Windows 10?
The DHCP server not working issue can be easily resolved by following the methods described above. You need to follow each method and then check if the issue has been resolved. This way you can ignore the remaining methods if you are able to browse the internet on your system. Updating drivers is an efficient way of resolving many minor issues on your pc and ‘unable to contact your DHCP server’ is one of them. To update the drivers, we recommended using Smart Driver Care which not only saves considerable time and effort but is also easy and a quick method to resolve this issue