
Here are a few methods that have been compiled from various gaming forums and recommended by experts. You can try each one in any order you like and then check if the issue has been resolved. If Yes, then ignore the remaining methods.
How to Fix Stuttering and Boost FPS in Warzone
Method 1: Power Plan.
The first easy fix is to switch to Ultimate Performance, a brand-new power plan that isn’t commonly known. The goal of this strategy is to get the most out of high-end installations.
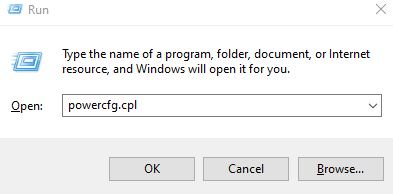
Step 1: Press Win+R (the Windows logo key and the r key) on your keyboard at the same time. Press Enter after typing or pasting powercfg.cpl.
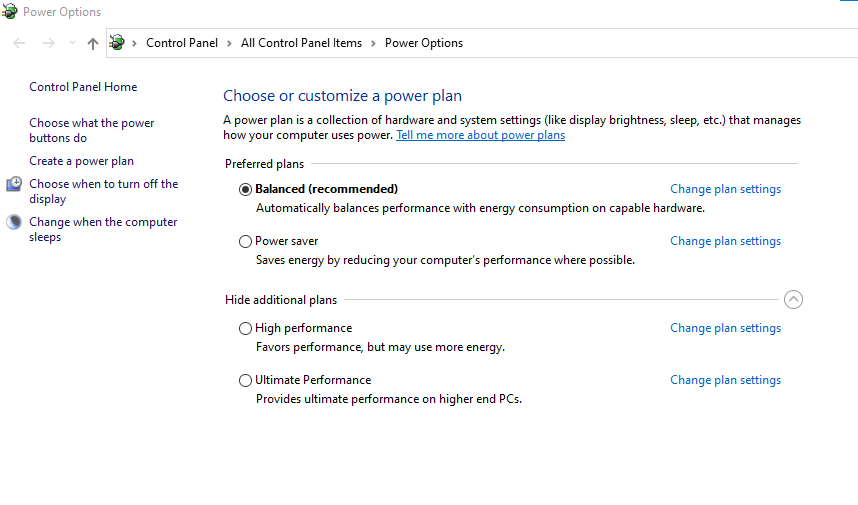
Step 2: Choose the Ultimate Performance option. If you can’t see this power plan, just go to the following step to reveal it.
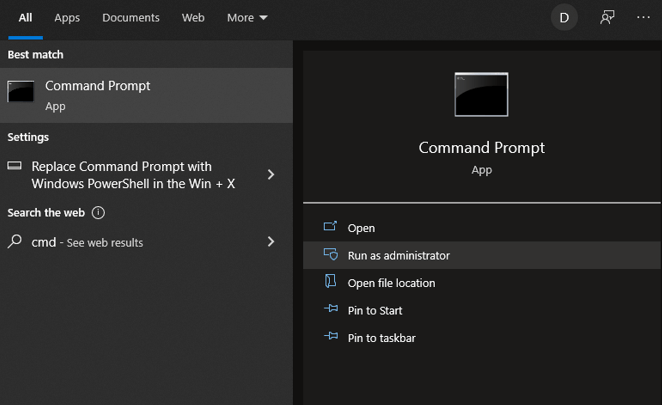
Step 3: Press Win (the Windows logo key) and type cmd on your keyboard. Choose the Run as Administrator option.
powercfg -duplicatescheme e9a42b02-d5df-448d-aa00-03f14749eb61
Step 4: Type or paste the following command into the command prompt and hit Enter.

Step 5: Launch Warzone after adjusting the power plan and join a game to test it out.
If this repair doesn’t work for you, try the next one down below.
Method 2: Try DirectX 11
Warzone may have compatibility difficulties with the default DirectX 12. To force Warzone to run on DirectX 11, manually add launch parameters and see if this helps with the stuttering.
Step 1: Launch the Battle.net client.
Step 2: Select Call of Duty: MW from the left menu and go to Options > Game Settings.
Step 3: Choose your game’s options. Then, in the text field, select the box next to Additional command line parameters and type -D3D11.
Step 4: Save your modifications and see if Warzone works more smoothly now.
Step 5: If the stuttering persists with DirectX 11, try the next option, which involves tweaking some in-game settings.
Method 3: Lower Game Graphics
It could be the game, or it could be that your GPU isn’t as powerful as you believe. Most of the time, lowering your in-game graphics settings will solve the stuttering problem. We’ve also included the suggested settings below for your convenience. You can adjust the settings to suit your PC’s configuration.
Step 1: Launch the game and select the GRAPHICS tab. Change the Display Mode to Fullscreen or Windowed in the Display section. Set the greatest setting for Screen Refresh Rate.
Step 2: Set Custom Framerate Limit to Unlimited and Sync Every Frame (V-Sync) to Disabled.
Step 3: Now you may put the game to the test.
Method 4: Alter Config File
According to feedback, changing specific settings in the Warzone configuration file improves performance significantly. It could also be a solution to your stuttering problem. To do so, take the following steps:
Step 1: Open notepad and navigate to This PC > Documents Call of Duty Modern Warfare > players, then open adv_options.ini.
Step 2: The value of the parameter RendererWorkerCount should be set to the number of physical cores on your CPU. Then, to save the changes, press Ctrl+S.
Step 3: Now go back into the game and see how far you’ve progressed. Take a look at the next trick, if this one doesn’t work for you.
Method 5: Install Updates
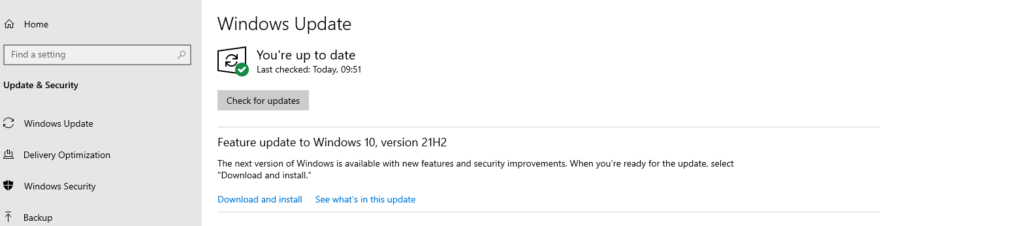
Microsoft releases security patches and new features for Windows 10 regularly. The update process occurs frequently, but you can always manually check for new patches to keep your PC in good form. Here’s how to manually check for updates:
Step 1: Press Windows + I on your keyboard to open Windows Settings.
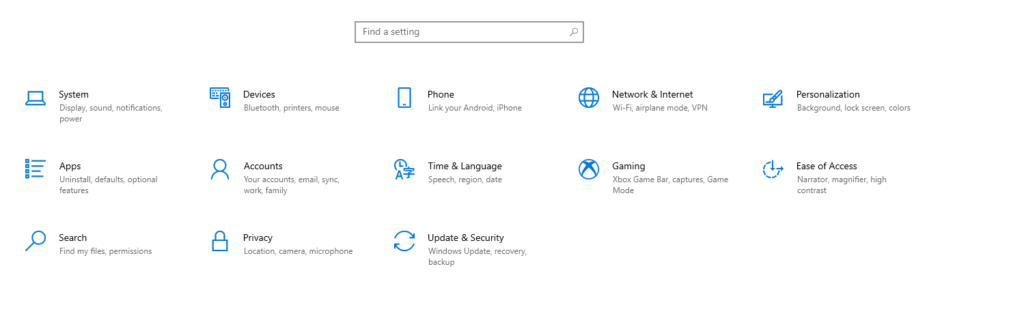
Step 2: Next Click on Update & Security.
Step 3: Now click on Windows Update from the left panel and then click on the Check For Updates button in the right section.
Method 6: Update Graphic Driver
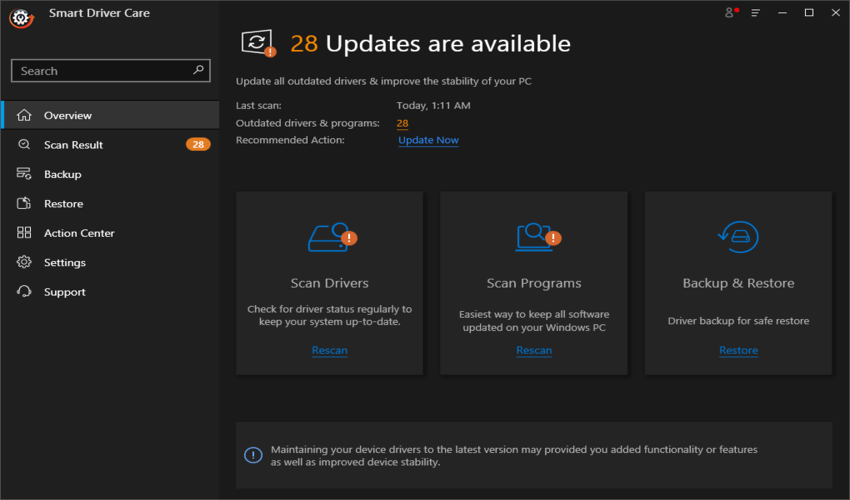
The final option left to resolve warzone stuttering and FPS drops is to update graphic drivers. This can be done manually by identifying and downloading the updated driver from the OEM website or using driver updater software. Smart Driver Care is an amazing application that can scan and update all your drivers in no time. It identifies outdated, missing, and corrupt drivers on your PC and fixes them in no time. Here are the steps:
Step 1: Download and install Smart Driver Care from the following URL.

Step 2: Open the application from the desktop shortcut after it has been installed.
Step 3: Select Scan Now to begin the scanning process.
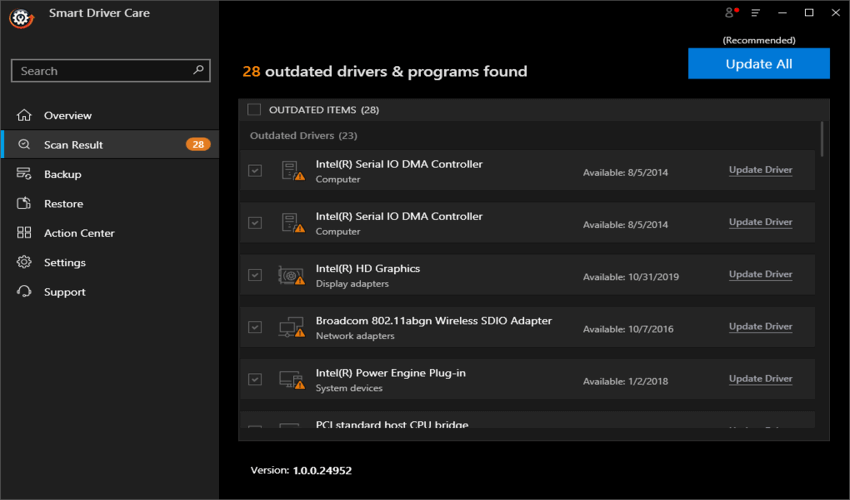
Step 4: A list of driver errors will appear on your screen. Click the Update Driver link next to the graphic driver to update the driver.
The Final Word On How to Fix Stuttering and Boost FPS in Warzone
Follow us on social media – Facebook, Instagram,_ and YouTube. For any queries or suggestions, please let us know in the comments section below. We would love to get back to you with a solution. We regularly post tips and tricks, along with answers to common issues related to technology.