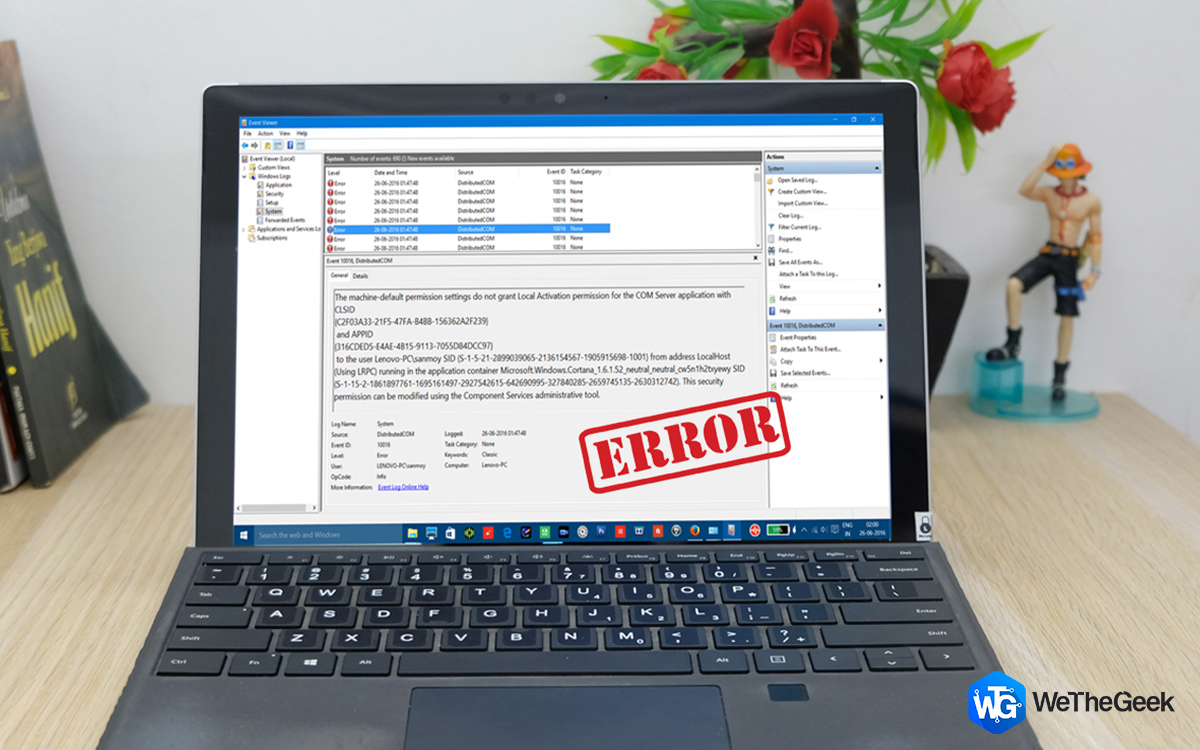
Windows 10 is the most widely used operating systems in the world, but unfortunately, it is not error-free. There are many different types of errors, and one which has been troubling many users is DistributedCOM Error 10016 in Windows 10. Well, the good news is that this error is not very dangerous and does not cause severe damage, system crashes or the dreaded blue screen of death. However, an error must be rectified as soon as possible and let us embark on a journey to resolve DistributedCOM Error 10016 in Windows 10.
Also Read: Quick Steps To Tackle “The File Is Open In Another Program Error” In Windows 10
So, What Is DistributedCOM Error 10016 In Windows 10?
The DistributedCOM stands for Component Object Model which is used in network and communications in a Windows 10 computer. This technology is an original Microsoft service which stays dormant and activates only when any application installed on the computer connects to the internet. The difference between a simple COM and DCOM is that the former can check data on the current machine, but the latter can gather information from remote servers as well.
With that clarified, let’s understand how a DCOM error can occur.
When DCOM does not receive a valid response from the remote servers, or if the application that wants to use DCOM and does not have the required permissions to do so, you can encounter the error.
Also Read: How to Fix Error 0xc000000f on Windows 10
How To Resolve Distributedcom Error 10016 In Windows 10?
There are two ways to resolve the DistributedCOM Error 10016 in Windows 10: The Easy Way and The Lengthier Way.
Fix DistributedCOM Error 10016 In Windows 10: The Easy Way
The error event ID 10016 can sometimes be resolved with a simple modification in the Registry value. But, first, before making any changes in the Windows Registry Editor, we must take a backup so that in case if something goes wrong, we can always restore it from the backup. Let us begin with the process of resolving the DistributedCOM Error 10016 in Windows 10:
Step 1. Press the Windows + R to open the Run box and type Regedit. Click on OK to open the Windows Registry Editor.
Step 2. Once the Registry window opens, click on File tab on the top left corner and from the drop-down, select Export to save a backup of Registry on your hard drive.
Note: The below steps will either produce no result or fix the error event ID 10016. It will not cause any adverse effects on your system.
Step 3. Navigate to HKEY_LOCAL_MACHINE\SOFTWARE\Microsoft\Ole. This path can be copied from here and pasted in the address bar on top of the Registry window.

Step 4. Once you reach the above address and click on Ole in the left panel and delete four registry keys from the right panel.
| DefaultAccessPermission | MachineAccessRestriction |
| DefaultLaunchPermission | MachineLaunchRestriction |
Step 5. You have deleted the file, click on File and then Exit to close the Registry Editor.
Step 6. Reboot the system and observe if you get the DistributedCOM Error 10016 in Windows 10 again.
As per the technical forums, this method has worked for many, and by merely deleting four registry keys will not affect your system’s functionally in any way but resolve the DistributedCOM Error 10016 in Windows 10.
Also Read: How to Fix driver_irql_not_less_or_equal Error on Windows 10
Resolve DistributedCOM Error 10016 In Windows 10: The Lengthier Way
The second way to fix the error event ID 10016 is to enable the DCOM permissions for all applications which cause the error. This means you will have first to observe make a list of all the applications which when run and connected to the internet, provide this error on your computer. It is also called the Lengthier Way as you will have to repeat the same process for each application as it cannot be applied to all in one go. The information of which apps cause this error can be obtained by checking the log corresponding to the event ID 10016 in the Event Viewer tool.
Step 1. Type “Event Viewer” in the search box on the left bottom corner of the taskbar and click on the relevant result to launch the Event Viewer on your system.
Step 2. Locate Windows Logs and then click on System. This will display all the errors occurred in your computer. Try to locate the last error entry of DistributedCOM Error with the event ID 10016. Make a double click on that entry to expand the error message.
Step 3. A new window will open, which will contain a lot of information about the error. Notice in the top box, there would be a CLSID and an APPID with a string of random alphanumeric characters.
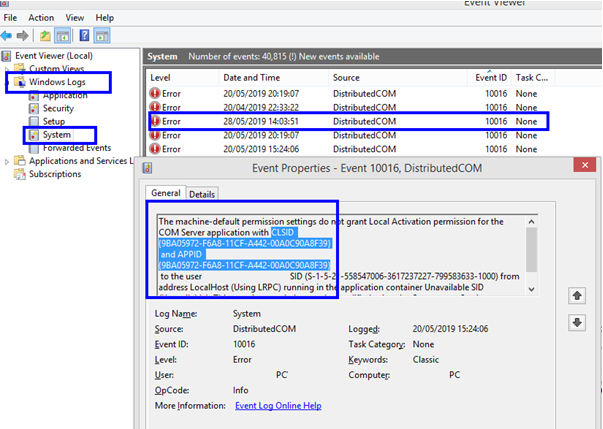
Step 4. Although the box can’t be edited, you can highlight and copy the CLSID and APPID and paste them on a word or text document. (Use CTRL + C to copy)
Step 5. Open the Registry Editor and navigate to the following path.
HKEY_CLASSES_ROOT\CLSID\ Paste your CLSID here
Note: You can copy and paste the above path in the address bar of the registry. Don’t forget to add the CLSID value form your computer here. In my case the value is {9BA05972-F6A8-11CF-A442-00A0C90A8F39}, so the final path looks like this:
HKEY_CLASSES_ROOT\CLSID\ {9BA05972-F6A8-11CF-A442-00A0C90A8F39
Step 6. Once you reach the path of your CLSID, check for the list of APPID listed under it. Compare the APPID you have copied from the Event Viewer.
Note: This will also tell you which service caused the error. As you can see in the screenshot attached, Shell Windows service was the reason for DistributedCOM Error with the event ID 10016.
Step 7. Now that, we have compared the APPID and confirmed the CLSID, you can make a right-click on the CLSID in the left panel. From the contextual menu, click on Permissions to open a new window.

Step 8. Next, click on Administrators and select the Edit button below. You will now get an option to switch to Basic Permission to Full Control and click on OK and Apply
Step 9. Restart the computer.
Step 10. After the computer restarts, Type “Component Services” in the search box on the taskbar and open the relevant application.
Step 11. In this window, click on Computers in the left pane and then locate My Computer and DCOM Config underneath it.
Step 12. Once you click on DCOM Config, you will find a list of various services that can use DCOM. Locate the service by the name discovered in the Registry Editor and APPID.
Step 13. Make a right-click on the service and select Properties and then Security.
Step 14. Locate Launch and Activation Permission and select Edit > Add > Add a Local Service > Apply. Don’t forget to tick the Local Activation box and click on OK.
Step 15. Restart your computer, and you will not get the DistributedCOM Error 10016 in Windows 10 with regards to this service. If other services cause this error, then you will have to repeat all the steps for that process or service too.
Also Read: Easily Fix Windows Update 0x80070422 Error Code
Your Thoughts On Steps To Resolve DistributedCOM Error 10016 In Windows 10
That concludes our journey to Resolve DistributedCOM Error 10016 in Windows 10. Always try the first method, and if you still receive the error, then go for the second method. Remember to go for the first DCOM error and then move down locating other DCOM error and compare the CSLID and APPID values to check if it is the same or a different service causing the error. In the case of different steps, you will have to follow the lengthier process many times.
The good thing is that this error does not disrupt the functioning of your system. So, once you follow the first method, you can wait until you get the error again, in which case you will have to follow the second method. And then you can continue to use your computer generally until you receive the error for the second time. This time, the error will be of a different service on which you can apply the second method. Keep using the computer and apply the second method only when you receive the DistributedCOM Error 10016 in Windows 10. This way, you will eventually get rid of the error once and for all without affecting your work and saving time and effort.
Follow us on social media – Facebook and Twitter. For any queries or suggestions, please let us know in the comments section below. We would love to get back to you with a solution. We post regularly on the tips and tricks along with solutions to common issues related to technology.
Suggested Reading:
Fixed: SYSTEM_PTE_MISUSE Blue Screen Error In Windows 10
What Is CLOCK_WATCHDOG_TIMEOUT Error & How To Fix It On Windows 10