Ever needed to install and run Linux on your Windows operating system? Well, you’ll be glad to know that you certainly don’t need to install third-party virtualization software (like VirtualBox) to run another OS on your Windows PC.
The built-in Hyper-V Windows 10 is a dedicated tool designed to create and run virtual machines. The feature is developed with virtualization technology that installs all the necessary elements & interface needed to create virtual machines to run other instances of Windows 10, 8.1, 7 or other OS, including Linux.
NOTE: Hyper-V Windows 10 feature is not a part of Windows 10 Home Edition. It’s available for PRO, Enterprise & Education editions. Moreover; you can’t just use the Hyper-V feature like that, you need to enable it first via Settings or PowerShell.
Keep Reading this step by step guide to learn How To Enable Hyper-V Windows 10 Tool & How To Use It for running virtual machines?
But First Check, if Your System Supports Hyper-V
To do so, follow the instructions below:
STEP 1- Launch Command Prompt & type Systeminfo & hit Enter key.
STEP 2- Now, navigate to the Hyper-V Requirements section & check whether all the required features for running Hyper-V are enabled or not.

Moreover, you should fulfill minimum system requirements such as:
- Running Windows 10 Pro/Enterprise/Education Edition
- RAM: 4 GB or More
- Processor: 64 Bit with SLAT
- CPU Support for VM Monitor Mode Extension (VT -c on Intel CPUs)
Well, if you fulfill all the mentioned system requirements, the next step is to enable Microsoft Hyper-V:
How To Enable Hyper-V Windows 10 Tool Via Settings?
Follow the instructions to enable this virtualization technology on your PC:
STEP 1 – Launch Settings > Apps > Apps & Features.
STEP 2 – Under Related Settings section, find and click on the option “Programs and Features”.
STEP 3 – Now click on the ‘Turn Windows features on or off’ from the left panel.
STEP 4 –Check the Hyper-V tool > hit the OK button & restart your system.
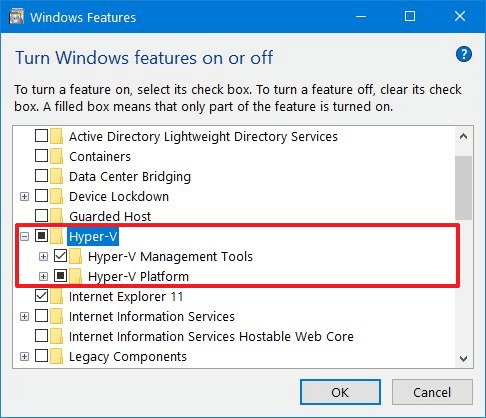
As soon as you complete the aforementioned steps, the Windows 10 Virtualization stack will automatically be installed on your PC along with the Hyper-V manager application. These are essentials to set up and run virtual machines on your PC.
How To Enable Hyper-V Windows 10 Tool Via PowerShell?
There’s another way to enable Hyper-V feature on your machine, follow the steps below:
STEP 1- Go to the Start menu & search for PowerShell, right-click on the first result that appears & Run as Administrator.
STEP 2- Type & execute the command line on your system.
DISM /Online /Enable-Feature /All /FeatureName:Microsoft-Hyper-V
STEP 3- Just press the ‘Y’ key to restart your PC.
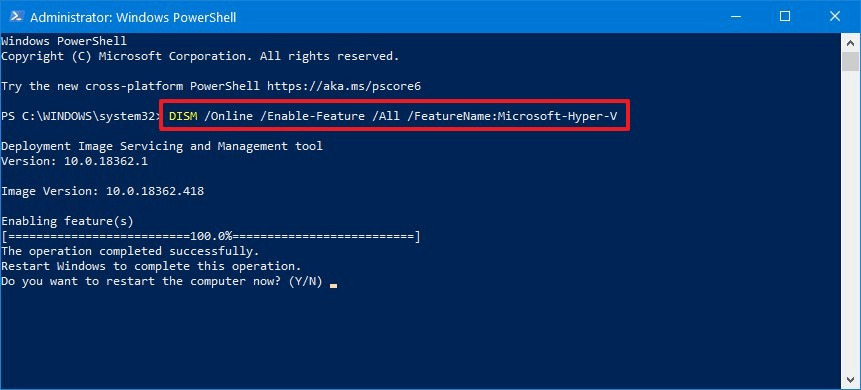
As soon as, you complete the aforementioned steps, the Hyper-V Manager, along with associated components, will be installed on your machine.
How To Configure Hyper-V Windows Tool?
Now that you’ve successfully installed Hyper-V, the next step is to configure it so that you can use the Hyper-V Manager for running Virtual Machines on Windows 10.
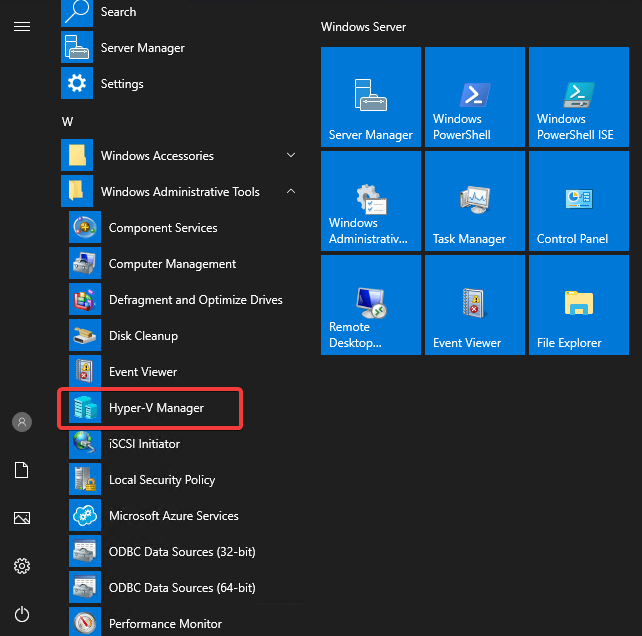
STEP 1- To run Hyper-V Manager, go to the Search box & search for Hyper-V Manager.
STEP 2- Click on the result & run the application.
STEP 3– On the Hyper-V Manager windows > Actions tab > Hyper-V Settings.
STEP 4- On the Settings page, choose Virtual Hard Disks to set it as the default drive & folder to store virtual hard disk files > Apply!
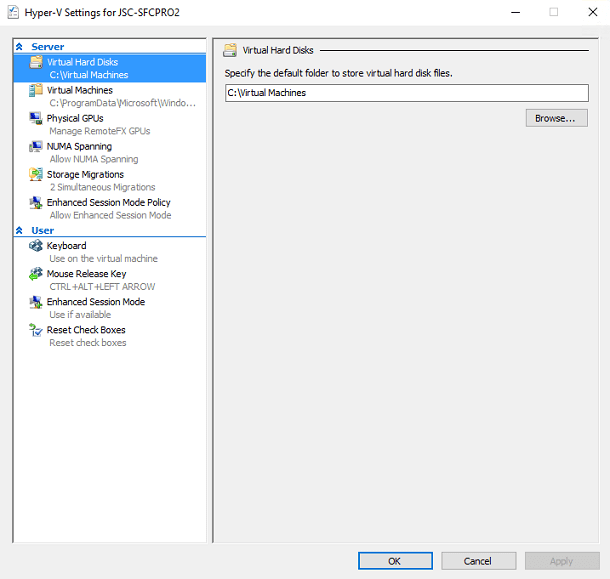
STEP 5- Now from the same settings window, select Virtual Machines to set it as the default folder for storing virtual machine configuration files.

STEP 6- The next step would be selecting Storage Migrations, to set the number of simultaneous storage migrations that are allowed. In the below screenshot, we’ve set it as 4. Hit the Apply button!

After configuring the Hyper-V Windows tool, the next step would be creating a Virtual Switch that would help you create virtual networks & interconnect them with virtual machines.
How To Create Virtual Switch For Running Windows Virtual Machines?
Just like a Network Interface Card (NIC) in a physical system, a virtual switch lets users create one or more virtual networks & use these to interconnect with virtual machines.
To create & manager virtual switch in Hyper-V, all you have to do is:
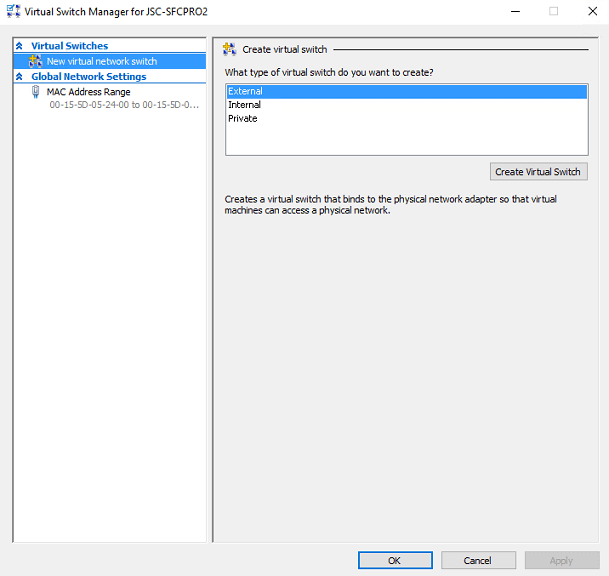
STEP 1- In the Hyper-V Manager > head towards the Action tab > hit the Virtual Switch Manager.
STEP 2- Click on the New Virtual Network Switch > from Actions pane, choose option ‘External’ & hit the Create button.
STEP 3- From the Properties section, you have to give a name to the virtual switch to Public & check the option given – “Allows management operating system to share this network adapters”. Hit Apply!
STEP 4- As soon as you hit the Apply button, a pop-up message would appear on your screen, indicating the potential loss of network connectivity while Hyper-V Windows Tool creates a new virtual switch.
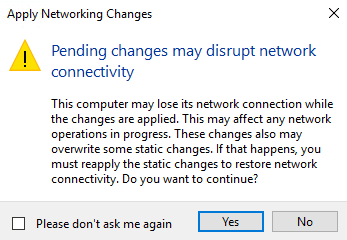
You can proceed with Yes to complete the creation process. Click OK to confirm!
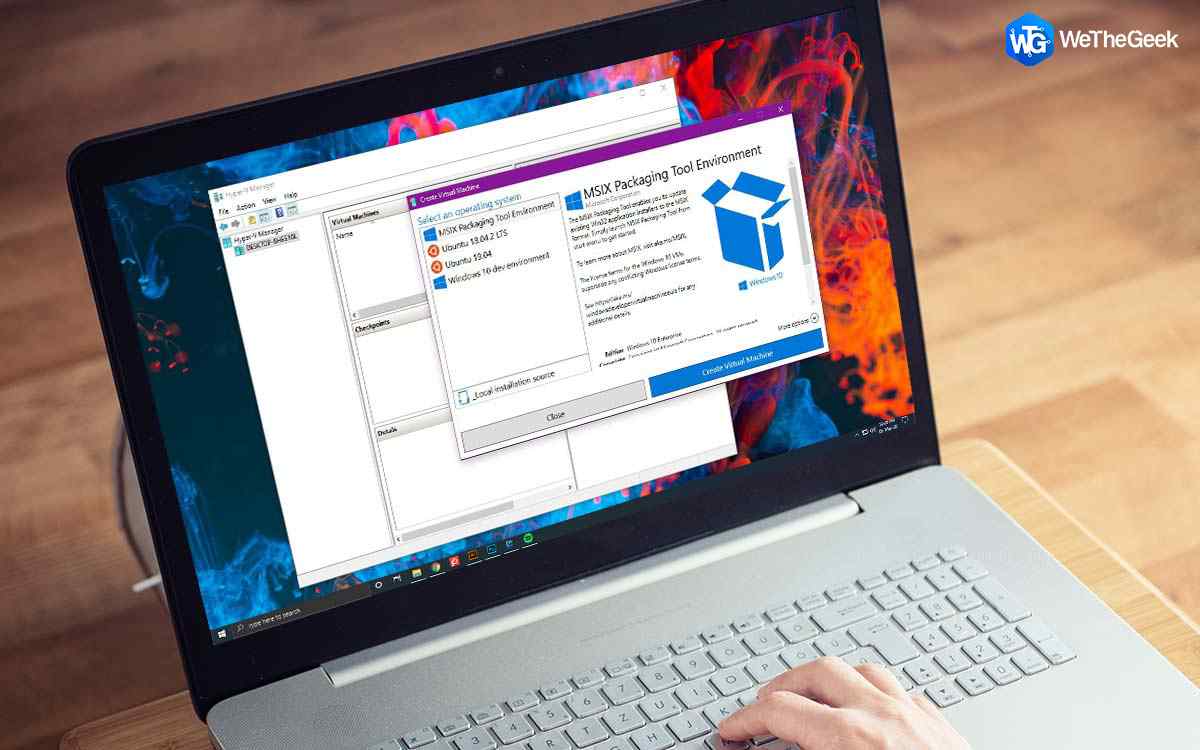
How To Create Virtual Machine Using Hyper-V Windows Tool?
Now that you’ve completed all the necessary steps to configure the settings & create a virtual switch to manage virtual machines, now you can move on to create The Windows Virtual PC.
STEP 1- From the Hyper-V Manager windows, go to Actions tab, and click on New and hit the Virtual Machine button.
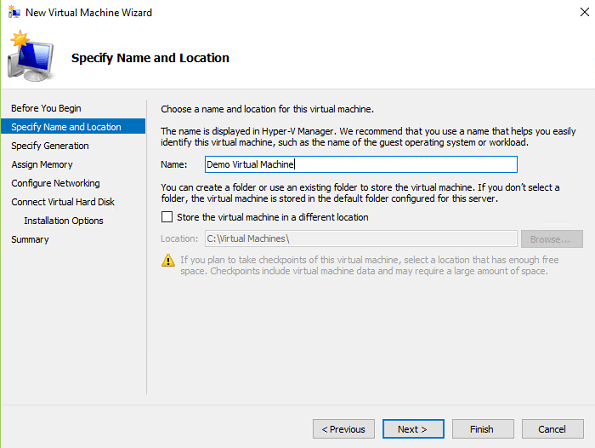
STEP 2- From the New Virtual Wizard > click on Next and skip the Before You Begin page.
STEP 3- On the next page, give the virtual machine a new name & click on Next button to continue the process.
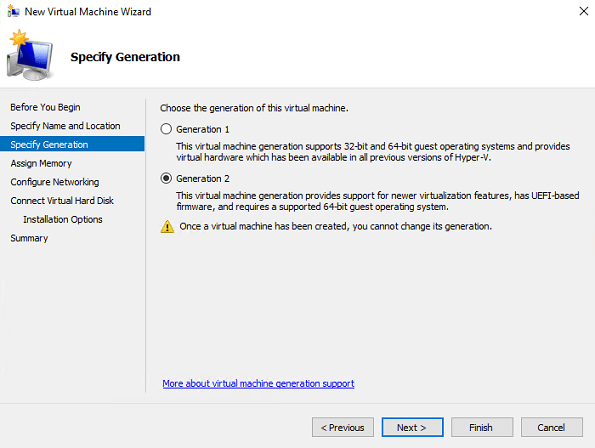
STEP 4- When you are taken to the Specify Generation Page. You have to choose the Generation options that support the guest operating system you will install in the virtual machine. Check out this complete guide to learn which generation option is best for supporting your guest OS.
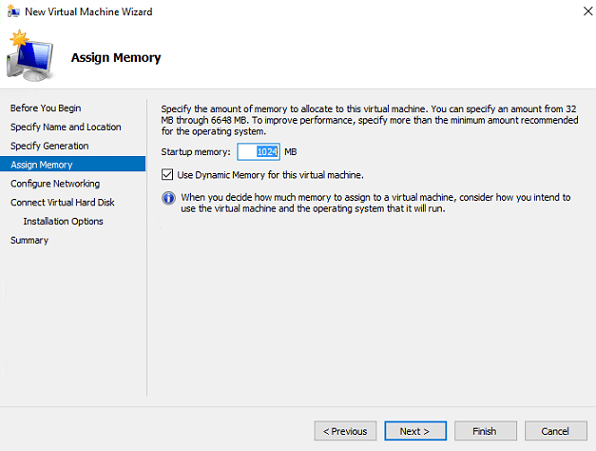
STEP 5- After you have selected the generation, click on Next to get redirected to the next page. In this window, you have to allot the amount of memory for your new virtual machine.
STEP 6- Once you are done allotting the space, the next option is to select the virtual switch that you have just created & click Next.
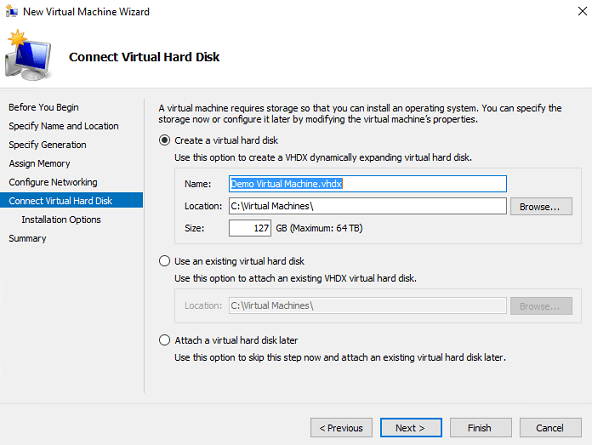
STEP 7- On the next page, review the options carefully to Connect virtual Hard Disk & hit the Next button.
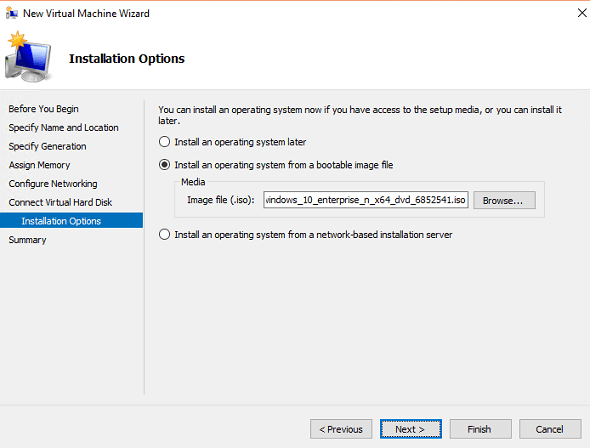
STEP 8 – Now comes the Installation Options page. Just select the option to Install an operating from a bootable image file & hit the Browse button to select the ISO image > Next.
STEP 9 – Review the settings once & click the Finish button to complete the new virtual machine wizard.
STEP 10 – If you’ve followed the steps correctly, you’ll be successfully able to create a new virtual machine., you can review it in the Hyper-V Manager.
STEP 11- Click on the newly created Windows Virtual Machine from the list & hit the Connect button, located on the right.
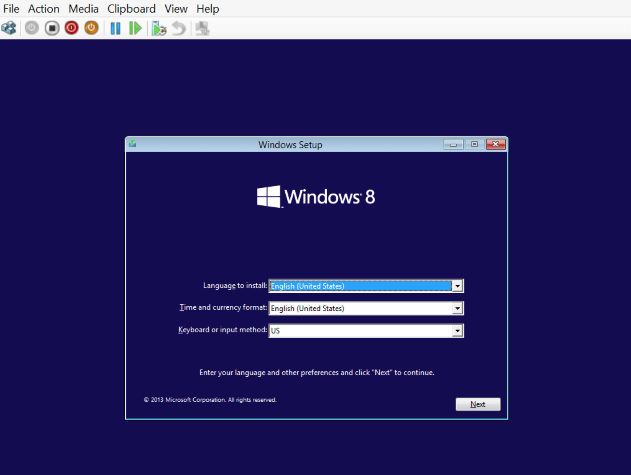
STEP 12- On the next dialog box, click on the Start button to start your Virtual Machine. Install the OS on your VM; similarly, you would do on your real hardware.
You’re All Set!
Finally, you’ll be able to play with multiple OS on just a single machine! Have any queries or confusion? Shoot them in the comments below!
READ MORE: