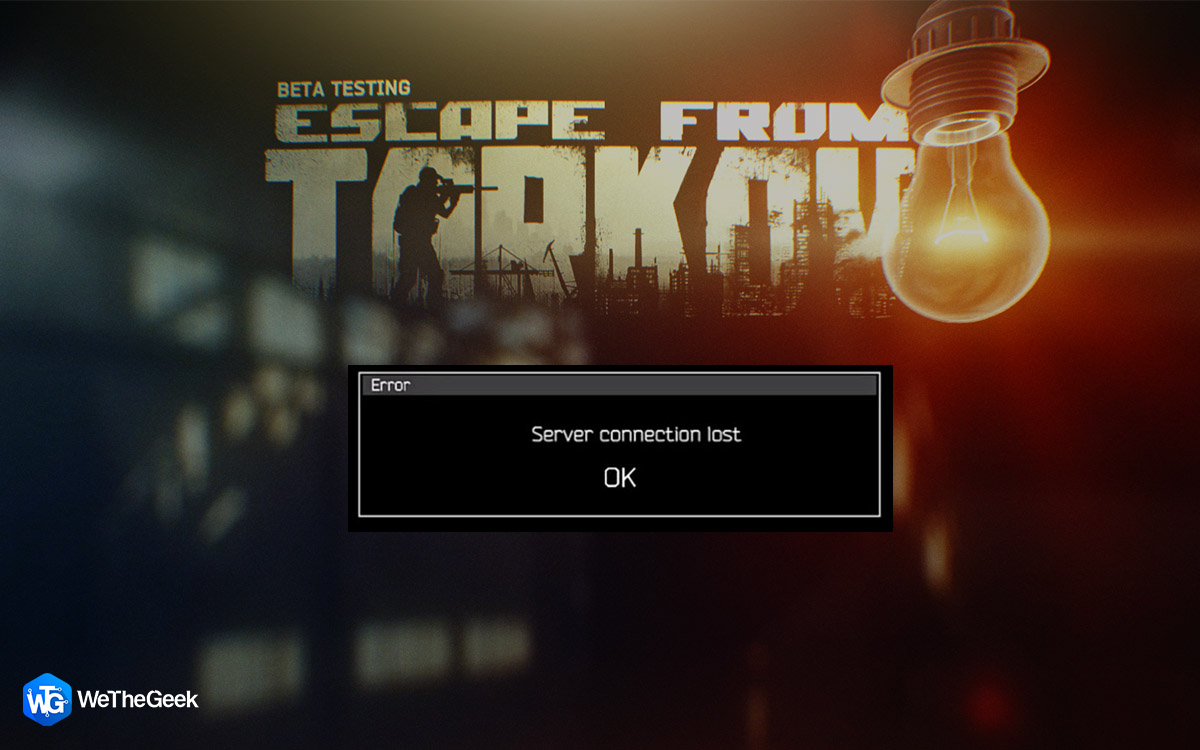
Escape from Tarkov is a multiplayer first-person shooter game that is very popular across the globe. It is played by many action-loving gamers but there have been certain errors like server connection lost in Tarkov which has caused a lot of frustration. Server issues can occur mainly if the server is down from the game developer’s end and there is nothing much you can do about it. However, it has been observed that this fault can be rectified by performing certain troubleshooting steps on your computer. This guide is a collection of the best steps to resolve the Escape From Tarkov Server Connection Lost error in Windows 10.
Different Method To Resolve Tarkov Server Connection Lost
There are a few steps that have been recommended by many gaming experts over troubleshooting forums that can help resolve server connection lost in Tarkov.
Method 1: Restart Your Modem/Router

The first method to try in case of internet issue is to restart your modem/router. There is no solid explanation why this method works most of the time, but it really does fix the issue. Here is what you need to do:
Step 1: Turn off all the modems and routers you have installed and unplug the cables.
Step 2: Wait for 60 seconds and reattach the cables.
Step 3: Turn on the power for your devices and reconnect your PC to the internet.
Step 4: Try to launch the game and check if the Tarkov server connection lost issue persists.
Method 2: Change Game Server
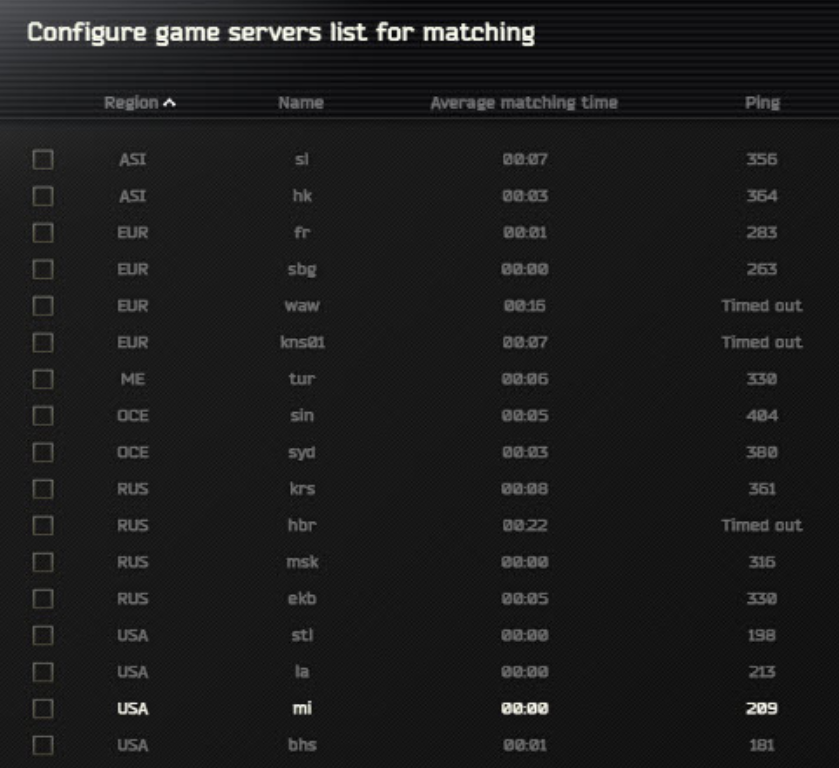
There are many servers of Escape from Tarkov that users can connect to. If you are facing a server connection lost error in Tarkov while choosing one particular server then you can disconnect it and choose another one. Also remember, to turn off the automatic server selection option when the game launches and choose a server that has the lowest ping.
Change a couple of servers to check if the Escape From Tarkov server connection lost error has been resolved before moving to the next step.
Method 3: Opt For a VPN
Another step that you can take to fix the server connection lost in Tarkov is to use a Virtual Private Network, more commonly known as a VPN. These applications mask your IP address and all the requests sent and received on your PC. A VPN allows you to choose a country server and this would be beneficial as any request you send from your PC on the internet will appear as a request sent from the VPN country selected. This can help fix many connectivity issues including Tarkov server connection lost.
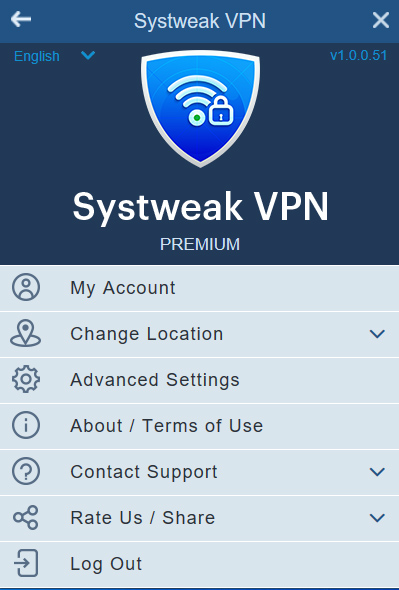
There are many VPNs available in the software world today, but we strongly suggest using Systweak VPN, a software that we have used for quite some time. Systweak VPN hides your IP address and all your activities over the internet making it impossible for anyone to trace you. It also has thousands of servers to choose from which means you can disguise yourself from any country and connect to the corresponding country game server. This is a major troubleshooting step to resolve the Escape from Tarkov server connection lost error on your PC.

Method 4: Turn Off IPv6
Moving on, we have another troubleshooting method that seems to have worked for many as per the gaming forums and that is to turn off the IPv6 on your PC. Here are the steps to complete this method:
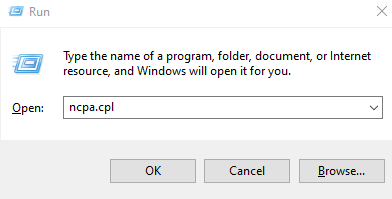
Step 1: Press Windows + R on your keyboard to invoke the RUN box.
Step 2: Type ncpa.cpl in the text space followed by Enter key.
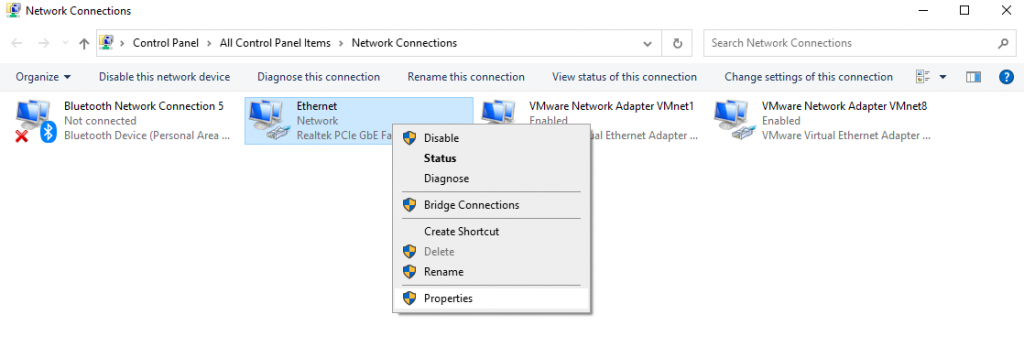
Step 3: In the new window, locate your network adapter and make a right-click on it and choose Properties from the context menu.
Step 4: A new window will open again where you have to scroll down and uncheck the box labeled as Internet Protocol Version 6 (TCP/IPv6).
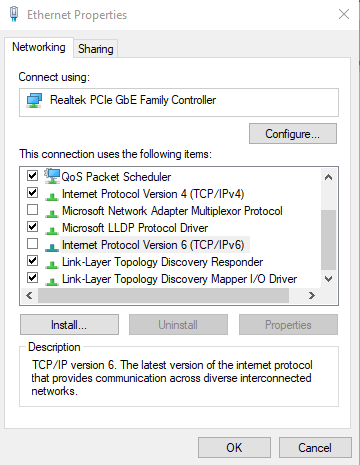
Step 5: Click on OK, exit all the windows opened, and restart your computer.
Launch the game and check if the Escape from Tarkov server connection lost issue has been resolved.
Method 5: Update Drivers
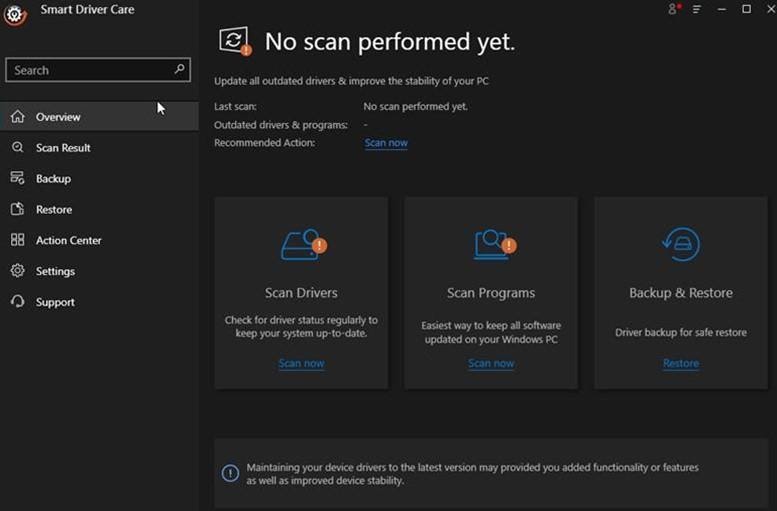
The final resolution for the Tarkov server connection lost issue is to update the drivers of your PC and in this case, the Network Drivers. These programs help maintain the communication between the hardware and the software ensuring that the PC delivers optimum performance at all times. To update the drivers, you would require a driver updater application and we recommend using Smart Driver Care for this purpose. Here are the steps:
Step 1: Download Smart Driver Care on your computer by using the following link provided below.
Step 2: Install the software by carrying out the on-screen instructions with positive responses.
Step 3: Click on the Scan Now button in the Scan Drivers section to commence the scanning process.
Step 4: A list of outdated drivers will appear within the app interface highlighting all the driver issues in your system.

Step 5: Locate your Network Driver in the list of driver errors and click on the update driver link beside it.

Step 6: Wait for some time it and once the update process is done, restart your PC to ensure that the changes carried out will take effect.
Initiate the game and check if the server connection lost in Tarkov has been resolved.
The Final Word On How to fix Server Connection Lost in Escape from Tarkov in Windows 10?
The Escape from Tarkov server connection lost issue does not allow gamers to initiate the game and complete the missions. If the Server issue is from the game developer’s end, then there is nothing you can do about. But if your friends can play and you are facing issues, then it is an error within your computer and can be fixed by following the methods described above.