It’s literally a small world. Wondering what we mean?
If traveling across the globe is what you aspire to, you may not need to spend hundreds or thousands of bucks on your travel ticket. Instead, a platform like Google Earth can fulfill your globe-trotting desires. All you would have to do is enter the location and you shall have a virtual scenic view of that location.
Of course, that still won’t be a match to physically being at your dream destination. But, let’s assume you want to give a virtual tour of your dream destination to a friend or family of yours on Google Earth because that’s where you all will be headed in the near future for vacation. How would you capture a Google Earth video?
Why Would You Want To Record a Google Earth Video?
Here are a couple of real-life scenarios where you might want to record a video of Google Earth –
Scenario # 1:
A friend of yours lives in another city (or even country) and he’s visiting your locality for the first time that too for a week. He wants to know how your locality is? Theoretically, it’s a decent locality with parks, high-rise multi-story apartments, some posh independent houses, grocery stores, a couple or more metro stations, and a lot more.
You even have a waterpark, a museum, and a supercar showroom nearby (by the way your friend’s a supercar fanatic). Now, instead of telling all this to him via a simple phone call or even a video call that would probably give him a limited vision of what he can expect, how about you give him a virtual tour of your locality by recording a Google Earth video. You could –
- Send 2D or 3D videos of a variety of places of his interest (e.g. the supercar showroom).
- Show him the exact distance from the metro station to your home.
- Mark the various parks where he can go for an early morning jog.
Scenario # 2:
(ii) You and your friends have planned a trip to a hill station where you all will be visiting some popular sites, checking out some notable landmarks, and then you all will head for a mountain hike. You’ve been to the place before so you know where to stay, what is notable to visit, and the exact route for the hike. Now, along with an itinerary, you could make a brief video that enlists all the places, pitstops, and routes and share it with your friends.
How To Record Google Earth On Windows/ Mac/ Online
How To Use The Google Earth’s Built-In Recorder To Capture Google Earth Video?
1. Open Google Earth in a browser and then download Google Earth on desktop.
2. Run the setup file and follow the on-screen instructions.
3. On the top-left, in the search box, enter the location whose tour you want to give.
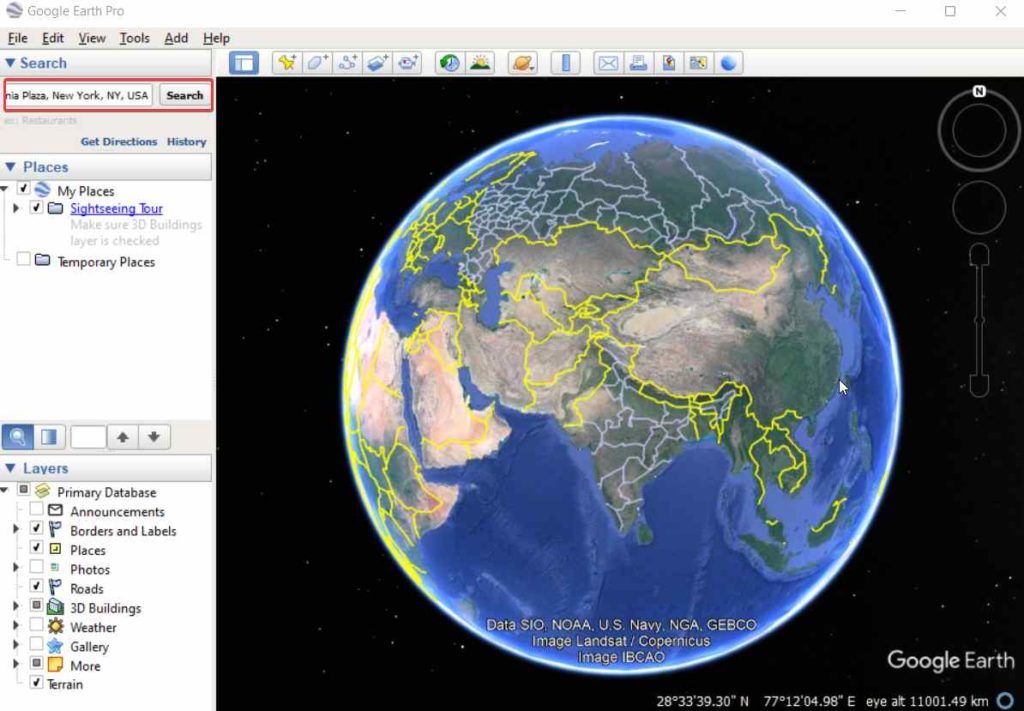
4. After you have entered the location and selected it, click on the Record a Tour icon as shown in the screenshot below.
![]()
5. You can even use the mic button on the bottom-left to record audio as well.
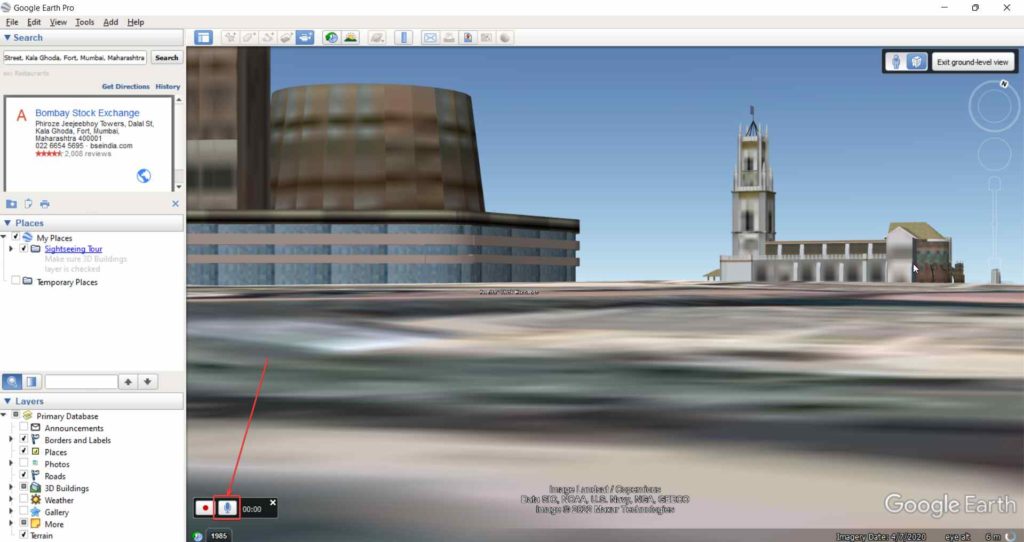
6. During the recording, you can switch to several places.
7. Once you are satisfied with your recording, you can click on the same button to stop.
8. Want to save your recording locally on your computer, click on the Save icon that you can find in the control center.
How To Use A Third-Party Utility To Record Google Earth Video
In this section, we’ll tell you how you can easily record Google Earth video on Windows and Mac using third-party screen recorder tools –
How To Record Google Earth Video On Windows Using A Screen recording Tool
You can download a screen recording application like Advanced Screen Recorder which is one of the best screen recording utilities for Windows. First and foremost, the interface is simplistic and can be understood quickly. Here are some of the notable features of Advanced Screen Recorder.
- You can choose to record any region of the screen. Thanks to multiple screen recording modes.
- Record videos in high quality. More specifically, you can record 4K videoshassle-freely.
- Get a total grip of the audio in your video recording. You can choose whether to use your computer’s sound or sound usingyour microphone.
- A comprehensive yet easy-to-use dashboard from which you can access and even manage all your recorded videos.
- Add watermarks to your recorded videos. Let’s say, you are an educator who has brilliantly demonstrated a virtual tour, you can add a watermark so that no one else can steal your creativity.
- Auto split and Auto Stop recording when your video reaches a set duration, time, or size.
How To Record Google Earth Video With Advanced Screen Recorder?
1. Download, run and install Advanced Screen Recorder.

2. Select the region that you want to record. Assuming that Google Earth is opened in a browser that’s snapped on the right, you can choose the Select Window option which would immediately bring the browser window into focus.
3. To further enhance your Google Earth video and add voice-overs during the recording, you can choose to remove system sounds such as mouse clicks and just record the sound coming out of your microphone.
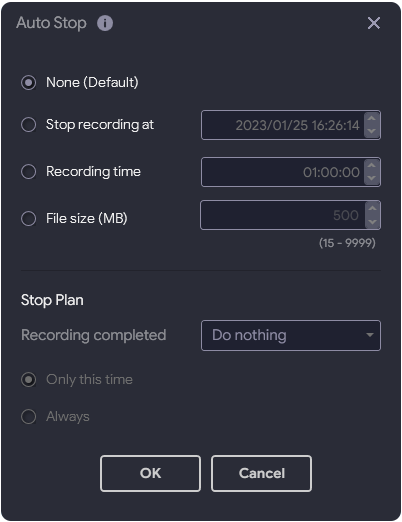
4. Wish to Auto Stop or Auto Split after the video recording reaches a particular time or size? Click on the hamburger icon from the top, and select Auto Stop or Auto Split.
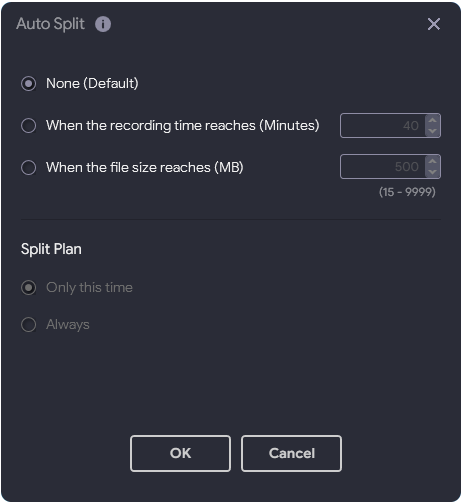
Specify size time, etc as shown in the screenshot below.
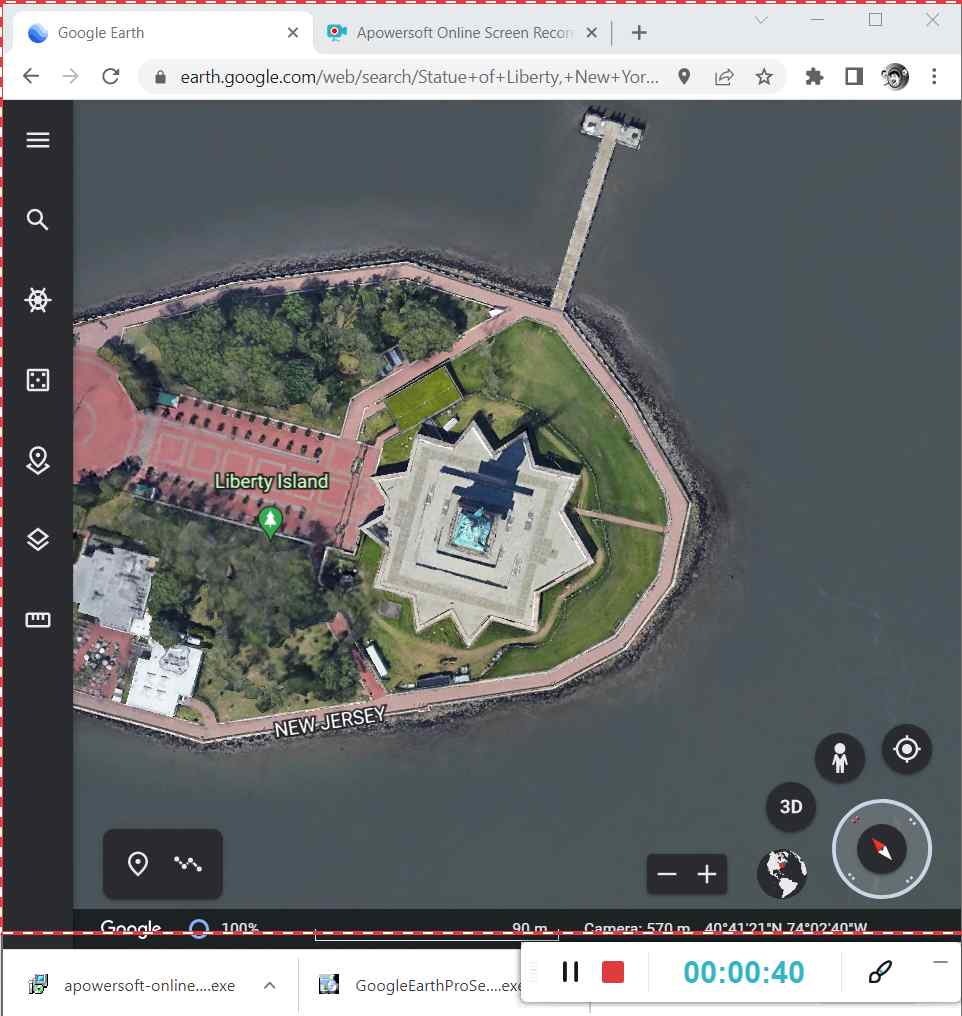
5. Once you have your settings as per your liking, click on the red-colored Record button.
6. You can even choose to pause the recording in between, for example, when you are switching between locations on Google Earth and you don’t want that to be seen in the recording, and then resume later.
![]()
7. Once you are done, click on the red button to stop the recording.
![]()
Please Note: The dashboard of Advanced Screen Recorder is one place where you can access all your recordings. And, in case you want to move your recordings to another location, the dashboard takes you to the recording’s original location, from where you can cut/paste or copy/paste the recording onto another location.
Want to dive deeper into this wonderful tool? Here’s a post worth checking out. Here you’ll find a comprehensive guide on how you can use this tool to your maximum benefit, what are its features and pricing as well.
How To Record Google Earth Video On Mac Using A Screen recording Tool
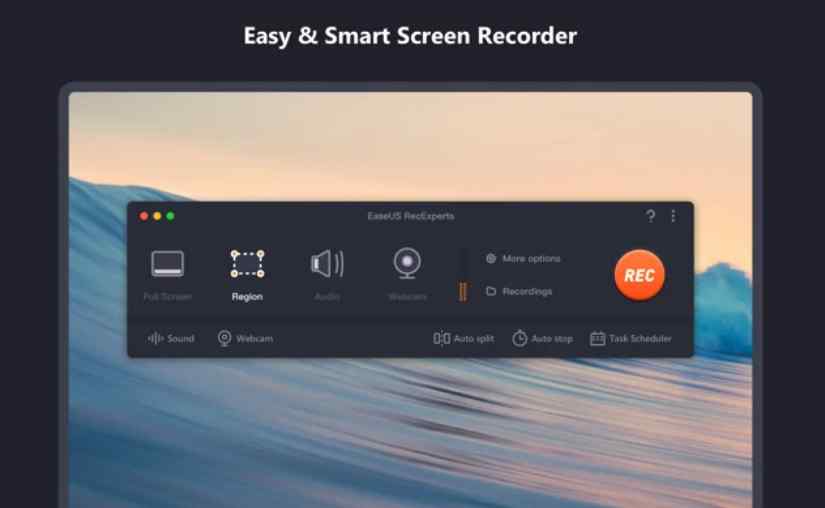
Quite like Windows, if you are a Mac user, you can easily capture Google Earth video. Here again, we recommend that you install a screen recording utility for Mac. EaseUS RecExperts for Mac is one of the best screen recording utilities for Mac. Here are some of its notable features –
- Record any screen region.
- Record multiple screens simultaneously.
- Get complete control of your computer and microphone sound (whichever one it is that you are using for video recording).
- Schedule recording automatically.
- Auto-split and Auto-stop.
How To Record Google Earth Video With EaseUS RecExperts On Mac?
1. Download, run and install EaseUS RecExperts for Mac.

2. Select the location on Google Earth whose video you want to record.
3. Select the region you want to record on Mac and tweak the audio settings to your liking.
4. Click on the orange-colored record button.
5. Select the desired audio settings.

6. You can even use Auto split and Auto stop features as well.
7. Once the recording is up to your liking, click the Stop icon.
How To Record Google Earth Online?
There are several online tools out there that let you record screens online, however, Apowersoft is a free online recorder that can perform the job of recording Google Earth video in the best possible manner.
1. Navigate to the free online screen recorder page.
2. Click on Start Recording

3. Download and run the launcher.
4. Select the region you want to record and the quality you want.

5. Choose the sound, in case you want to record a voice-over while you are capturing the Google Earth video.
6. Click on the red-colored Rec button to start recording.

7. You can play/ pause while recording the video.
8. Wish to annotate? Mark the exact landmark that you want to show to your family (the place where you all will positively gather together and take selfies), the Free online Screen recorder from Apowersoft even lets you do that as well.
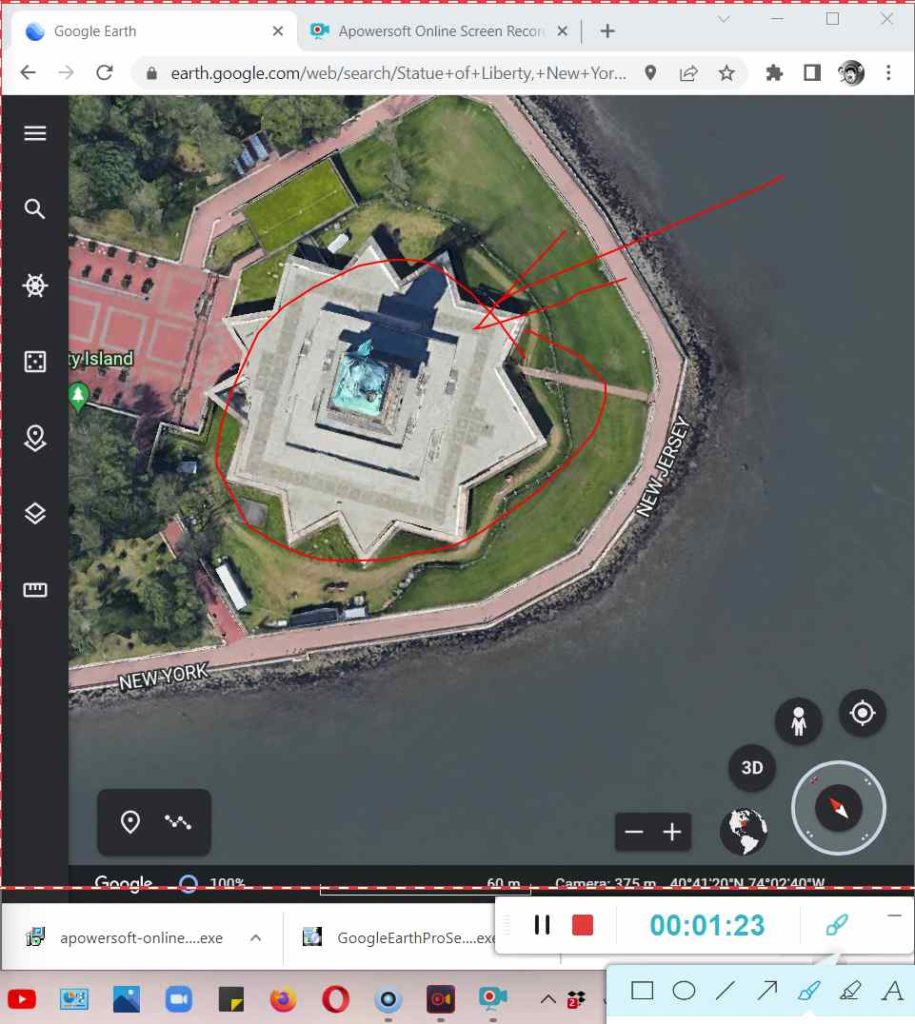
9. Click on the stop button to stop the recording.
Wrapping Up
That’s it, the world’s your oyster – Go ahead, show the world the place you’d love to explore or have explored with the help of recorded Google Earth videos. If you loved what you read, share it with your friends, family, and colleagues who have the same travel bug and love for places as you do. For more such content, keep reading WeTheGeek.
Frequently Asked Questions –
Q1. Is there a way to record Google Earth?
There are multiple ways to record Google Earth videos. You can either use Google Earth Pro’s inbuilt recorder or you can use screen recording utilities like Advanced Screen recorder (Windows), EaseUS RecExperts (Mac), and Apowersoft free online screen recorder (online).
Q2. How do I save a Google Earth recorded video?
Either platforms that we have discussed in this post – be it Google Earth’s built-in screen recorder, screen recording utilities, or Mac and Windows or online screen recorder, all let you save your recorded video at the destination you want. In Advanced Screen Recorder, you can find the recorded video in the dashboard, from where you can go straight to the saved location and even choose the desired format as well.