
Elden Ring, one of the most anticipated games of 2022, has finally arrived. However, many players are dissatisfied with their experience. Since the release, a variety of performance difficulties and technical defects have been reported. Don’t worry if you’re also experiencing inexplicable Elden Ring FPS decreases and stuttering. We’ve compiled all of the easy and quick fixes for you in this post. You are not obligated to attempt all of them. Simply work your way through the list until you locate the one that works.

How To Fix PC Stuttering on Elden Ring
Method 1: Enhance the graphical settings
If you’re using a laptop or a system with several GPUs, make sure the dedicated GPU is being used appropriately. If you don’t, you’ll notice a significant loss in FPS, therefore it’s best to change the settings for maximum performance.
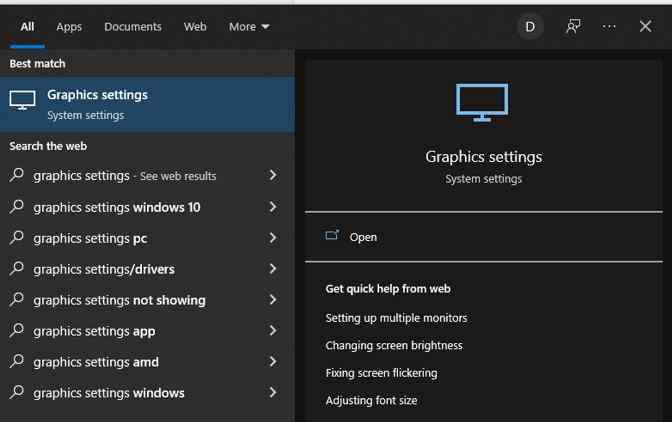
Step 1: Type graphics settings into the Windows search box, and then pick Graphics settings from the results.
Step 2: Click Browse after selecting the app from the drop-down menu.
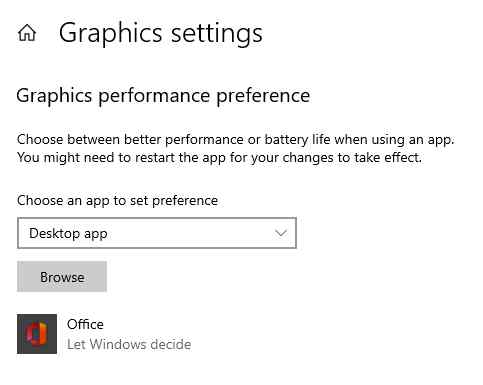
Step 3: Add the eldenring.exe file to the game’s installation folder.
Step 4: Once it’s been added, right-click it and choose Options.
Step 5: Select High performance and save your changes.
If this approach fails, move on to the next option.
Method 2: Make sure the game files aren’t corrupted
Elden Ring frame rate reductions can also be caused by missing or corrupted game files. You can check whether there’s anything wrong with your game files and have Steam automatically repair it before moving on to the more advanced processes. The steps are as follows:
Step 1: Select the Library tab on your Steam client after launching it.
Step 2: From the game list, right-click Elden Ring and select Properties.

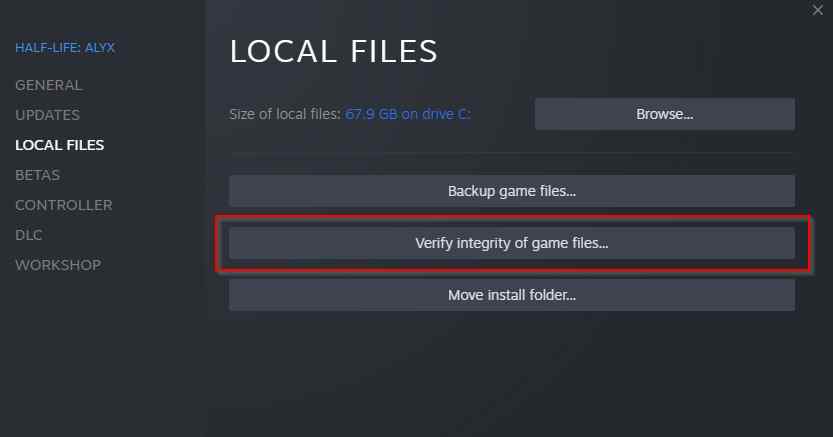
Step 3: Select LOCAL FILES and then Verify game file integrity.
Note: Steam may take some time to check and restore the game files, replacing any incorrect files with those from the legitimate server. Check to see whether the game is running more smoothly now. If that doesn’t work, move on to the next step.
Method 3: Turn off the Steam overlay
Another major reason for FPS difficulties is the in-game overlay. You might simply disable it and see if it improves performance.
Step 1: Open Steam and go to the Library tab.
Step 2: Right-click Elden Ring in the game list and select Properties.
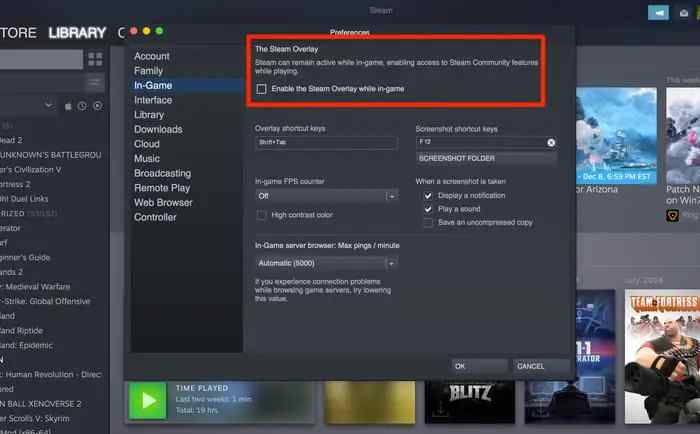
Step 3: While in-game, untick Enable the Steam Overlay.
Restart the game and run the test again. Have you had no luck yet? Continue to the next step in the process.
Method 4: NVIDIA parameters can be tweaked
If none of the other techniques work and you’re using an NVIDIA graphics card, tweaking specific graphical settings in Elden Ring may assist.
Step 1: NVIDIA Control Panel can be accessed by right-clicking any empty place on your desktop and selecting it.
Step 2: In the left pane, select 3D settings > Manage 3D settings.
Step 3: Scroll down the Global Settings tab until you locate Shader Cache Size and change it to Unlimited.
Apply the adjustments and see if you can play the game normally now.
Method 5: Disable the root enumerator for Microsoft Device Associations
Disabling Microsoft Device Association Root Enumerator, according to several gamers, significantly reduces stuttering. Although disabling this device may prevent some parts of the device driver from installing, your computer will continue to function normally.
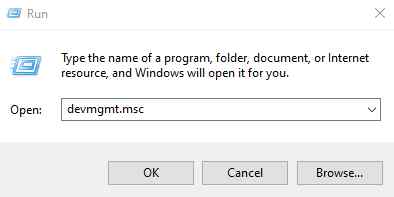
Step 1: To use the Run command, press the Windows logo key and R at the same time on your keyboard. Click OK after typing devmgmt.msc.
Step 2: To open the category, double-click Software devices.
Step 3: Disable the device by right-clicking Microsoft Device Association Root Enumerator.
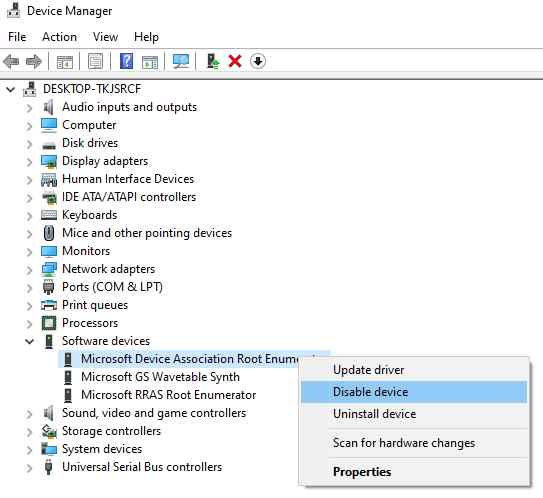
To confirm, click Yes.
Check to see if you get a bump in FPS right away. If this is the case, you can re-enable the device when you’re not playing the game. If the problem persists, switch the gadget on and examine it.
Method 6: Update Your Drivers (Network Driver)
Using driver updater software is the simplest and fastest way to update drivers on your PC. Advanced Driver Updater is one of the best tools in this category since it scans your computer for outdated, corrupt, and missing drivers. It then goes through its database to find the most recent and appropriate driver, which it then downloads and installs on your computer. The steps for installing Advanced Driver Updater on your computer are as follows.
Step 1: To download and install Advanced Driver Updater on your PC, click the Download button below.

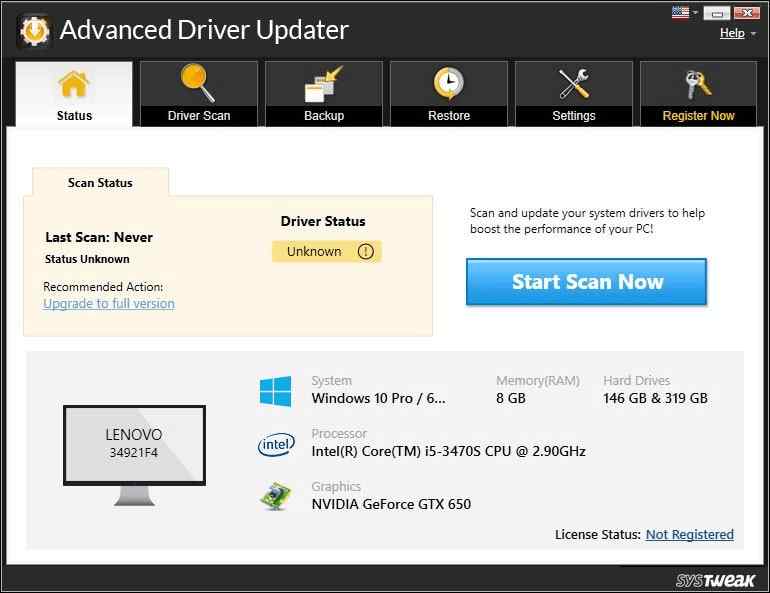
Step 2: After the program has been installed, run it.
Step 3: Select the Start Scan Now option in the center of the screen.
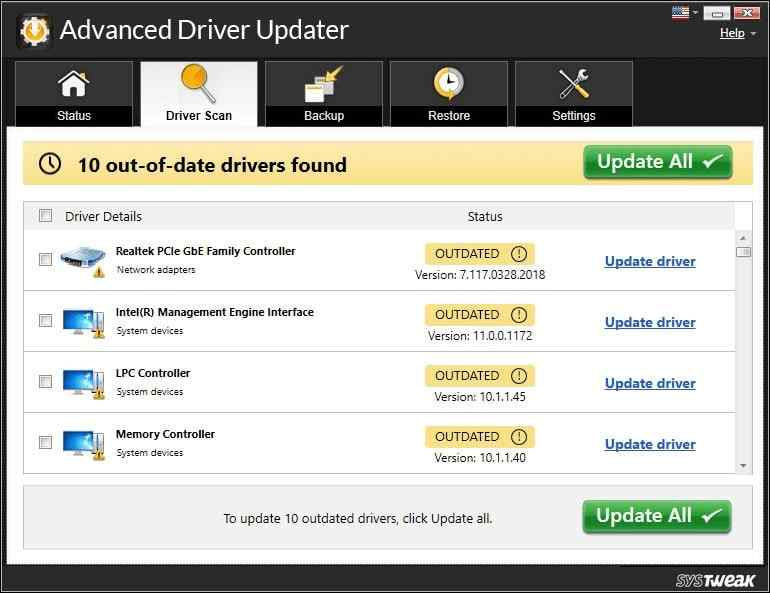
Step 4: Within the app interface, a list of driver abnormalities will appear on your screen. Look for the network drivers in the list.
Step 5: Once you’ve identified the problem with the network driver, click the Upgrade icon next to the driver you want to update.
Step 6: After you’ve finished updating the drivers, restart the computer to confirm that the changes have taken effect.
The Final Word On PC Stuttering on Elden Ring? Here’s How to Fix it!
The above expert-recommended methods are compiled from various troubleshooting forums and are guaranteed to fix your issue. Updating Drivers is an efficient method to fix many drivers and Advanced Driver Updater is an amazing tool that can automate this process for you.
Follow us on social media – Facebook, Instagram, and YouTube. For any queries or suggestions, please let us know in the comments section below. We would love to get back to you with a solution. We regularly post tips and tricks, along with answers to common issues related to technology.