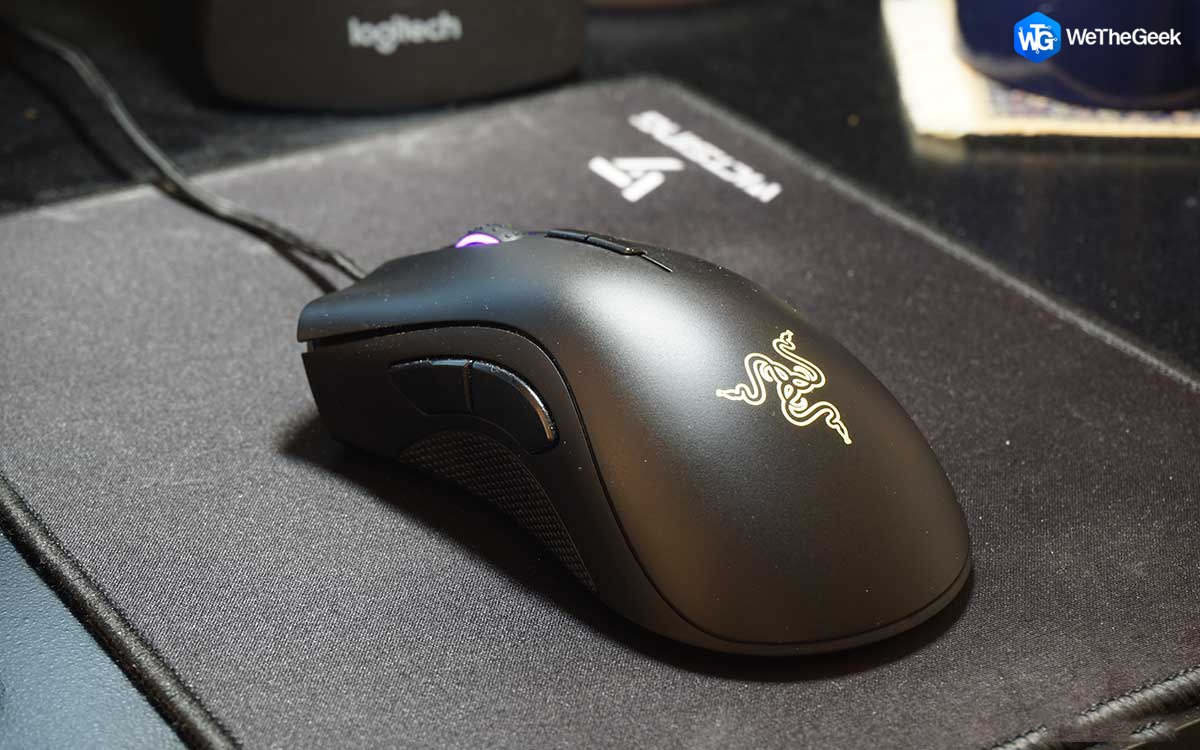
Razer Deathadder mouse is a well-known name for gamers. If you are facing lags and issues, while using the mouse, then the whole gaming experience could get ruined. To fix them, you need to find a solution to update the Razer Deathadder driver. Here in this post, we talk about how you can take this process ahead manually and using software.
Problems Associated With Razer Deathadder Driver –
If you have recently updated to Windows 10 and are unable to use your Razer Deathadder mouse with the system, the issue might be an outdated driver. The mouse might display issues such as not detecting on Windows 10 or some functions not working. This will help you recognize that this is associated with the Razer Deathadder driver. When you receive an update on the current version of Windows or if you have upgraded your operating system, such problems are common to occur. So, to get back on working with the mouse for Windows 10, let’s learn how to update the device driver. First, let’s try to fix the problems with general solutions listed:
1. Mouse is not recognized
When your Razer Deathadder mouse is not recognized at all by the system, try these helpful tips to fix it:
- Connect the mouse to another system to rule out any of the port, USB and cable connections issues.
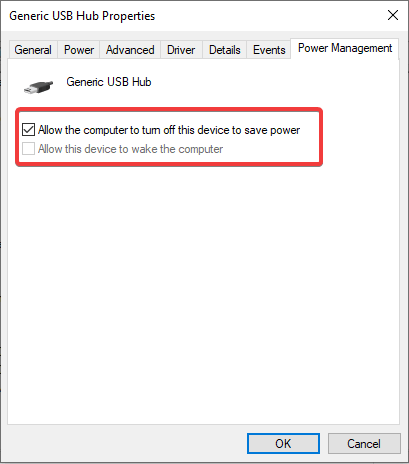
- Check your USB ports settings in Device Manager:
It might be the reason that the device has stopped working. The power management settings are turned on for allowing the System to disable the device to save power. This setting can be changed by going to Device Manager> USB Controllers. Right-click on the relevant USB port from the list.
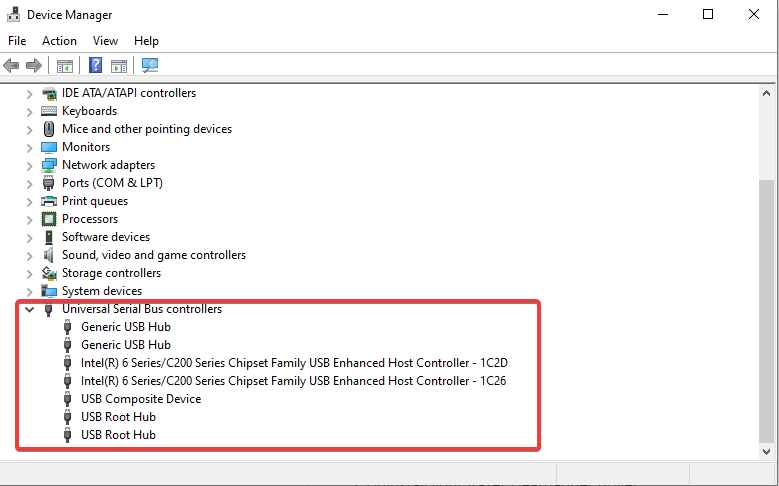
Here, under the section of Power management, check if the permission is granted to the system to turn off the device. Uncheck the box in front of the ‘Allow the computer to turn off this device to save power’.
2. Mouse Not Working Smoothly
If the Razer Deathadder mouse is not running smoothly, try to wipe it with a clean cloth. Otherwise, try to make changes to the settings. If you use Razer Synapse look for Surface Calibration, and turn it on. These steps will help your mouse work smoothly. If they do not work for you, this must be a problem of an outdated Razer Deathadder driver. In the next section, you will learn how you can update the device driver to make it function well.
How To Update Razer Deathadder Driver Manually?
If you are not able to fix the issues of the Razer Deathadder mouse, try to update your device driver. The manual method will require you to download the latest driver from the official website. The manufacturers often launch the updates for the drivers on their websites, and it’s easier to get it there. For Razer Deathadder, you can check the latest drivers here.
Choose from the list given and select your preferred language and download it. Restart your computer for applying the changes.
If selecting the correct one from the list seems overwhelming to you, try the next method.
How To Update Razer Deathadder Driver with Software?
Device drivers are required to be continuously updated for the stable performance of the device. The regular updates on all the device drivers on the system help it work without interruptions. The issue with Razer Deathadder driver can also be curbed with subsequently updating it for Windows 10.
We recommend using Advanced Driver Updater to update Razer Deathadder driver. Install it from the download button below.

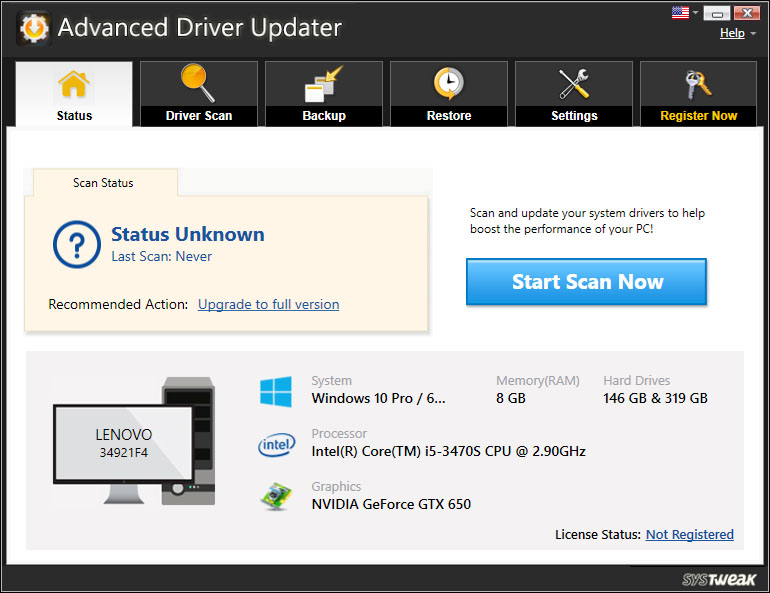
Advanced Driver Updater is a tool for Windows, which helps in updating the device drivers automatically. It comes with a large database of drivers, so you can update the outdated and incompatible drivers. This automatically enhances the performance of the system and fixes any driver issues for the devices.
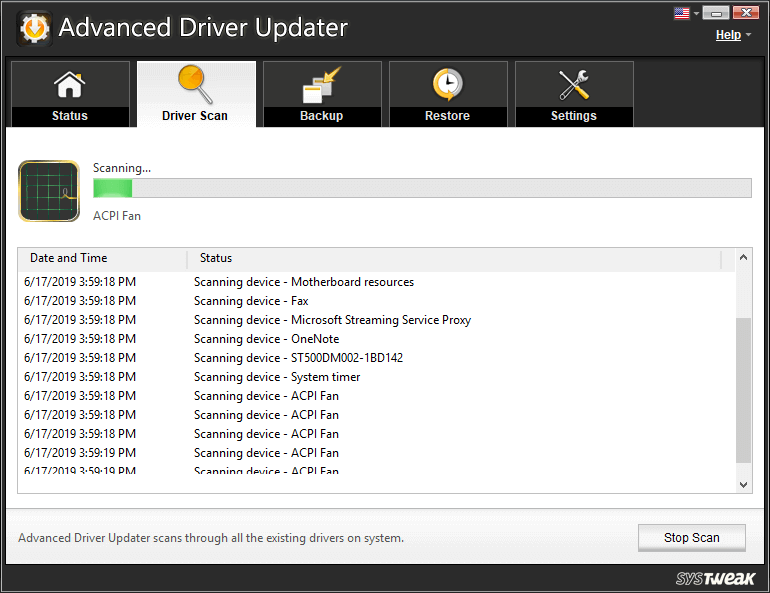
Step 1: Once installed, Scan Status will confirm if any of the drivers are outdated and need action. To start looking for outdated drivers, click on Start Scan Now.
Step 2: The Driver Scan section will show you the list of the outdated drivers on your system. It takes a short while to scan.
Step 3: Look for the required driver and select it and then click on Update Selected Items, or better click on Update All to update all outdated drivers at once.
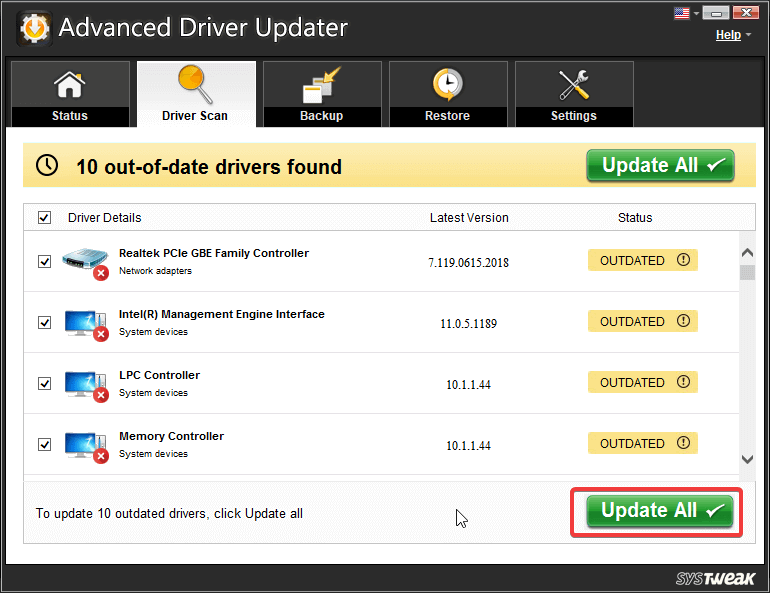
Step 4: Once the required drivers are updated, you need to Restart the computer to apply all the changes.
This can help quickly resolve the issues with the Razer Deathadder mouse. Also, using Advanced Driver Updater will save you from the complicated method of updating it manually. The results relieve you from worries of checking for the update time and again.
Conclusion:
This is how to update Razer Deathadder driver on Windows 10. We have shown you both- manual and automatic methods to get your Razer Deathadder mouse working again. The simple tips will help you fix the general problems with the mouse on your own.
We Love To Hear From You
Please tell us your views on the post for how to update Razer Deathadder driver on Windows 10 in the comments section below. Also, update all drivers present on your system using Advanced Driver Updater. We post regular tips and tricks, along with solutions to common issues related to technology. Subscribe to our newsletter to get daily updates on the tech world. Follow us on social media – Facebook, Instagram and YouTube.
Related Topics:
Solution: If Mouse Display is Disappearing in Windows 10.