
No matter how you have recorded a video on your screen, the job is not finished until you have removed unnecessary parts from the recorded video. And, why consider trimming your screen recording? To get your user’s attention to the exact areas of your recording.
Unwanted parts such as those few seconds or minutes when you are giving a buildup, letting your audience into a webinar, and asking people to settle down, can take away your end-users attention. Not just that such redundant sections would just add up to the size of your video recording.
In this post, we’ll discuss some simple ways to trim screen recording, so that, you will be able to grab your audiences’ attention faster and save storage space.
What Is Trimming A Screen Recording?
When you trim a screen recording, you cut desired clips or sections of the recording. It could be the beginning, middle, end, or any portion.
How To Trim Screen Recording On Windows 11, 10 PC
1. Using A Screen Recording Tool
Many screen recording utilities for Windows let you trim your screen recordings in a hassle-free manner. Let’s take Advanced Screen Recorder for example. It is one of the best screen recording utilities for Windows. To know more about this tool, check out this post.
Here we shall conduct a fresh screen recording and trim it. Here are the steps for the same –
1. Download, run, and install Advanced Screen Recorder.

2. Select the area that you want to record.
3. Select recording configuration i.e. the System Sound, Microphone, and Webcam (if required).
4. Click on the Start Recording button.
5. Click on the Stop button to stop the recording session.
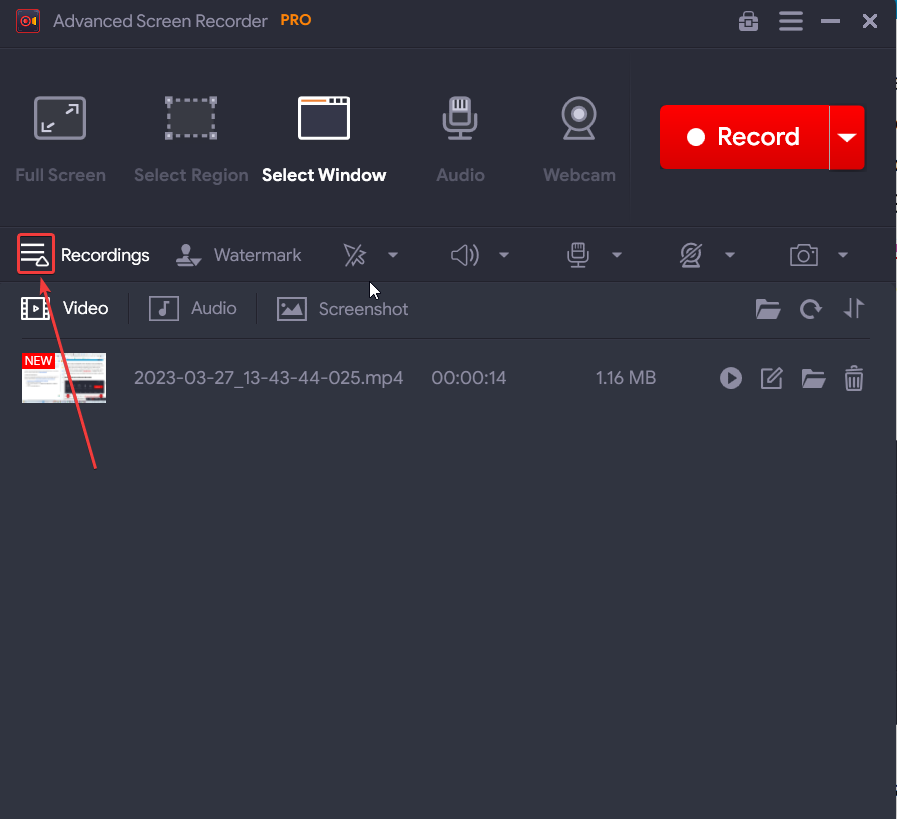
6. Now click on the dropdown button located towards the left of Recordings as shown in the screenshot below.
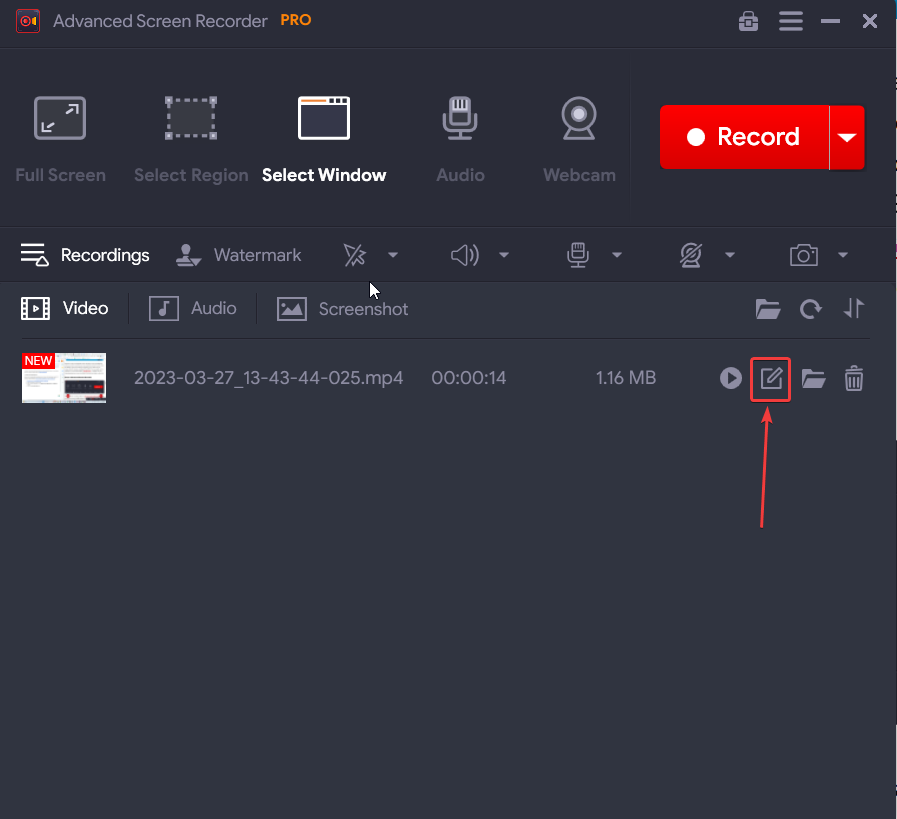
7. You will now be able to see all your recordings. Click on the Edit button.
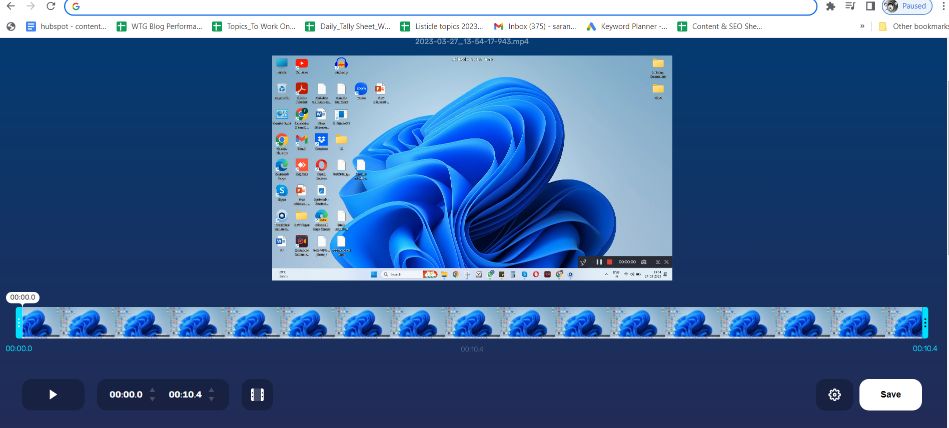
8. The moment you’ll do that, a new window will appear. This is where you can trim your recording. You can play your recording and carefully decide the area your want to trim.
9. To trim the recording, you can see two handles. You can pull these and select the area you want to trim.
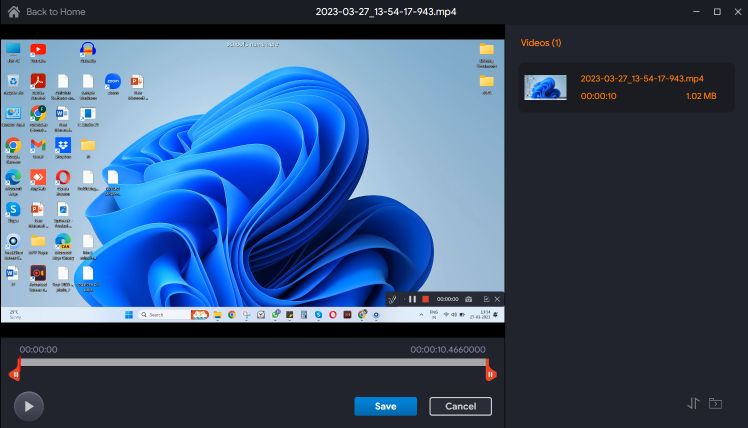
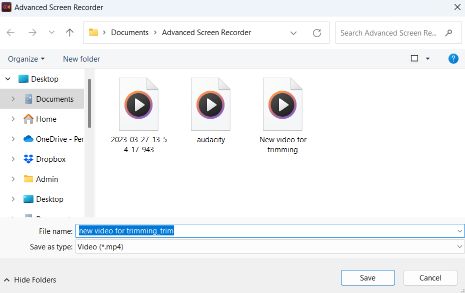
10. The best here is that you can keep the original video intact and the trimmed recording will be saved as a separate file.
2. Trim Video Online
Another way you can trim your screen recording is by using an online video cutter. For instance, you can visit Online Video Cutter and trim video recording. Here’s how you can trim the video online –
1. Visit Online Video Cutter.
2. Click on Open file to head to a location on your hard drive where your screen recording is placed. Or, even better you can drag and drop your screen recording here.
3. Here you can either use the handles to trim your video or you can specify the exact time range.
4. You can further click on the Settings icon to select the file format.
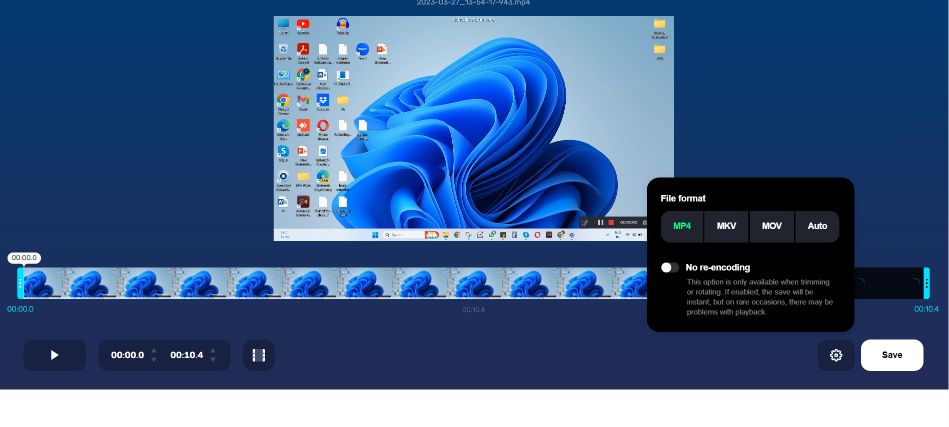
5. Once done, click on the Save button.
3. Use A Video Editor To Trim Your Video
If apart from trimming your screen recording on your Windows PC, you want to engage in full-fledged video editing – add effects, perform color correction, and do other such tasks, a video editing program is something that would go a long way. Here are some of the best video editing software for Windows.
Now, some of this software may have a slight learning curve, so, if you are someone who has just started video editing and wants to deliver a professional-grade output, Wondershare Filmora is a video editing software you can consider installing. This post will give you insight into how you can create and edit videos with this tool.
But, let’s say, you just want to trim your screen recording using Wondershare Filmora. There are multiple ways you can trim your video –
1. Import your video into Wondershare Filmora by clicking on New Project.
2. Click on File, then click on Import Media and click on Import Media Files.
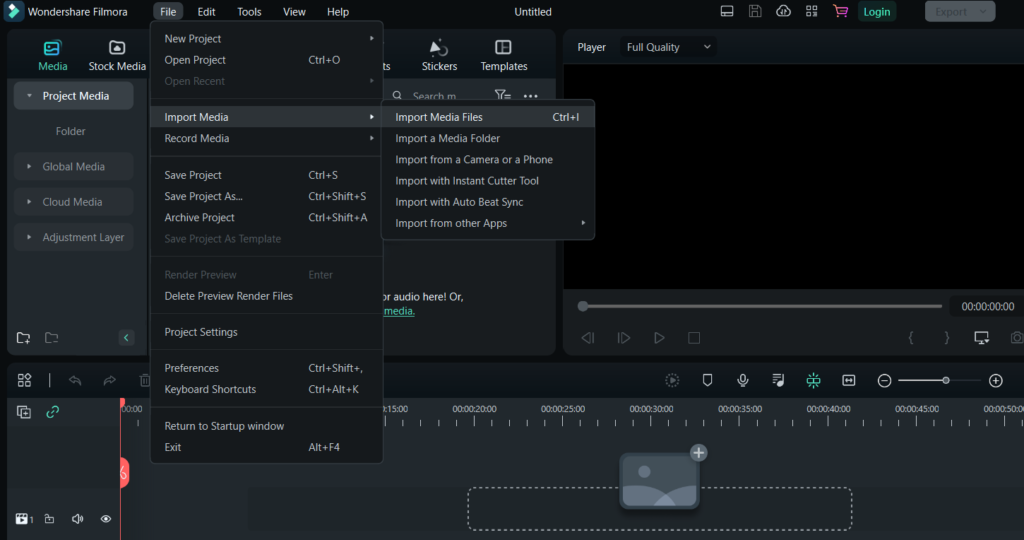
3. Head to the location where your screen recording is placed and select your screen recording.
4. Choose the start and end of your screen recording by dragging the edges of your clip as shown in the screenshot below.
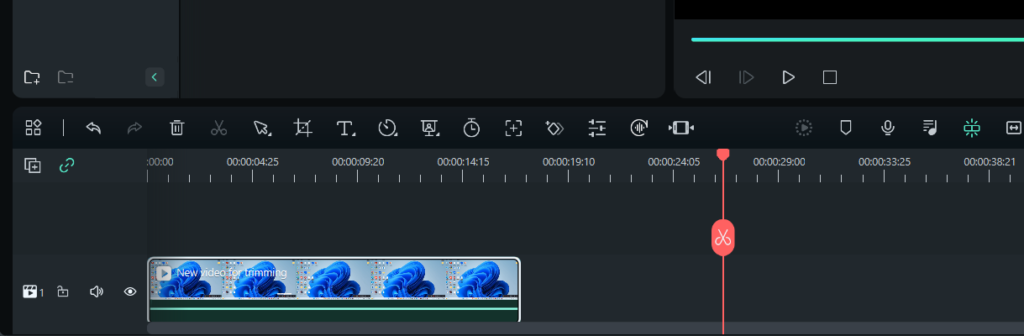
5. Again, click on File > Save Project As
Wrapping Up
Which of the above option did you choose to trim your screen recording? If it’s recording your screen and then trimming it, we recommend that you go with a screen recording tool like Advanced Screen Recorder. However, if some advanced edits have to be performed, a full-fledged video editing tool would prove to be more helpful. Do let us know in the comments section if this post proved to be helpful. For more such content, keep reading WeTheGeek. You can also find us on Facebook, Pinterest, YouTube, Twitter, and Instagram.