
A VPN or a Virtual Private Network is a boon in the digital space. It lets you bypass geographical restrictions when you want to access websites, streaming service libraries, or other content not available in your country. A VPN also prevents you from miscreants trying to track your online activities by encrypting your internet connection. That’s not all, there are several other benefits of using a VPN. But, how do you set up a VPN connection on a Mac?
That’s what this post’s for. Before we dive into the ways to set up a VPN on a Mac, you can check out some of the best VPNs for Mac.
How To Set Up A VPN On MacBook or Mac Desktop –
Here we will discuss two ways in which you can set up a VPN on a Mac. First, we’ll use a third-party VPN which is the easiest way you can use a VPN on Mac. In the second method, we’ll touch on setting up a VPN on a Mac without a third-party app.
How To Set Up a Third-Party VPN On Mac
There are some great third-party easy-to-use VPNs for Mac. Surfshark VPN, for instance, is one of the best VPNs for Macs. Here are the steps that can help you get started –
Step 1 – Download, install, and run Surfshark on a Mac

Step 2 – If you have an active subscription, log in using your credentials or get a subscription by clicking on the Create account button.
Step 3 – Once you have logged in select a location. Alternatively, you can connect to the fastest server by clicking on the Connect button.
Step 4 – When connecting for the first time, Surfshark will prompt you to add VPN configurations to your device. You will also be required to furnish your Mac user password.
Step 5 – If everything goes right, you will see a connected status.
Step 6 – Click on the arrow over the Connected button and you will also be able to see your IP address.
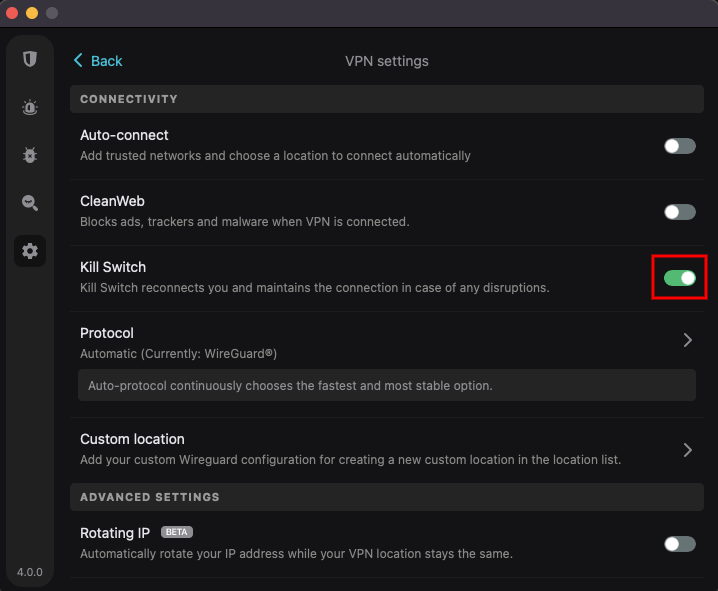
We also urge you to enable the Kill Switch by toggling it on. This way even if your VPN connection drops due to some reason, your internet connection too will drop and you will not be exposed to any danger especially if you are visiting a potentially harmful website.
Step 7 – You can even shift from the Fastest server to the Nearest country by clicking on the hamburger icon next to the Fastest server.
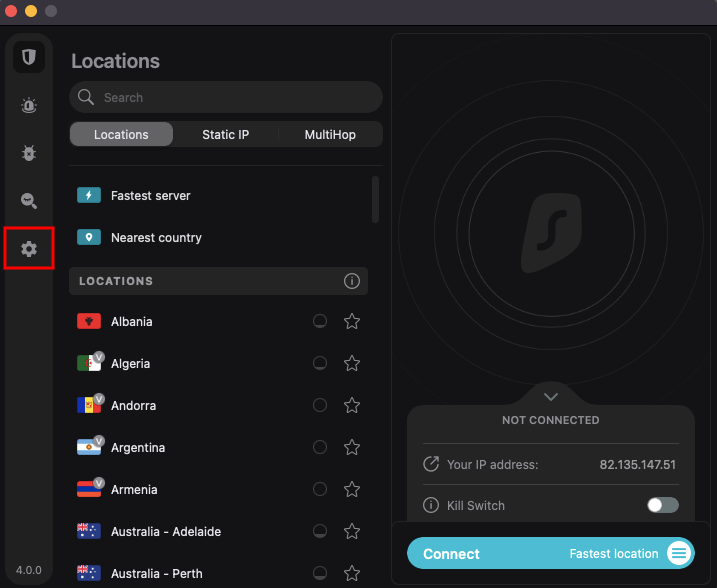
Step 8 – While scrolling through the list of locations on the left, you can even check in real-time how many servers are available in each of these countries which might further help you in selecting a location. You can also click on the star that you can see next to each location if you intend to put the location in your favorites.
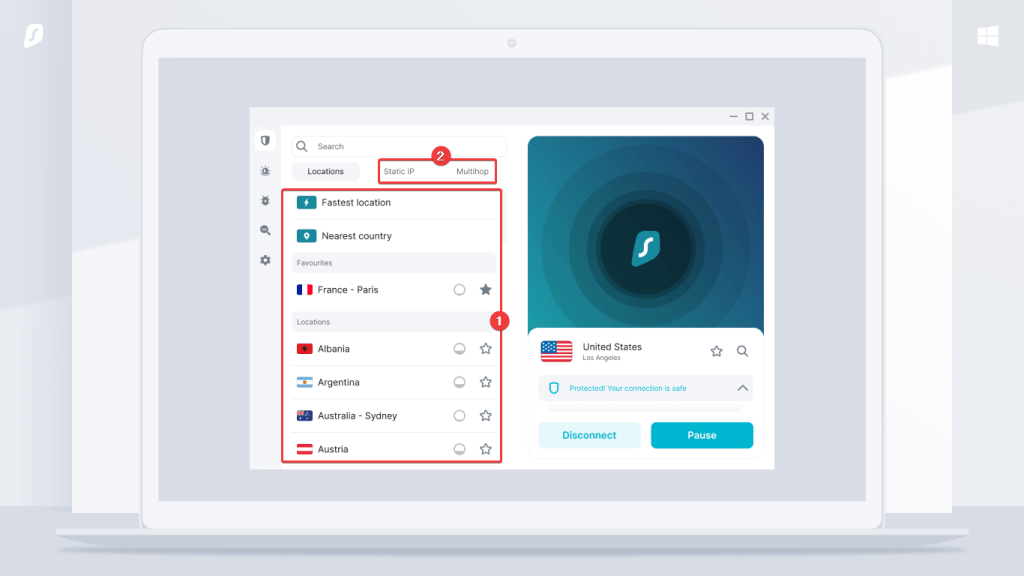
Additionally, you have an option to choose from Static or Multihop. The latter connects you to a VPN which then connects to another server ensuring more anonymity.
Now that we have got you started you might want to play around with the various features or even know about its various other notable aspects. For that, you can check out this post.
Enter VPN Settings Manually
In case you don’t want to invest in a paid subscription for Surfshark VPN or any paid VPN for that matter, here is a free method with which you can set up a VPN on your Mac for free –
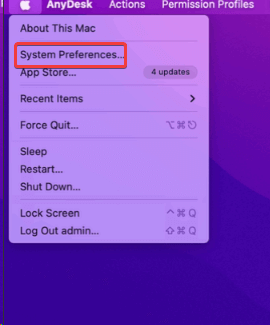
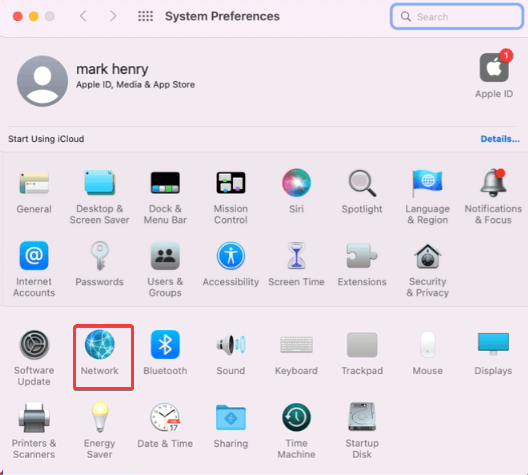
Step 1 – Click on the Apple menu > System Preferences.
Step 2 – When System Preferences open, click on Network.
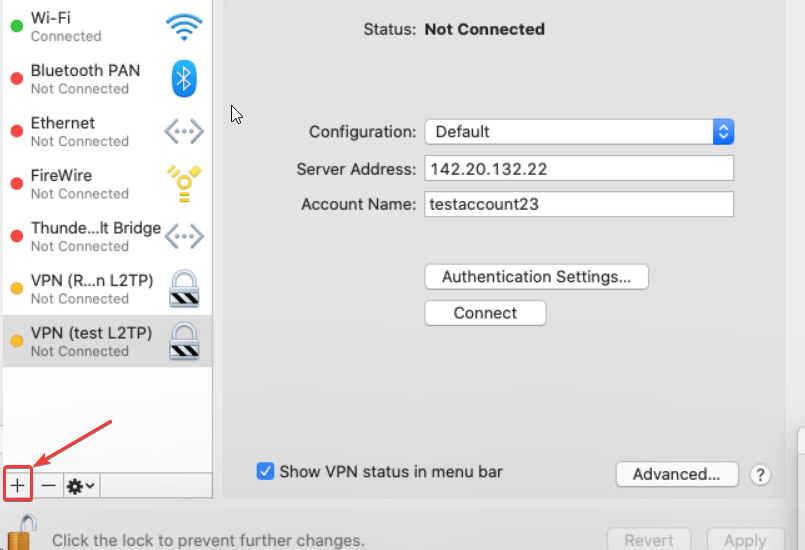
Step 3 – When the Network opens, click on the + sign at the bottom-left corner.
Step 4 –. Click on the Interface dropdown and click on VPN.
Step 5 – Select your VPN Type. For example, L2TP over IPSec.
Step 6 – If need be, enter additional settings.
Step 7 – In the Service Name, enter the name of the VPN service you are going to use. Let’s take an example of vpngate.net
Step 8 – Open Safari, head to vpngate.net
Step 9 – Scroll down. In the given table, focus on the section that says L2TP/IPsec. Head back to your Network section on your Mac and in the Service Name, enter the name of the region you have selected from the table on vpngate.net. Once you have done that, click on Create.
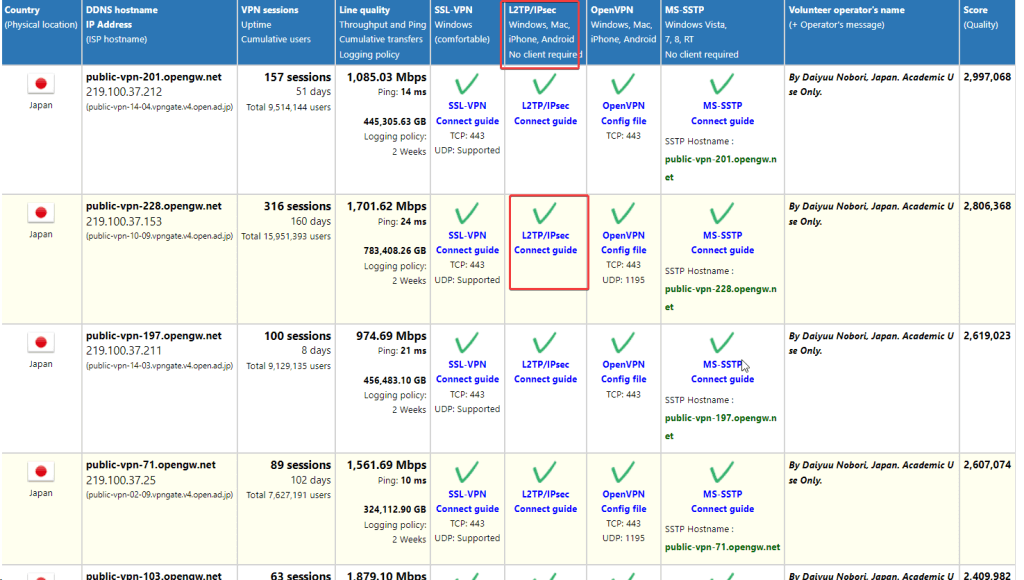
Step 10 – Next, you will be asked to enter the Server Address and Account Name. Again, go back to vpngate.net, from the IP Address section of the table, copy the Server Address, and paste it into the Server Address in your Mac’s settings. Enter the Account Name as VPN.
Step 11 – Click on the Authentication Settings and enter the Password under User Authentication, and Shared Secret under Machine Authentications as VPN. Click on OK. Also, head to the bottom of the same page, and click on the checkbox that says Show VPN status in the menu bar.
Step 12 – Click on Advanced, click on the checkbox that says Send all traffic over VPN connection, and click on OK.
Step 13 – Click on the connect button to get connected to the server of your chosen region.
Use A VPN On Mac For Enhanced Security
A third-party VPN service like Surshark is a better option because it offers better security, is simple to use, offers more features, and lets you connect to the fastest server. Also, the configuration itself is a simple process. That said, you can also try out the free VPN method that we discussed if you use a VPN once in a while if you don’t have an active third-party VPN service subscription.
Which of the above methods did you like? Do let us know in the comments section below. For more troubleshooting content, application setup guides, and more, keep reading WeTheGeek.
You can always reach out to us on Instagram, YouTube, Facebook, Flipboard, and Pinterest.